|
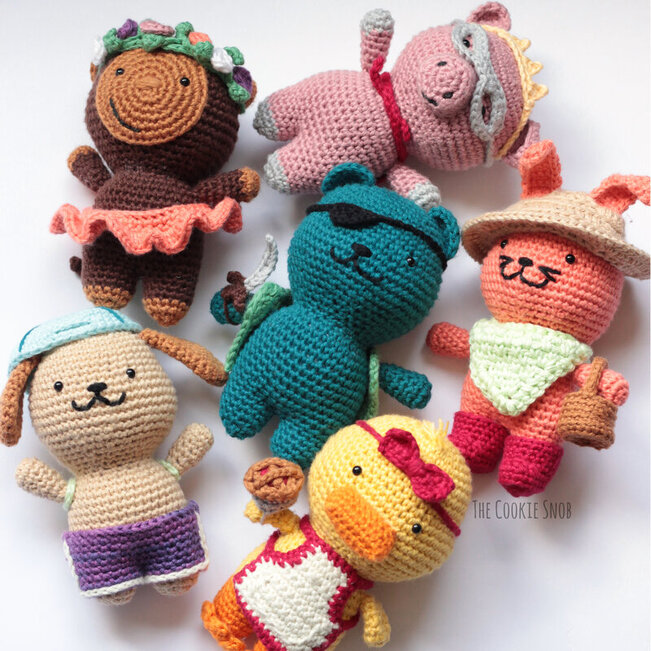
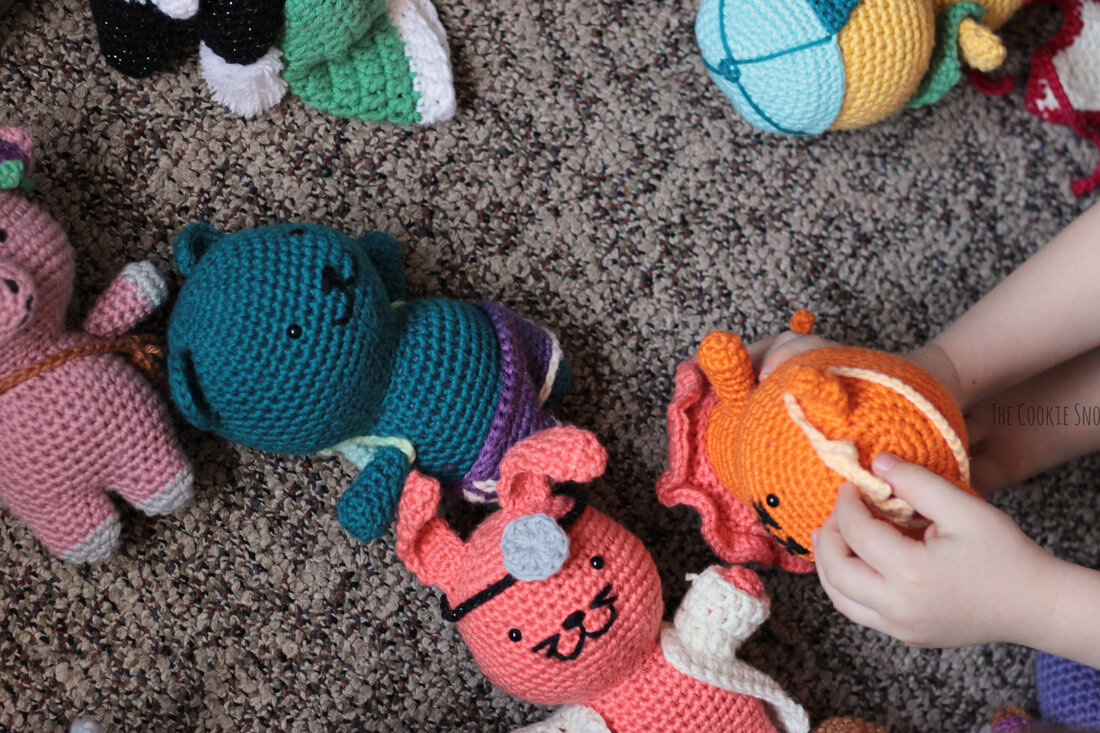
The Cookie Pal accessory patterns are now finally ready to share! Thank you to those who have been waiting so patiently for these patterns. When I first designed the Cookie Pals, I had no intention of making them accessories. But then when it was time to post the first pattern, something possessed me to make a tiny backpack and shorts...and the rest is history. So it definitely wasn't a necessary step, per se, but I'm kind of glad that I pulled it off (even though it meant designing them last minute every week), because this is exactly the sort of thing I loved as a kid. So I'm excited to share these fun accessory patterns with you all! This is gonna be kind of a long post (there are 22 different accessory patterns!), so I'll keep this short and sweet. The accessories are made using I Love This Cotton! Yarn and an E (3.5 mm) hook (the same yarn and hook size I used for the Cookie Pals themselves). So just use whatever type of yarn/hook you used for making your Cookie Pal and there shouldn't be any gauge issues. I didn't calculate yardage, since they're all so small and I just made mine with scrap yarn. Most patterns will work for any Cookie Pal and the few that don't can be modified if you'd like (there are suggestions for simple modifications in the description for each pattern). And, as always, you can get in touch with me if you have any questions about any of these. Stitch Glossary: st(s) = stitch(es) ch = chain ss = slip stitch sc = single crochet inc = sc increase (work 2 sc in the same st) dec = sc decrease (decrease over 2 sc sts) sc3tog = sc 3 together (decrease over 3 sc sts) fsc = foundation single crochet hdc = half double crochet hdc2tog = hdc 2 together (decrease over 2 hdc sts) dc = double crochet dc2tog = dc 2 together (decrease over 2 dc sts) FLO = front loop only BLO = back loop only Materials:
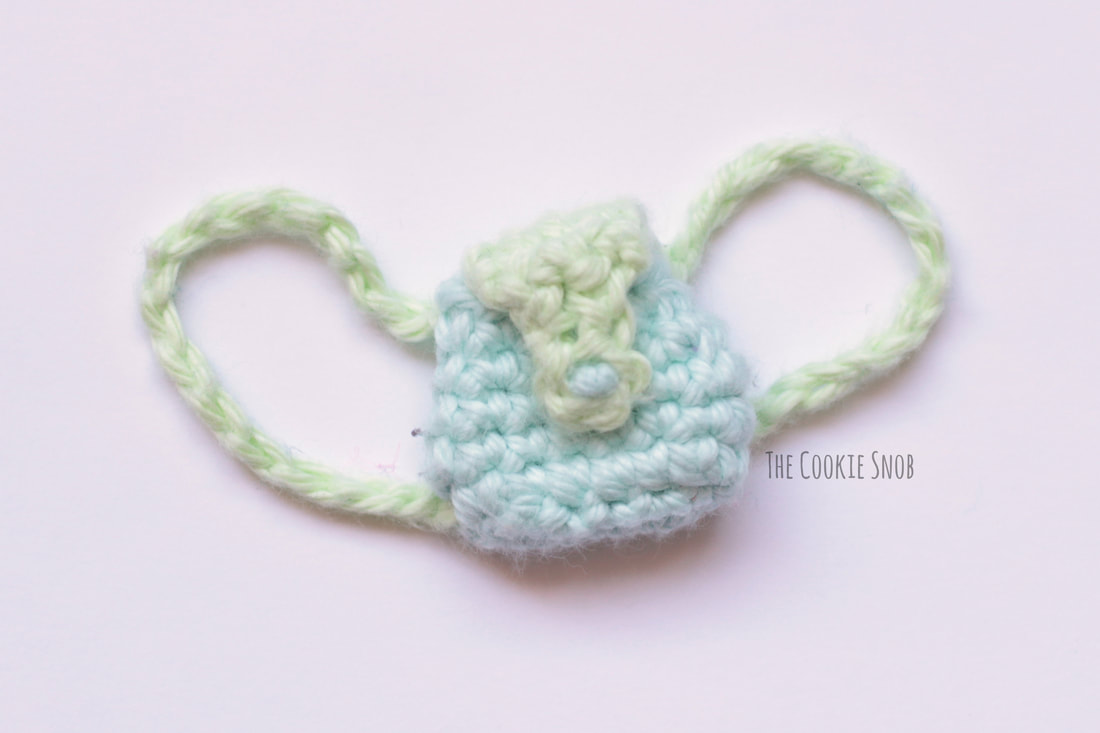
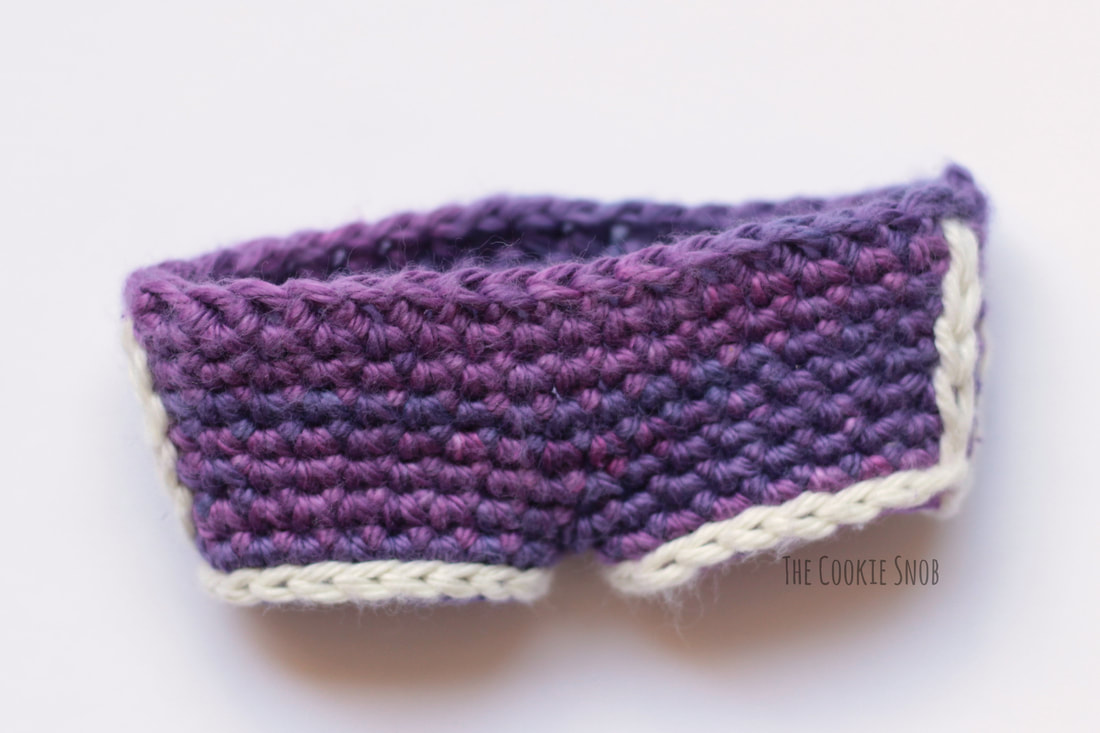
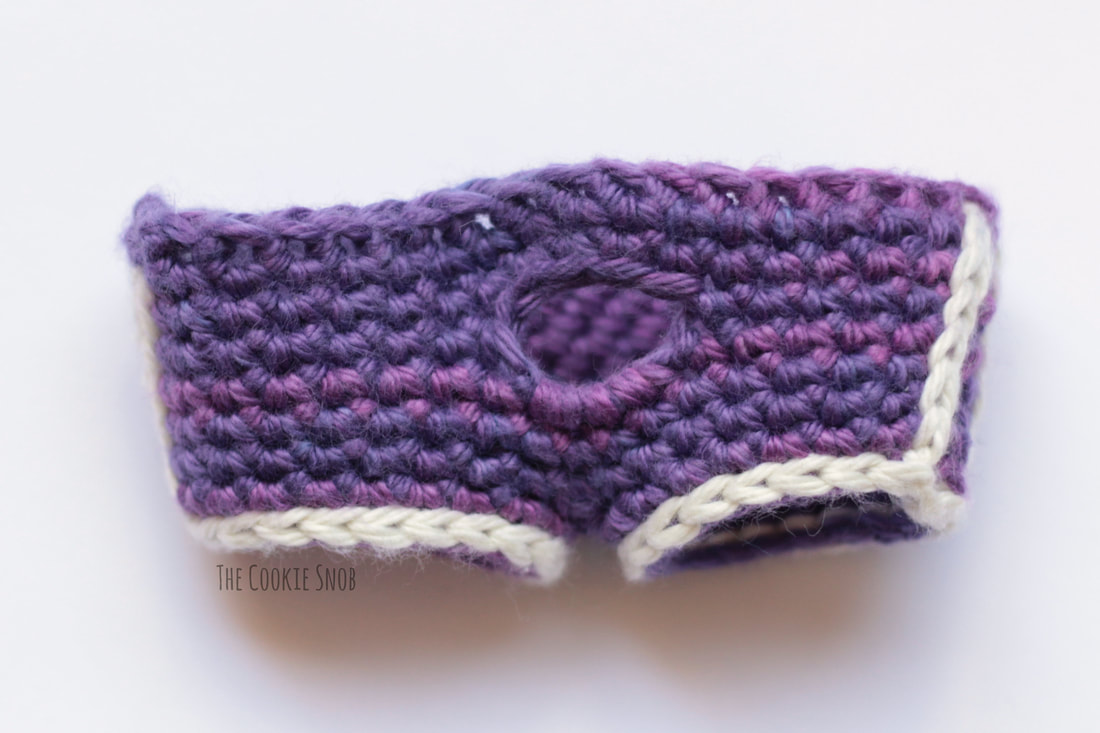
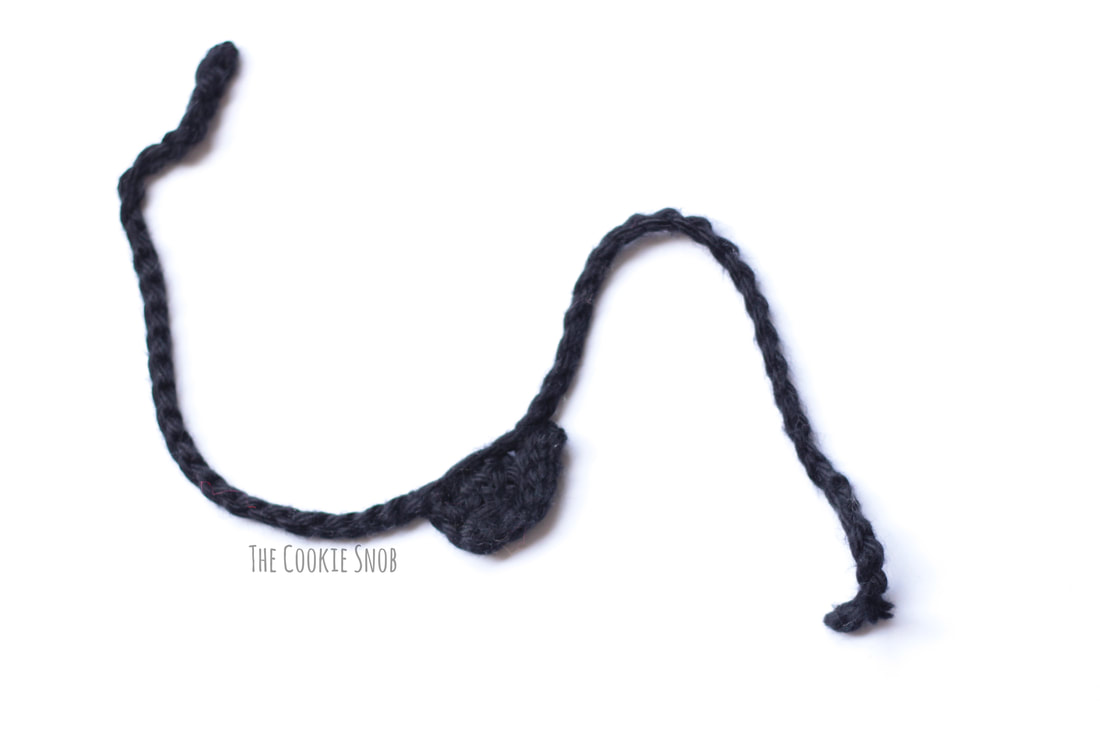
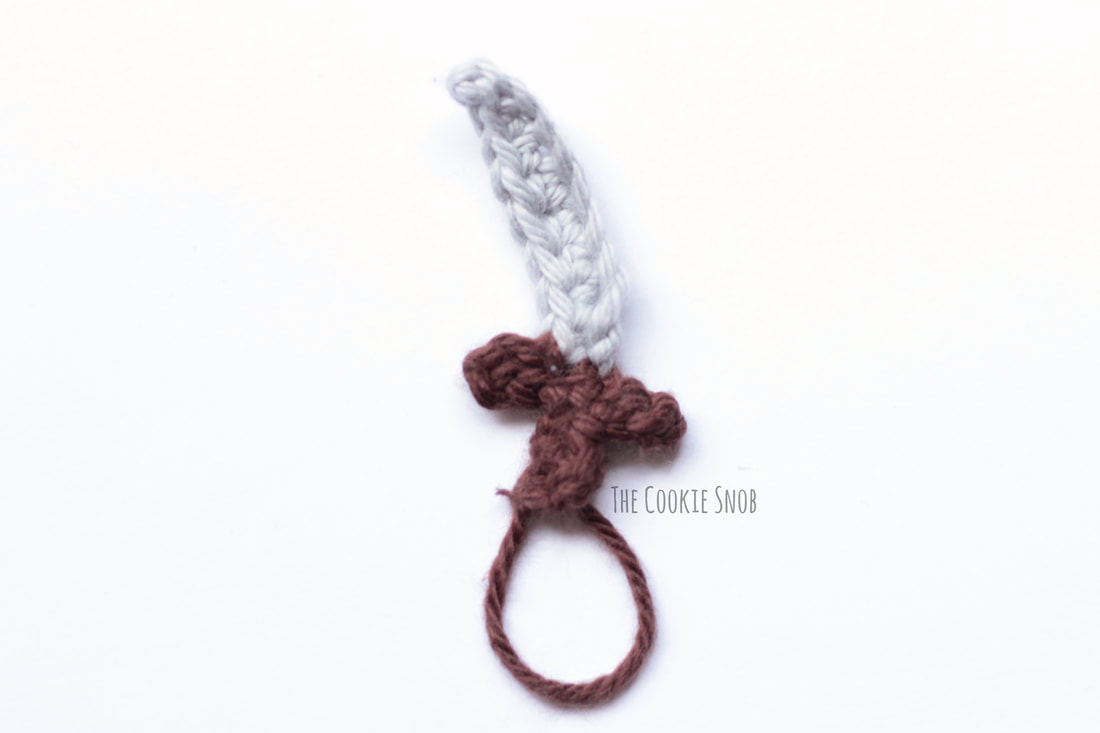
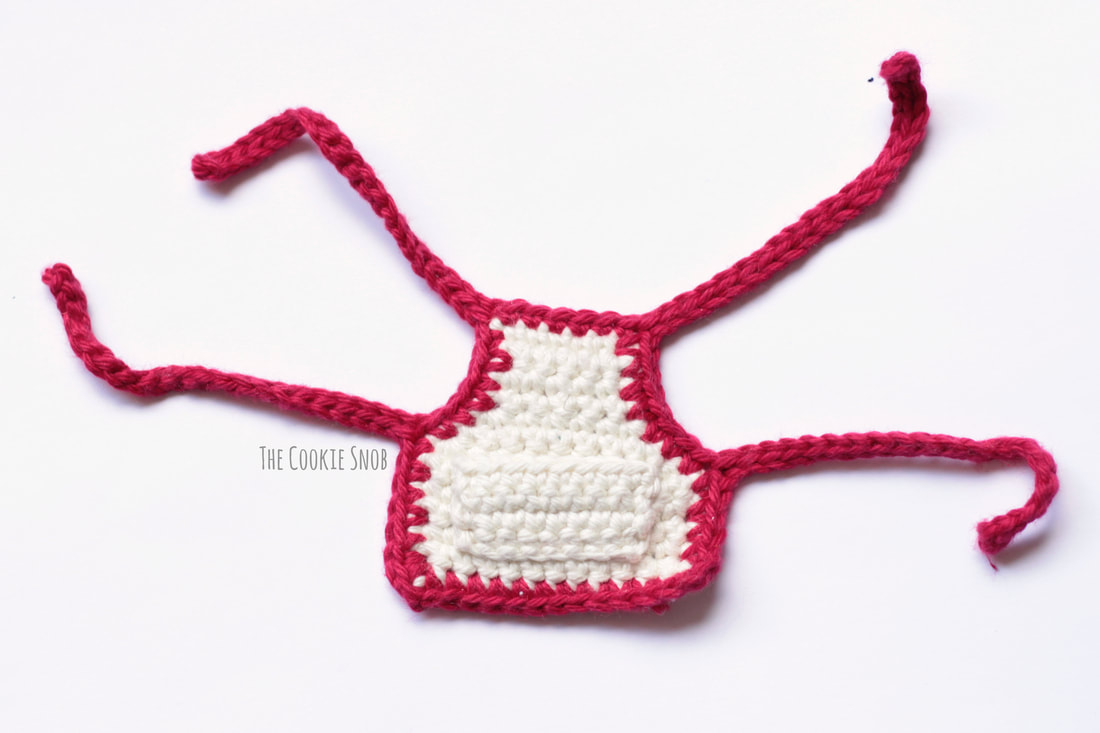
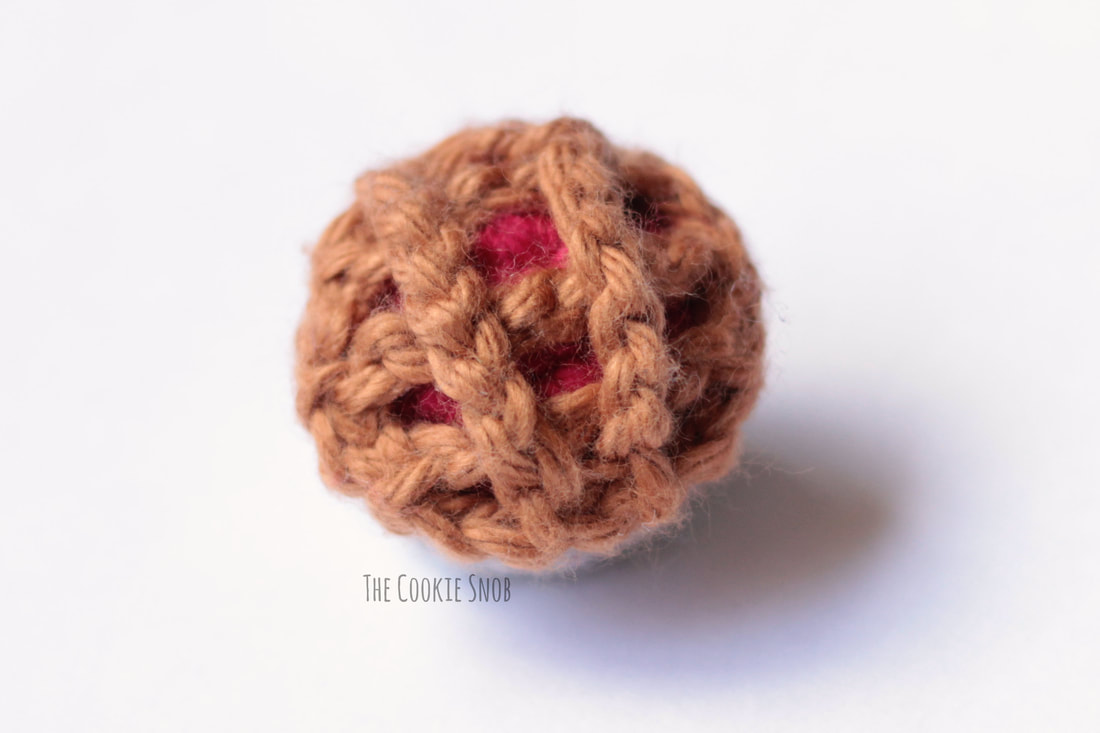
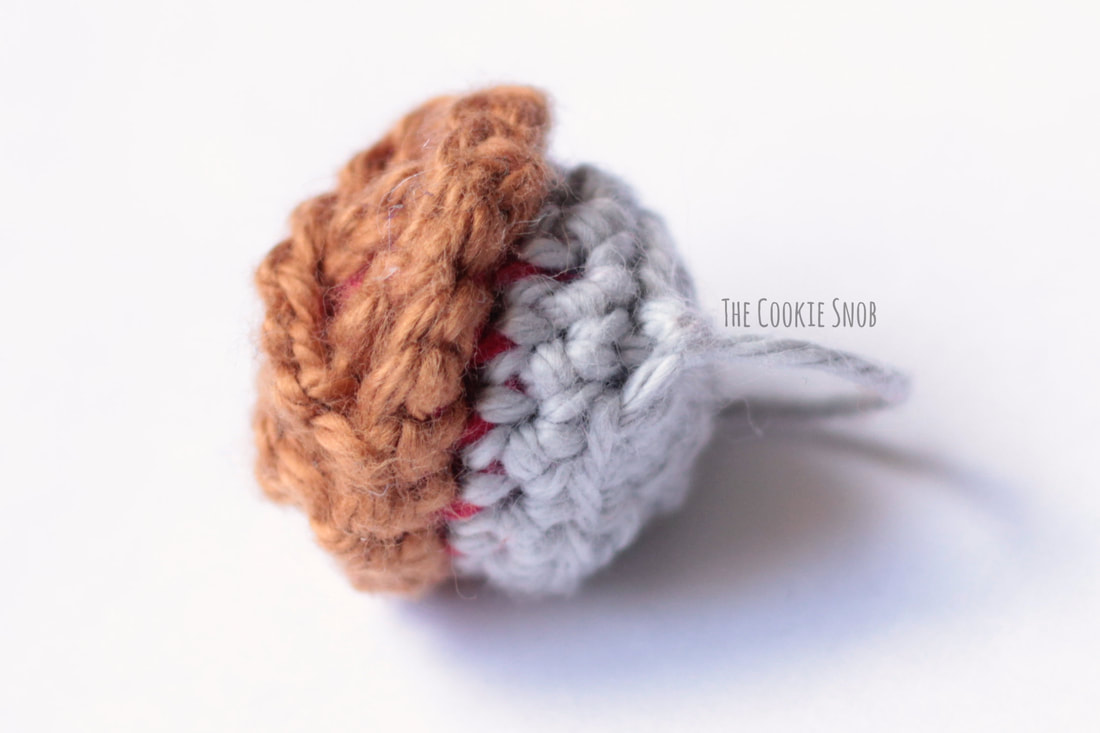
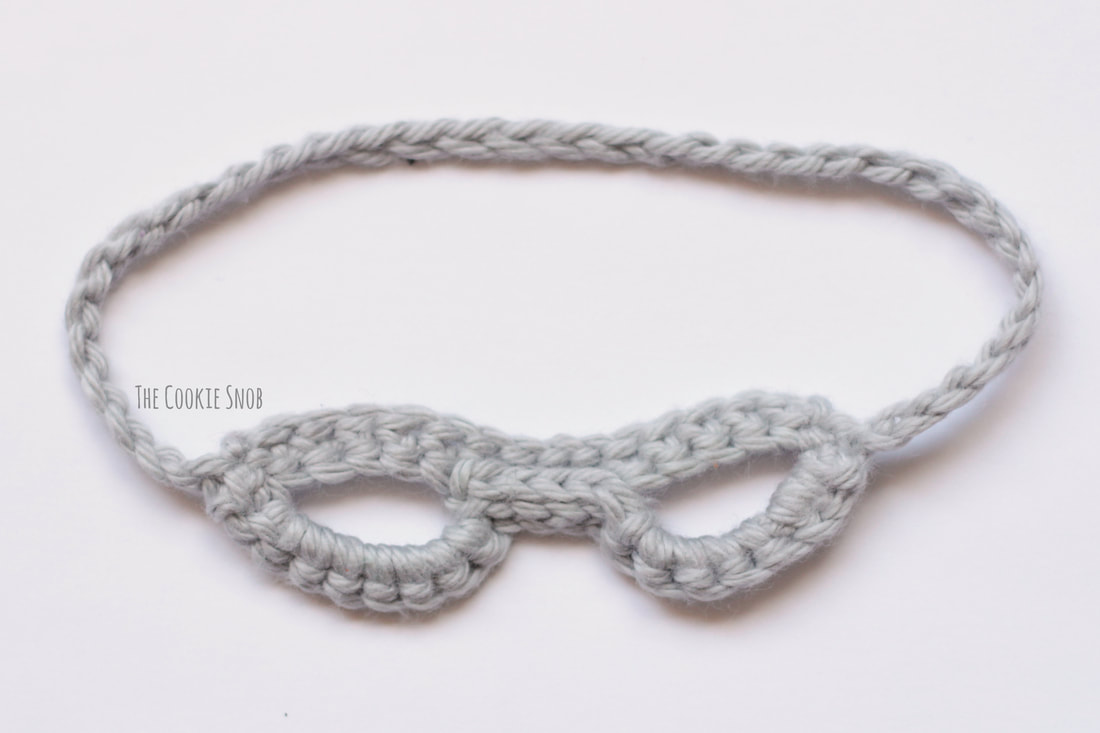
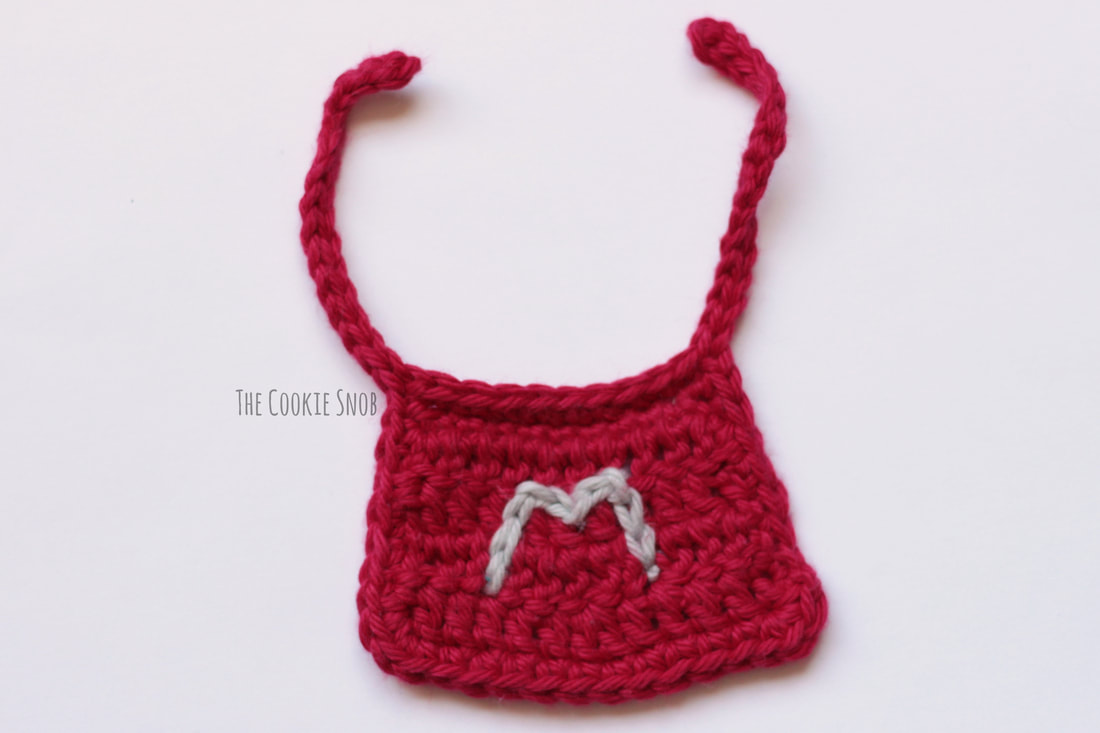
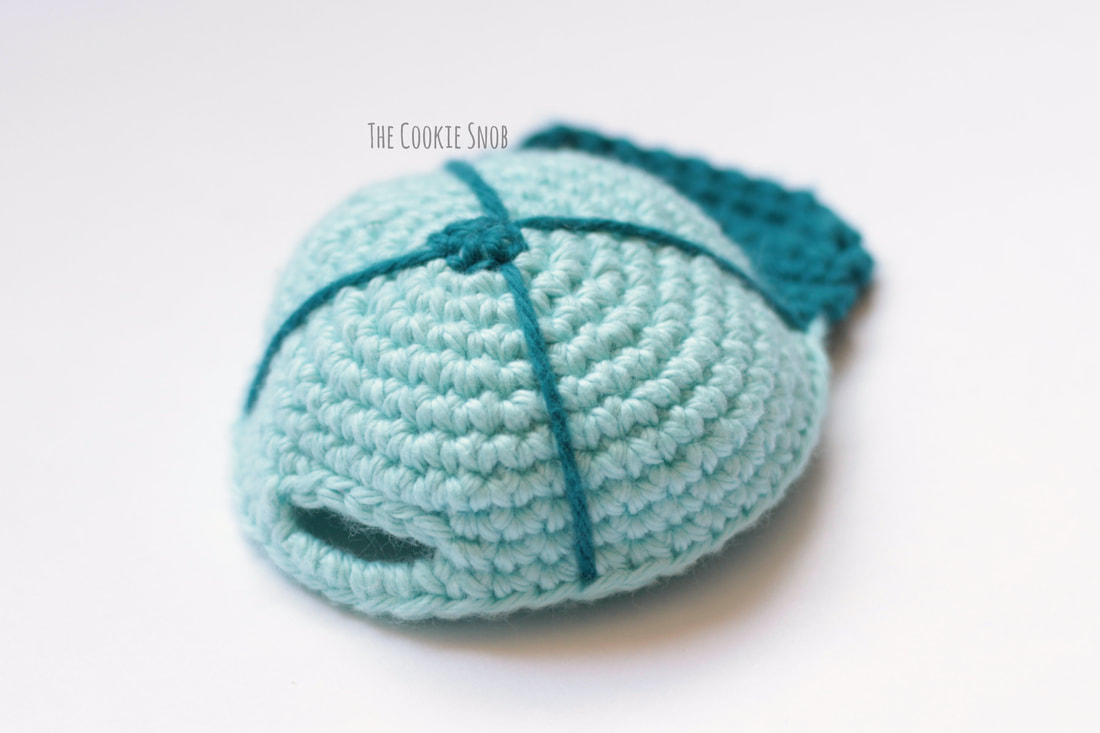
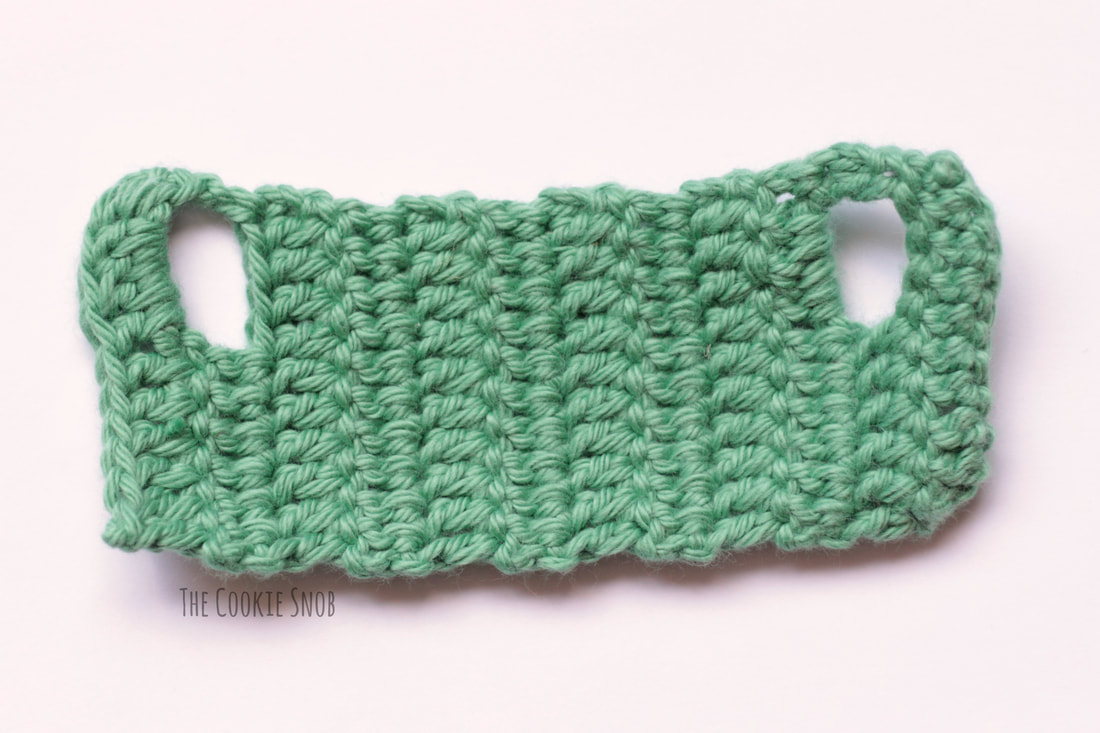
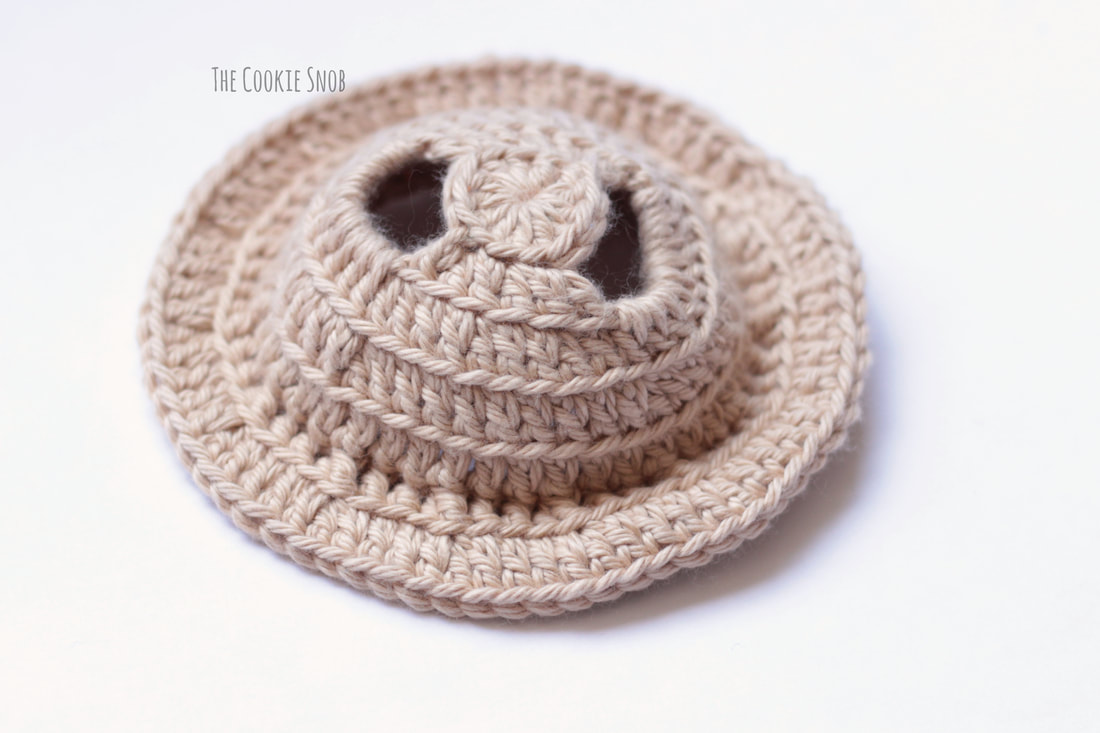
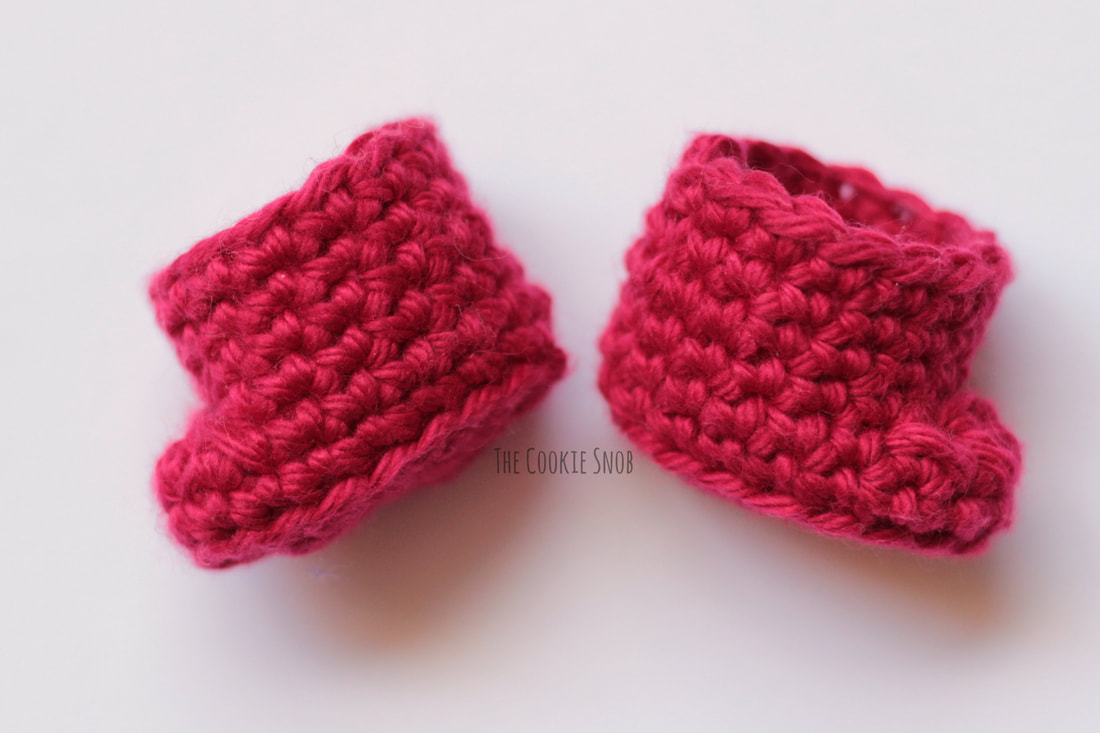
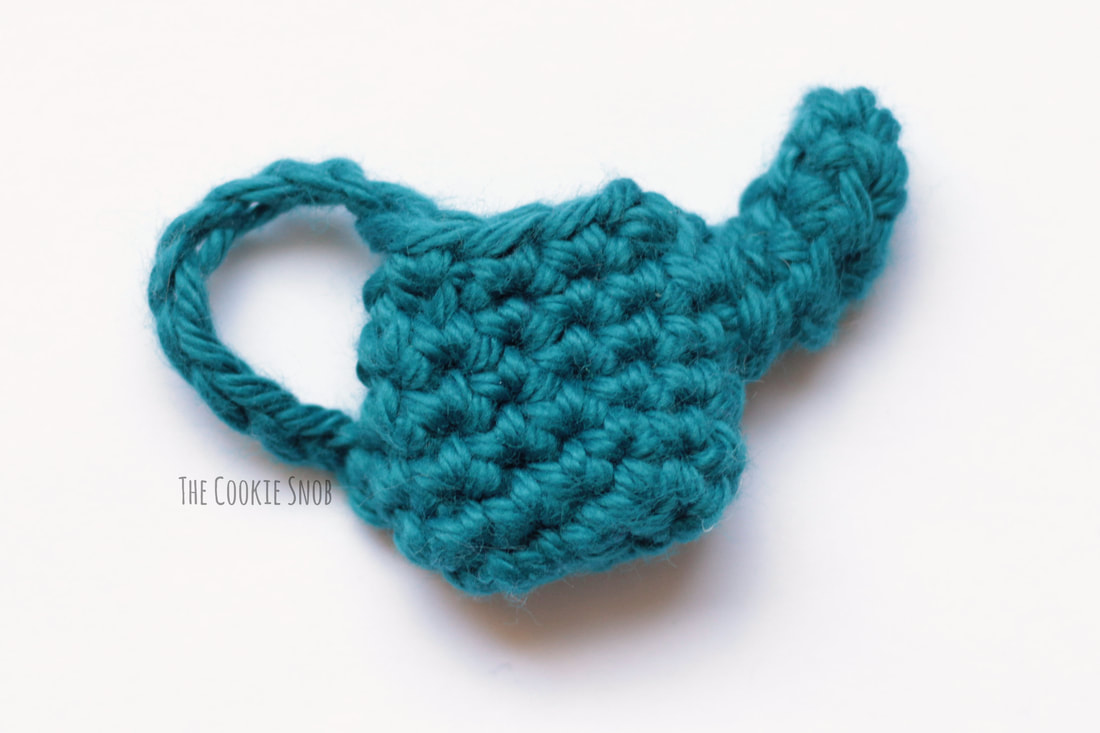
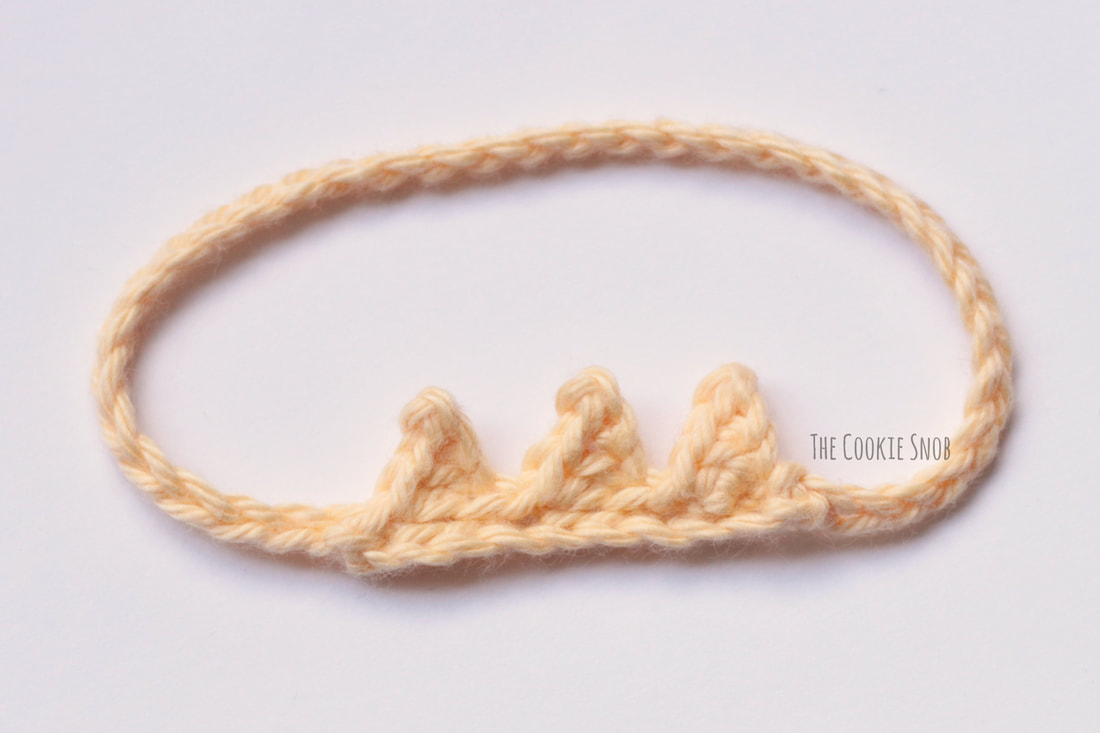
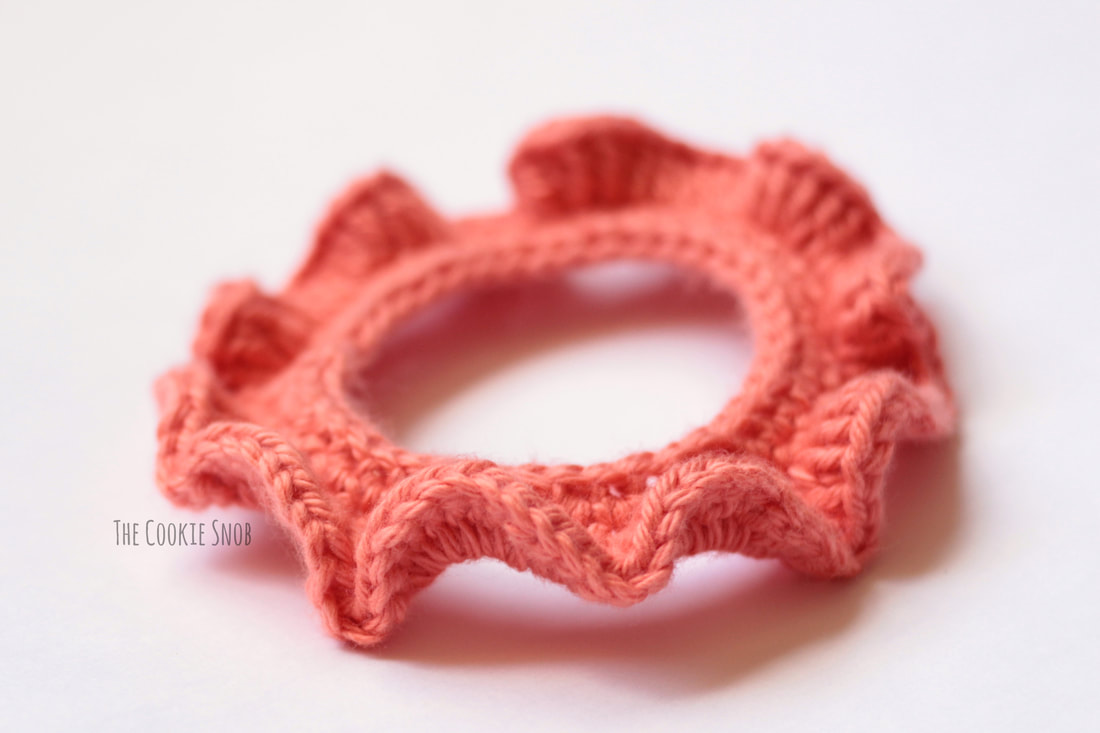
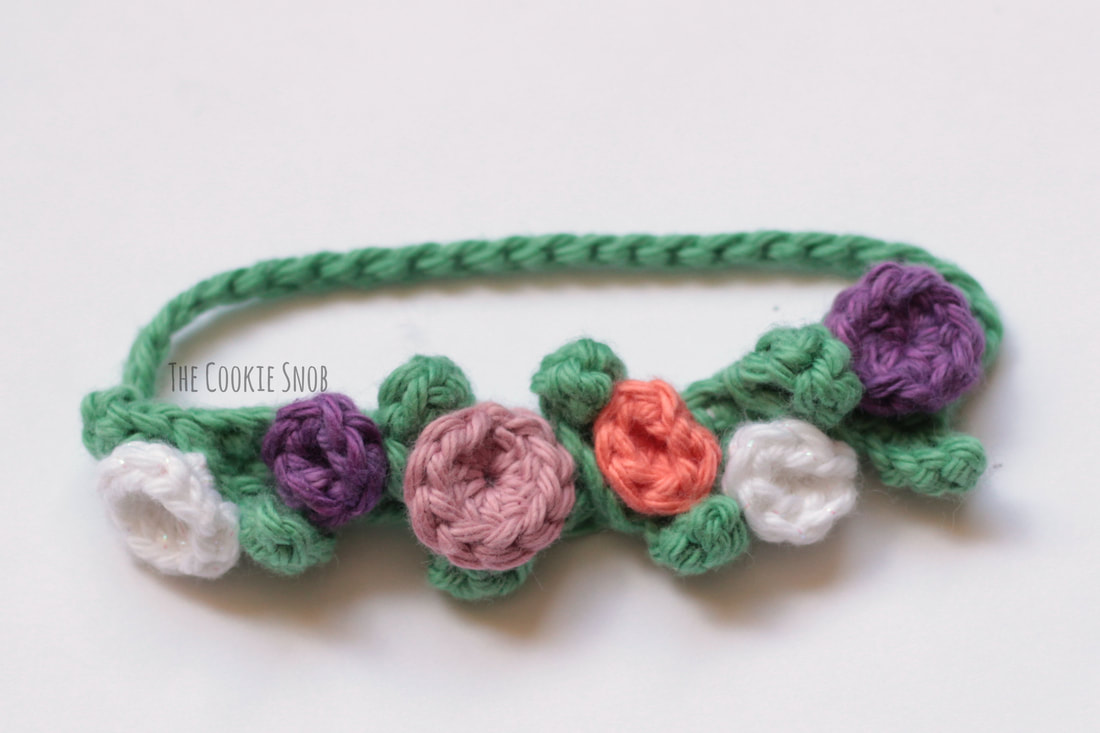
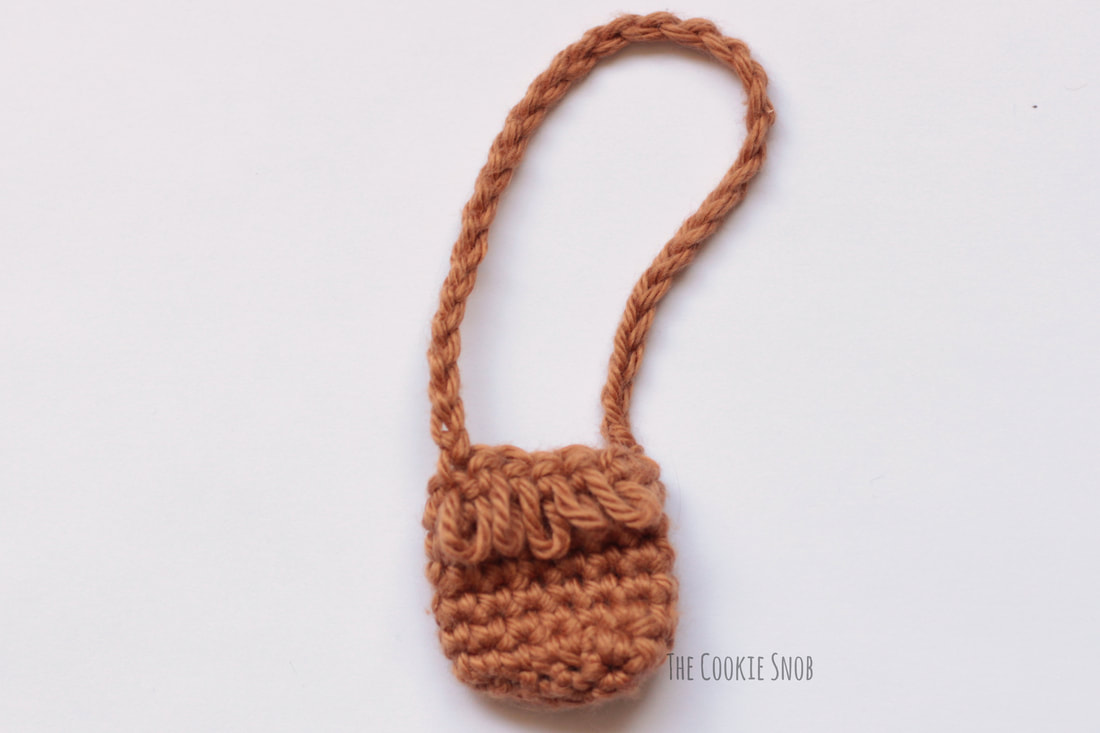
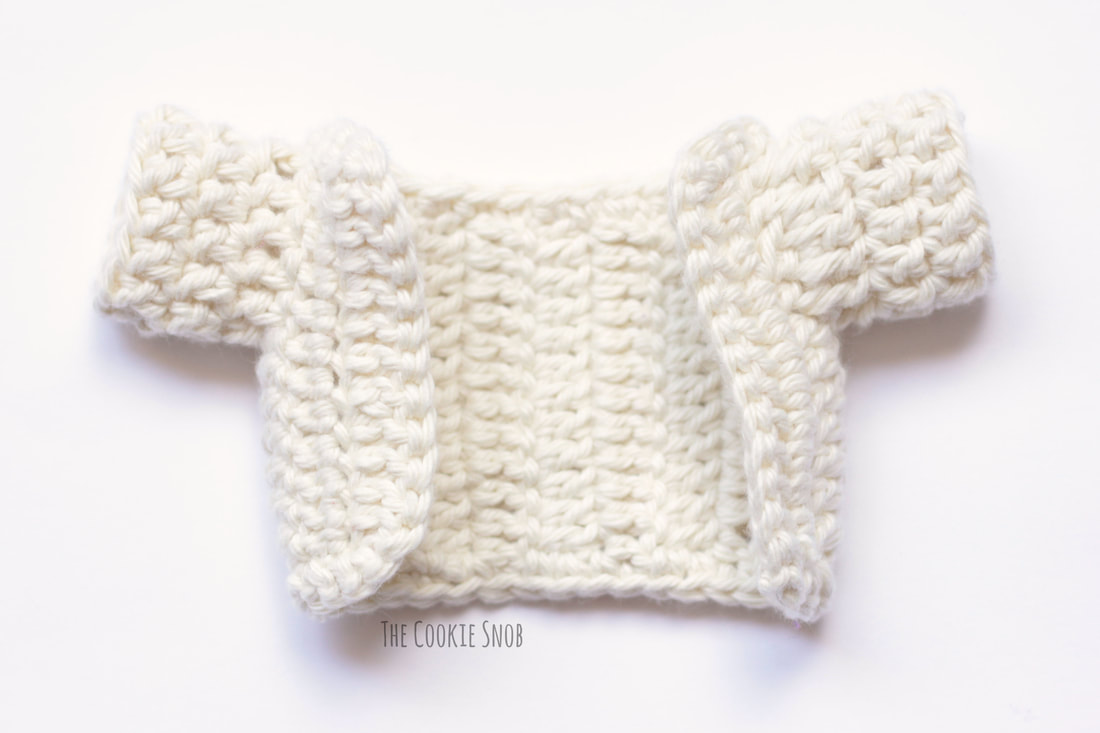
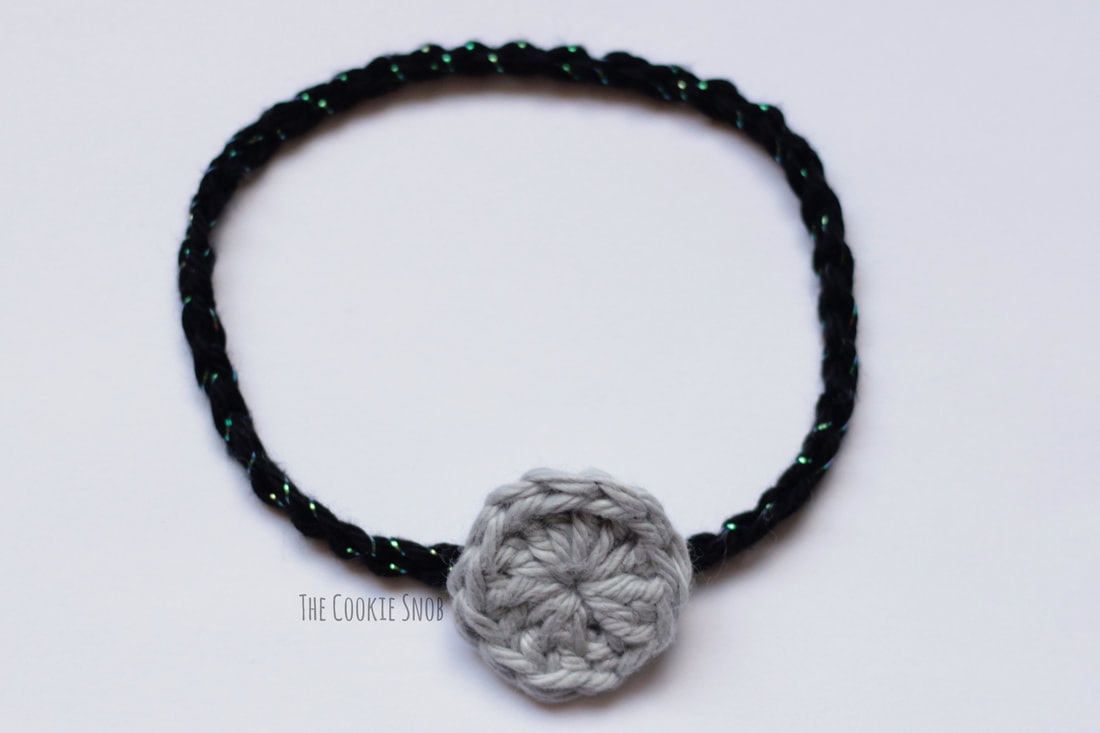
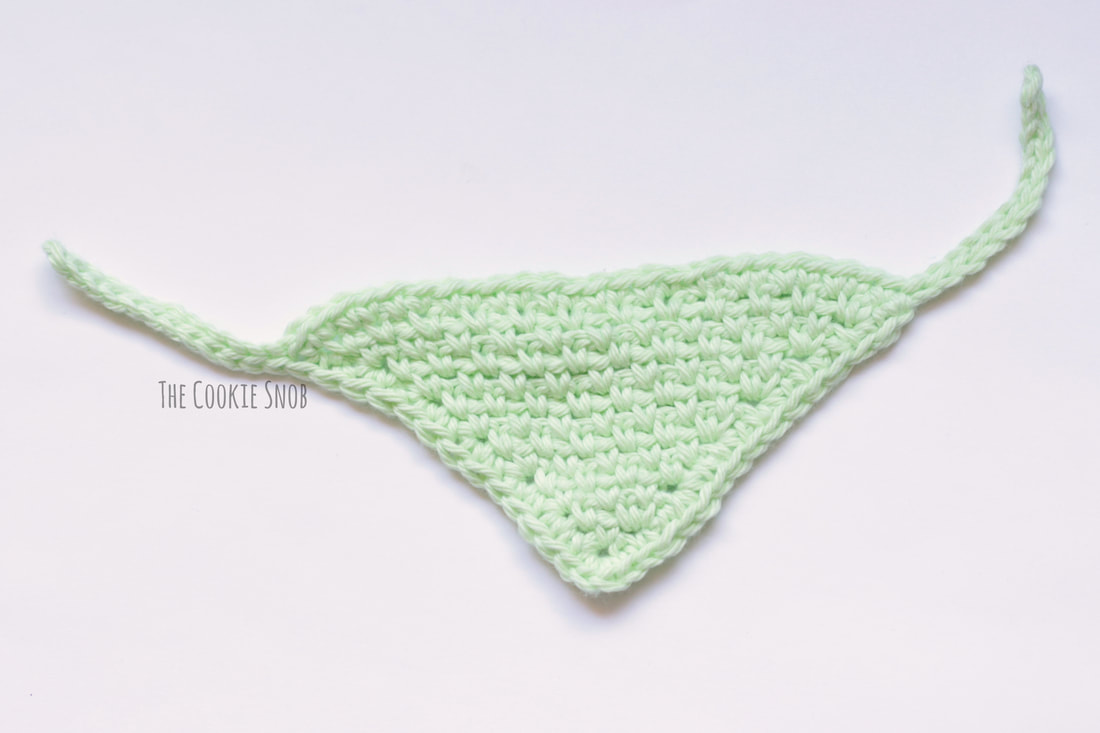
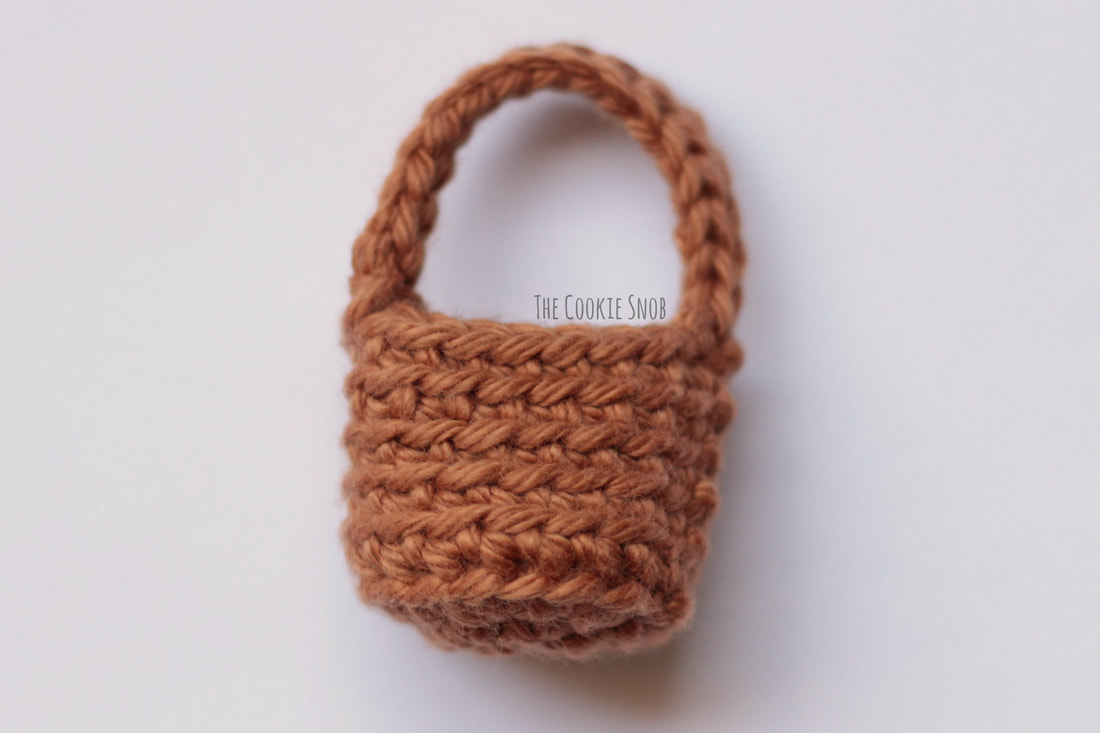
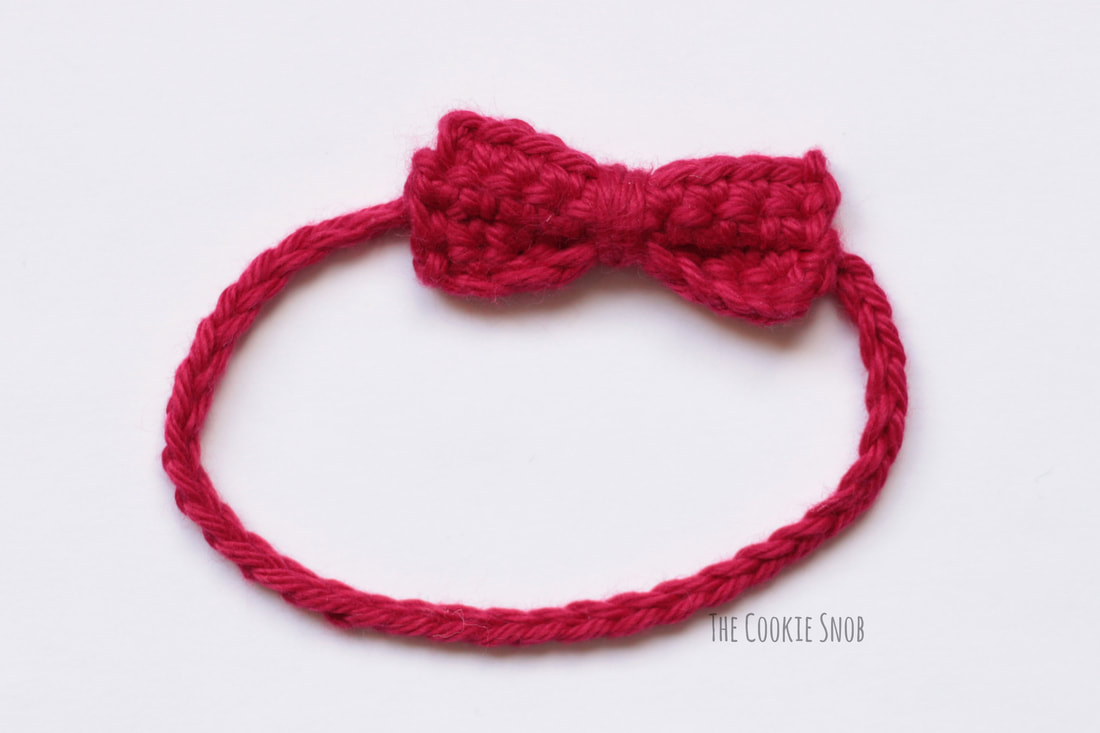
Backpack Seen on: Beverly the Bear This backpack actually opens and closes with a little stitched-on button and loop. I made mine in two colors, but feel free to use just one if you prefer. Starting with the main color: Ch 6 Row 1: sc in the 2nd ch from the hook, sc in the next 4 sts, turn (5) Row 2: ch 1, sc across, turn (5) Row 3: ch 1, sc across, sc around all four sides of the rectangle (work 2 sc along each short side and 5 sc along each long side), ss to join (14) Rows 4-5: ch 1, sc around, ss to join (14) Row 6: ch 1, [dec, sc in the next 5 sts] 2 times, ss to join (12) Row 7: ch 1, [dec, sc in the next 4 sts] 2 times, ss to join (10) Switch to the accent color Rows 8-10: ch 1, sc in the next 4 sts, turn (4) Row 11: ch 1, dec 2 times, turn (2) Row 12: ch 1, dec, ch 4, ss to last st to join, fasten off To make the straps for the backpack, join your accent color yarn at the top left of the backpack, ch 16, and then ss to the bottom of the backpack. Fasten off. Repeat on the right side. To make the button closure for the backpack, use your tapestry needle and a bit of the main color yarn to create a large french knot centered on the front of the backpack. Weave in ends. Shorts Seen on: Beverly the Bear The shorts are very similar to the leg construction of the Cookie Pals. They can be made with out without the decorative edging. They can also be extended easily if you want to make longer pants. The shorts include a tail hole, so it should fit all of the animals. Starting with the main color: Round 1: fsc 36, ss to join (36) Rounds 2-3: ch 1, sc around, ss to join (36) Round 4: ch 1, sc in the next 8 sts, ch 4, skip the next 4 sts, sc in the next 24 sts, ss to join (32 sts + ch 4 space) Round 5: ch 1, sc in the next 8 sts, sc 4 times in the ch-4 space, sc in the next 24 sts, ss to join (36) Round 6: ch 1, sc around, ss to join (36) First Leg Round 1: ch 1, sc in the next 10 sts, skip the next 18 sts, sc in the next 8 sts, ss to join (18) First Leg Round 2: ch 1, sc in the next 18 sts, ss to join (18) Fasten off Join yarn to the unworked sts you skipped in round 18 (anywhere is fine, but I recommend in the back) Second Leg Round 1: ch 1, sc in the next 18 sts, ss to join (18) Second Leg Round 2: ch 1, sc in the next 18 sts, ss to join (18) Fasten off. If there are any gaps from creating the legs, you can stitch them shut with the remaining yarn tail. Weave in ends. For the optional edging: Using the accent color, ss around the bottom of the legs. Surface crochet 1-2 stripes going up the sides of the legs. Weave in ends. Eye Patch Seen on: Pedro the Puppy This eye patch can be made with long ties (as shown), or you can just chain the length of your Cookie Pal's head to create a large loop if you prefer. Ch 4 Row 1: sc in the 2nd ch from the hook and in the next 2 sts, turn (3) Row 2: ch 1, sc across, turn (3) Row 3: ch 1, sc3tog (1) Turn, ss around the curved sides (the u-shaped part). Fasten off. Ch 25, ss across the flat top of the eye patch piece, ch 25. Fasten off and weave in ends. Pirate Sword Seen on: Pedro the Puppy I designed the sword to be removable, but if you prefer a more permanent version, you can just skip adding the loop and sew it in place using the yarn tail instead. Starting with the gray yarn: Ch 9 Row 1: ss in the 2nd ch from the hook, sc in the next 2 sts, hdc in the next 3 sts, sc in the last 2 sts (8) Switch to brown yarn: Row 2: ch 3, ss in the 2nd ch from the hook, ss in the next st, ss to join, ch 3, ss in the 2nd ch from the hook, ss in the next st, ch 1, sc in the middle, turn, ch 1, sc, turn, ch 1, sc, fasten off. Loop the yarn tail around the width of the Cookie Pal's arm and knot to the other side of the sword handle to keep the loop in place. Weave in ends. Apron Seen on: Christopher the Cat You can make the apron with or without the pocket, depending on how much detail you want. I think an accent-colored edging looks awesome, but feel free to use just one color. Starting with the main color: Ch 7 Row 1: sc in the 2nd ch from the hook, sc in the next 5 sts, turn (6) Rows 2-4: ch 1, sc across, turn (6) Row 5: ch 1, inc, sc in the next 4 sts, inc, turn (8) Row 6: ch 1, inc, sc in the next 6 sts, inc, turn (10) Row 7: ch 1, inc, sc in the next 8 sts, inc, turn (12) Rows 8-12: ch 1, sc across, turn (12) Switch to accent color: sc across the bottom of the apron, sc up the first side, ch 21, ss in the 2nd ch from the hook and in the next 20 sts, sc around the first curved edge, ch 21, ss in the 2nd ch from the hook and in the next 20 sts, sc across the top, ch 21, ss in the 2nd ch from the hook and in the next 20 sts, sc around the second curved edge, ch 21, ss in the 2nd ch from the hook and in the next 20 sts, sc down the last side of the apron, ss to join. Fasten off. For the pocket: Using the main color: Ch 9 Row 1: sc in the 2nd ch from the hook, sc in the next 7 sts, turn (8) Rows 2-4: ch 1, sc across, turn (8) Fasten off, leaving a long yarn tail. Using a tapestry needle and the yarn tail, sew the pocket to the bottom of the front of the apron, leaving the top edge open. Weave in ends. Cherry Pie Seen on: Christopher the Cat Like the pirate sword, the pie was designed to be removable. But you skip adding the loop and just stitch it in place with the yarn tail if you prefer it to be permanent. Starting with the red yarn: Round 1: Make a magic circle and work 6 sc into the circle, pull taut to close, ss to join (6) Round 2: ch 1, inc around, ss to join (12) Round 3: ch 1, sc around, ss to join 12) Switch to the brown yarn: Round 4: ch 1, working in FLO: [inc, sc] 6 times, ss to join (18) For the lattice crust: ch 6, ss to round 4 on the opposite edge of the pie (skip 6 sts on the right side), ss once toward the center, ch 7, ss to round 4 on opposite edge of the pie, ss once toward the far end of the pie, ch 6, ss to round 4 on the opposite edge of the pie, ss twice, ch 7, turn piece so that you're working perpendicular to the first set of lattices, ss to round 4 on the opposite edge of the pie, ss twice toward the other end of the pie, ch 7, ss to round 4 on the opposite edge of the pie. Fasten off. Note: This is probably best described with step by step photos or a diagram, but since this post was so long already, I tried to keep it bare minimum. If there's an interest in more details on making the lattice, just let me know. Or you can either leave off the lattice entirely (make it a double crust by using all brown yarn) or just make individual chains and sew them on. I'm just lazy and wanted to devise a method that was worked all in one piece. Using the gray yarn: Join to the back loop leftover from Round 3: Round 5: ch 1, working in BLO: sc around, ss to join (12) Round 6: ch 1, sc around, ss to join (12) Round 7: ch 1, working in BLO: [dec, sc] 4 times, ss to join (8) Begin stuffing the pie. Round 8: ch 1, dec 4 times, ss to join (4) Fasten off, leaving a long yarn tail. Finish stuffing. Using the tapestry needle, weave the yarn tail through the front loops of the last round and pull taut to close. Move the yarn tail to one edge of the pie tin. Loop the yarn tail around the width of the Cookie Pal's arm and knot to the other side of the pie tin to keep the loop in place. Weave in ends. Superhero Mask Seen on: Maxwell the Monkey This mask is made with one loop to hold it in place, but you can easily substitute ties if you prefer (see the pattern for the eye patch for guidance if you're not sure how to do this) Ch 16 Row 1: sc in the 2nd ch from the hook, sc in the next 14 sts, turn (15) Row 2: ch 1, sc, ch 6, skip the next 4 sts, ss in the next 5 sts, ch 6, skip the next 4 sts, turn Row 3: ch 1, sc 7 times in the ch-6 space, ss in the next 5 sts, sc 7 times in the ch-6 space, ss to join, ch 35, ss to join on opposite side of mask (make sure not to twist the ch). Fasten off, weave in ends Cape Seen on: Maxwell the Monkey I've embellished the cape with an "M" for "Monkee Man," which I surface crocheted on. You can stitch on any design you'd like, or just leave it plain. Ch 11 Row 1: sc in the 2nd ch from the hook, sc in the next 9 sts, turn (10) Rows 2-3: ch 2, dc across, turn (10) Row 4: ch 2, dc in the next 5 sts, work 2 dc in the next st, dc in the next 4 sts, turn (11) Row 5: ch 2, dc in the next 5 sts, work 2 dc in the next st, dc in the next 5 sts (12) Row 6: ch 1, sc across the bottom edge, sc evenly up the side, ch 21, ss in the 2nd ch from the hook and in the next 19 sts, sc across the top edge, ch 21, ss in the 2nd ch from the hook and in the next 19 sts, sc evenly down the side, ss to join. Fasten off, weave in ends. Decorate the cape with accent color, if desired. Baseball Hat Seen on: Derek the Duck This hat is designed to fit the Cookie Pals without large ears the best. You could modify the hat similar to the straw hat pattern below if you want to include ear holes. The hat also has optional stitching to make the hat lines for extra decoration, but they're completely optional. Starting with the main color: Round 1: Make a magic circle, work 6 sc into the circle, pull taut to close (6) Round 2: inc around (12) Round 3: [inc, sc] 6 times (18) Round 4: [sc, inc, sc] 6 times, (24) Round 5: [inc, sc in the next 3 sts] 6 times (30) Round 6: [sc in the next 2 sts, inc sc in the next 2 sts] 6 times (36) Round 7: [inc, sc in the next 5 sts] 6 times (42) Round 8: sc around (42) Round 9: sc in the next 12 sts, ss in the next 5 sts, sc in the next 25 sts (42) Round 10: sc in the next 12 sts, ch 5, skip the next 5 sts, sc in the next 25 sts (37 sc + ch-5 space) Round 11: sc in the next 12 sts, sc 5 times in the ch-5 space, sc in the next 25 sts, turn (42) Switch to accent color Bill Row 1: ch 1, working in BLO: sc in the next 12 sts, turn (12) Bill Rows 2-3: ch 1, sc across, turn (12) Bill Row 4: ch 1, dec, sc in the next 8 sts, dec, turn (10) Bill Row 5: ch 1, dec, sc in the next 6 sts, dec (8) Fasten off. Using the accent color yarn and a tapestry needle, sew decorative lines on the hat and a circle at the top. Vest Seen on: Derek the Duck This vest can be easily adjusted to be longer or shorter depending on what you're looking for. I left mine plain, but it would also be cute with some accent-colored edging or some decorating stitching/pockets. Ch 12 Row 1: dc in the 3rd ch from the hook, dc in the next 9 sts, turn (10) Row 2: ch 2, dc, ch 5, skip the next 3 sts, dc in the next 6 sts, turn (7 dc + ch 5 space) Row 3: ch 2, dc in the next 6 sts, [dc, dc2tog, dc] in the ch-5 space, dc in the next st, turn (10) Rows 4-10: ch 2, dc across, turn (10) Row 11: ch 2, dc in the next 6 sts, ch 5, skip the next 3 sts, dc in the next st, turn (7 dc + ch 5 space) Row 12: ch 2, dc, [dc, dc2tog, dc] in the ch-5 space, dc in the next 6 sts (10) Fasten off, weave in ends. Straw Hat Seen on: Beatrice the Bunny This sun hat is designed specifically for the bunny ears, which are at the top of the head. You can adjust the ear holes lower on the hat if you want it to fit better on the Cookie Pals with the lower ears. The hat is worked mostly in the back loop only to give it a woven look, but you can work the stitches in both loops if you don't like the ridges. Round 1: Make a magic circle, ch 2, work 12 dc into the circle, pull taut to close, ss to join (12) Round 2: ch 2, working in BLO: work 2 dc in the next st 3 times, ch 6, skip the next 3 sts, work 2 dc in the next st 3 times, ch 6, skip the next 3 sts, ss to join (12 dc + 2 ch-6 spaces) Round 3: ch 2, working in BLO: [work 2 dc in the next st, dc] 3 times, dc 9 times in the ch-6 space, [work 2 dc in the next st, dc] 3 times, dc 9 times in the ch-6 space, ss to join (36) Round 4: ch 2, working in BLO: [work 2 dc in the next st, dc in the next 8 sts] 4 times (40) Round 5: ch 2, working in BLO: [dc in the next 19 sts, work 2 dc in the next st] 2 times (42) Round 6: ch 2, working in FLO: [dc in the next 2 sts, work 2 dc in the next st] 14 times (56) Round 7: ch 2, working in BLO: [dc in the next 3 sts, work 2 dc in the next st] 14 times (70) Fasten off, weave in ends. Rubber Boots Seen on: Beatrice the Bunny These boots are designed to be about as tall as a Cookie Pal's leg. If you want more of a shoe and less of a boot, you can just make the top of the boot shorter. Ch 6 Round 1: inc in the 2nd ch from the hook, hdc in the next 3 sts, inc in the last st, working up the other side of the ch, inc, hdc in the next 3 sts, inc, ss to first sc to join (14) Round 2: ch 1, inc, sc in the next 5 sts, work 3 sc into the next st, sc in the next 6 sts, inc, ss to join (18) Round 3: ch 1, working in BLO: sc around, ss to join (18) Round 4: ch 1, sc in the next st, hdc2tog, dc2tog, hdc2tog, sc in the next 6 sts, ss to join (15) Rounds 5-8: ch 1, sc around, ss to join (15) Fasten off, weave in ends Watering Can Seen on: Beatrice the Bunny The watering can is made in two pieces: the main portion of the can with the handle, and the spout, which is then stitched on separately. Ch 5 Round 1: inc in the 2nd ch from the hook, sc in the next 2 sts, inc, working up the other side of the ch, inc, sc in the next 2 sts, inc, ss to join (12) Rounds 2-5: ch 1, sc around, ss to join (12) Round 6: ch 1, [dec, sc in the next 2 sts] 3 times, ss to join (9), ch 9, ss to the bottom of the can to form the handle. Fasten off. For the spout: Ch 5 Row 1: sc in the 2nd ch from the hook, hdc in the next 2 sts, dc, turn Row 2: ch 2, dc, hdc in the next 2 sts, sc Fasten off, leaving a long yarn tail. Using a tapestry needle and the yarn tail, sew the spout shut lengthwise and then sew in place on the side of the watering can (opposite from the handle). Weave in ends. Crown Seen on: Clementine the Cow If you'd like the crown to be wider you can simply increase the number of points on the crown and then decrease the size of the ch that goes around the head accordingly. Or, you can also use the tie option instead (see the eye patch pattern above for details). Ch 13 Row 1: *ss in the 2nd ch from the hook, sc, hdc, skip 2 sts, ss to join*, ch 4, repeat from * to *, ch 4, repeat from * to *, ch 35, ss to join Fasten off, weave in ends Ballet Tutu Seen on: Clementine the Cow I prefer to start off the skirt with fsc stitches, but if you really don't like them, you can start by chaining 41 and sc across instead for the first round. Round 1: fsc 40 times, ss to join (40) Rounds 2-3: ch 1, sc across, ss to join (40) Round 4: ch 2, dc 3 times in each st across, ss to join (120) Flower Crown Seen on: Penny the Pig The crown base is made separately and then you can make as many individual flowers as you'd like (in the large or small size) and stitch them on. You can make the crown base with or without the leaves. Ch 22 Row 1: dc in the 3rd ch from the hook, dc in the next 10 sts, ch 25, ss to join (20) Leaves: *ch 4, ss in the 2nd ch from the hook, sc, hdc, ss, ch 3, ss to the opposite side of rectangle, a few stitches over,* repeat from * to * until you reach the end of the rectangle. Fasten off. (The ch should form a chevron shape across the length of the rectangle, but exact placement of the leaves does not matter) For a small flower: Round 1: Make a magic circle, ch 1, hdc 7 times into the circle, ss to join. Fasten off. For a large flower: Round 2: Make a magic circle, ch 1, hdc 10 times in the circle, ss to join. Fasten off. Using the tapestry needle and the yarn tails, sew the flowers onto the crown base. Weave in ends. Boho Bag Seen on: Penny the Pig and Piper the Panda The bag is finished with an optional row of loop stitches, for extra decoration. You can make the bag without them as well, if you want a plainer version. I made the strap the length for a cross-body bag, but you can make it shorter for more of a standard purse if you prefer. Ch 6 Row 1: sc in the 2nd ch from the hook, sc in the next 4 sts, turn (5) Row 2: ch 1, sc across, turn (5) Row 3: ch 1, sc across, sc around all four sides of the rectangle (work 2 sc along each short side and 5 sc along each long side), ss to join (14) Rows 4-8: ch 1, sc around, ss to join (14) Ch 30, ss to opposite side of top of bag to make the strap. Optional: loop stitch 5 times across the top of the bag. Fasten off, weave in ends. Lab Coat Seen on: Paul the Platypus This coat is basically just a modified version of the vest. I designed it to be an extra long coat, since it was meant to be a white coat, but you can easily make it a shorter coat for a more normal look. Ch 14 Row 1: dc in the 3rd ch from the hook, dc in the next 11 sts, turn (12) Row 2: ch 2, dc, ch 5, skip the next 3 sts, dc in the next 8 sts, turn (9 dc + ch 5 space) Row 3: ch 2, dc in the next 8 sts, [dc, dc2tog, dc] in the ch-5 space, dc in the next st, turn (12) Rows 4-10: ch 2, dc across, turn (12) Row 11: ch 2, dc in the next 8 sts, ch 5, skip the next 3 sts, dc in the next st, turn (9 dc + ch 5 space) Row 12: ch 2, dc, [dc, dc2tog, dc] in the ch-5 space, dc in the next 8 sts, turn (12) Ch 2, dc down the short side, sc across the long side, dc down the short side, sc across the last long side, ss to join. Fasten off. For the sleeves: Join yarn to one end of an arm hole. Round 1: ch 2, dc 12 times evenly across the arm hole, ss to join (12) Rounds 2-3: ch 2, dc around, ss to join (12) Fasten off. Repeat for the second arm hole. Weave in ends. Head Mirror Seen on: Paul the Platypus As with the other headband-style accessories, you can either use the ch loop as shown or create ties as with the eye patch pattern. Starting with the gray yarn: Round 1: Make a magic circle, ch 2, work 12 dc into the circle, pull taut to close, ss to join (12) Fasten off, leaving a long yarn tail. Using the black yarn: Ch 40, ss to join. Using a tapestry needle and the yarn tail, stitch the circle onto the headband. Weave in ends. Bandana Seen on: Shelby the Sheep Note: This is the ONLY accessory that uses a different size hook. For this piece only, I recommend an H (5.0 mm) crochet hook. You can make it using the smaller hook size (the pattern will work just fine either way), but I like the drape that the larger hook gives. Plus, it works up faster, which is always a plus. You can easily adjust the size; this is just c2c moss stitch until it's the size you'd like. Ch 3 Row 1: sc in the third ch from the hook, turn Row 2: ch 3, [sc, ch 1, sc] in the ch-3 space from Row 1, turn Row 3: ch 3, sc in the first ch-1 space, ch 1, [sc, ch 1, sc] in the ch-3 space, turn Row 4: ch 3, sc in the first ch-1 space, ch 1, [sc, ch 1] in each ch-1 space across, [sc, ch 1, sc] in the ch-3 space, turn Repeat Row 4 until the short sides measures 3.5" (or desired size). Ch 13, ss in the 2nd ch from the hook and in the next 11 sts, sc across the top of the bandana, ch 13, ss in the 2nd ch from the hook and in the next 11 sts, sc around the bottom of the bottom, ss to join. Fasten off, weave in ends. Basket Seen on: Shelby the Sheep The sides of the basket are worked in the back loop only to give it more of a woven look, but you can just work it in both loops if you don't want the ridges. Round 1: Make a magic circle, work 6 sc into the circle, pull taut to close, ss to join (6) Round 2: ch 1, inc around, ss to join (12) Round 3: ch 1, [inc, sc] around, ss to join (18) Rounds 4-8: ch 1, working in BLO: sc around, ss to join (18) Ch 15, ss to oppostite side of the top of the basket to join, ss back across the handle to make it slightly thicker, ss to join. Fasten off, weave in ends. Bow Seen on: Piper the Panda This bow can be made on a headband, as shown, or with ties (see the eyepatch pattern for an example). The bow can be headband or a bowtie, depending on preferences. You can also make the bow without the band and stitch it in place for a permanent bow. Ch 10 Row 1: sc in the 2nd ch from the hook, sc in the next 8 sts, turn (9) Rows 2-4: ch 1, sc across, turn (9) Fasten off. Ch 40, ss to join. Fasten off. Place the rectangle on top of the band. Wrap a piece of yarn (or the yarn tail from the band) tightly around the center of the bow and over the band several times. This will shape the bow and attach the bow to the band at the same time. Tie securely and weave in ends. Whew! We made it through ALL of the accessories! I hope that you have fun dressing up and personalizing your Cookie Pals! If you make some cute accessories for your yarn friends, I'd love to hear about how it goes. You can reach me in the comments section below, on social media, or by email. Happy hooking! Want to make sure you don't miss any future blog posts? Join my mailing list! (Spam-free, I promise!) ***You're welcome to do whatever you'd like to with finished products made from these patterns but if you do sell them, I ask that you link back to my page. You may not copy these patterns, repost them anywhere (either altered or in their original forms), or claim them as your own. You may not use any photos on this site for your own use. ***
5 Comments
chris
5/6/2020 10:08:00 pm
Where do I find the patterns for the critters?
Reply
Erin
5/7/2020 11:48:05 am
You can find them in the "Plushy" section of my crochet page (click the Crochet tab in the menu at the top of the page). Or you can go to the first Cookie Pal post, where I've added the links at the bottom of the post: https://www.cookiesnobcrochet.com/home/cookie-pals-giveaway
Reply
Jolie
6/18/2023 07:15:59 am
Can Paul the platypus wear the boots too? Because he has webbed feet, will they fit him?
Reply
Erin
7/12/2023 12:52:59 pm
Great question! The boots probably wouldn't fit him very well. They're usually a pretty tight fit for the other cookie pals, so I'm guessing the extra yarn from the webbed feet would make it too hard to put them on. But if you wanted the look, you could make a platypus without the webbed feet and put the boots on permanently (so you wouldn't be able to tell anything was missing).
Reply
Leave a Reply. |
Welcome!Thank you for stopping by to visit my own personal corner of the web! Feel free to take a look around and check out what I've been crafting, crocheting, or baking. Hopefully you'll find something to inspire your own creativity! Archives
March 2024
|



 RSS Feed