
|
Baby #4 has joined our family and we're all so happy she's here, safe and sound. She's been keeping me extra busy lately (no surprise there), so I haven't had much time for crocheting. But I finally managed to finish a project and I can't wait to share the free crochet pattern with you all! Meet the bunny lovey! 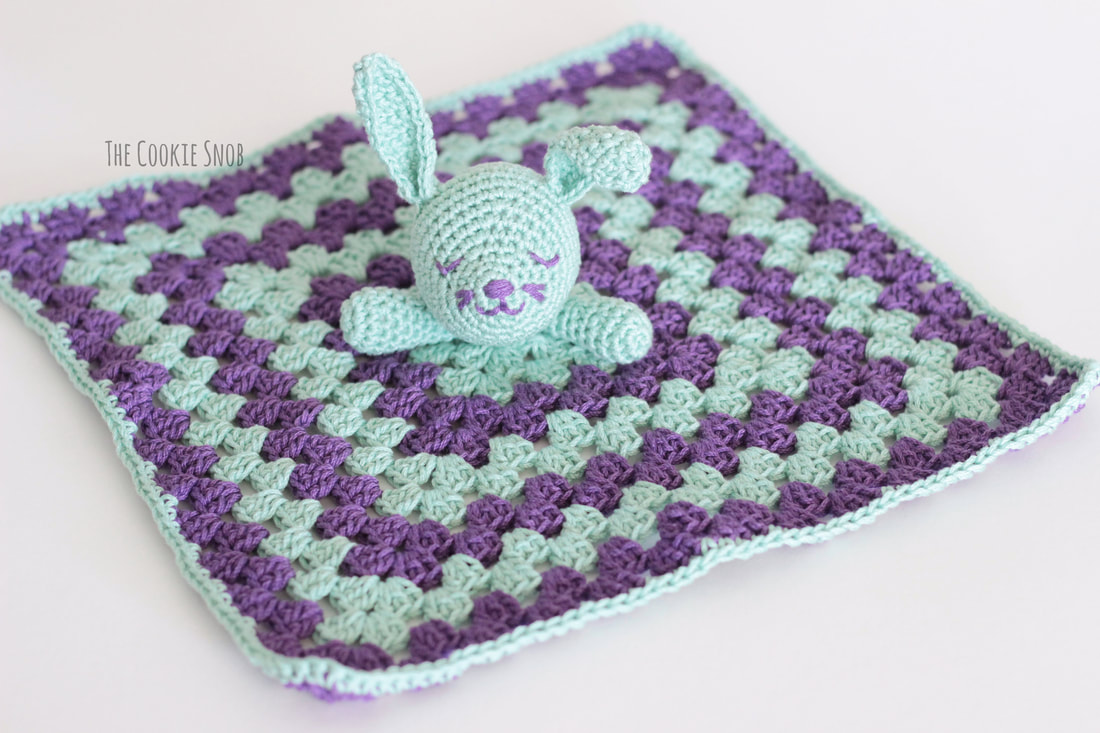 I've crocheted a lovey for each of my kids (you can find the puppy version here, the elephant version here, and a bonus panda version here), so it only seemed right that I crochet a lovey for her as well. I debated for a long time about which animal I wanted to use for the base, but ultimately landed on a classic: a cuddly bunny. 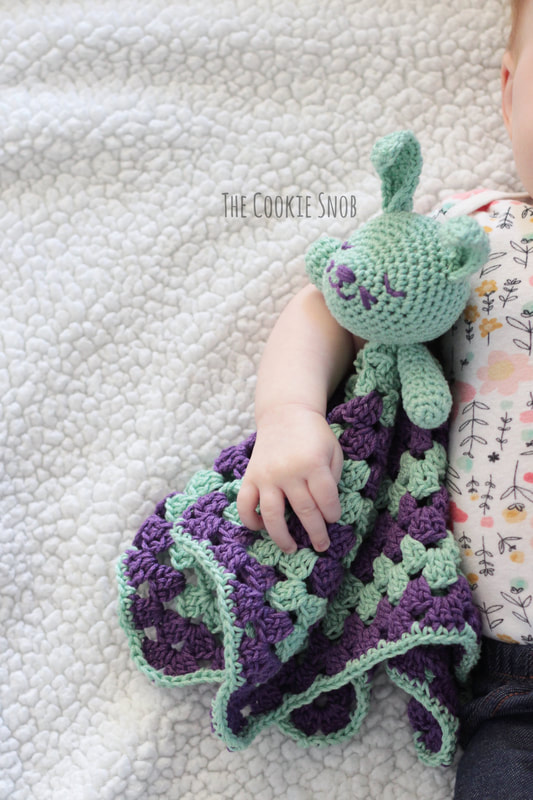 The basic structure of the lovey is super simple: a basic granny square with a head and arms sewn in the middle. Feel free to substitute a different stitch to make the square or change around the placement of the head and arms, You can definitely get creative and personalize it anyway you'd like. But no matter which way you put it together, I do NOT recommend using safety eyes or noses for this pattern. Trust me. I have personally witnessed several different safety eyes fall out over time (hello, choking hazard!) and I've even seen one of my shark-like children BITE the safety eyes off of something. So save the safety eyes for things intended for older kids or things used only under constant supervision and just stitch the eyes on instead. It's not worth the potential safety hazard. 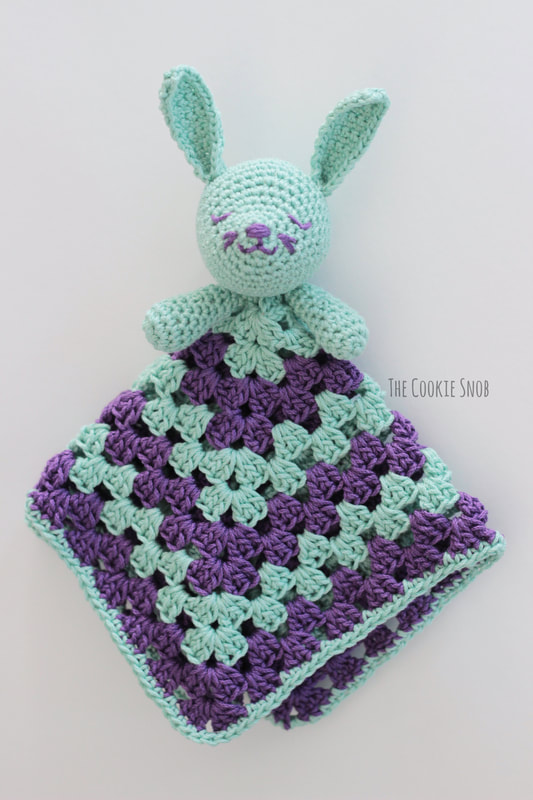 Now that I've got that disclaimer out of the way, let's take a look at the pattern! If you're interested in an ad-free printable PDF version of this pattern, you can find one on Ravelry. (And a special thank you to everyone who supports my blog and keeps it running!) Stitch Glossary: st(s) = stitch(es) ch = chain ss = slip stitch sc = single crochet inc = sc increase (work 2 sc into the same st) dec = sc decrease (I prefer to use an invisible decrease st) dc = double crochet Materials:
Gauge: After the first 2 rounds, the granny square should measure 2 inches by 2 inches. The final square should be 12 inches by 12 inches. Note: Gauge isn't crucial for this project as long as your stitches are tight enough to keep in the stuffing when making the head and arms. I tend to crochet tightly, so if you're a looser crocheter, I recommend sizing down a hook. Granny Square Base: Note: There are lots of different variations to make granny squares; feel free to substitute your own favorite. If you're new to granny squares, I recommend checking out my Hip To Be Square Tie pattern, which has some photos you might find helpful. Starting with the H hook and Mint yarn: Ch 4 and ss to form a ring Round 1: ch 3, work 2 dc into the ring, ch 2, *work 3 dc into the ring, ch 2*, repeat from * to * 3 times, ss to top of the ch 3 to join Round 2: ss over to ch-2 space, ch 3, [2 dc, ch 2, 3 dc] into the ch-2 space, ch 1, *[3 dc, ch 2, 3 dc] into the next ch-2 space, ch 1*, repeat from * to * 3 times, ss to top of ch 3 to join Round 3: ss over to ch-2 space, ch 3, [2 dc, ch 2, 3 dc] into the ch-2 space, ch 1, [3 dc, ch 1] into the ch-1 space, *[3 dc, ch 2, 3 dc] into the next ch-2 space, ch 1, [3 dc, ch 1] into the ch-1 space*, repeat from * to * 3 times, ss to top of ch 3 to join Fasten off yarn. Switch to Purple yarn. Join in any ch-2 space (any corner) Round 4: ch 3, [2 dc, ch 2, 3 dc] into the ch-2 space, ch 1, [3 dc, ch 1] into each ch-1 space, *[3 dc, ch 2, 3 dc] into the ch-2 space, ch 1, [3 dc, ch 1] into each ch-1 space across*, repeat from * to * 3 times, ss to top of ch 3 to join Round 5: ss over to ch-2 space, ch 3, [2 dc, ch 2, 3 dc] into the ch-2 space, ch 1, [3 dc, ch 1] into each ch-1 space, *[3 dc, ch 2, 3 dc] into the ch-2 space, ch 1, [3 dc, ch 1] into each ch-1 space across*, repeat from * to * 3 times, ss to top of ch 3 to join Fasten off. Switch to Mint yarn. Join in any ch-2 space (any corner) Rounds 6-7: Repeat rounds 4-5 Fasten off. Switch to Purple yarn. Join in any ch-2 space (any corner) Rounds 8-9: Repeat rounds 4-5 Fasten off. Switch to Mint yarn. Join in any ch-2 space (any corner) Rounds 10-11: Repeat rounds 4-5 Fasten off. Switch to Purple yarn. Join in any ch-2 space (any corner) Rounds 12-13: Repeat rounds 4-5 Fasten off. Switch to Mint yarn. Join in any ch-2 space (any corner) Round 14: ch 1, sc in each st and ch space around, ss to join Fasten off.  Head: Note: The head is worked in a continuous round, so I recommend using a stitch marker to keep your place. Using the Mint yarn and the F hook: Round 1: Make a magic circle and work 6 sc into the circle (6) Round 2: inc around (12) Round 3: sc around (12) Round 4: [inc, sc] 6 times (18) Round 5: [inc, sc in the next 2 sts] 3 times, sc in the next 9 sts (21) Round 6: [inc, sc in the next 3 sts] 3 times, sc in the next 9 sts (24) Round 7: [inc, sc in the next 4 sts] 3 times, sc in the next 9 sts (27) Round 8: [inc, sc in the next 5 sts] 3 times, sc in the next 9 sts (30) Round 9: [inc, sc in the next 6 sts] 3 times, sc in the next 9 sts (33) Round 10: [inc, sc in the next 7 sts] 3 times, sc in the next 9 sts (36) Rounds 11-13: sc around (36) Before we move on to the next round, I recommend that you pause crocheting and finish the face. It'll be easier than doing it later when the back opening is smaller. Using a bit of Purple yarn and the tapestry needle, stitch on eyes, nose, and mouth. I stitched the nose back and forth 5 times across round 1, stitched the mouth as shown between rounds 2 and 3, and stitched the eyes as shown between rounds 4 and 6. I also added some little whiskers on either side of the nose (starting one round away from the nose). Feel free to use different placements or styles for the stitches as you prefer. 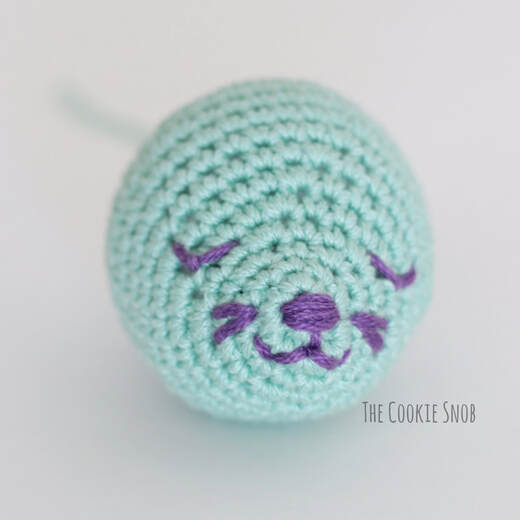 Now back to crocheting! Round 14: [dec, sc in the next 4 sts] 6 times (30) Round 15: sc around (30) Round 16: [dec, sc in the next 3 sts] 6 times, (24) Round 17: sc around (24) Begin stuffing the head. Continue to stuff as you go. Round 18: [dec, sc in the next 2 sts] 6 times, (18) Round 19: sc around (18) Round 20: [dec, sc] 6 times (12) Round 21: dec 6 times (6) Fasten off, leaving a long yarn tail for sewing. Finish stuffing. Using the tapestry needle, pull the yarn tail through the front loops of the last round and pull taut to close the hole. 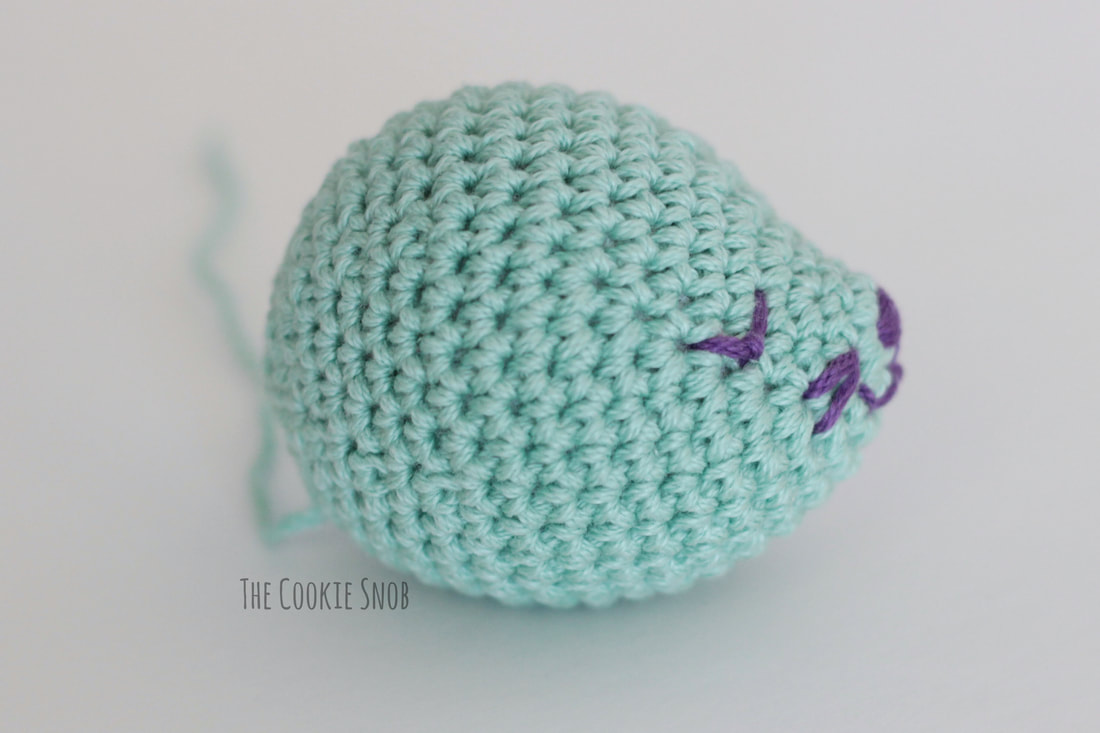 Ear (make 2): Using the Mint yarn and the F hook: Make a slip knot, leave a long yarn tail (8-9”) for sewing later. Ch. 5 Row 1: sc in the 2nd ch from the hook and in each remaining st across, turn (4) Row 2-13 : ch 1, sc across, turn (4) Row 14: ch 1, dec twice, turn (2) Row 15: ch 1, dec (1) Ss around the entire ear to create a neat edge. Fasten off. You can either leave the ear as is, or you can pinch the bottom shut by threading the long yarn tail your tapestry needle and sewing the bottom edge of the left and right sides of the ear together. I sewed the bottom edge for both of my ears. 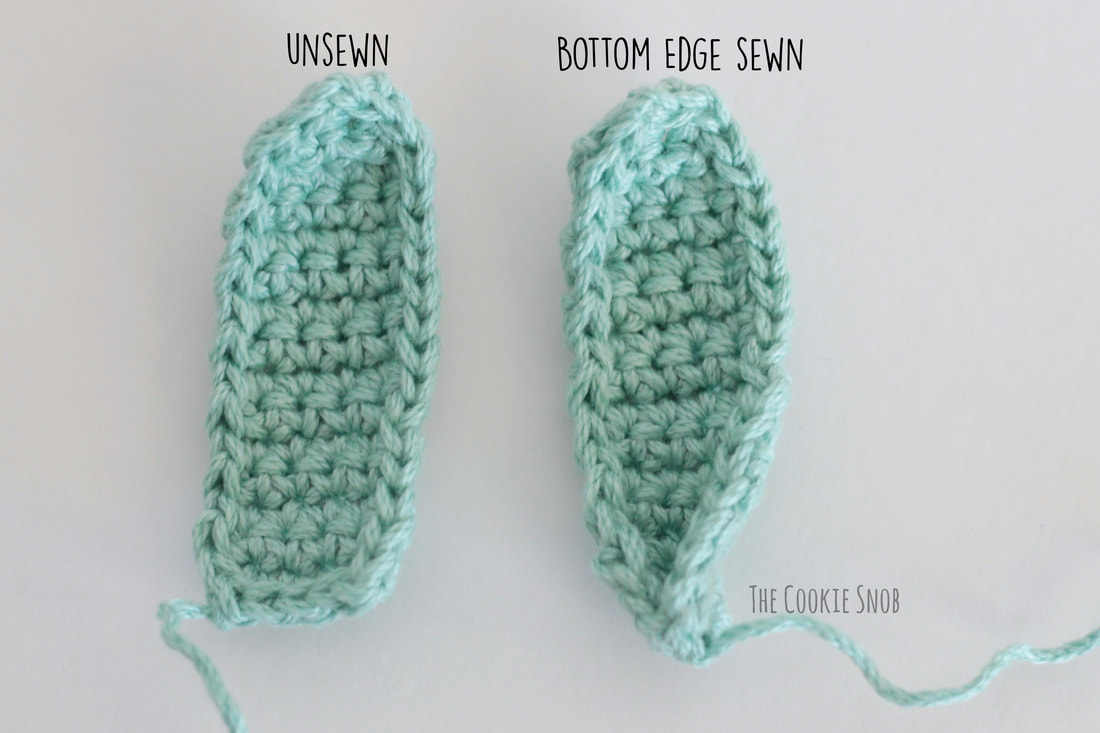 Arm (Make 2): Note: The arm is made in a continuous round, so I recommend using a stitch marker to keep your place. Using the Mint yarn and the F hook: Round 1: Make a magic circle and work 6 sc into the circle (6) Round 2: inc around (12) Rounds 3-4: sc around (12) Round 5: [dec, sc in the next 4 sts] around (10) Round 6: sc around (10) Round 7: [dec, sc in the next 3 sts] around (8) Rounds 8-9: sc around (8) Begin stuffing the arm. Continue to stuff as you go. Round 10: [dec, sc in the next 2 sts] around (6) Round 11: sc around (6) Ss to even off the round, and fasten off, leaving a long yarn tail for sewing. Finish stuffing. Using the tapestry needle, pull the long yarn tail through the front loops of the last round and pull taut to close off the opening. 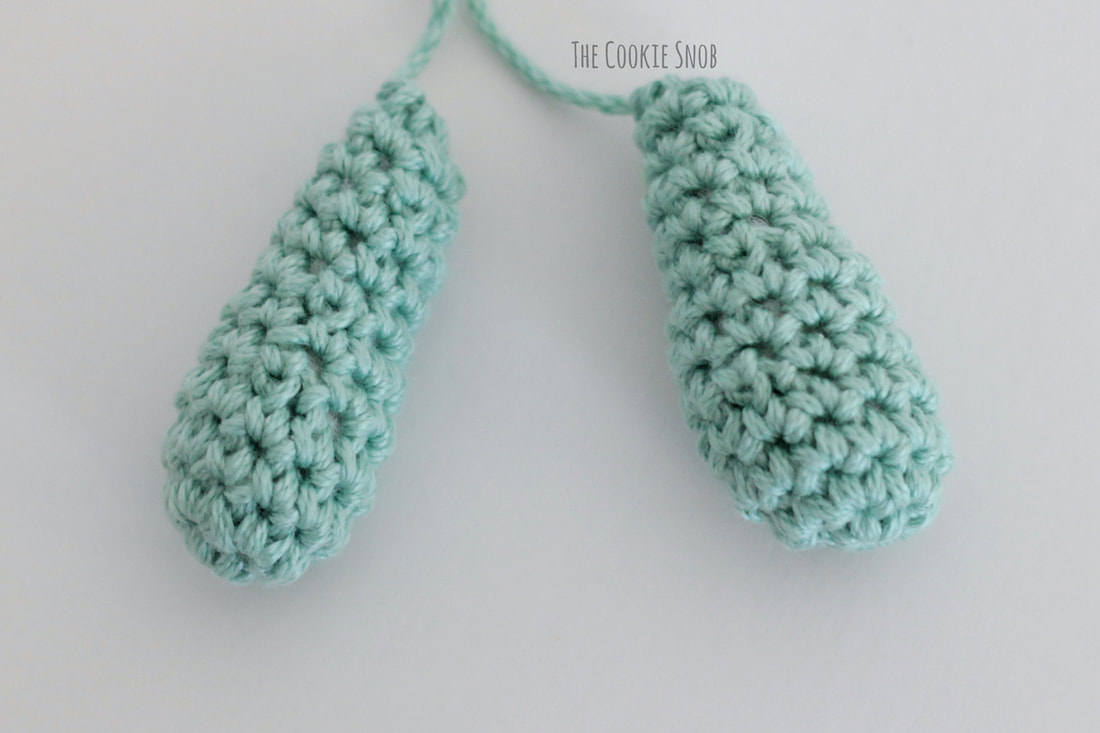 Assembly: Using the yarn tails and the tapestry needle, stitch the ears onto the bunny head. I stitched mine between rounds 10-12. Be sure to sew securely; if the recipient is anything like my kids, the ears are going to be tugged on a lot. 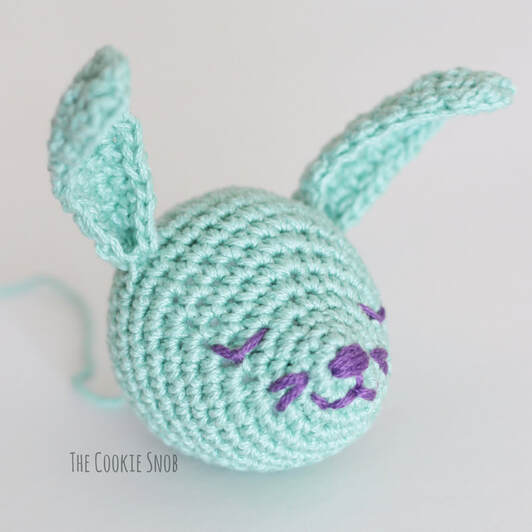 Next, using the yarn tails and the tapestry needle, stitch the head to the center of the granny square base. I sewed mine so that it's facing one of the corners of the square, but you can place it so that it faces one of the straight sides of the square if you prefer. Stitch the arms directly beneath the head, slightly off to the side. Be sure to stitch everything securely in place so that nothing will fall off later. Weave in ends. 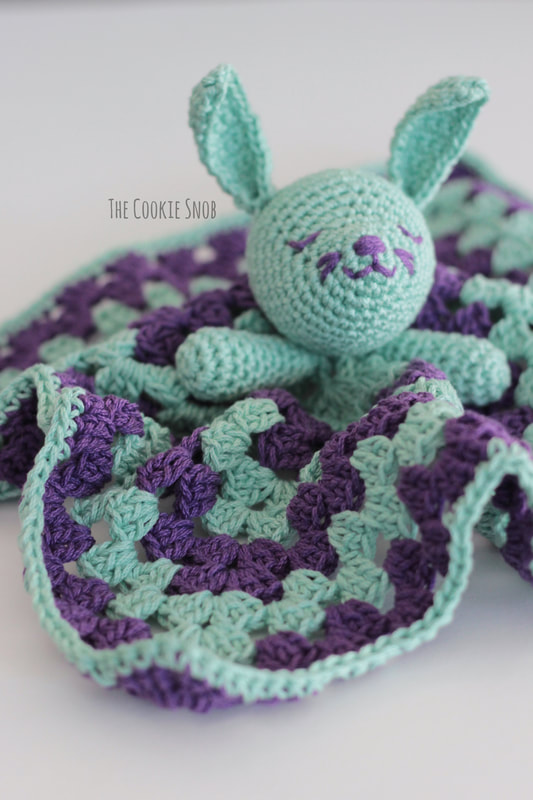 And there you have it! I hope that you enjoy making this sweet, sleepy bunny lovey for a special little one in your life. If you have any questions or comments about the lovey as you go, feel free to get in touch in the comments section below, by email, or on social media. It can sometimes take me a bit to get back to you (full disclosure), but I'll do my best to give you a prompt response. Happy hooking! Want to make sure you don't miss any future blog posts? Join my mailing list! (Spam-free, I promise!) ***You're welcome to do whatever you'd like to with finished products made from this pattern but if you do sell them, I ask that you link back to my page. You may not copy this pattern, repost it anywhere (either altered or in its original form), or claim it as your own. You may not use any photos on this site for your own use. *** 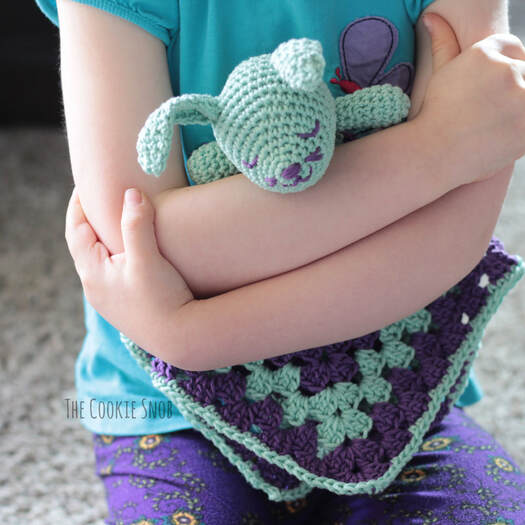
1 Comment
Jean Krause
3/25/2023 03:40:47 pm
Thank you very much for the pattern to make the Bunny Lovey. I enjoy crochet and look forward to making this Leave a Reply. |
Welcome!Thank you for stopping by to visit my own personal corner of the web! Feel free to take a look around and check out what I've been crafting, crocheting, or baking. Hopefully you'll find something to inspire your own creativity!   
Archives
March 2024
|
 RSS Feed