
|
Sometimes I like to pretend to be the Yarn Whisperer. A large portion of my yarn stash consists of unmatched skeins and I'm never quite sure what to do with them. So I'll often pick up a skein, look at it for a while, and ask it what it wants to be. This particular skein was quite insistent that I show off its stripes and that it have a nice soft drape. (Don't worry, the yarn doesn't actually answer back.) A moss stitch seemed like the perfect solution. But what to make with the moss stitch? Well, I needed to make a lovey anyway, so why not? Then something about the colors whispered, "paaandaaa" and thus this lovey came to be! Whether or not your skeins speak to you, you can benefit from my crazy and enjoy this cuddly panda lovey pattern. 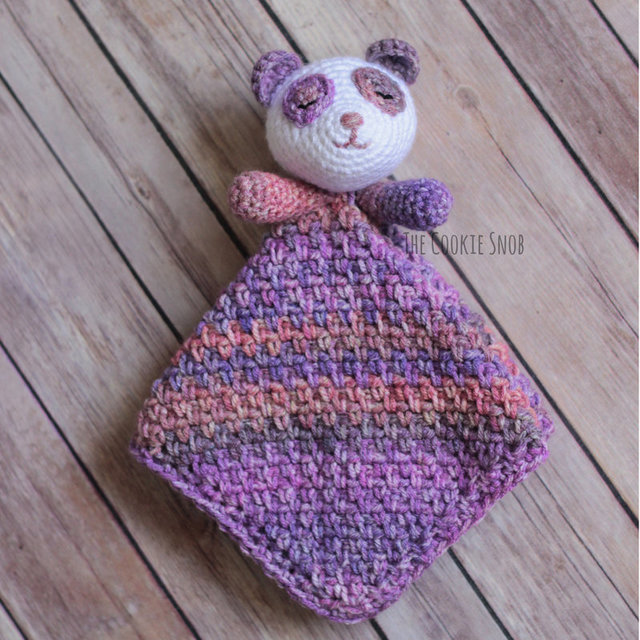 First, a few pattern notes: This panda lovey is made with a typical lovey construction: by making the blanket base and then sewing on the head and arms. But to minimize the amount of sewing, I designed the head of the panda so that you can directly crochet the ears on instead of stitching them on. (Score!) If you find that this method is too confusing, you can skip attaching the ears during Round 12 of the head and then sew them on with the yarn tails afterwards. Either will work. After my youngest used his crazy shark teeth to literally bite the tops off of safety eyes a few months ago (don't worry, I got them away from him before he could eat them), I decided that safety eyes and babies don't mix. So I opted for stitching the eyes on instead to help make this lovey design as baby-safe as possible. But this pattern should work for whatever method you want to use for the eyes. And if you're a loose crocheter, I highly recommend sizing down at least one hook size, because I tend to crochet more tightly than average; gauge isn't super critical here, but you'll want to be sure that the stitches are tight enough to keep in the stuffing. Alright, everybody good? Let's get to crocheting! 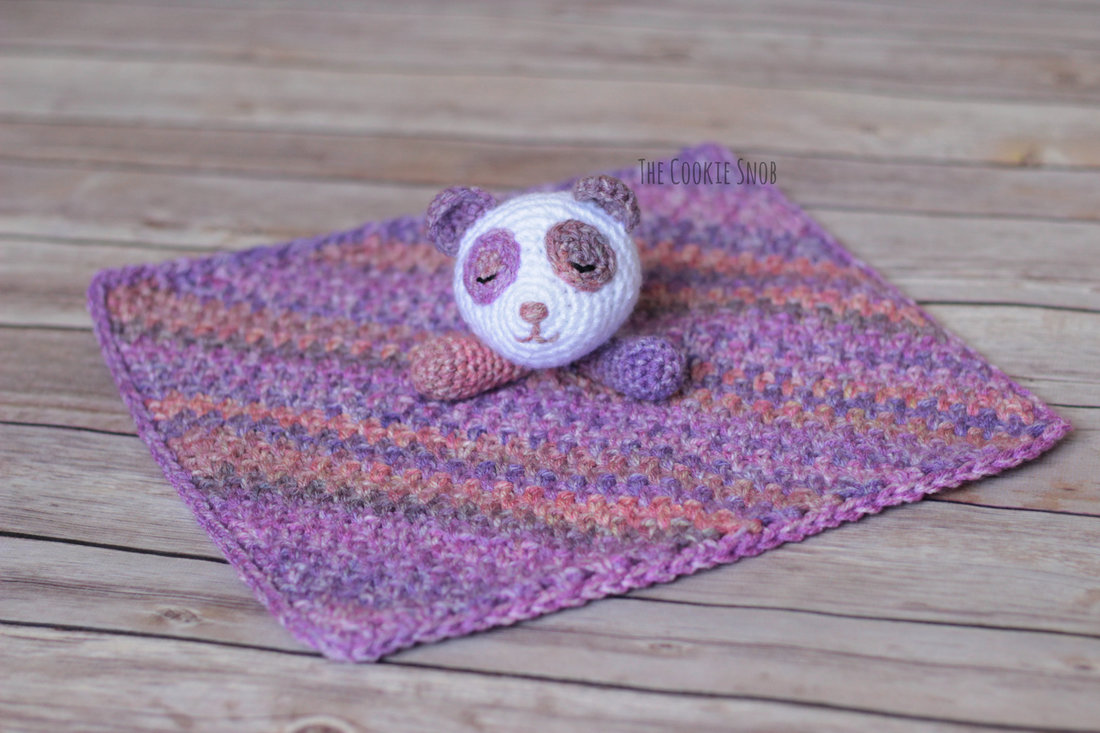 If you'd like an ad-free printable PDF version of this pattern, you can find one on Ravelry. Stitch Glossary: st(s) = stitch(es) ch = chain ss = slip stitch sc = single crochet inc = sc increase (work 2 sc into the same st) dec = sc decrease (sc2tog) hdc = half double crochet dc = double crochet Materials:
Blanket Using the Shocking Violet yarn and the K hook, we're going to make an 11" square using the c2c moss stitch. If you're already familiar with this stitch, you'll just need to increase until the sides measure 11", then begin decreasing. If you haven't used this stitch before, I highly recommend checking out this tutorial first. I've written out the instructions below, but if you're having any trouble with stitch placement, I'd recommend consulting the photo tutorial. Ch 3 Increase Row 1: sc in the 3rd ch from the hook, turn Increase Row 2: ch 3, [sc, ch 1, sc] in the ch-3 space from the previous row, turn Increase Row 3: ch 3, sc in the first ch-1 space, ch 1, [sc, ch 1, sc] in the ch-3 space, turn Increase Row 4: ch 3, sc in the first ch-1 space, ch 1, [sc, ch 1] in each ch-1 space across, [sc, ch 1, sc] in the ch-3 space, turn Repeat Increase Row 4 until the sides measure just under 11" Transition Row: ch 3, sc in the first ch-1 space, ch 1, [sc, ch 1] in each ch-1 space across, [sc, hdc] in the ch-3 space, turn Decrease Row 1: ch 2, skip the first 2 sts, sc in the first ch-1 space, [ch 1, sc] in each ch-1 space across, sc in the ch-3 space, turn Decrease Row 2: ch 2, skip the first 2 sts, sc in the first ch-1 space, [ch 1, sc] in each ch-1 space across, sc in the ch-2 space, turn Repeat Decrease Row 2 until you reach a row with only 3 sc total Decrease Row 3: ch 2, sc in the first ch-1 space, sc in the ch-2 space, turn Decrease Row 4: ch 1, sc in ch-2 space Border: ch 1, sc evenly around the sides of the blanket, working a [sc, ch 1, sc] in each corner, ss to the first sc to join. Fasten off. 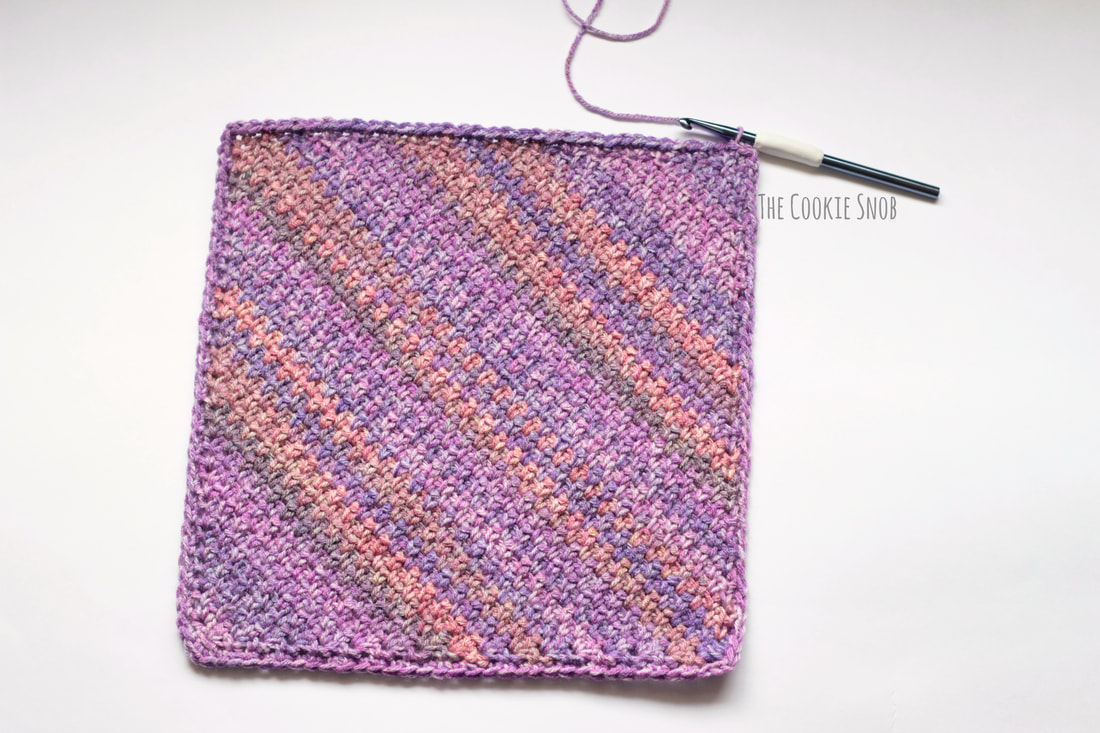 Ear (Make 2): Using the Shocking Violet yarn and the F hook: Row 1: Make a magic circle and work 4 sc into the circle, pull taut and turn (4) Row 2: ch 1, inc across, turn (8) Row 3: ch 1, sc across, turn (8) Work 4 sc evenly across the bottom (the flat part) of the ear. Ss to the other side to join and fasten off. 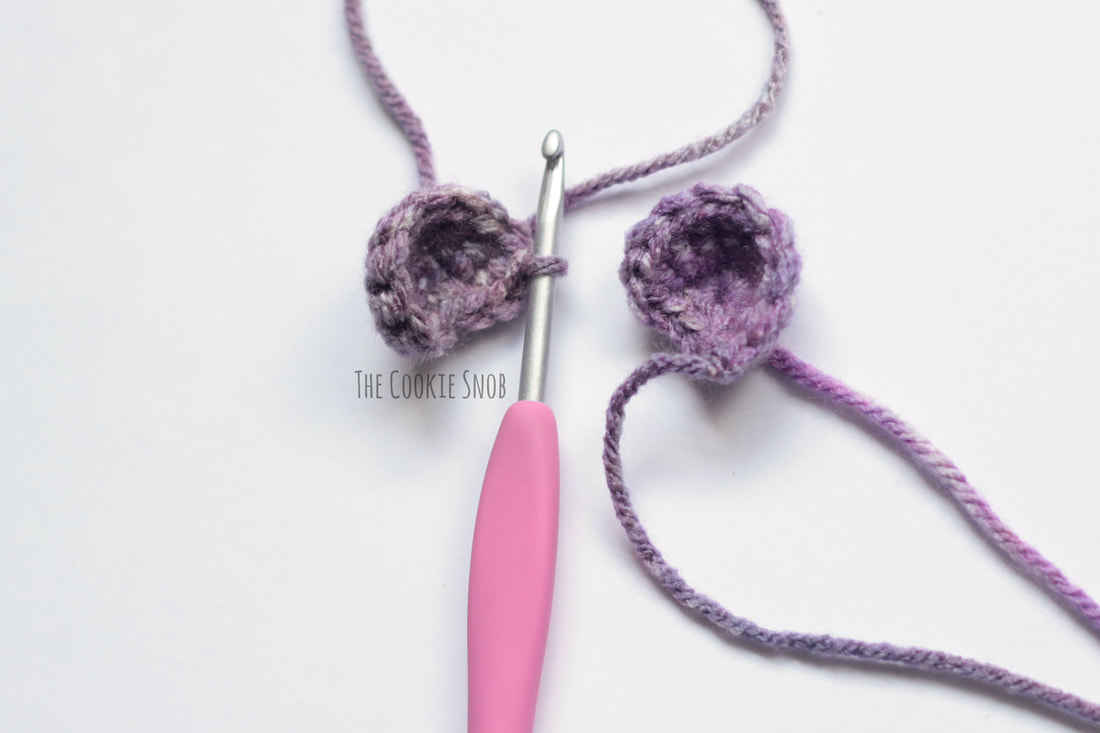 Eye Patch (Make 2): Using the Shocking Violet and the F hook: Round 1: Make a magic circle and sc, hdc, dc, dc, hdc, sc into the circle. Pull taut and ss to the first st to join (6) Round 2: ch 1, inc, inc, [sc, hdc] in the next st, dc twice in the next st, [hdc, sc] in the next st, inc, ss to join (12) Fasten off, leaving a long tail for sewing. Using a tapestry needle and a tiny bit of black yarn, stitch on eyes. 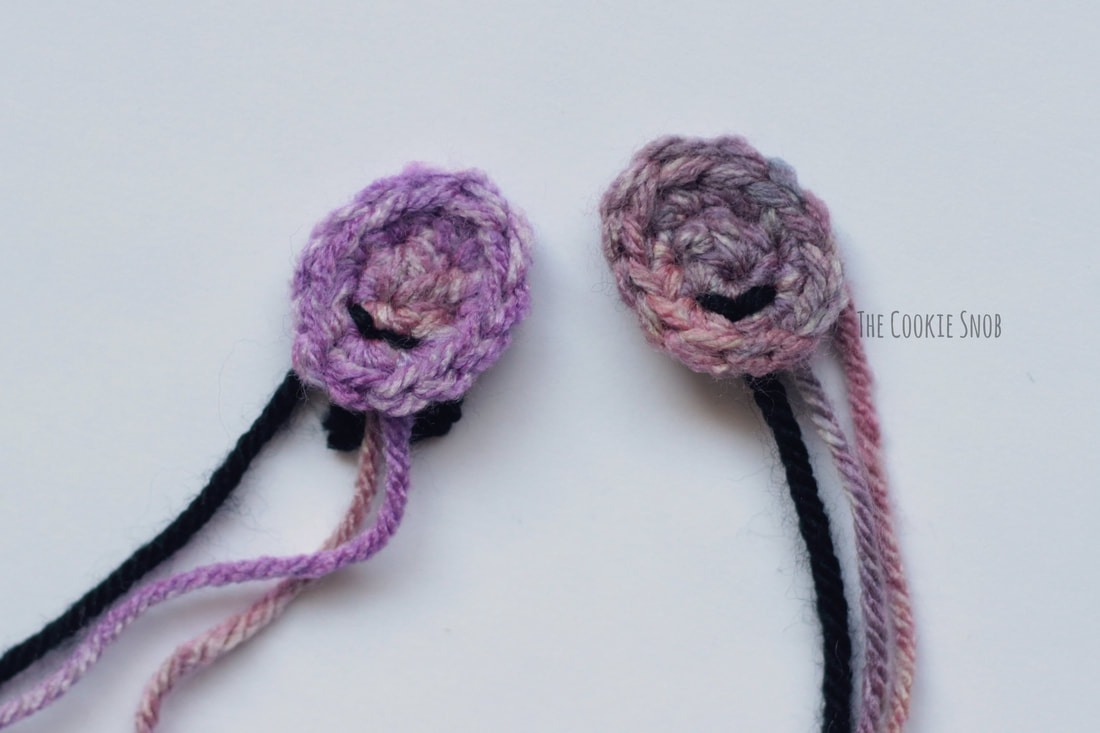 Arm (Make 2): Note: The arm is made in a continuous round, so I recommend using a stitch marker to keep your place. Using the Shocking Violet Yarn and the F hook: Round 1: Make a magic circle and work 6 sc into the circle (6) Round 2: inc around (12) Rounds 3-4: sc around (12) Round 5: [dec, sc in the next 4 sts] around (10) Round 6: sc around (10) Round 7: [dec, sc in the next 3 sts] around (8) Rounds 8-9: sc around (8) Begin stuffing the arm. Continue to stuff as you go. Round 10: [dec, sc in the next 2 sts] around (6) Round 11: sc around (6) Ss to even off the round, and fasten off, leaving a long yarn tail for sewing. Finish stuffing. Using the tapestry needle, pull the long yarn tail through the front loops of the last round and pull taut to close off the opening. 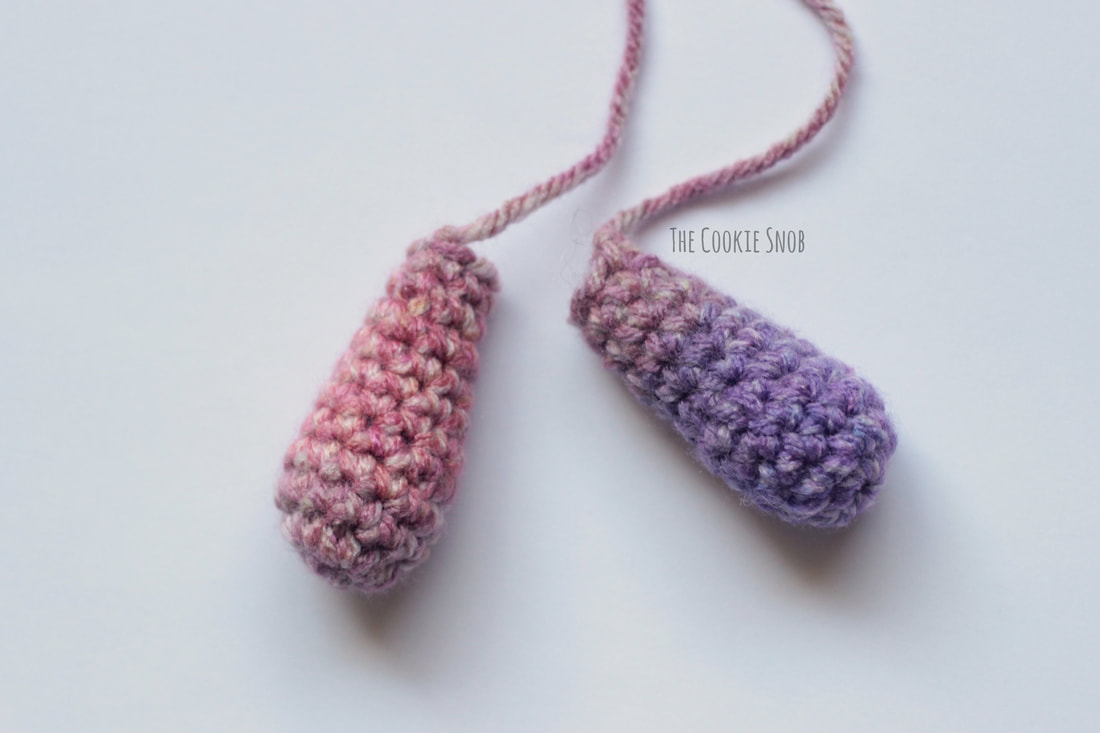 Head: Note: The head is worked in a continuous round, so I recommend using a stitch marker to keep your place. Using the White yarn and the F hook: Round 1: Make a magic circle and work 6 sc into the circle (6) Round 2: inc around (12) Round 3: sc around (12) Round 4: [inc, sc] 6 times (18) Round 5: [inc, sc in the next 2 sts] 3 times, sc in the next 9 sts (21) Round 6: [inc, sc in the next 3 sts] 3 times, sc in the next 9 sts (24) Round 7: [inc, sc in the next 4 sts] 3 times, sc in the next 9 sts (27) Round 8: [inc, sc in the next 5 sts] 3 times, sc in the next 9 sts (30) Round 9: [inc, sc in the next 6 sts] 3 times, sc in the next 9 sts (33) Round 10: [inc, sc in the next 7 sts] 3 times, sc in the next 9 sts (36) Round 11: sc around (36) Now we're going to attach the ears by stitching them directly onto the head as we go. Remember the 4 sts we made across the bottom of the ears earlier? We're going to put them to good use now. Round 12: sc in the next 6 sts. Holding the first ear with the wrong side facing you and the flat bottom of the ear lined up with the next 4 sts, insert your hook through both the next sc (in white) and the first of the 4 sts at the bottom of the ear and work a sc. Sc through both the next st (in white) and the next st at the bottom of the ear 3 more times . . . 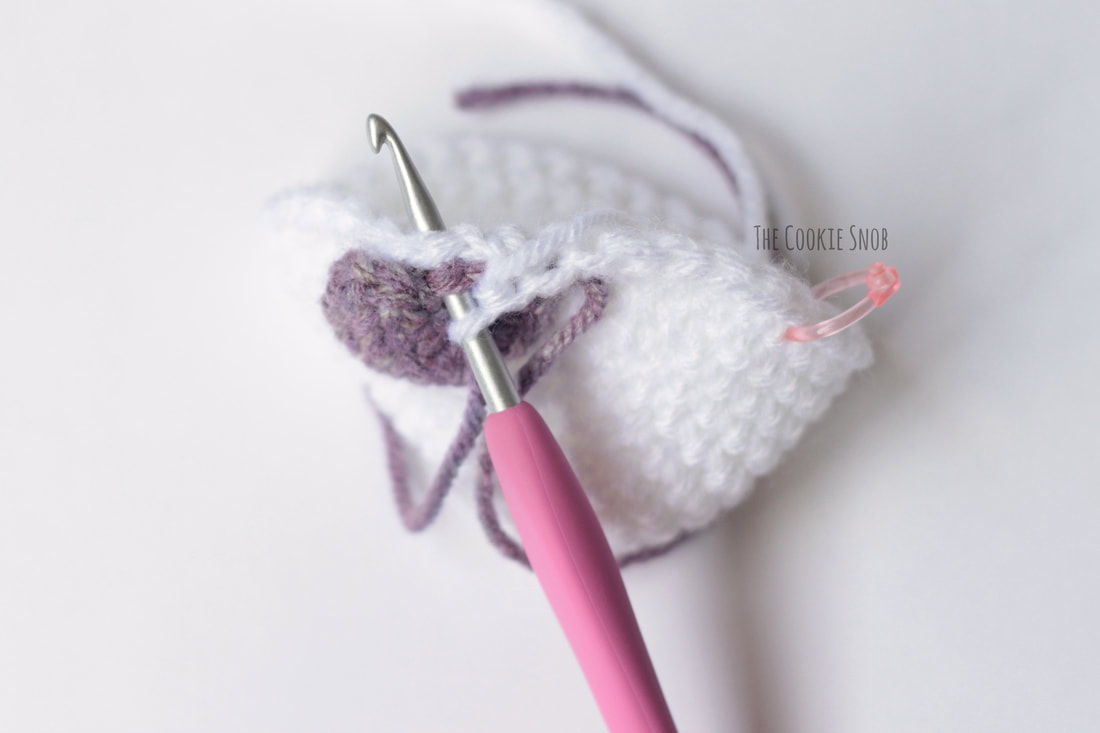 . . . sc in the next 6 sts (just through the white yarn) . . . 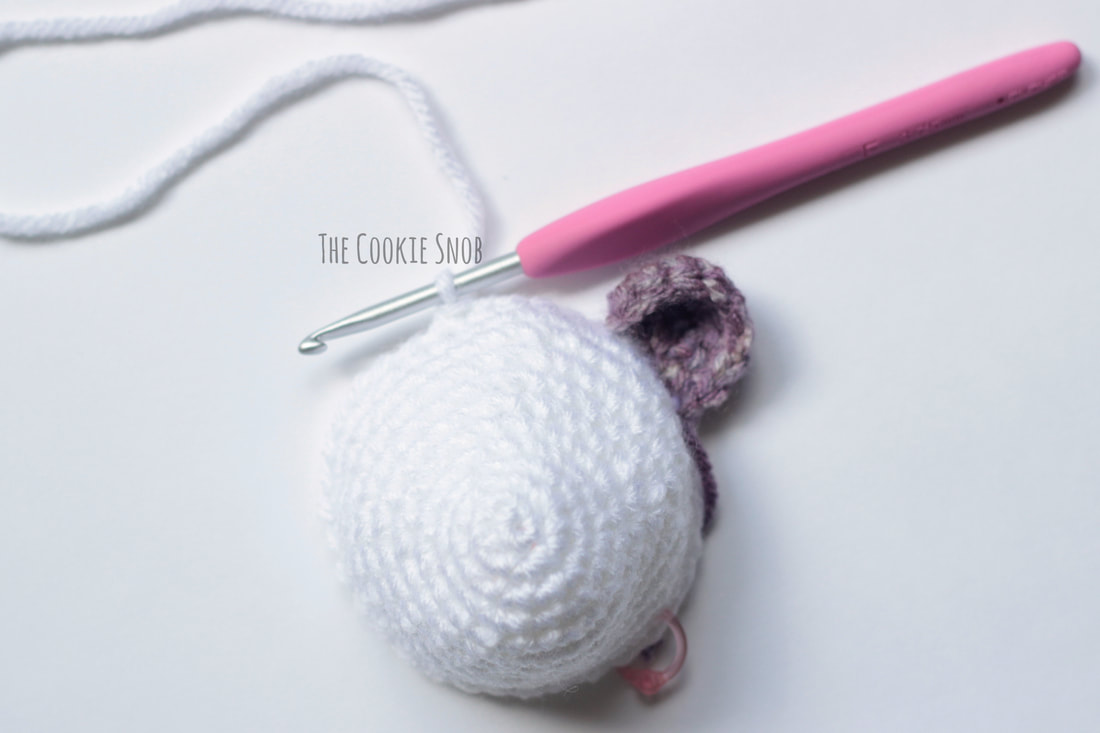 . . . and then attach the second ear the same way. Holding the second ear with the wrong side facing you and the flat bottom of the ear lined up with the next 4 sts, sc through both the next 4 sts (in white) and the 4 stitches at the bottom of the ear, then sc in the last 16 sts (36) 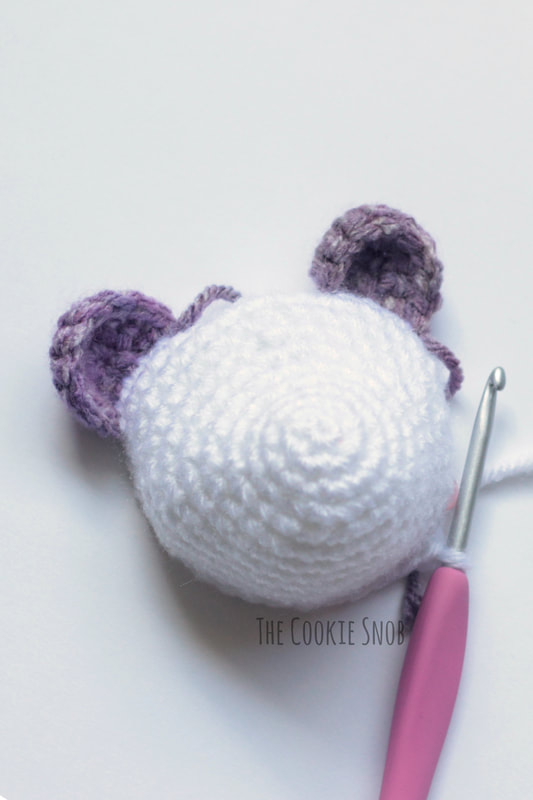 Round 13: sc around (36) Before we move on to the next round, I recommend that you pause crocheting and finish the face. It'll be easier that doing it later when the back opening is smaller. Using the yarn tails and the tapestry needle, stitch on eyes as shown. Using a bit of the Shocking Violet yarn and the tapestry needle, stitch on the nose and mouth. I stitched the nose back and forth 5 times across Round 1, but you can use a different style or placement if you prefer. 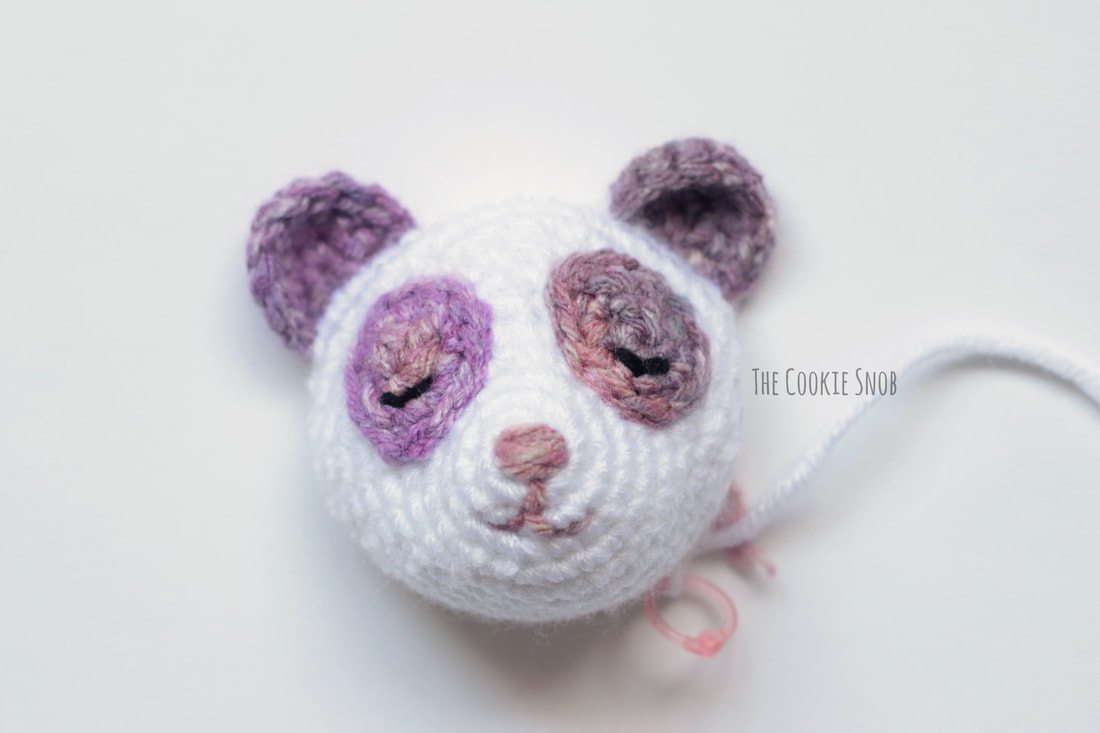 Now back to crocheting! Round 14: [dec, sc in the next 4 sts] 6 times (30) Round 15: sc around (30) Round 16: [dec, sc in the next 3 sts] 6 times, (24) Round 17: sc around (24) Begin stuffing the head. Continue to stuff as you go. Round 18: [dec, sc in the next 2 sts] 6 times, (18) Round 19: sc around (18) Round 20: [dec, sc] 6 times (12) Round 21: dec 6 times (6) Fasten off, leaving a long yarn tail for sewing. Finish stuffing. Using the tapestry needle, pull the yarn tail through the front loops of the last round and pull taut to close the hole. 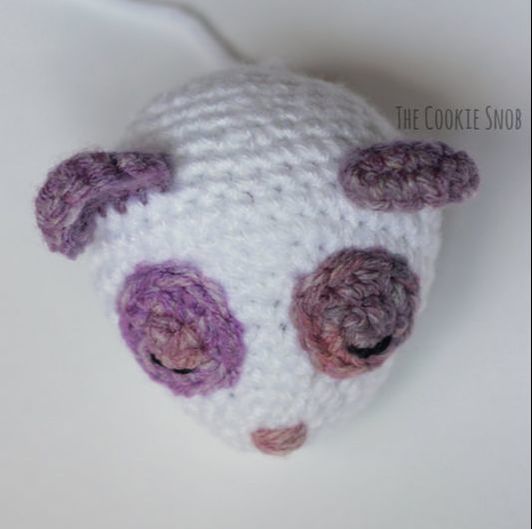 Assembly: Now we're going to sew the head and arms onto the blanket. You can stitch them onto a corner if you'd like you, but I prefer to place mine in the center. To help you find the center, I recommend folding the blanket in half and then in half again. Place a piece of scrap yarn or a stitch marker in the center point and then unfold. You can remove the marker once you start sewing the head in place. 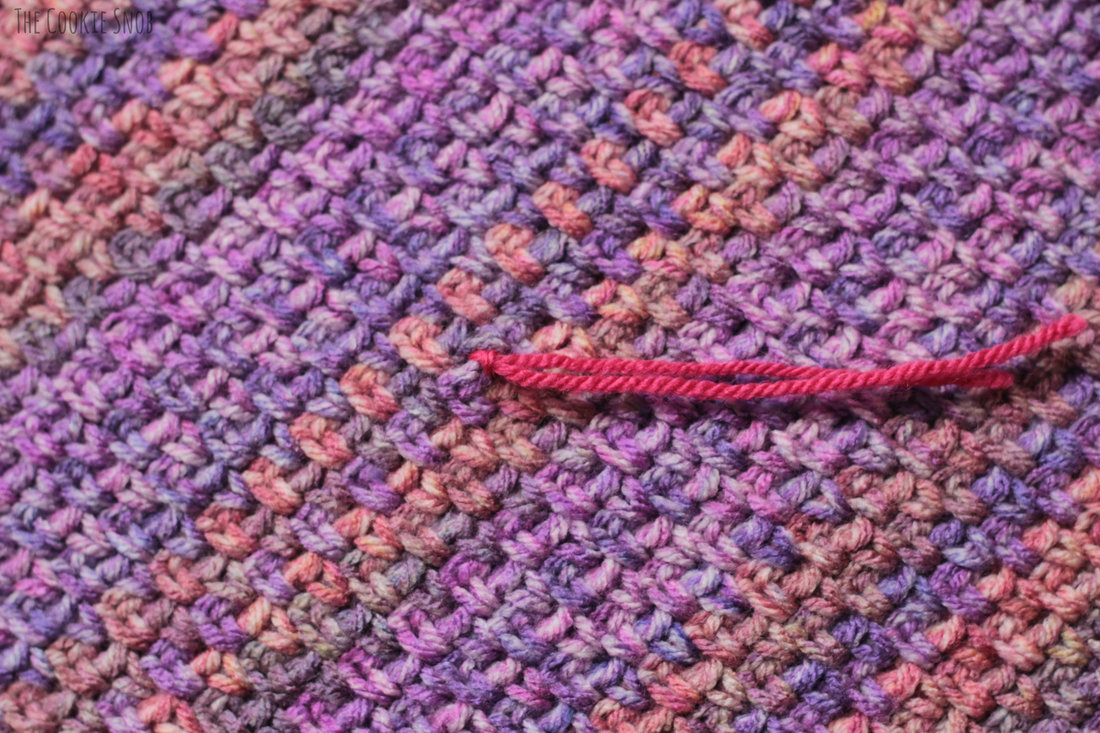 Using the tapestry needle, insert the long yarn tail from the head through the back hole you closed off and pull it out approximately where you would find the "neck." You can now use the yarn and the tapestry needle to stitch the head to the center point of your blanket. Make sure to stitch it securely in place. Then, using the yarn tails from the arms, stitch the arms to the blanket right beneath the head, as shown. Weave in ends. 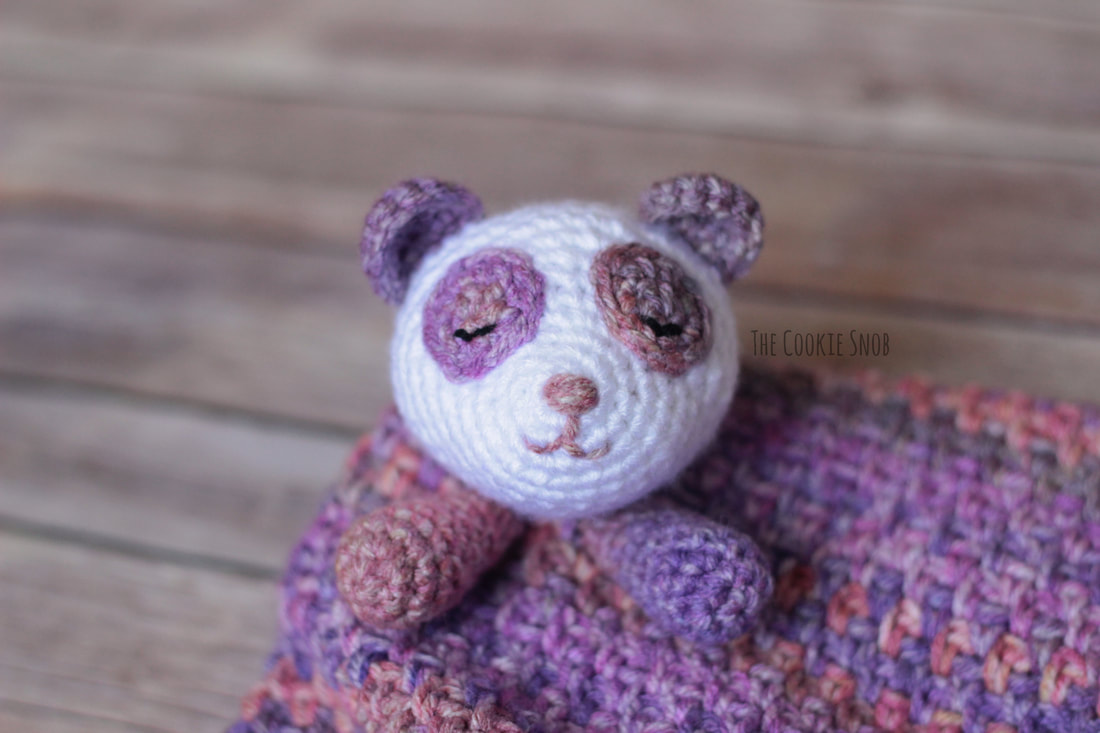 Congratulations! You've now finished an adorable sleepy panda lovey. I hope you enjoyed this pattern. If you'd like a printable, PDF version, you can find one on Ravelry. And if you have any questions or comments about the pattern, you can reach me in the comments section below or on social media. Happy hooking! Want to make sure you don't miss out on any future blog posts? Join my mailing list!  ***You're welcome to do whatever you'd like to with finished products made from this pattern but if you do sell them, I ask that you link back to my page. You may not copy this pattern, repost it anywhere (either altered or in its original form), or claim it as your own. You may not use any photos on this site for your own use. *** 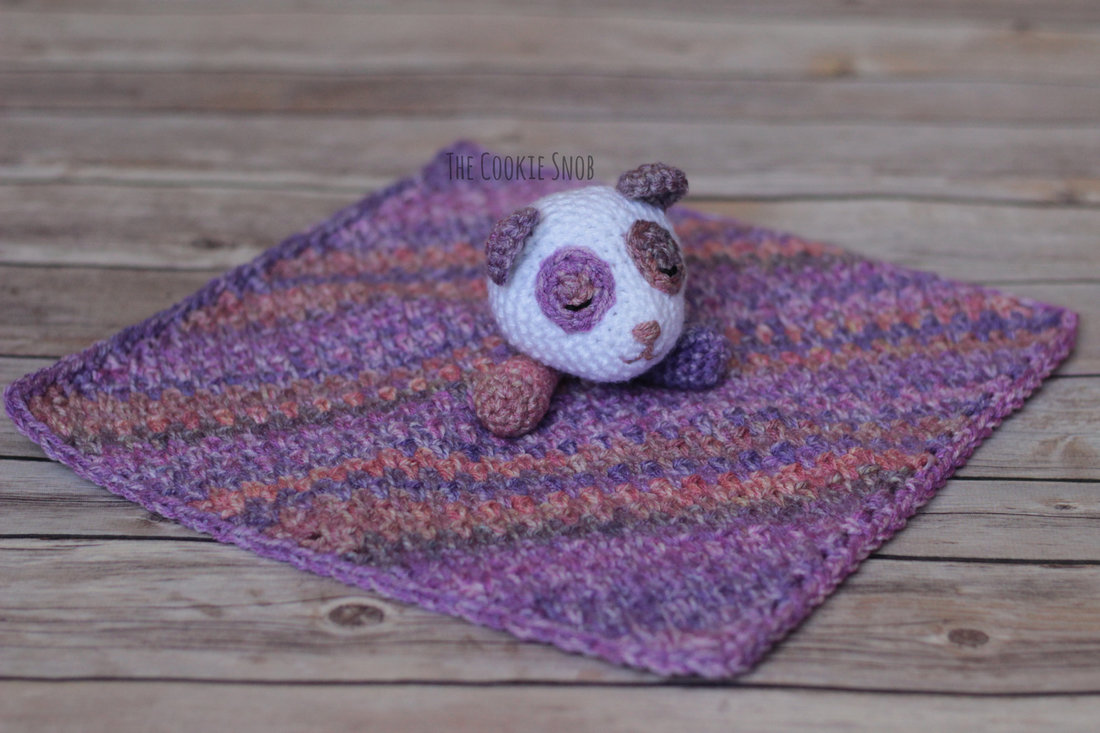
3 Comments
8/8/2018 10:25:17 am
What a wonderful projects. I had a skein at the store whisper baby doll dress the other day and it magically ended up in my cart and I finished it for my Christmas donation yesterday. Clearly it does happen.
Erin
8/8/2018 02:04:26 pm
Oh good! I'm glad it's not just me haha.
Margo Dekker
3/23/2024 09:42:10 am
Good day, do you have a you tube video for your pattern. I am a bit confused with the eye patch. Leave a Reply. |
Welcome!Thank you for stopping by to visit my own personal corner of the web! Feel free to take a look around and check out what I've been crafting, crocheting, or baking. Hopefully you'll find something to inspire your own creativity!   
Archives
March 2024
|
 RSS Feed