
|
Some of you may have noticed that I haven't posted anything in a while. Morning sickness + 2 high energy kids = way too exhausted to do anything, let along blog. But I'm finally starting to feel better and I'm BACK! I'm still not feeling 100% and things are kinda of crazy around here these days, so bear with me if I'm slow at answering your questions, etc, but things are definitely looking up. So let's kick things off with a simple textured cowl pattern! 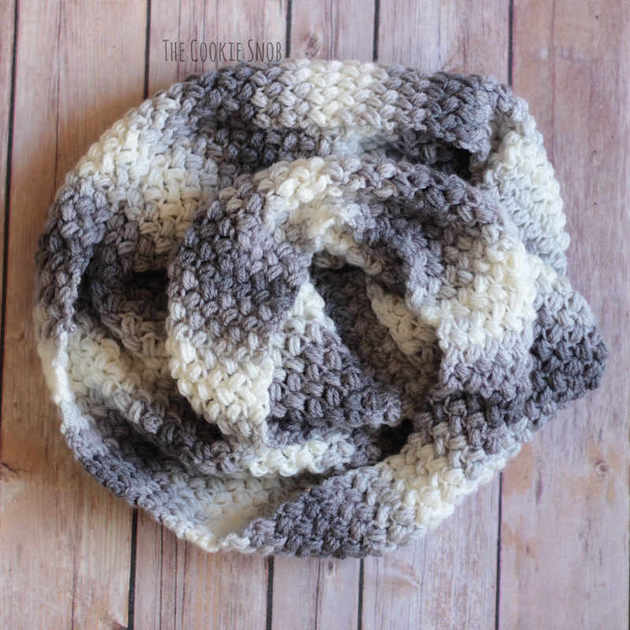 Back when I posted my True Colors Cowl, I mentioned that I had to switch to Plan B because Plan A wasn't working with the yarn I had. Well, this is the original Plan A and I found the perfect yarn for it! The pattern for this cowl is super simple: it's just the bean stitch in rows, worked until it's the length you want. I made mine a double-wrap cowl length, but I'll give you measurement suggestions for a single wrap cowl or a regular scarf as well so you can customize it any which way you'd like. You can make the single wrap version with just one skein of the Lion Brand Ice Cream Yarn and with two skeins you can make both a double wrap cowl and a matching beanie or a full length scarf. So grab your yarn and let's go! Edit: You can now find the matching beanie pattern here!  Note: If you're not familiar with the bean stitch, I recommend checking out my Legume Lagoon Blanket, which includes a step-by-step photo tutorial for the bean stitch. Materials:
Stitch Glossary: st(s) = stitch(es) ch = chain bean st = bean stitch (see note below) To make the bean st: Insert the hook into your desired stitch. Yarn over and pull up a loop. [Yarn over, insert the hook into the same st, and pull up a loop ] twice. Yarn over and insert the hook into the same st once more and pull up another loop. You should now have 6 loops on your hook. Yarn over one last time and pull the yarn through all 6 loops on the hook. Ch 1 to finish off the bean st. (Remember, you can a step by step photo tutorial for this stitch here.) Ch. 37 Row 1: bean st into the 3rd ch from the hook, [skip the next st, then bean st in the next st] across, turn Row 2: ch 2, bean st into the 2nd st after the turning ch, [skip the next st, then bean st in the next st] across, turn Repeat row 2 until the cowl is your desired length. You can make it any size you'd like, but if you're looking for some general guidelines, here are the lengths I would use:
 Tip: When it's time to change skeins (or if you encounter a knot within your skein), you have .a couple of options. If you don't mind shifting the pattern a bit, you can just go on your merry way and not worry about it. But if you want a seamless pattern of stripes without any visible changes, you'll have to be judicious about where you join your second skein. I recommend pulling out the new skein until you reach the same spot in the pattern where you stopped with the previous skein. Then join the new yarn at that location and cut off the extra yarn. (Feel free to save it for something else; I used my extra bit of yarn for my beanie.) 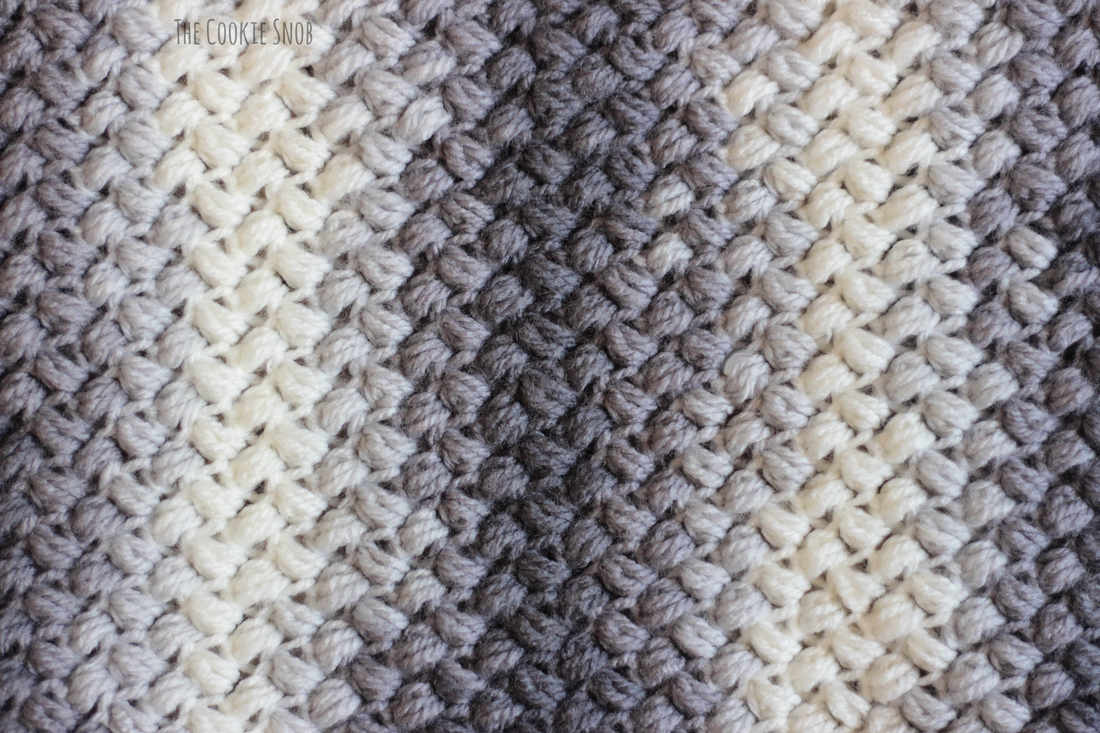 Fasten off. If you're making a cowl (either single or double wrap), leave a long yarn tail for sewing. Using a tapestry needle and the yarn tail, sew the short ends of the cowl together to make a continuous loop (make sure it's not twisted before you start sewing). Weave in ends. 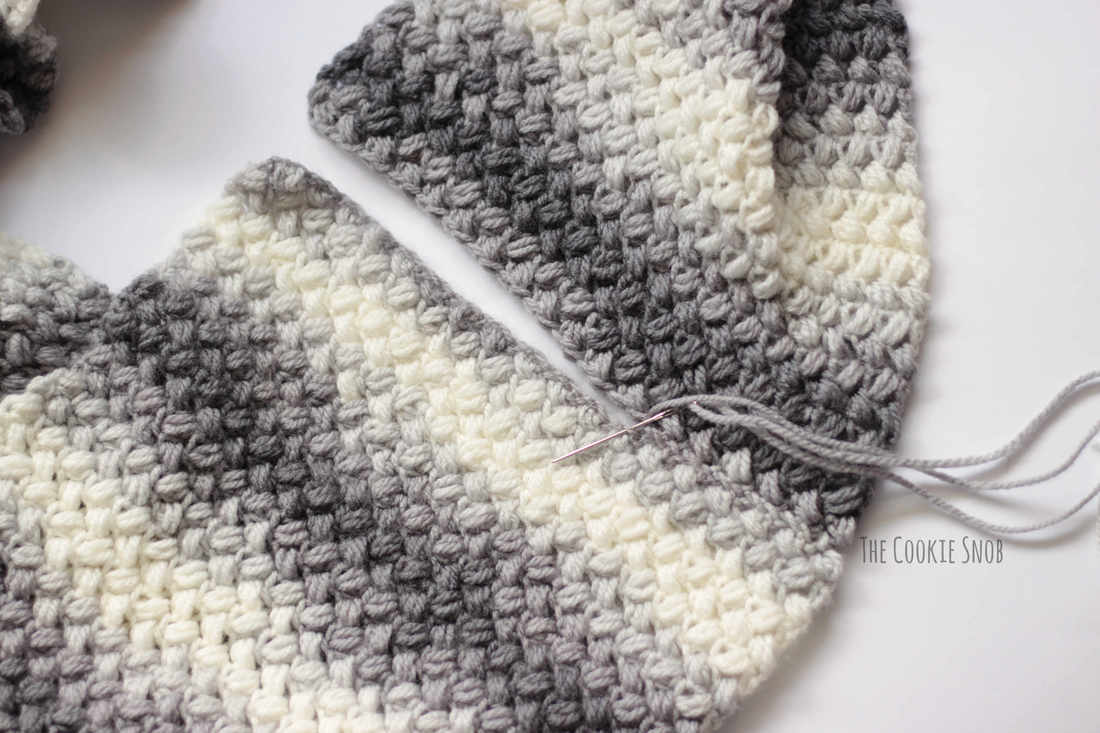 And there you have it! A cozy cowl to help keep you warm. I hope you enjoy this pattern. And be sure to keep an eye out for the matching beanie pattern coming soon! (Edit: you can now find the pattern for the hat here!) If you have any questions or comments about this pattern, you can reach me in the comments section below or on social media and I'll get back to you as soon as I can. If you end up making one, I'd love to see how it turns out, so feel free to share a picture. Happy Hooking! Want to make sure you don't miss any future blog posts? Join my mailing list: 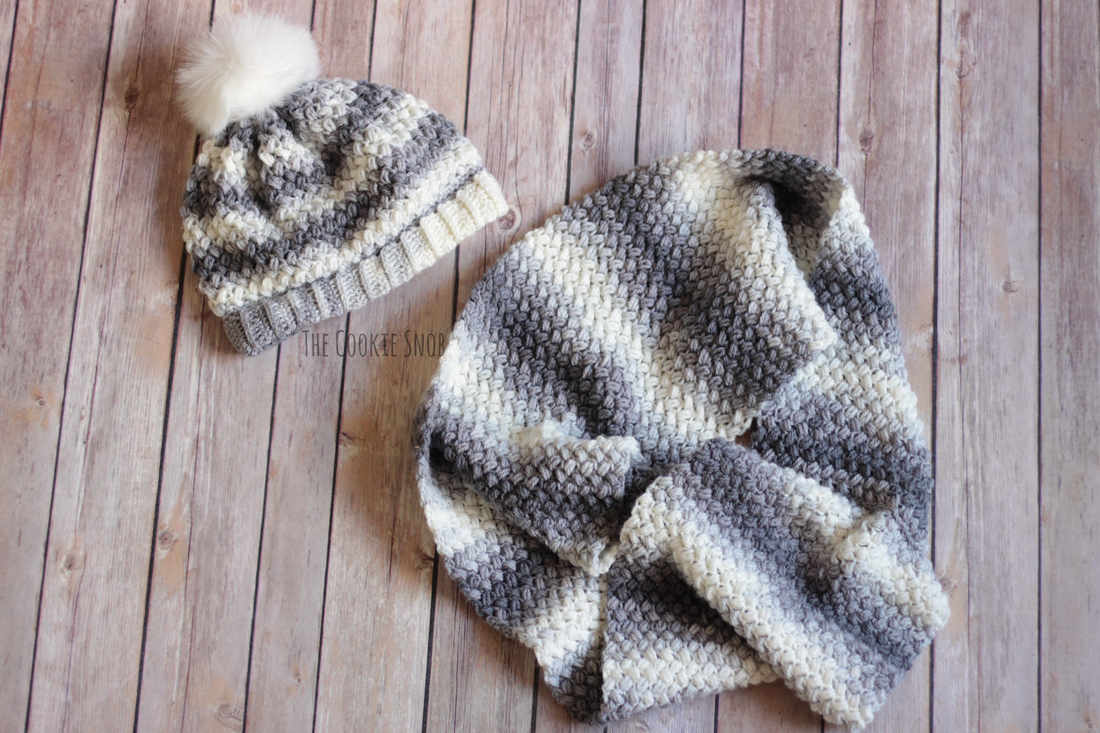 ***You're welcome to do whatever you'd like to with finished products made from this pattern but if you do sell them, I ask that you link back to my page. You may not copy this pattern, repost it anywhere (either altered or in its original form), or claim it as your own. You may not use any photos on this site for your own use. *** 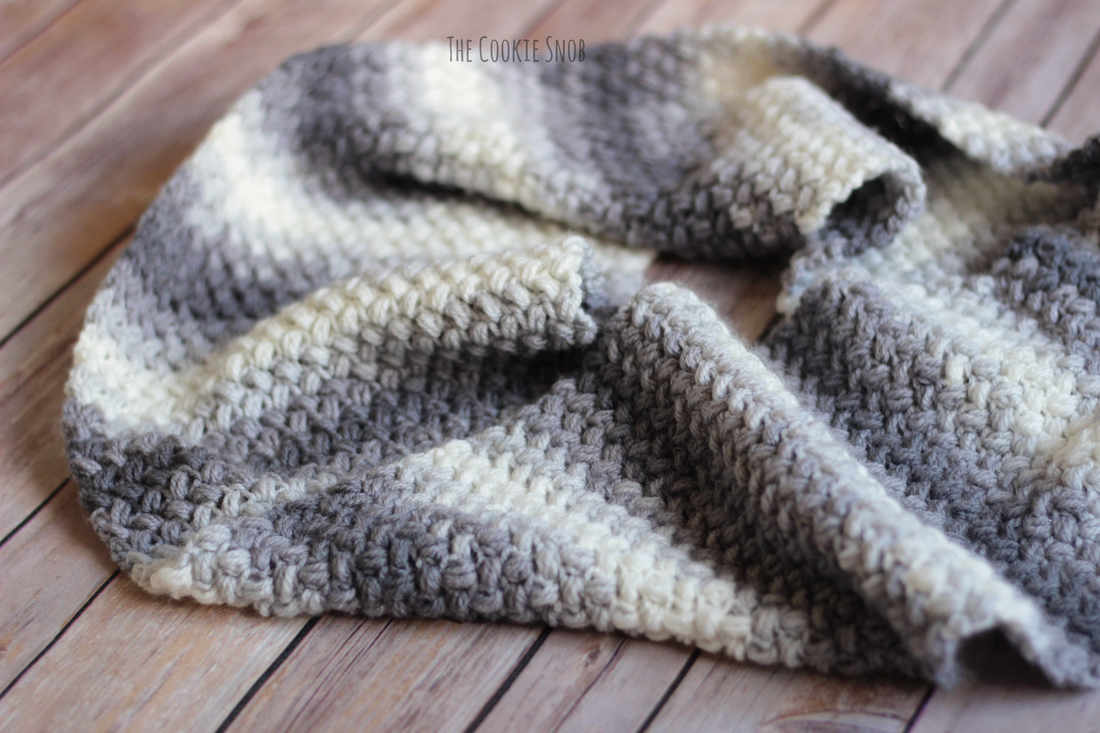
0 Comments
Leave a Reply. |
Welcome!Thank you for stopping by to visit my own personal corner of the web! Feel free to take a look around and check out what I've been crafting, crocheting, or baking. Hopefully you'll find something to inspire your own creativity!   
Archives
March 2024
|
 RSS Feed