
|
Confession: I don't like crocheting blankets. I guess I'm just impatient, but I get boooooored with making afghans. It always turns into an exercise in willpower...that I almost always lose. I will, however, make an exception for an occasional baby blanket. Partly because I like making gifts for friends and family members who are expecting a new arrival, and partly (okay, mostly) because they're so much smaller than an adult-sized blanket. I bought a couple of yarn cakes a while back, intending to make them into a blanket, but wasn't really happy with any pattern ideas I came across and I was more than happy for an excuse to procrastinate any/all blanket making. After tiring of them glaring accusingly at me out of the top of my yarn stash, I decided that the time had come to actually use the yarn cakes. And I'm so glad I did, because the texture on this blanket is incredible. It definitely makes this blanket worth the time it takes.  This blanket pattern is super simple. No counting, no fuss, just lots and lots of bean stitches, so it's perfect for Netflix crocheting. The bean stitch is a yarn eater, so this blanket is pretty dense. I would definitely recommend keeping it on the small side so that it doesn't get too heavy. But I think it would be a great, snuggly stroller blanket for cold weather. My blanket ended up being about 35" X 32" (unstretched), but you can easily adjust the size if you want something larger. 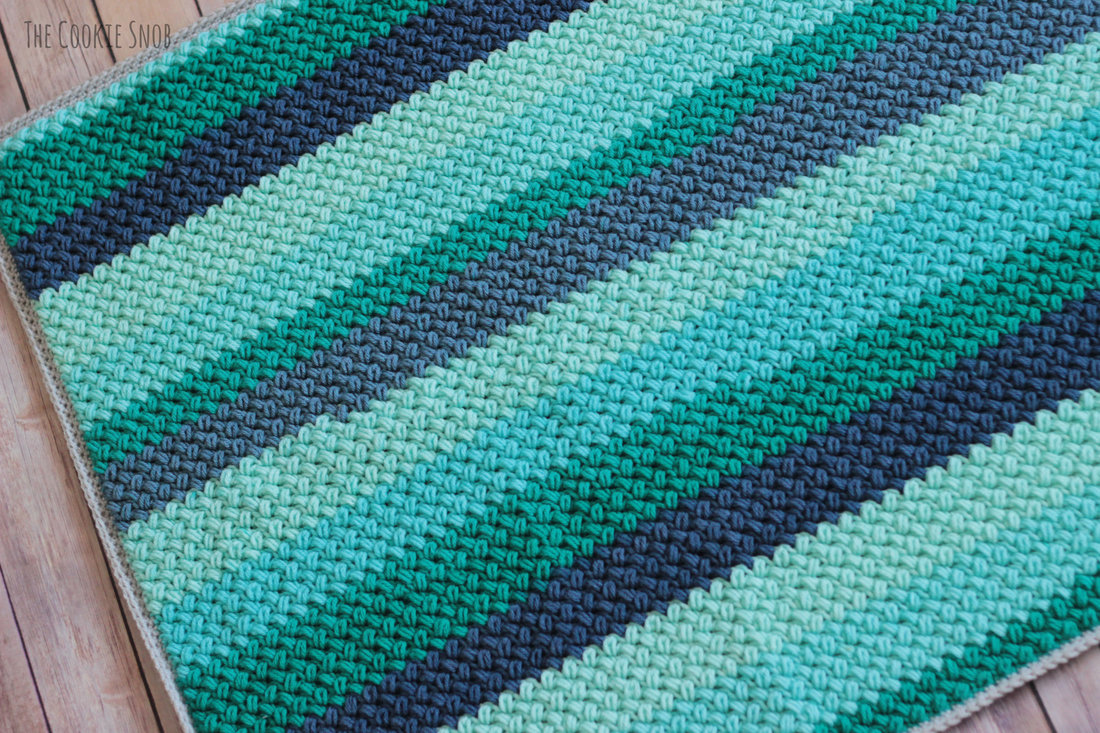 If you've never used the bean stitch before, don't sweat it. I've got a step-by-step photo tutorial to help you out. You'll be a bean stitch pro in no time. Now on to the pattern for the Legume Lagoon Blanket (I never could resist a pun...) Edit: You can now find an ad-free printable PDF version on Ravelry. Materials:
Stitch Glossary: st(s) = stitch(es) ch = chain sc = single crochet bean st = bean stitch (see explanation and photo tutorial below) To make the bean st: Insert the hook into your desired st. Yarn over and pull up a loop. [Yarn over and insert the hook into the same st and pull up a loop] twice. Yarn over and insert the hook into the same st once more and pull up another loop. You should now have 6 loops on your hook. Yarn over one last time and pull the yarn through all 6 loops on the hook. Ch 1 to finish off the bean st. For any visual learners out there, here's a photo tutorial of the first bean st: Insert the hook into the 3rd ch from the hook (shown with an arrow). 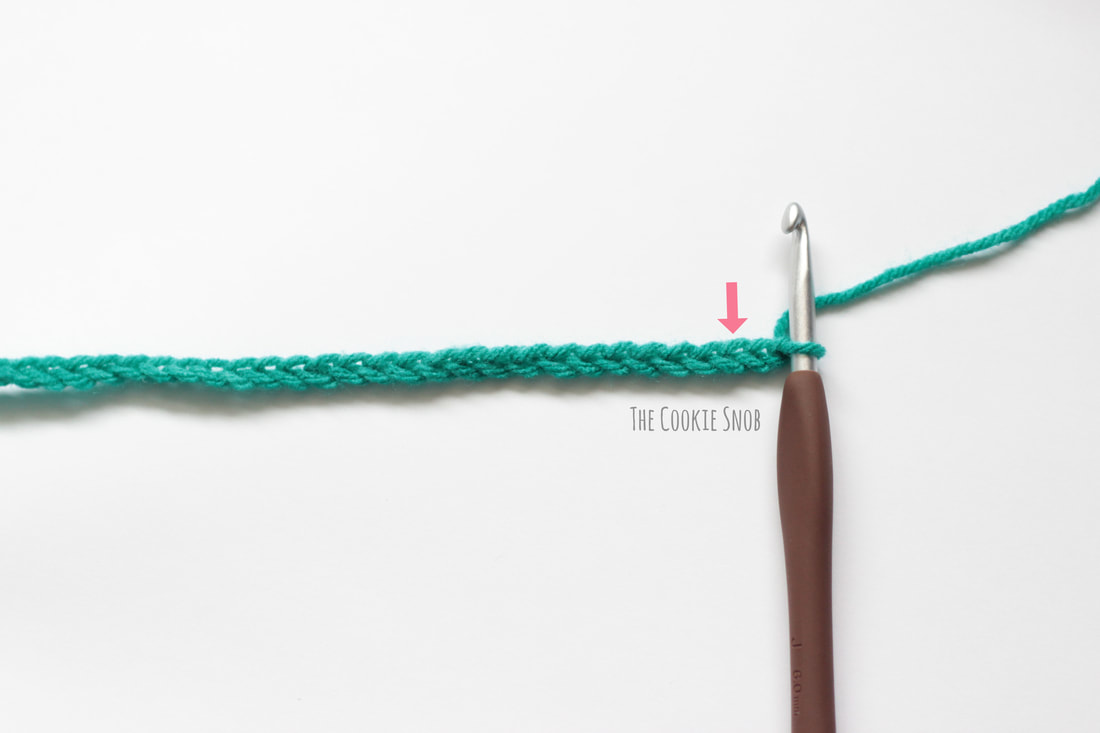 Yarn over and pull up a loop. 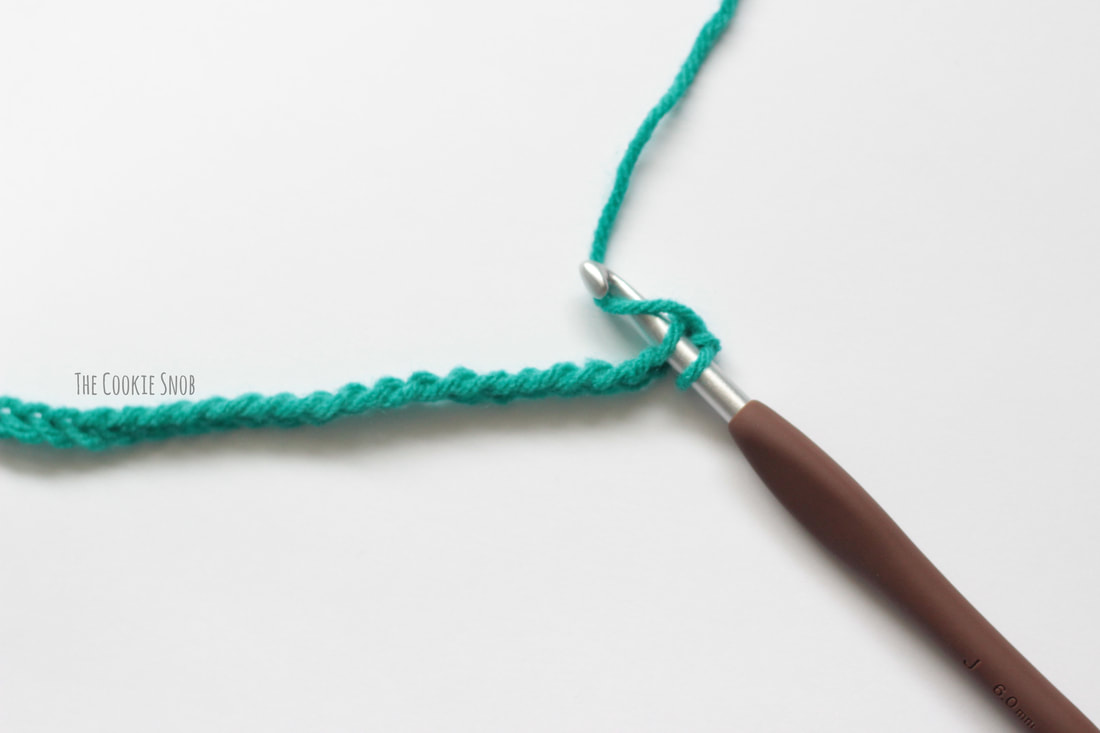 Yarn over and insert the hook into the same st and pull up a loop. 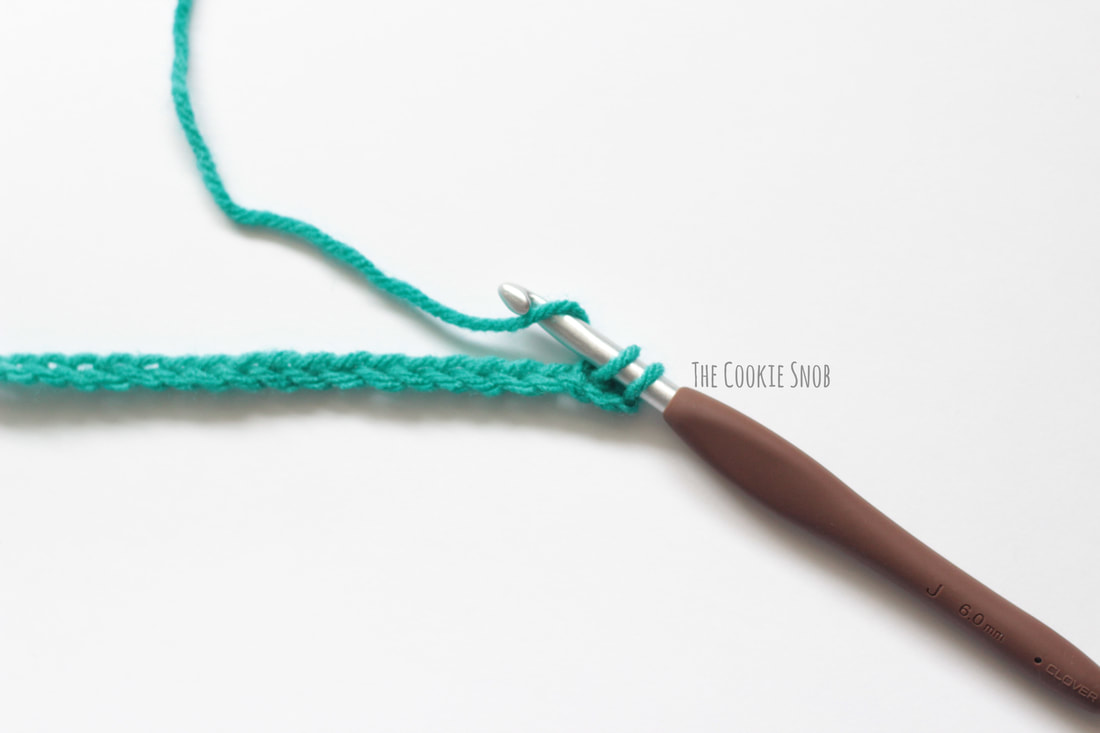 Yarn over and insert the hook into the same st once more and pull up another loop. You should now have 6 loops on your hook. 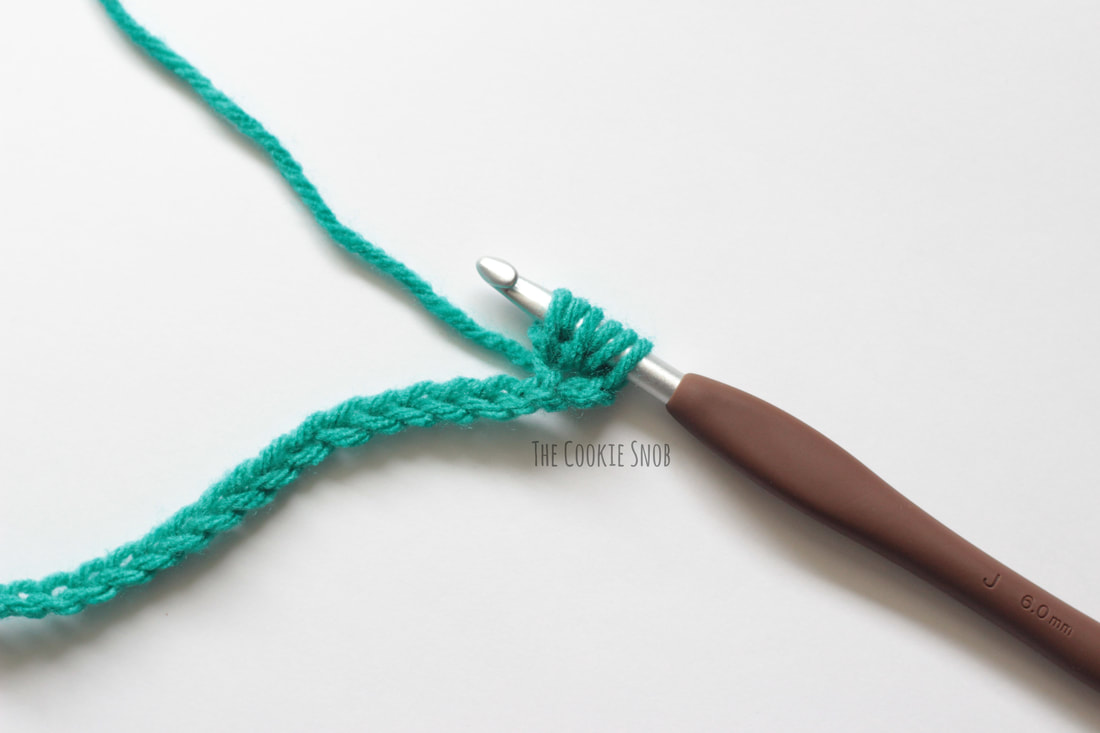 Yarn over one last time and pull the yarn through all 6 loops on the hook. Ch 1 to finish off the bean st. 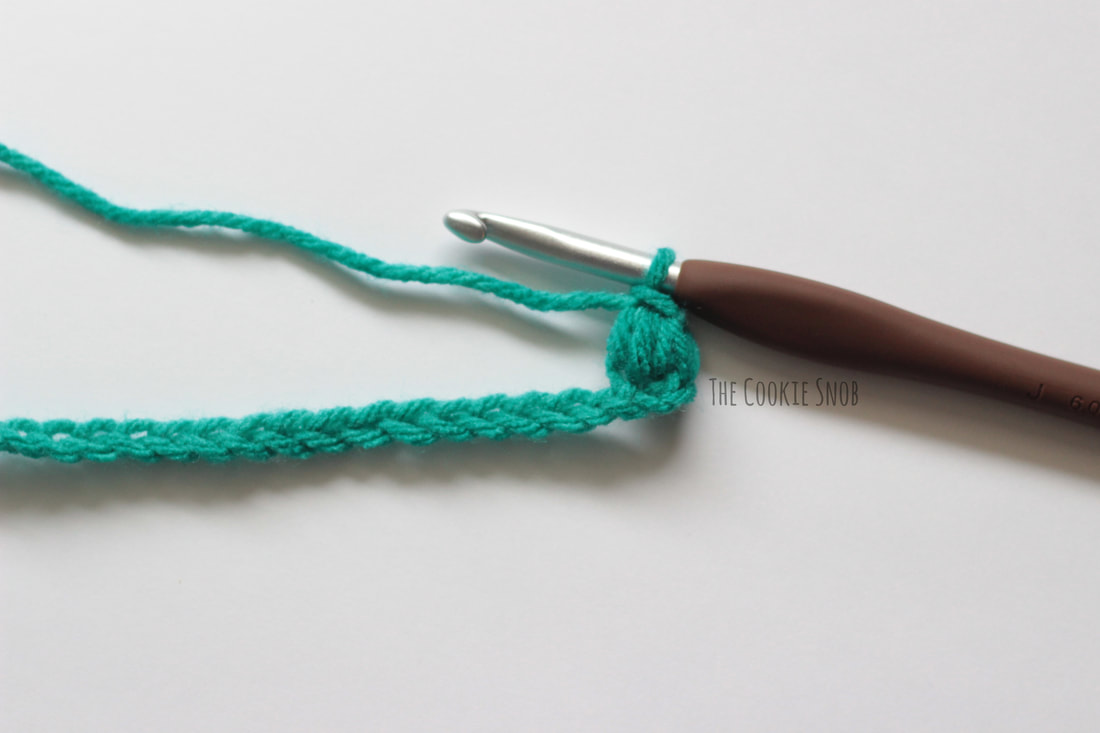 Ta-dah! Ch 107 Row 1: bean st into the 3rd ch from the hook, [skip the next st, then bean st in the next st] across, turn Row 2: ch 3, bean st into the 2nd st after the turning ch (shown with an arrow), [skip the next st, then bean st in the next st] across, turn 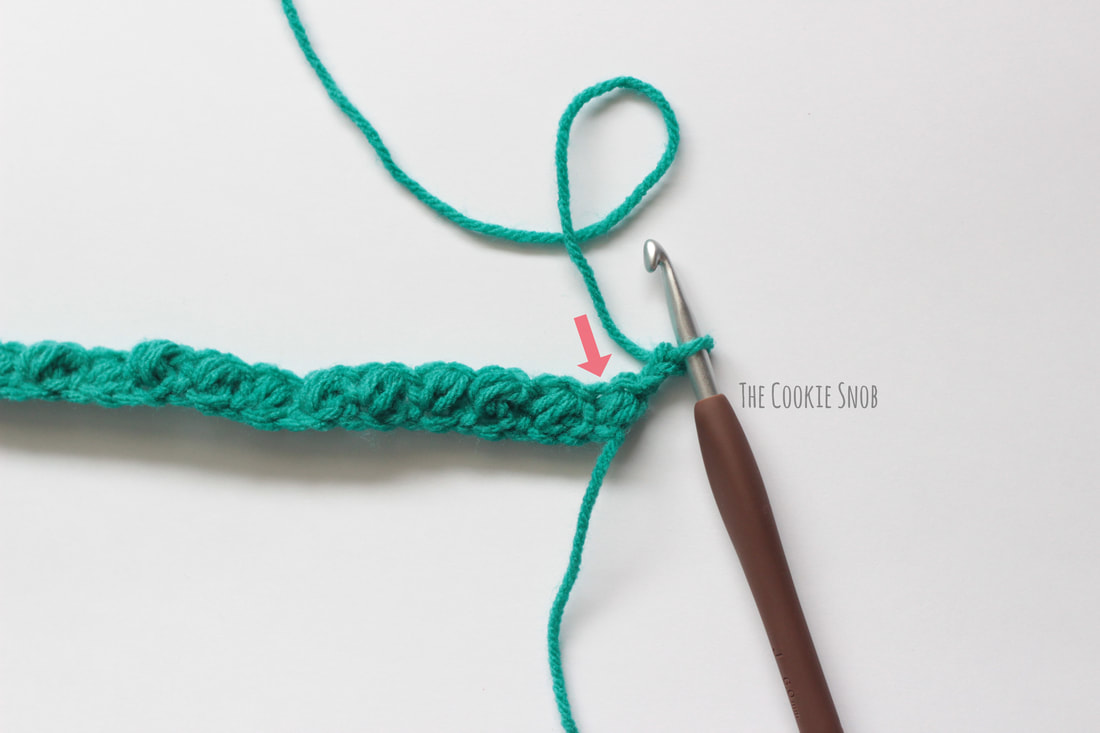 Repeat row 2 until the blanket is your desired length. Fasten off. 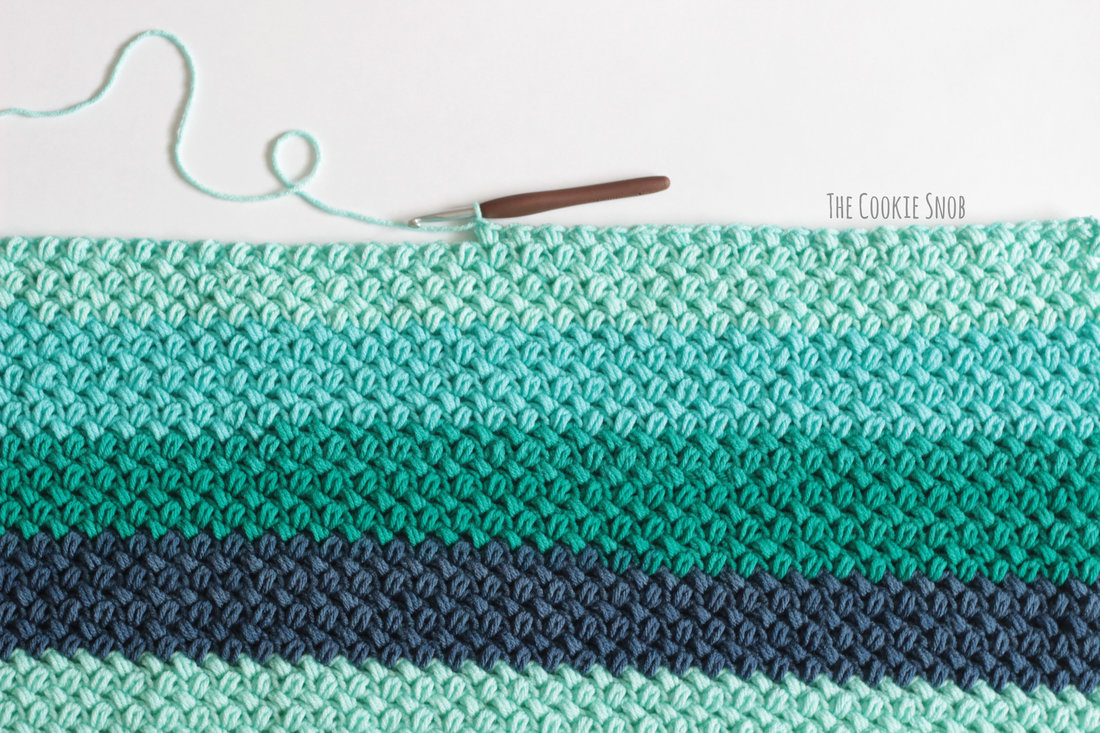 For the border: Switch to the accent color yarn. [Sc, ch 2, sc] in the right corner of the last row. Row 1: sc in each st across the top of the blanket, [sc, ch 2, sc] in the corner, sc evenly down the side of the blanket, [sc, ch 2, sc] in the corner, sc in each st across the bottom of the blanket, [sc, ch 2, sc] in the corner, sc evenly up the side of the blanket, ss to the first sc to join Rows 2-3: ch 1, sc in each st around, working [sc, ch 2, sc] in each corner, ss to join Fasten off. Weave in ends. 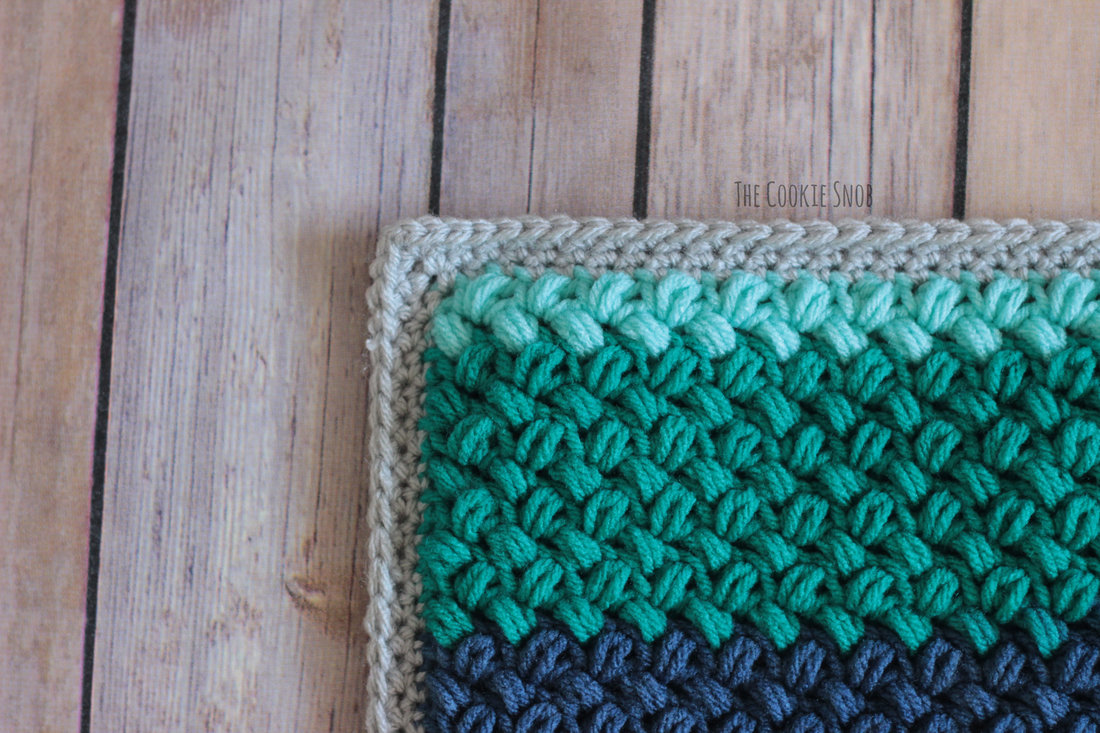 And there you have a cozy, textured blanket! 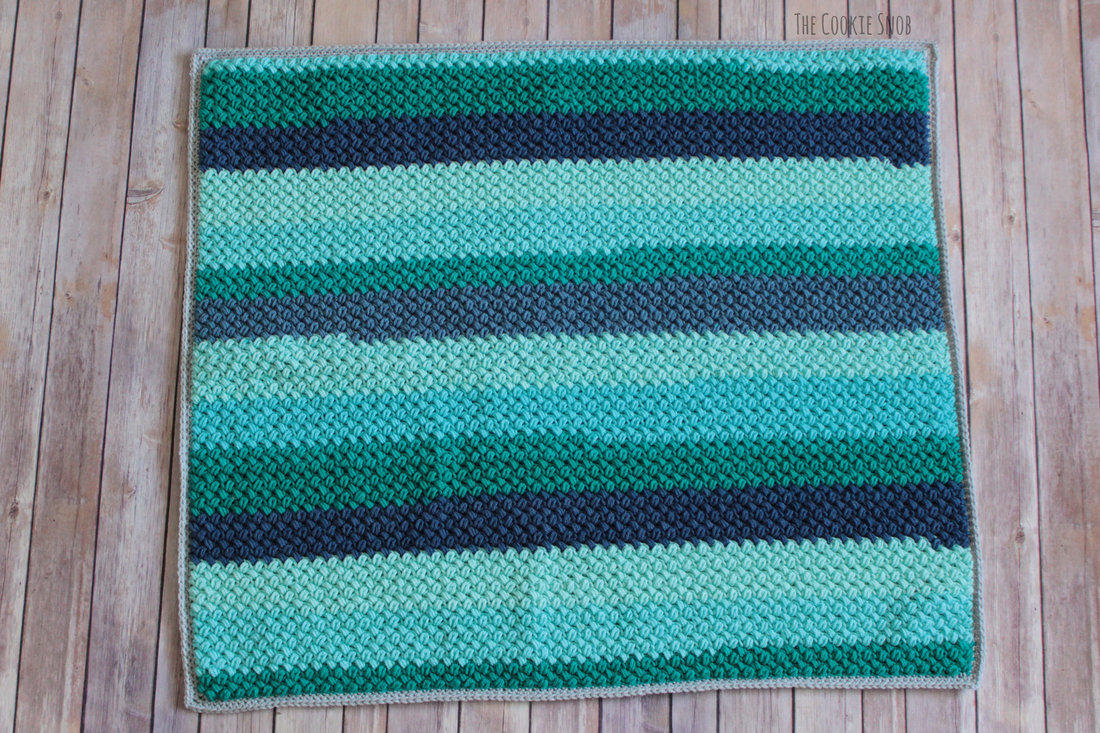 I hope you enjoy this pattern. If you have any questions or comments about it, you can reach me in the comments section below, or on social media. And if anyone has interest in an ad-free PDF of this pattern, just let me know and I'll put one together. (Edit: You can now find the printable PDF version on Ravelry.) Happy hooking! Want to make sure you don't miss any future blog posts? Join my mailing list: 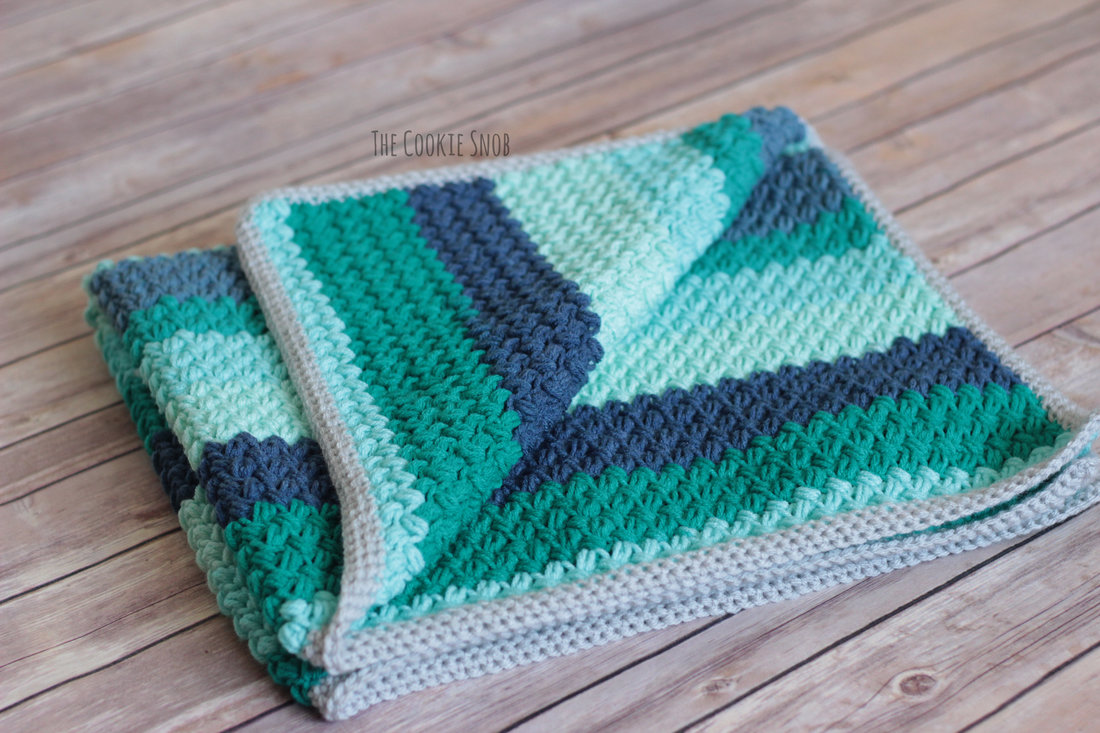 ***You're welcome to do whatever you'd like to with finished products made from this pattern but if you do sell them, I ask that you link back to my page. You may not copy this pattern, repost it anywhere (either altered or in its original form), or claim it as your own. You may not use any photos on this site for your own use. ***
23 Comments
2/20/2018 10:11:31 pm
Very well explained.....love the colors and the pattern....thanks for sharing!!!! 2/21/2018 06:42:41 am
I have a tendency to work on an afghan while making something else as it takes away from the boredom. I have a graduation one I need to get back to as June is fast approaching. 3/6/2018 09:48:16 pm
If I want to make this bigger, what is the multiple for the beginning chain?
Erin
3/6/2018 09:59:33 pm
Any odd number of stitches will work. You'll need 2 stitches to account for each "bean" and then there are 3 stitches in the turning chain. So it'll be any multiple of 2, plus 3.
Lori Oates
3/7/2018 07:55:02 am
Thanks!
Rie
3/7/2018 07:05:12 am
Came over to visit from Moogly and HOHD, but will be back! Beautiful blanket.
Erin
3/7/2018 07:19:38 pm
Thanks! Glad to have you visit :)
Melanie
3/14/2018 11:19:22 am
I know exactly what you mean about getting bored with blankets! I learned to crochet about 4 years ago and the first thing I started was a blanket for my husband. I put it down to try amigurumi and since then I've made probably 50 stuffed animals and dolls and my poor husband's blanket is still less than half finished. Like you, I can manage a baby blanket for a baby of someone I love but I've given up on bigger blankets.
Erin
3/14/2018 07:25:05 pm
Oh good, I'm glad it's not just me! Some part of me is always envious of the people who keep making gorgeous blankets, but the rest of me is happy making amigurumi and small pieces haha
Sue
4/4/2018 02:50:23 pm
Interested in pdf. Love the look of this!
Erin
4/17/2018 07:30:15 pm
Alright, I'll add it to my to do list! I'll let you know once the PDF is ready :)
Arlene
4/15/2018 08:51:34 pm
Interested in a copy of the pattern, please
Erin
4/17/2018 07:30:58 pm
Okay, I'll add it to my to do list! Once the PDF is ready I'll let you know and post a link to it here :)
Margaret
5/19/2018 09:23:57 pm
Interested in a written pattern as well please and thank you. Your work is beautiful !! 8/8/2018 09:28:32 pm
Awesome love the picture tutorial for visual learners like myself. Hi5
Barbara DeVault
11/4/2018 08:51:28 am
Thanks so much for the clear directions. I will be making this to send to the Cheyenne River Reservation in S. Dakota where it gets very cold. I know a little baby and its mom will be very happy with the lovely cushy texture and warmth.
Ari
4/8/2019 11:34:19 am
Hi, I just found this pattern and I would love to try to make this - it's my first time working with a yarn cake that changes color. Do I just follow the pattern from start to finish? Do the colors change nicely to match what you made? Can you tell I have no idea what I'm doing, I've only been crocheting for a week!
Erin
4/8/2019 11:48:19 am
I'm glad you like the pattern! You can just follow the pattern as written and the color changes should take care of themselves. You'll notice from my pictures in the pattern that the color changes don't always line up perfectly with the end of the row, but I thought it still looked fine. If you want perfectly even stripes of color, you can crochet with your yarn cake until you won't have enough of color A to finish a complete row and then cut the yarn cake and pick it back up for the next row starting with color B from the cake. But then you'll have to weave in all the ends and you'll have extra bits of yarn leftover.
Holly
11/21/2019 06:07:42 pm
I love this pattern, and I think it's the perfect stitch for a new special yarn I bought! I have one question, though - once the initial row is established, are we then crocheting into the chain stitch between beans? That's what it seems like to me, but I just wanted to double-check that I'm doing this right. Thanks! And thank you for sharing this pattern with us!
Erin
12/6/2019 09:42:59 am
Hi Holly! I'm so glad you like the pattern. Yes, you'll be working into the space between the bean stitches. This will help give them their signature slant. Sorry for the delayed response, but I hope this helps! Let me know if you have any other questions. 8/19/2020 12:47:07 am
How many stitches would you need for a50”x60” blanket? I’m fairly new and step trying to figure it out. Thank you!
Erin
8/20/2020 10:57:51 pm
Hi Deedee!
jordi
2/12/2022 12:16:41 pm
Is this stitch also referred to as the Mini Bean stitch. Leave a Reply. |
Welcome!Thank you for stopping by to visit my own personal corner of the web! Feel free to take a look around and check out what I've been crafting, crocheting, or baking. Hopefully you'll find something to inspire your own creativity!   
Archives
March 2024
|
 RSS Feed