
|
No, you're not having deja-vu. You have seen this hat before. (Mostly.) Last October I posted patterns for both a crocheted Cabled Crown Beanie and a knitted Cabled Crown Beanie. But I was never quite happy with how the knit version worked out. I've since learned that when adapting a crochet pattern into a knit pattern, it needs a little bit of a different approach; the stitches behave differently. So I decided to revisit the knit version and I'm happy to announce that the new and improved version is now ready! 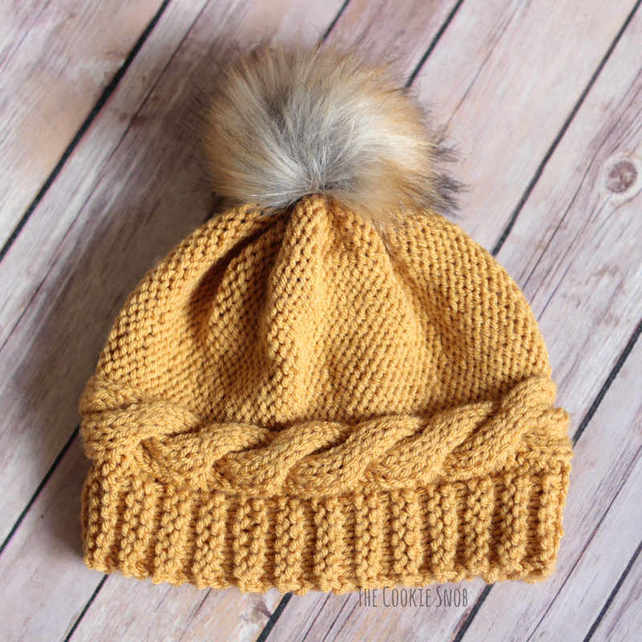 Most of this pattern is the same, with some minor but crucial tweaks. I removed the extra columns and increased the width of the cable in order to make the cable the unobstructed star of the show. I also made the hat less slouchy (but you can easily adjust the pattern to make it slouchier again if that's your preference). Just in case anyone prefers the old version, I'll leave the pattern up. And if you've purchased the ad free printable PDF version of the old pattern, be sure to check Craftsy for a pattern update that will include the instructions for the new version as well. 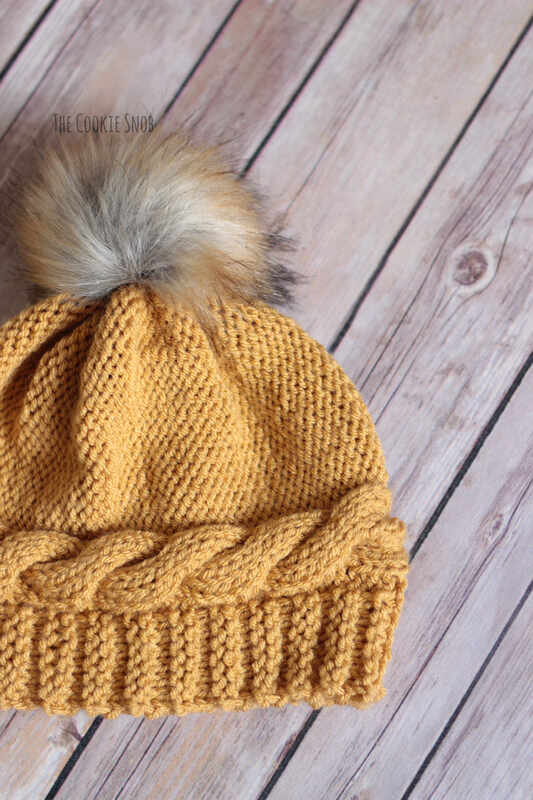 Like the earlier version, this hat is knit sideways and then seamed up. So if you don't know how to knit in the round, this hat is still totally doable! Now let's take a look at the pattern. You can find an ad-free, printable PDF version of the pattern on Ravelry (that also includes to original version of the pattern). Materials:
Stitch Glossary: st(s) = stitch(es) k = knit st p = purl st c8f = cable 8 forward (slip 4 sts onto the cable holder and move it to the front, knit the next 4 sts, then knit the 4 sts on the cable holder) RS = right side WS = wrong side Gauge: 2" = 8 sts, 2" = 10 rows Cast on 35 sts Row 1: (RS) p18, k8, p2, k7 (35) Row 2: (WS) p7, k2, p8, k18 (35) Row 3: (RS) p18, k8, p9 (35) Row 4: (WS) k9, p8, k18 (35) Row 5: (RS) p18, c8f, p2, k7 (35) Row 6: Repeat row 2 Row 7: Repeat row 3 Row 8: Repeat row 4 Row 9: Repeat row 1 Row 10: Repeat row 2 Row 11: Repeat row 3 Row 12: Repeat row 4 Row 13: Repeat row 5 Rows 14-91: Repeat rows 6-13 eleven times Rows 92-94: Repeat rows 2-4 Cast off, leaving an extra long yarn tail. 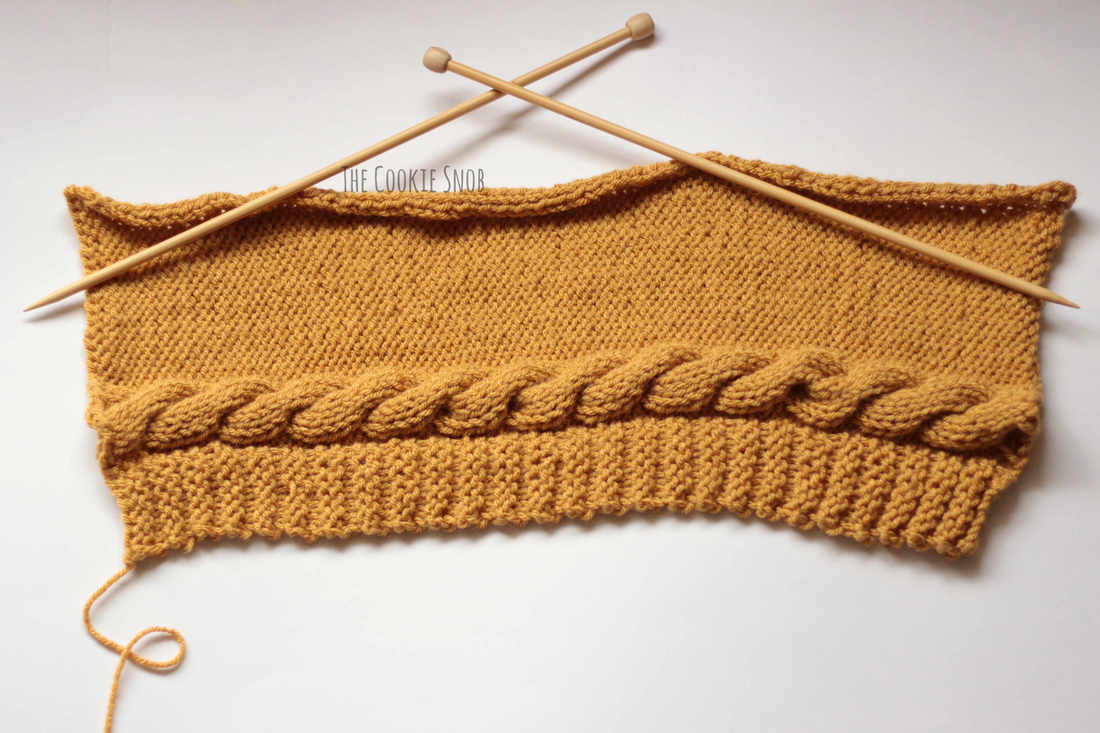 Using the yarn tail and the tapestry needle, seam up the short ends of the hat to form a tube. 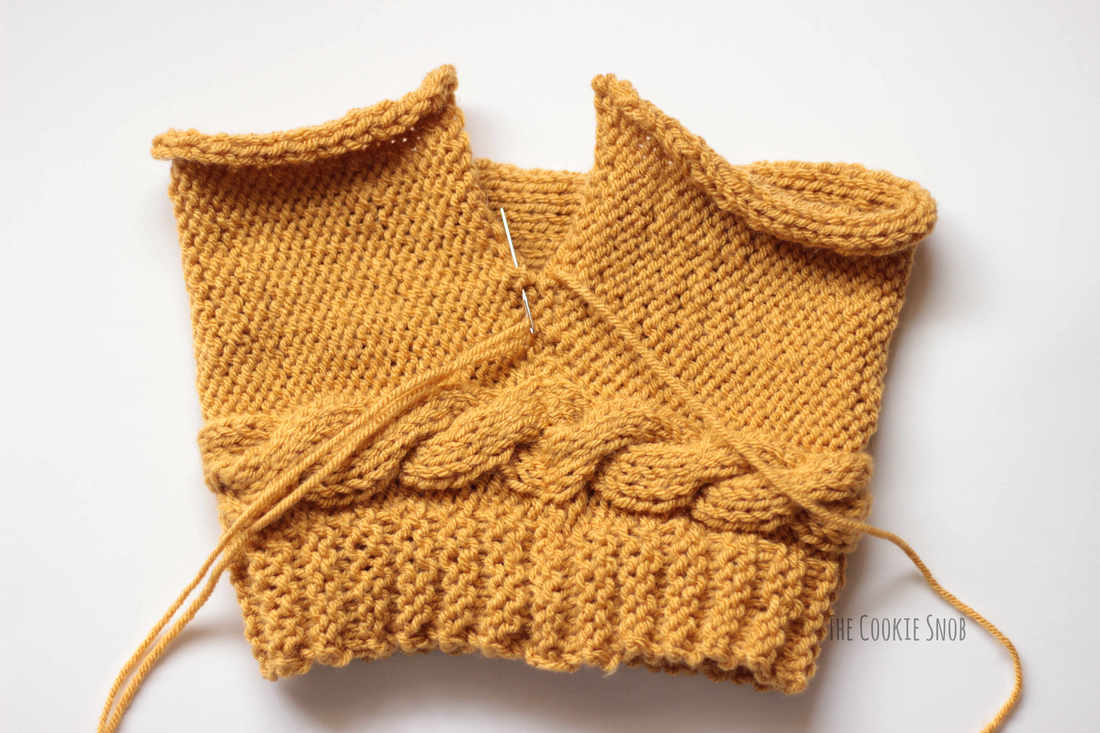 Then thread the yarn tail through the stitches along the top of the hat and pull taut to close (just like closing up a drawstring bag). 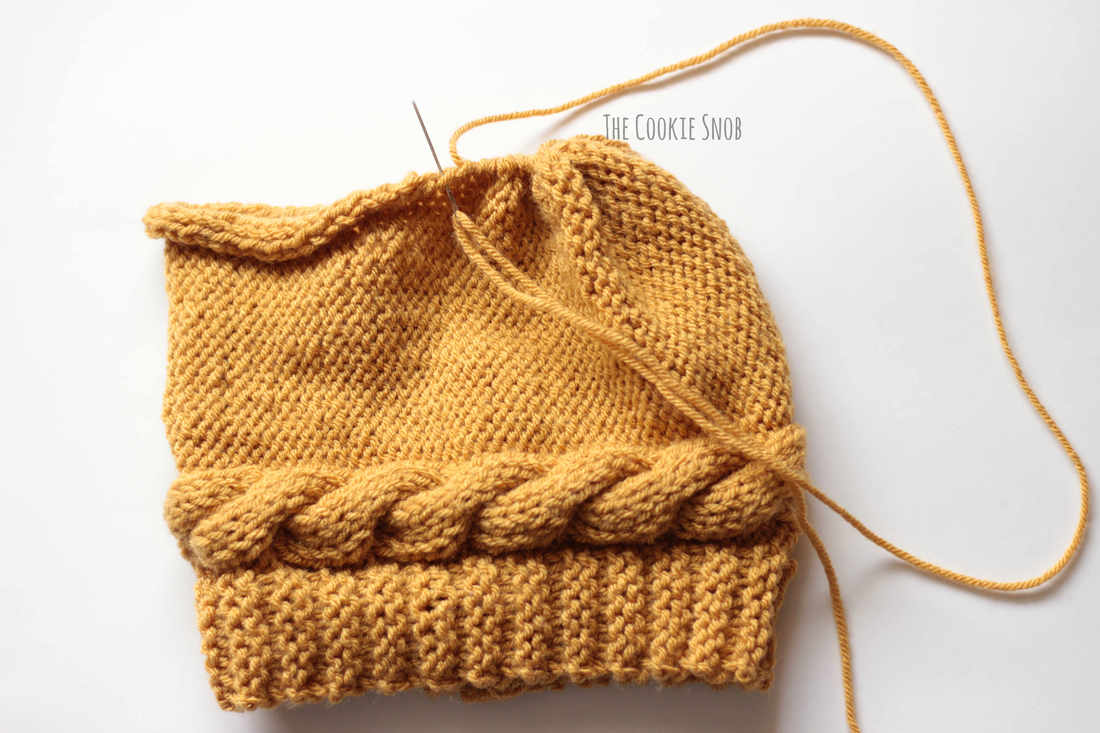 This will probably leave you with a small hole at the top. Finish sewing it shut using the yarn tail and then fasten off. I like to sew the final hole closed from the inside of the hat to help keep things as neat as possible.  If you'd like to add a pompom, you can sew one on now. I added a large faux fur pompom to mine that snaps on and off for easy washing. Weave in remaining ends. 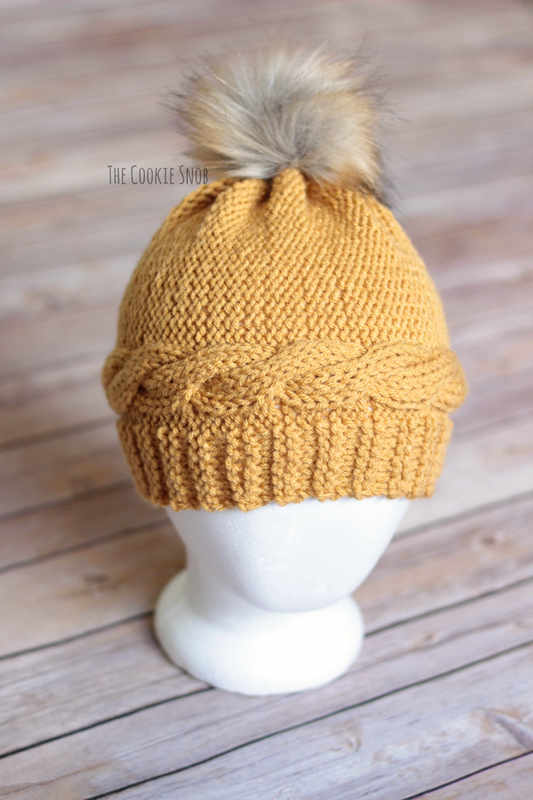 Your cabled crown beanie is now ready and prettier than ever! I've been wearing mine daily and I love it. I hope you like it too! If you have any questions or comments about this hat, you can reach me in the comments section below or on social media. And if you'd like an ad-free printable PDF version, you can find one on Ravelry that includes both versions of the beanie. Want to make sure you don't miss any future blog posts? Join my mailing list: 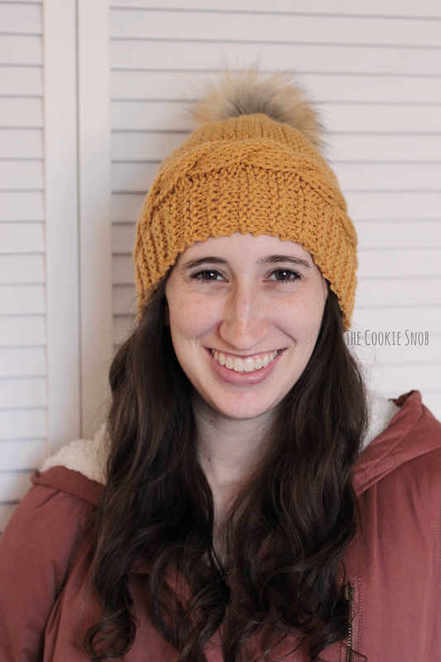 ***You're welcome to do whatever you'd like to with finished products made from this pattern but if you do sell them, I ask that you link back to my page. You may not copy this pattern, repost it anywhere (either altered or in its original form), or claim it as your own. You may not use any photos on this site for your own use. ***
22 Comments
Arlynn Grimm
12/3/2018 12:27:02 am
I can't seem to download the updated version of the pattern. Can you help?
Erin
12/3/2018 12:27:47 pm
Hi Arlynn,
Angela Hatchell
1/13/2019 06:49:34 am
How do you snap the Pom Pom on and off?
Erin
1/15/2019 07:17:39 pm
Hi Angela,
Jeanne Reinisch
1/30/2019 07:13:25 pm
Your new version is much better. Congrats. I may knit, but wish it was knit in the round. 2/3/2019 06:25:35 pm
I love that this pattern is knit flat. It gives a different look to the stitch direction. It's really fun and looks great!
Erin
2/8/2019 03:46:43 pm
Thanks, Jeanne! It would be awesome if it was in the round, but unfortunately the cables would be in the wrong direction for this particular design. I hope that you enjoy the pattern if you end up making one :) 2/3/2019 06:30:30 pm
Thanks Erin ~ I love this pattern and had fun making this hat. Took only a few hours and looks great. Thank you for posting it for FREE! It looks nice in a Sage green. The snap on faux fur attachments were a little pricey for me, so I got a faux fur pom pom at JoAnne's and bought a pack of large snaps and sewed them on. Looks great!.
Erin
2/8/2019 03:45:10 pm
Wow, you're so speedy! Feel free to send some of your extra knitting skills my way since I knit at a turtle's pace haha. I'm glad that you like the hat! And making your own snap on pompoms is definitely a great idea! It makes it super convenient for washing the hat :)
Jeanne Reinisch
2/7/2019 06:19:34 pm
Hello
Erin
2/8/2019 03:48:15 pm
Thanks for your great suggestions! I'm still a newbie knitter, but I'll be sure to check out your ideas and give them a try next time I make one.
Ladell Bradley
3/23/2019 10:31:10 am
Just wish it was in the round but going to try looks so cuite
Jeanne Reinisch
3/23/2019 04:14:31 pm
Ladell
Janice Riley
9/22/2020 05:51:48 pm
Could this be made into a messy bun hat?
Erin Sharp
9/25/2020 10:29:08 pm
I think you could probably pull it off. If I were attempting to turn this design into a messy bun version, I'd make the body of the hat a few stitches shorter for a tighter fit (as written, it has a bit more drape for a slightly slouchy look). And then when you're closing up the hat, don't pull the hole entirely closed so that you can have a good sized gap for ponytails. Or you could even stitch the top closed around a hair tie so that it has a nice elastic opening (depending on how big you want it to be). Hopefully that helps! :)
Arlene Strohl
12/4/2020 11:48:36 am
not sure if my other message went through. Love the hat, new at knitting. how do adapt this to knit in the round?
Erin
12/9/2020 09:36:23 pm
Hi Arlene! Great question. I love knitting in the round too, but unfortunately this design won't work with that method, based on the direction of the stitches. In order to make a hat in the round, the cables would have to be vertical instead of horizontal. Sorry! But I hope you still enjoy the hat :)
Pinky
10/31/2021 03:42:32 am
Are the above instructions complete? It says to cast on 35 stitches and gives instructions for 94 rows? I don’t understand how this works and why row 5 for the front cable is part of the 11 time repeat.
Janet R McArthy
11/20/2021 10:16:47 pm
I'm with you Pinky there needs to be more than 35 CO for an entire hat !!!!!! ":( cute and I will make it but I am sure there will need to be more that 35 for the entire depth of the hat
Jeanne Reinisch
10/31/2021 11:50:32 am
Whoa….I sure don’t remember knitting this hat much less using a Russian graft (what?). Gotta look for the hat.
Pinky
10/31/2021 01:59:09 pm
Assuming 10/31/21 reply is to me. Do I need to purchase instructions for hat on Ravelru? The only instruction in this post are for the 35 stitches that I don’t understand. I don’t know where instructions are for cartridge ribbing, horizontal cable and reverse stockinette-#of stitches and rows. Again I’m not getting the 35 stitches instructions as related to this project. I have some knitting knowledge but am very lost.
Jan
7/15/2023 02:48:19 am
Nice pattern - I have knitted twice once as per pattern and once increasing by 15 stitches ( good adult size) Leave a Reply. |
Welcome!Thank you for stopping by to visit my own personal corner of the web! Feel free to take a look around and check out what I've been crafting, crocheting, or baking. Hopefully you'll find something to inspire your own creativity!   
Archives
March 2024
|
 RSS Feed