
|
With a move looming on the horizon, I am *not* supposed to be buying more yarn right now. But the other day, I found myself at the craft store and, lo and behold, the yarn was on sale. ALL of it. It was all over the store, tempting me as I got the things that were actually on my list. I successfully resisted the siren call of new skeins until—like Odysseus—I got too curious and made the mistake of listening to their songs. I found myself holding a skein of rainbow yarn as it sang, "Buuuuy meeee! I am so beauuutifulll! I am self-striiiiiipinggg! Effortless rainbows will fly from your hooooook!" But unlike Odysseus, I wasn't tied up to the mast of ship, so the next thing I knew there were 4 skeins of it in my shopping cart. Oops. To justify my fibrous indiscretion, I vowed that I crochet with it ASAP. And thus was born the Rainbow Dreams Baby Blanket!  This blanket is made from panels of corner-to-corner moss stitch that shows off the self-striping of the yarn to maximum effect. Then I crocheted the panels together and added a border to create a lovely rainbow-hued blanket. This pattern is great because you don't really have to count stitches, you just keep going until it's the right size. Which also means that it's really easy to customize the size of your blanket. I made 7 panels out of 3.5 skeins for a baby-size blanket (each skein made 2 panels with a little bit left over), but you can easily add more panels or increase the size of the panels if you want something with different dimensions. You can also change up the colors and use a different self-striping yarn, or even use single-colored yarns. I'm picturing alternating solid colors or maybe even a rainbow of solid colors; it would look awesome either way. So, without further ado, let's check out the pattern. 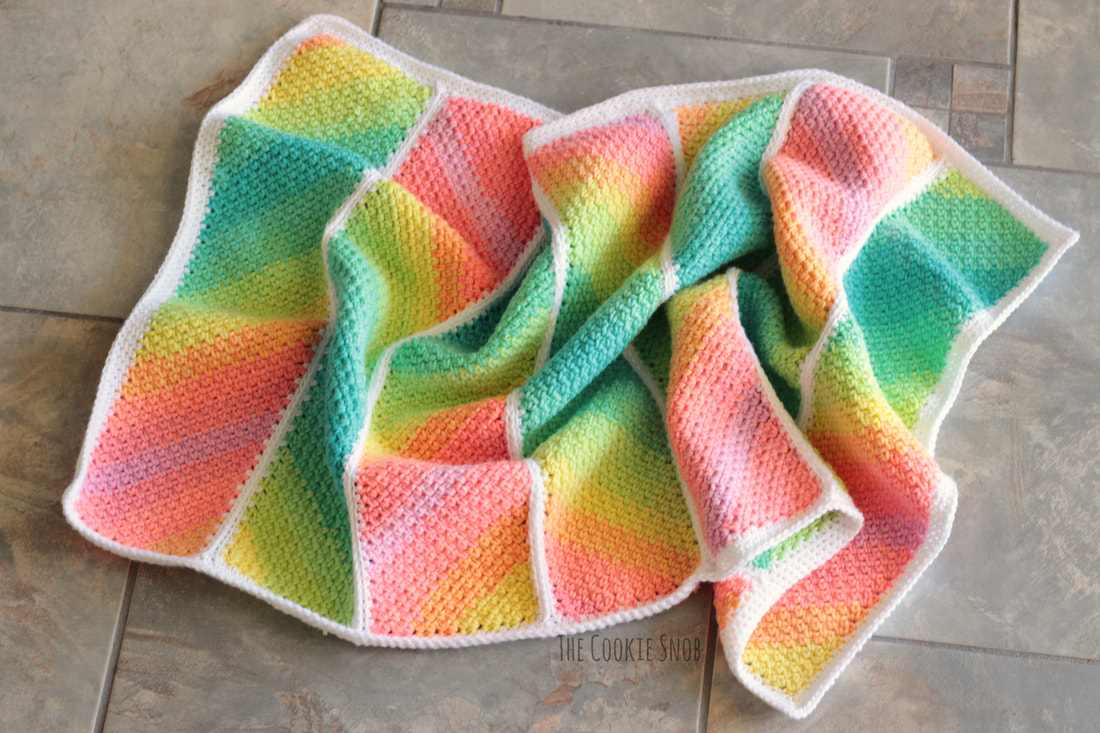 If you're interested in an ad-free printable PDF version of this pattern, you can find one on Ravelry. (And a special thank you to everyone who supports my blog and keeps it running!) Note: If you're new to c2c moss stitch, I highly recommend checking out my step-by-step photo tutorial to get you started. I also have a tutorial on making rectangles with the c2c moss stitch, which should be helpful, since that's what we'll be doing here. Stitch Glossary (all terms are US crochet terminology): st(s) = stitches ch = chain ss = slip stitch sc = single crochet hdc = half double crochet Materials:
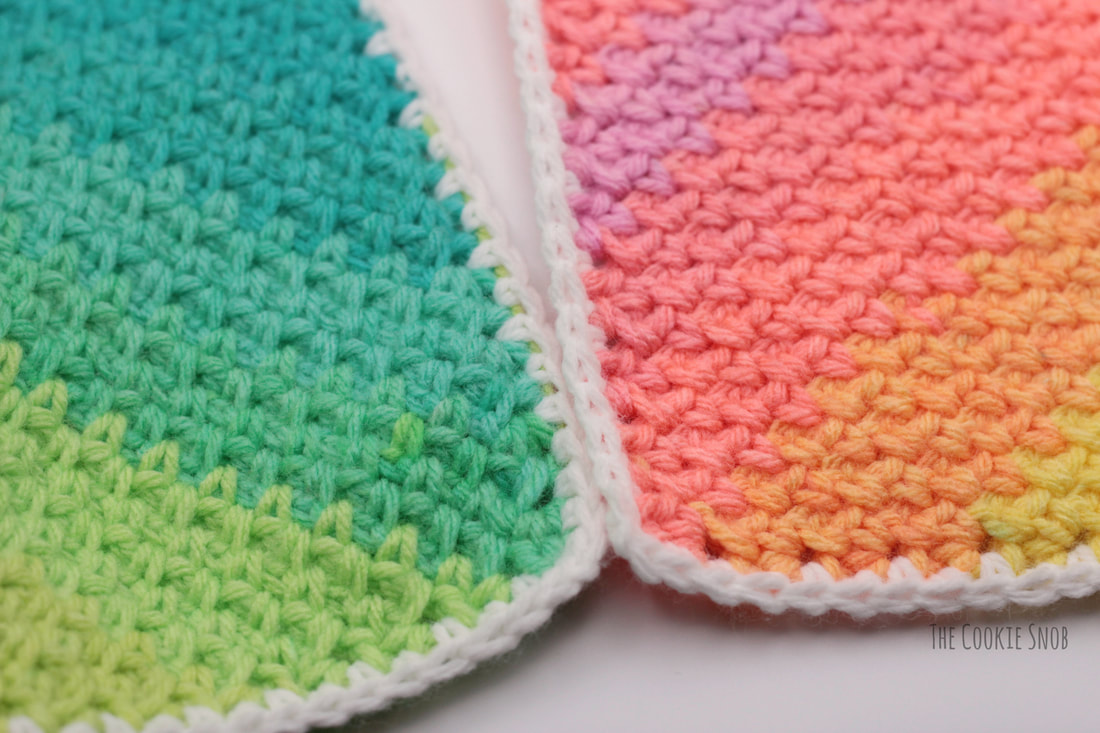
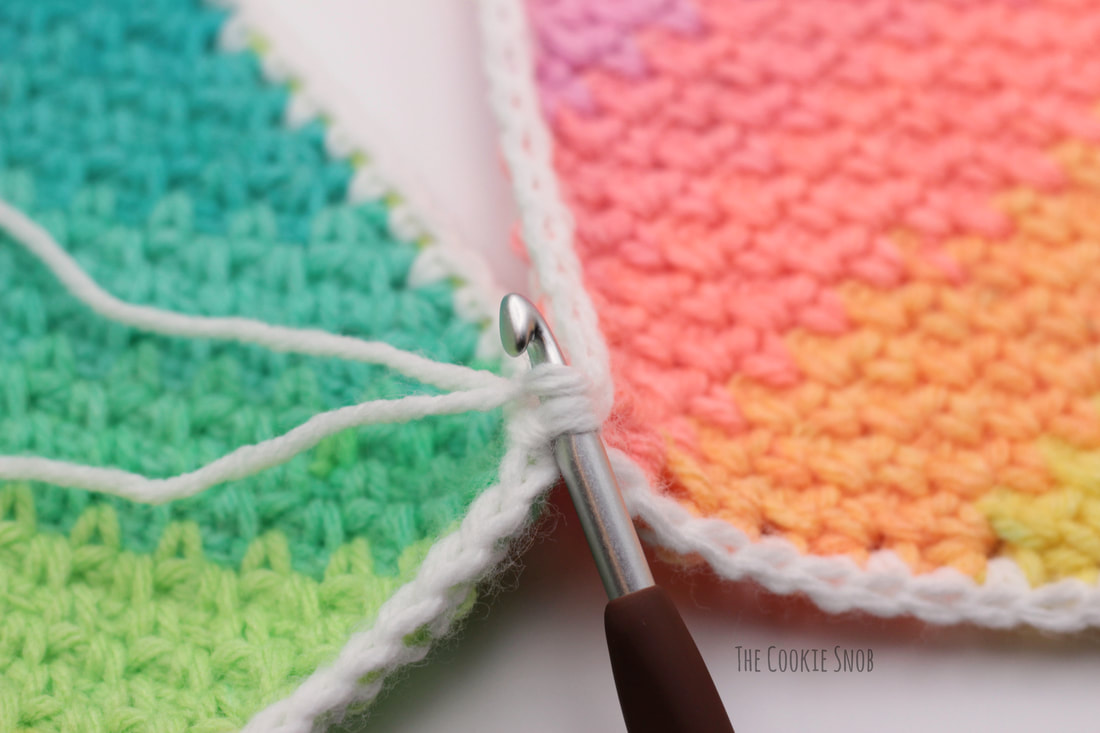
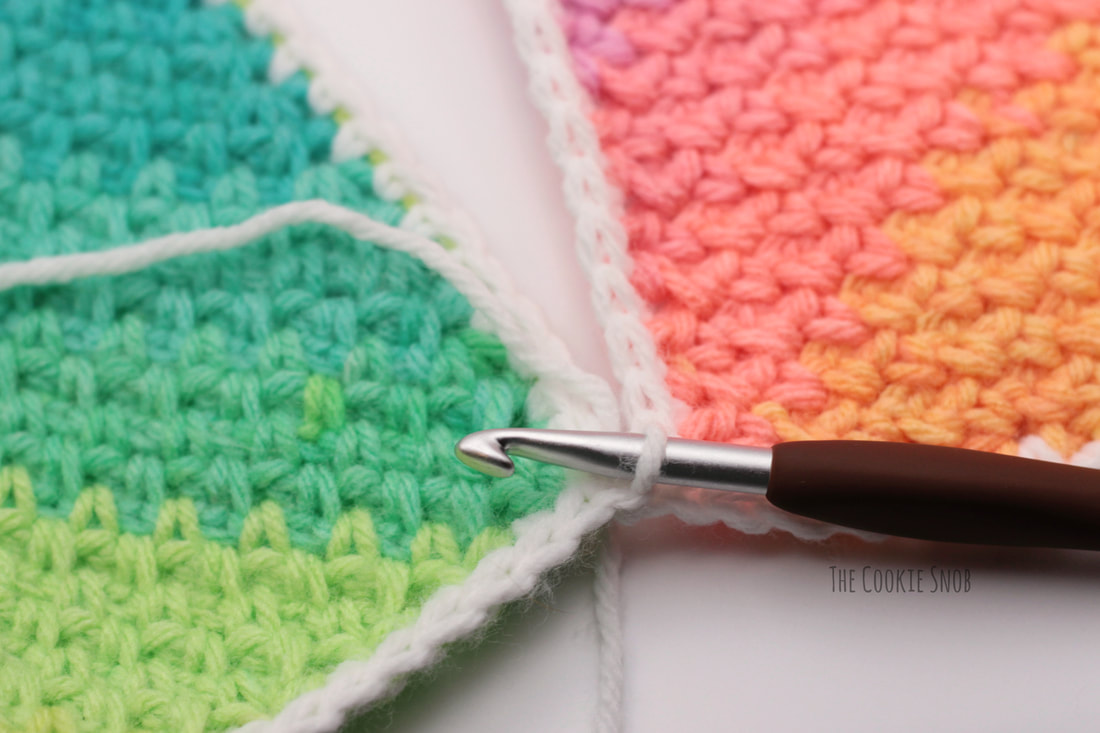
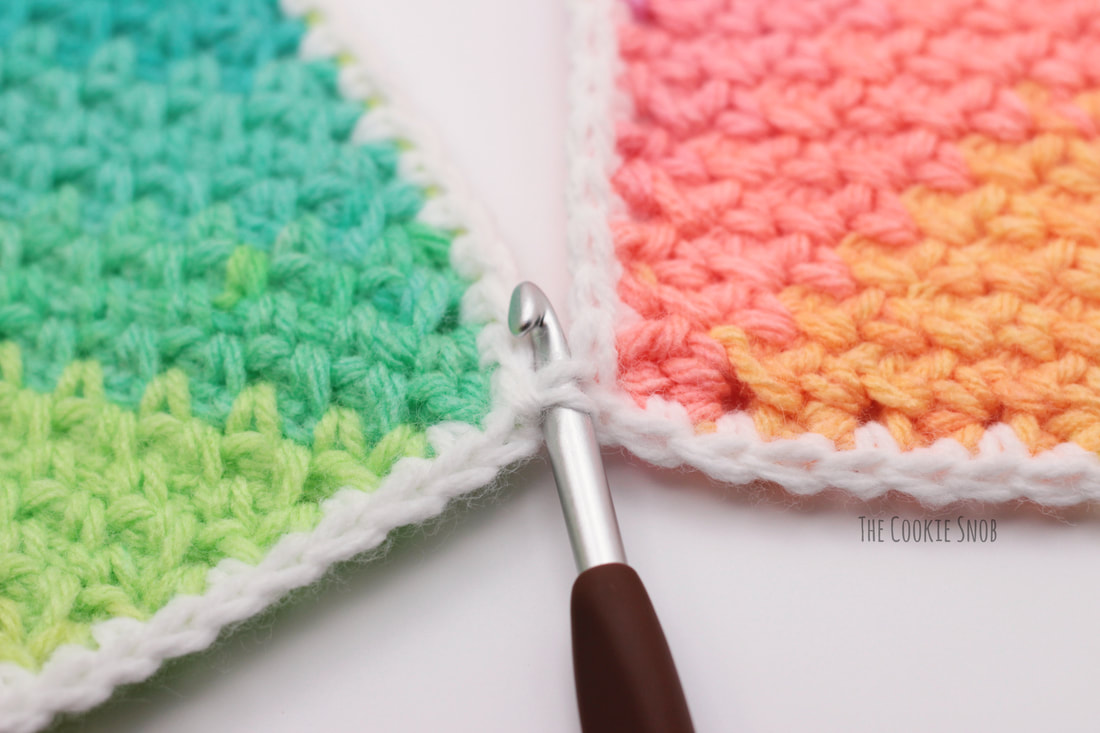
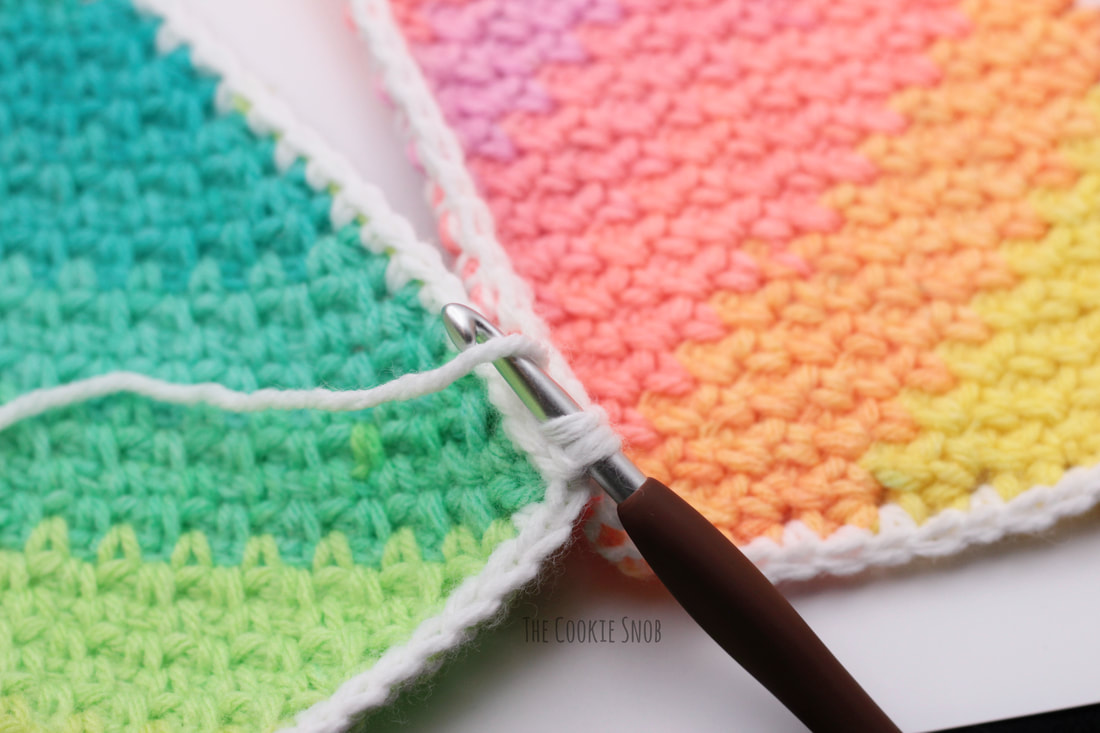
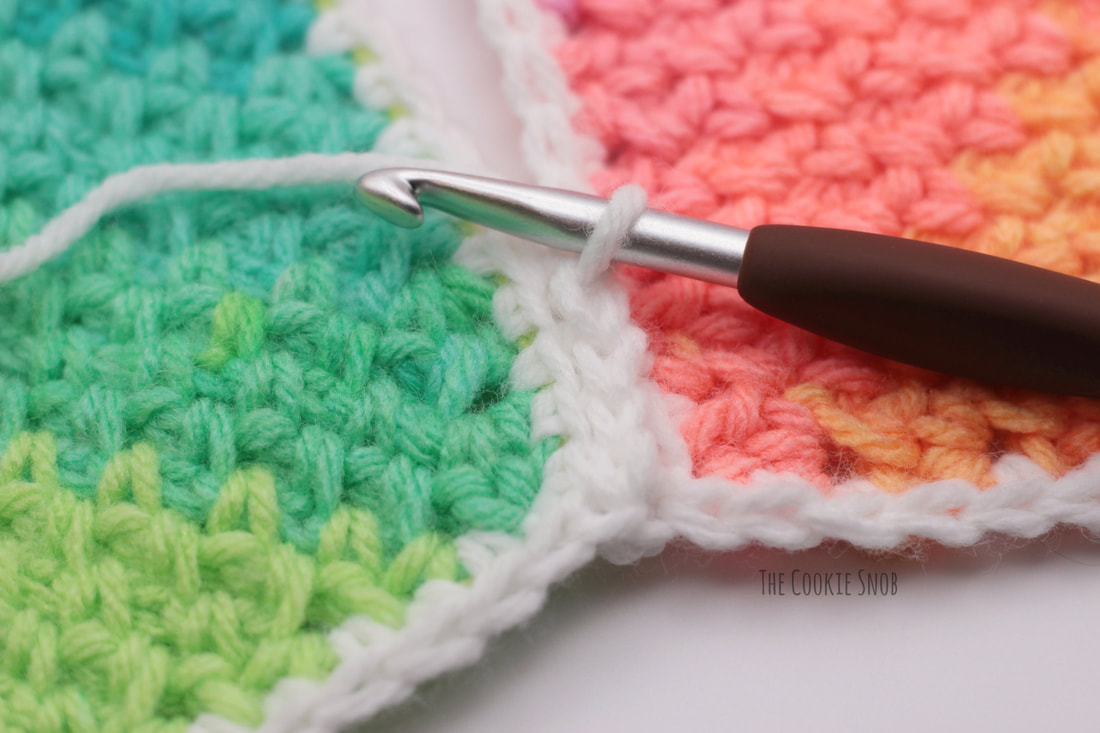
Gauge: 2" = 6 rows of moss st 2" = 5 sc + 4 ch It's okay if your gauge is different, since we're working with dimensions and not stitch counts. But your exact yardage will vary if your gauge is significantly different; I tend to crochet tightly, so you may want to size down a hook if you're a looser crocheter. Rainbow Panels (make 7): Using the Retro Stripe yarn: Ch 3 Row 1: sc in the third ch from the hook, turn Row 2: ch 3, [sc, ch 1, sc] in the ch-3 space from Row 1, turn Row 3: ch 3, sc in the first ch-1 space, ch 1, [sc, ch 1, sc] in the ch-3 space, turn Row 4: ch 3, sc in the first ch-1 space, ch 1, [sc, ch 1] in each ch-1 space across, [sc, ch 1, sc] in the ch-3 space, turn Repeat Row 4 until the short side measures just under 5" Row 5: ch 3, sc in the first ch-1 space, [ch 1, sc] in each ch-1 space across, [sc, hdc] in the ch-3 space, turn Row 6: ch 2, skip the first 2 sts, sc in the first ch-1 space, ch 1, [sc, ch 1] in each ch-1 space across, [sc, ch 1, sc] in the ch-3 space, turn Row 7: ch 3, sc in the first ch-1 space, [ch 1, sc] in each ch-1 space across, sc in the ch-2 space, turn Repeat Rows 6-7 until the longest side measures 25" Row 8: ch 2, skip the first 2 sts, sc in the first ch-1 space, [ch 1, sc] in each ch-1 space across, [sc, hdc] in the ch-3 space, turn Row 9: ch 2, skip the first 2 sts, sc in the first ch-1 space, [ch 1, sc] in each ch-1 space across, sc in the ch-2 space, turn Repeat Row 9 until you have only 3 sc sts left Row 10: ch 2, sc in the first ch-1 space, sc in the ch-2 space, turn Row 11: ch 1, sc in ch-2 space Fasten off. 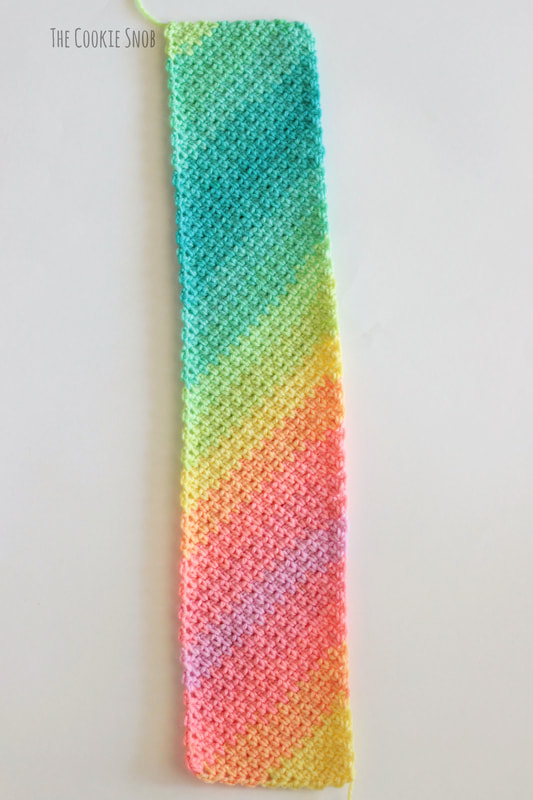 I recommend making all your colorful panels first before you add the white borders to each panel. That way you can lay out your panels and arrange them how you'd like before you add the border; the panels themselves don't have a right side/wrong side, but the border will, so you want to make sure they're facing the direction you want them in for the final blanket. I arranged mine in a chevron type pattern, alternating patches of colors, but you can arrange them however you'd like. Border row: Using the white yarn, make a standing sc in any corner. Sc evenly down each side, working about 1 st per row. The exact number of stitches doesn't matter as long as you're consistent from one rectangle to the next. I made 16 sc across the short ends and 75 sc across the long ends, but depending on your gauge, you may need more or fewer stitches; just make sure that you're not working too few and making the rectangle buckle or working too many and making the edges ruffle. When you get to a corner, work [sc, ch 1 sc] into each corner. When you get back to the first corner you made, ch 1, sc in the same space as the first sc and ss to join. Fasten off. 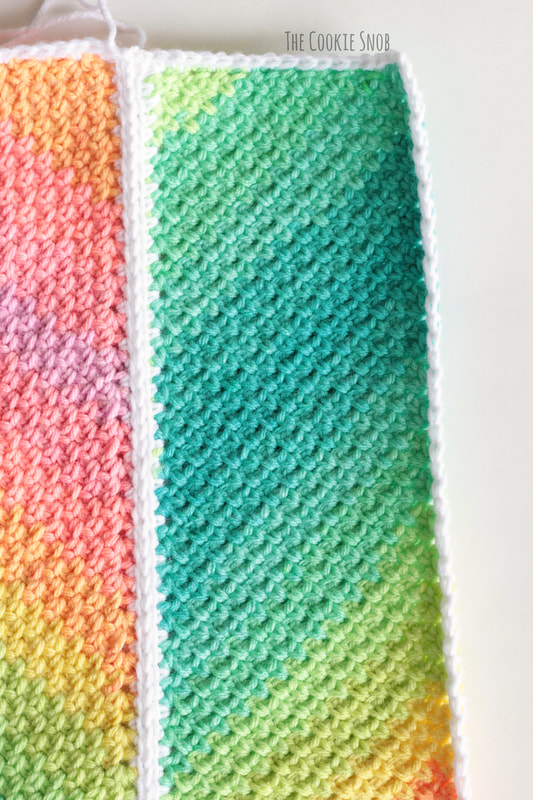 Joining Panels: If you prefer to use a different method, you may, but I used the zipper method. Here's a basic run down of how it works, with some step-by-step photos to help you out: Lay the two panels you want to join side by side (see photo A). We will only be using the back loops of each panel. Insert your hook from front to back into the ch 1 of the corner on the first panel . Then insert your hook into the ch 1 of the corner on the second panel (see photo B). Tie a slip knot with the working end of the white yarn and slide onto the hook. You should now have 3 loops on your hook (see photo C). Yarn over (See photo D) and pull through all 3 loops (see photo E). Now insert the hook from front to back into the next st on the first panel (again, we're only using the back loops here!), then from front to back into the next st on the second panel. Yarn over and pull through all three loops. Repeat in the next set of stitches (see photo F) until you've attached every stitch together along the long sides of the panels. When you get to the end, be sure to attach the ch 1 of each corner together, then fasten off.
Border: Row 1: Using the white yarn, make a standing sc in any corner. Sc in each st until you get to the corner. [Sc, ch 1] sc in the corner. Repeat until you get back to the first corner you made. When you get to a white joining section, I recommend making a sc in each ch 1 as well as working one extra sc in the middle of the join itself. Once you get back to the first corner, [ch 1, sc] in the same space as the first sc and ss to join Rows 2-3: ch 1, sc in each st across and work a [sc, ch 1, sc] in each ch 1 corner space, ss to first sc to join Fasten off and weave in any ends 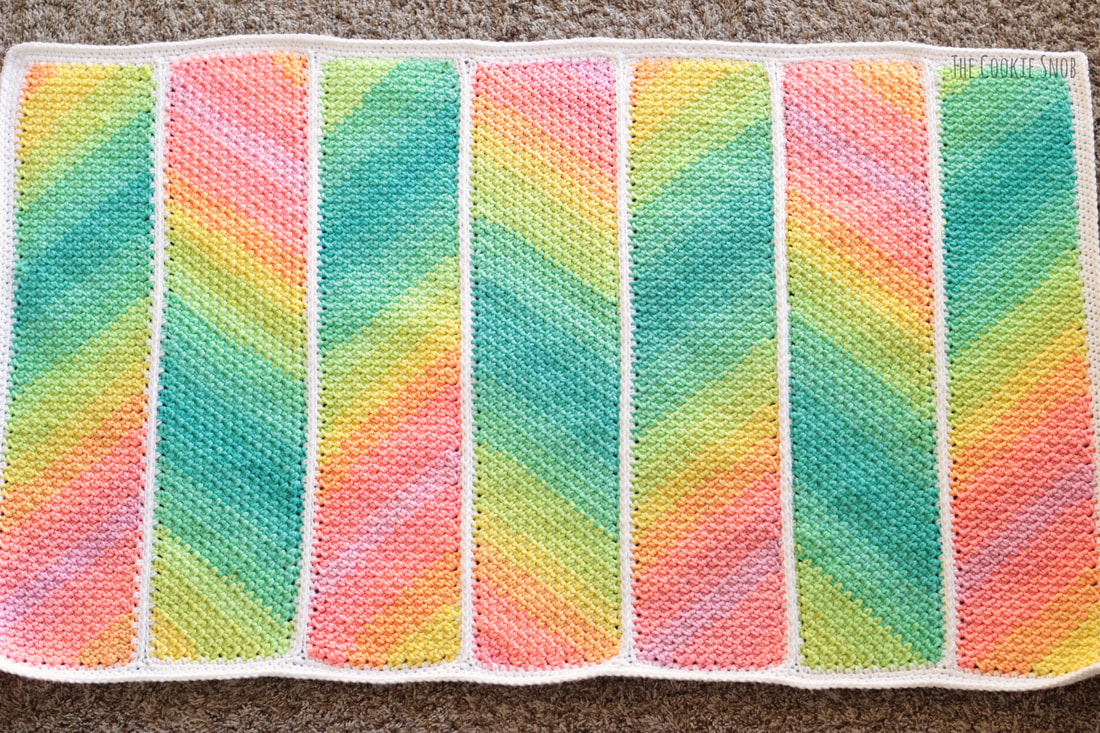 You did it! Isn't it beautiful? I hope that you enjoyed making this crochet pattern. If you have any questions or comments about the pattern, I'd love to hear from you! You can reach me in the comment section below, by email, or on social media and I'll get back to you as soon as I can. Happy hooking! Want to make sure you don't miss any future blog posts? Join my mailing list! (Spam-free, I promise!) 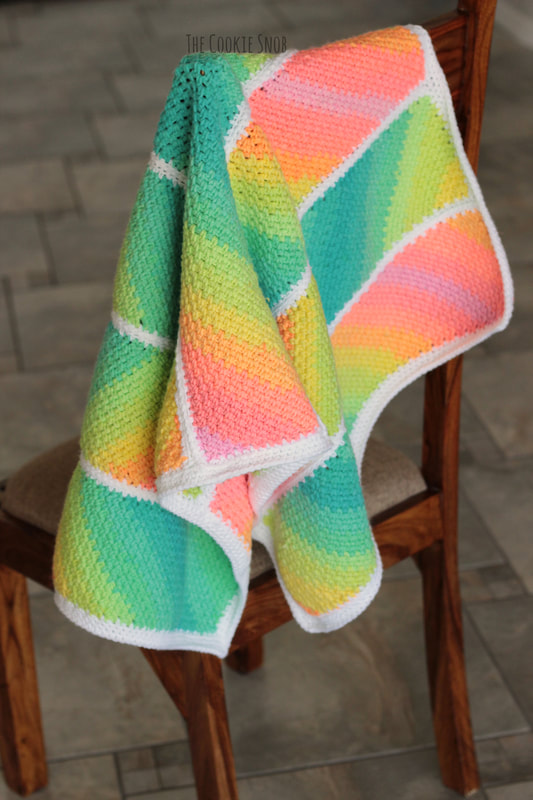 ***You're welcome to do whatever you'd like to with finished products made from this pattern but if you do sell them, I ask that you link back to my page. You may not copy this pattern, repost it anywhere (either altered or in its original form), or claim it as your own. You may not use any photos on this site for your own use. *** 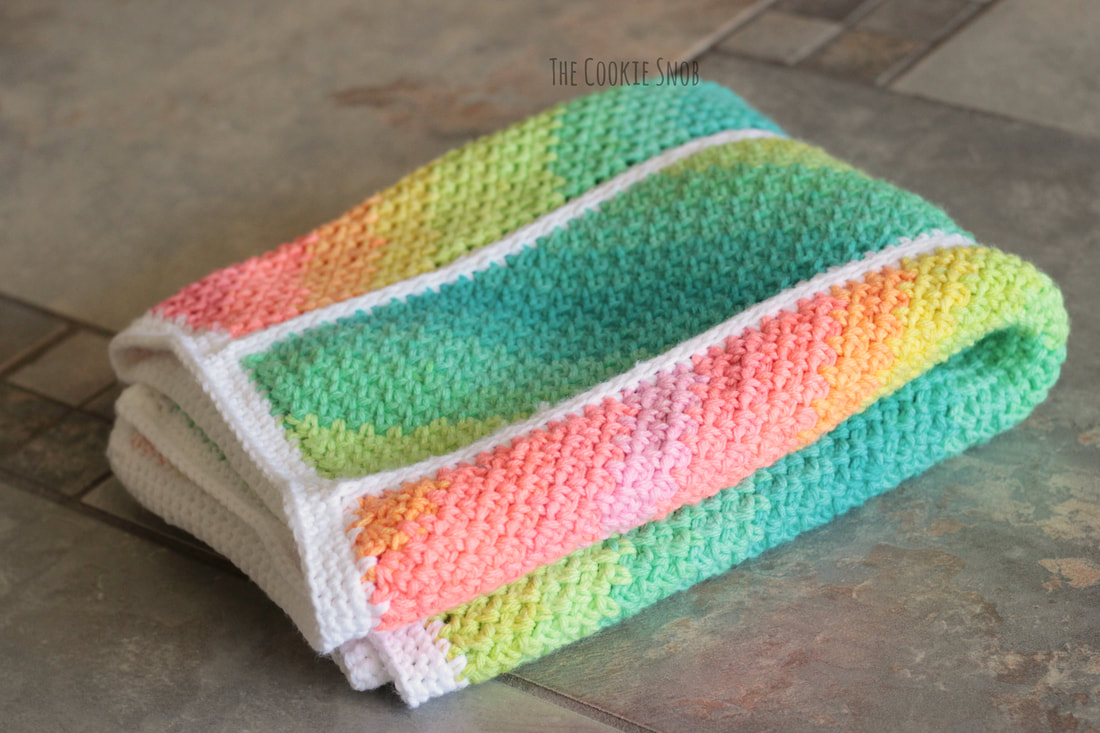
0 Comments
Leave a Reply. |
Welcome!Thank you for stopping by to visit my own personal corner of the web! Feel free to take a look around and check out what I've been crafting, crocheting, or baking. Hopefully you'll find something to inspire your own creativity!   
Archives
March 2024
|
 RSS Feed