
|
A couple months back, I put together a photo tutorial for the C2C Moss Stitch. And you all have been rocking it! I've loved seeing your finished washcloths and hearing about your ideas for using the stitch. But the original tutorial only included instructions for making squares. Since I've been getting a lot of requests for a rectangle photo tutorial, I finally put one together! So now you can make quadrilaterals to your heart's content. (Just like last time, this is not a stitch that I invented; this is just another resource for anyone else like me who prefers photo tutorials. I've been told that Polly Plum is the inventor of this stitch, so full credit to her for this clever construction and be sure to check out her site and send some crochet love her way.) 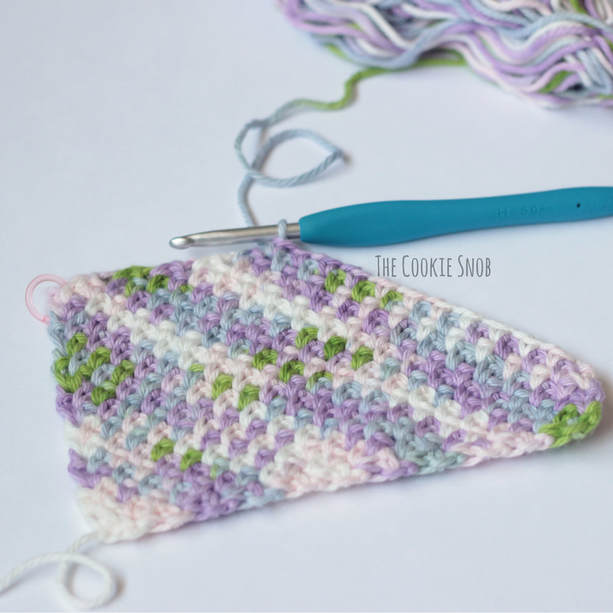 This tutorial will walk you through making a rectangle with the C2C moss stitch using step-by-step photos. I'm assuming that you've already looked through the first tutorial for the square, so if you haven't yet, be sure to click over and check that out first. 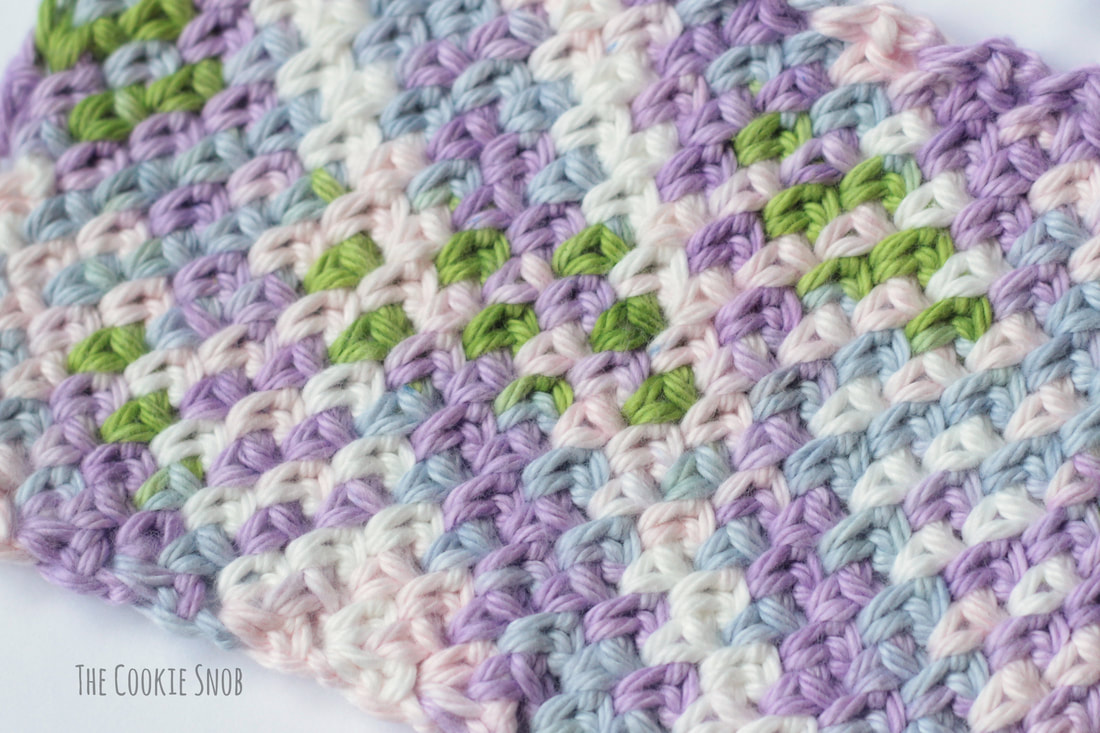 Now that we're all on the same page, we can get started with the rectangle! Instead of making a washcloth like the original tutorial, we're just gonna make a quick swatch to teach you the basics. Feel free to make it as large or as small as you'd like; the same instructions will apply to any size. (Although you should probably make sure to test out the technique on a small swatch before you commit to an entire baby blanket . . .just sayin'.) I'm making my swatch with a size H (5.0mm) crochet hook and some leftover I Love This Cotton! Yarn in the colorway Cotton Candy, but you can use whatever you have on hand. We're gonna begin our rectangle the same way that made our square. In fact, the directions for the first section are literally exactly the same. So just follow the basic increasing instructions from the first tutorial. Once one side is the length that you want, it's time to start doing things a little bit differently. So come back over to this page and we'll get started! 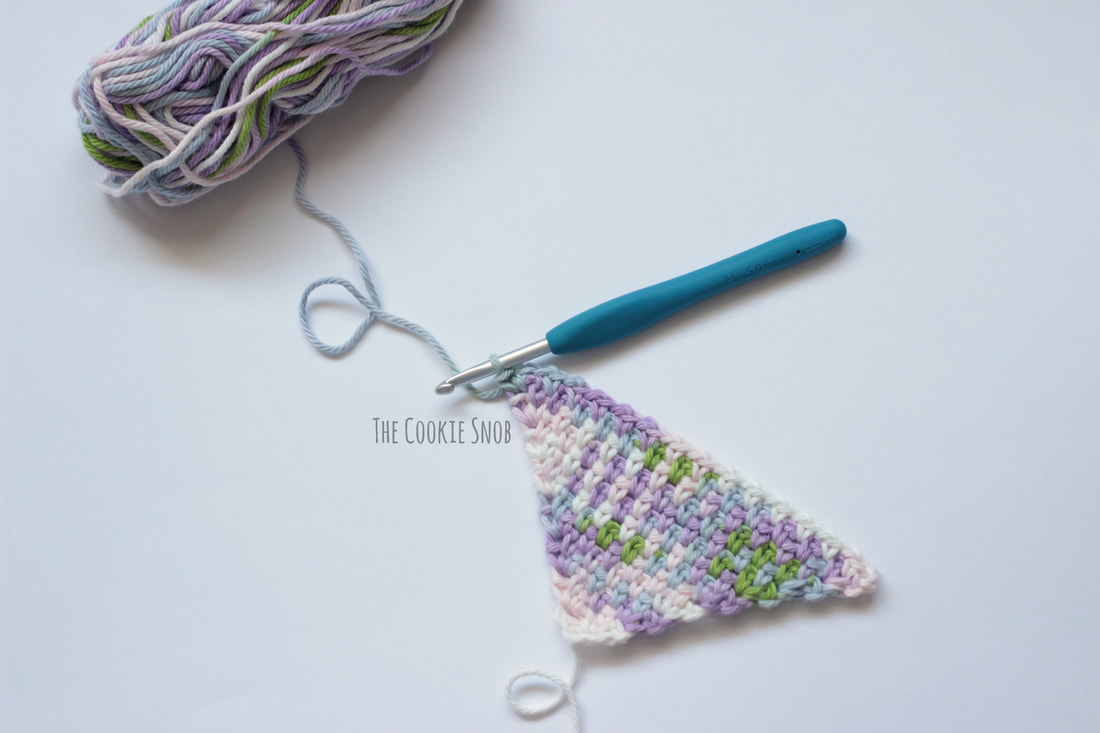 Basically, we're going to follow the increase pattern on one side while following the decrease pattern on the other side. This row begins with the usual increase pattern: ch 3, sc in the first ch 1 space (indicated by the arrow in the picture below, in between the marked "v"s of the first 2 sc stitches) and ch 1. Then [sc, ch 1] in the ch 1 spaces across. 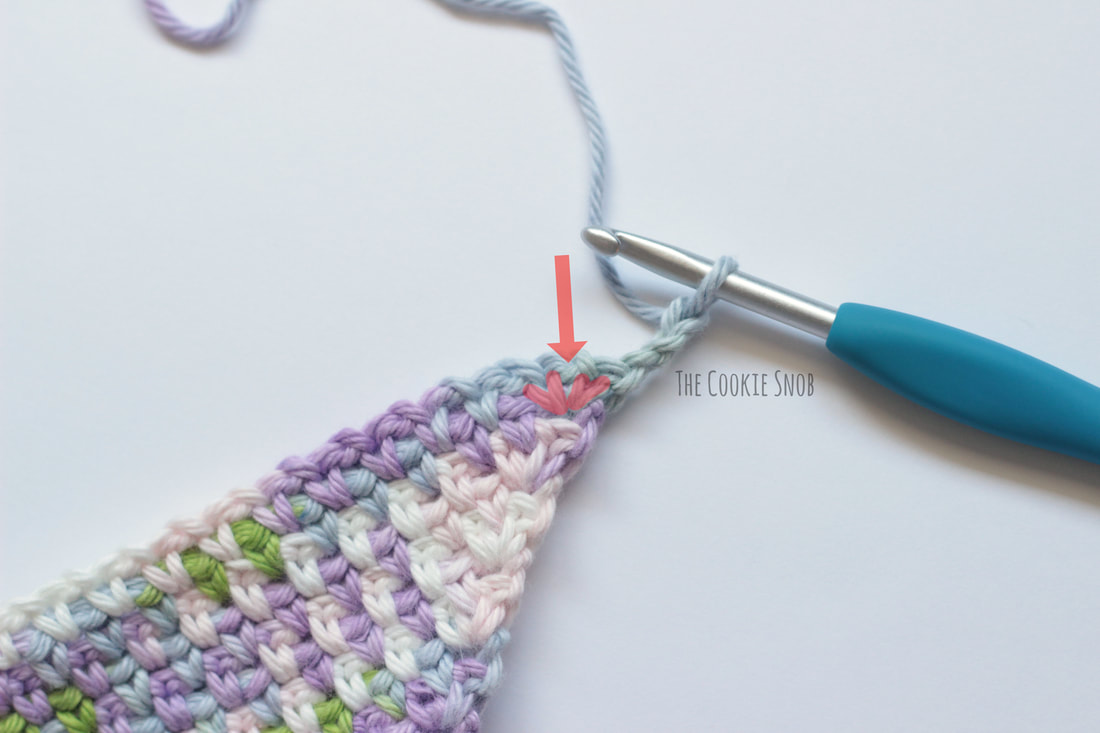 At the end of the row, we're going to switch to the decreasing pattern. In the final ch 1 space, sc and then do NOT ch 1. Instead, we're going to immediately work the next stitch in the ch 3 space. 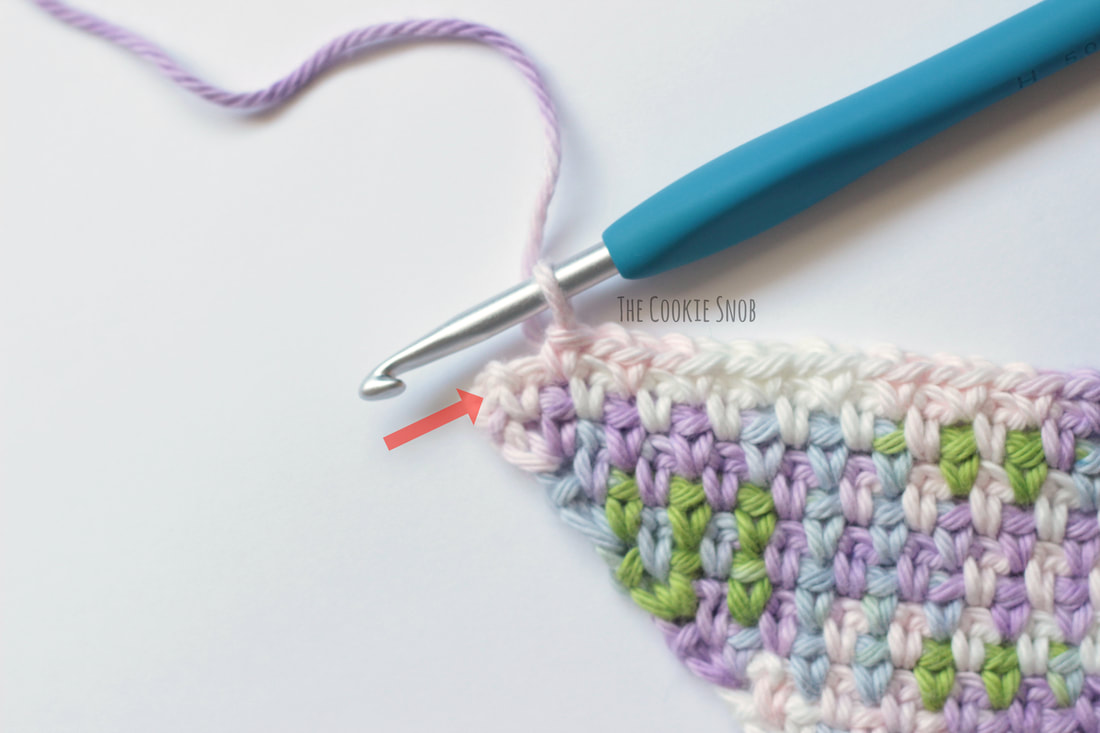 Sc in the ch 3 space. 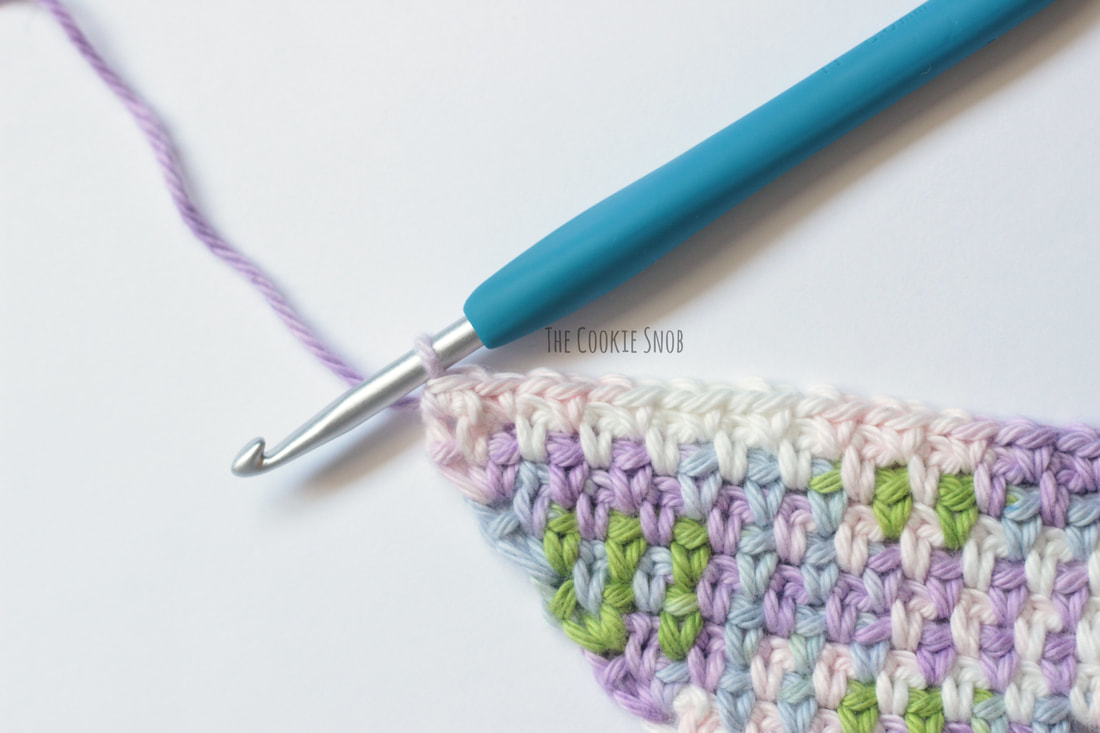 Turn and ch 2. Skip the first 2 sts and work the first [sc, ch 1] into the ch 1 space. [Sc, ch 1] in each remaining ch 1 space across. 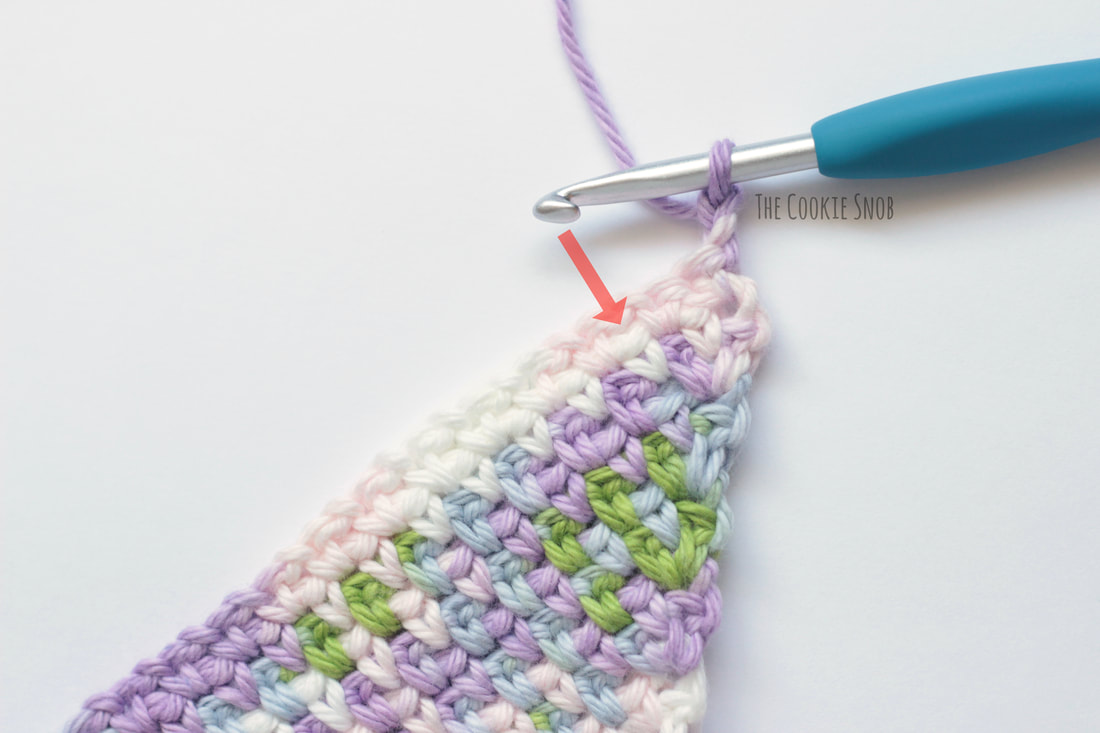 At the end of the row, we're going to switch back to the increase pattern (since this is the "increase" side of our rectangle). [Sc, ch 1, sc] in the ch 3 space. 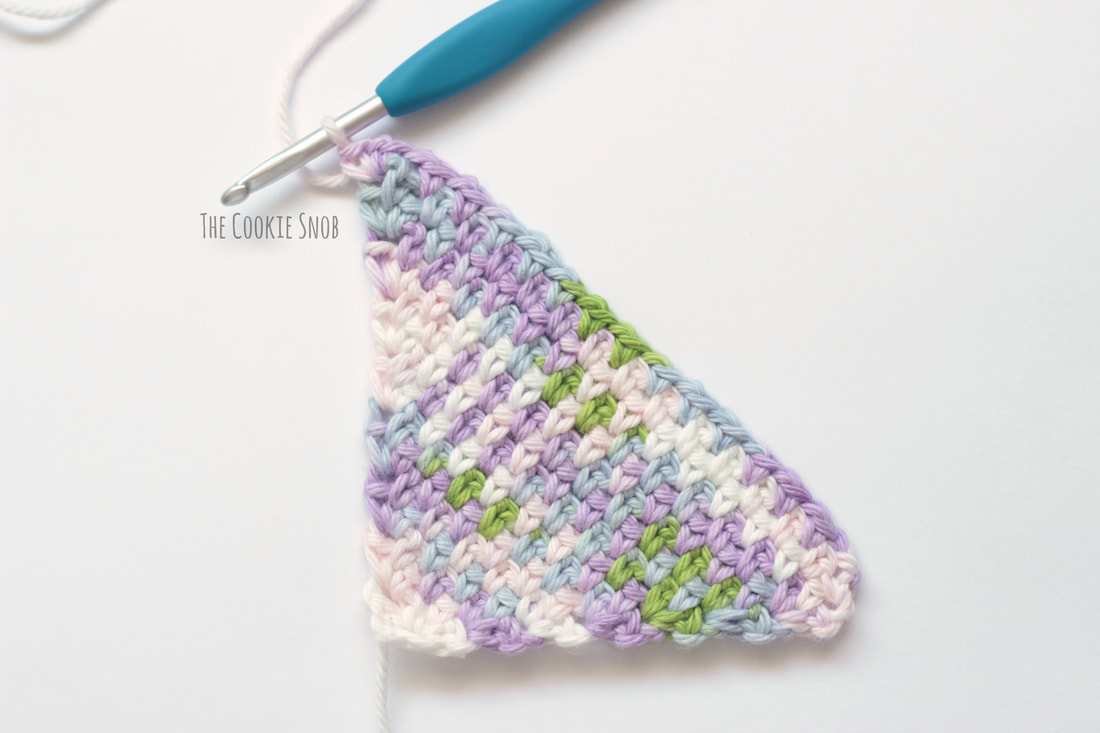 Turn. Ch 3. As before, sc in the first ch 1 space, ch 1, [sc, ch 1] in the ch 1 spaces across. When you get to the last ch 1 space at the end of the row, sc and do NOT ch 1. Instead, immediately sc in the ch 2 space. 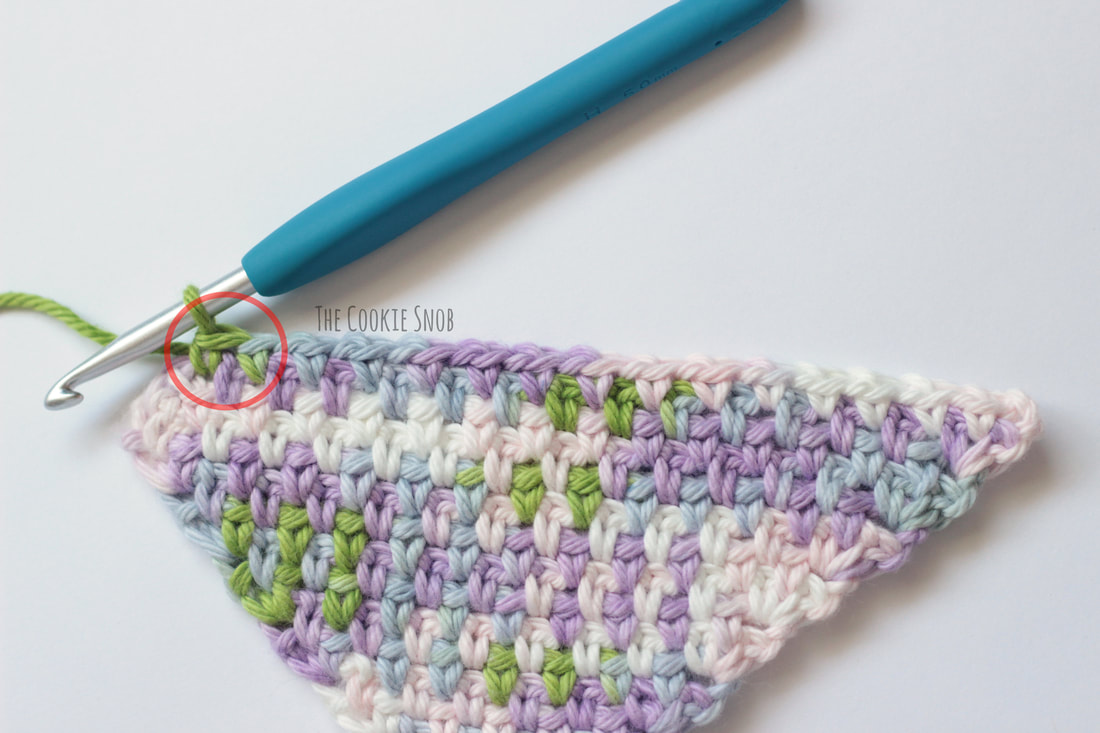 Turn. Ch 2. Skip the first 2 sts and [sc, ch 1] in the first ch 1 space. [Sc, ch 1] in each remaining ch 1 space across. [Sc, ch 1, sc] in the ch 3 space. 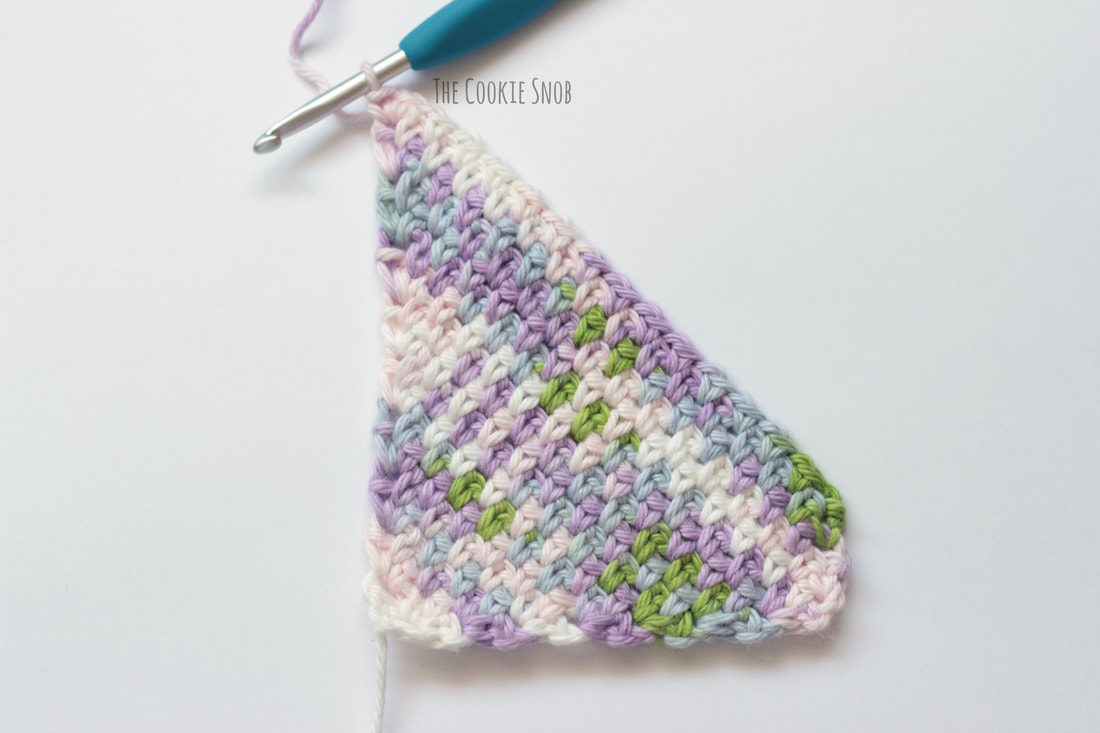 Continue to repeat the previous two rows, increasing on one side while decreasing on the other. If you find you're having trouble remembering which side is which, I'd recommend placing a stitch marker on the "decrease" side. That way when you get to the side with the stitch marker, you'll remember to follow the decrease pattern. And on the opposite side, you'll follow the increase pattern. 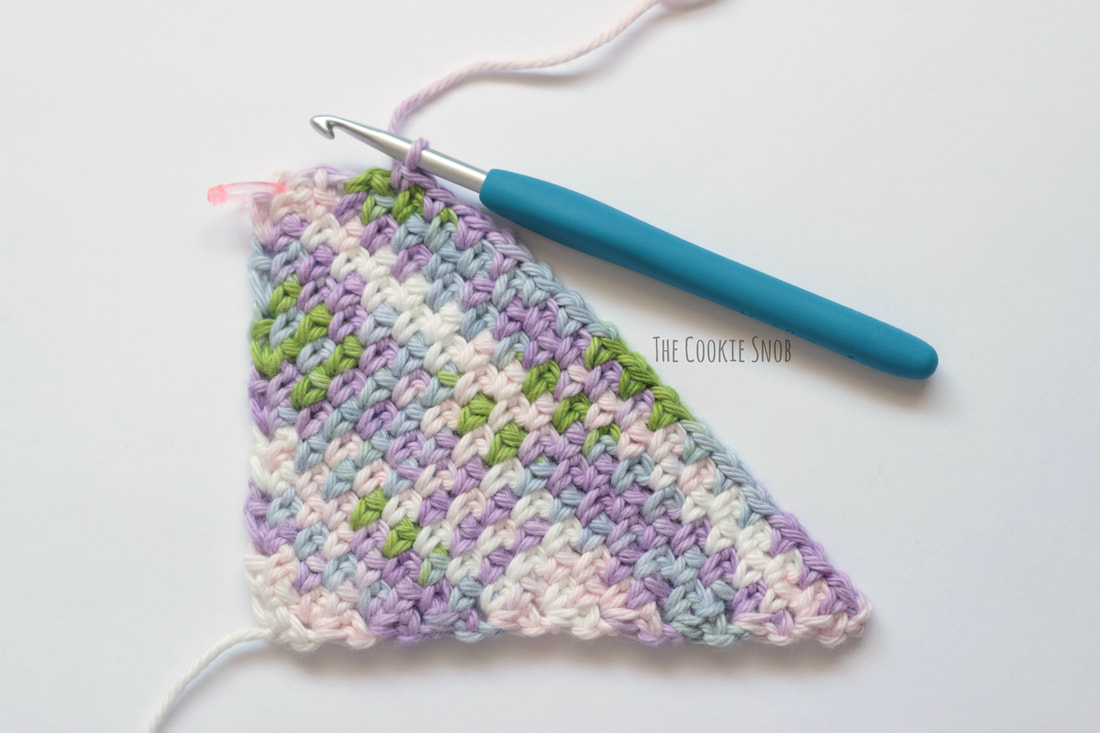 Once the length of the rectangle is the size you want, we're going to start decreasing on both sides. 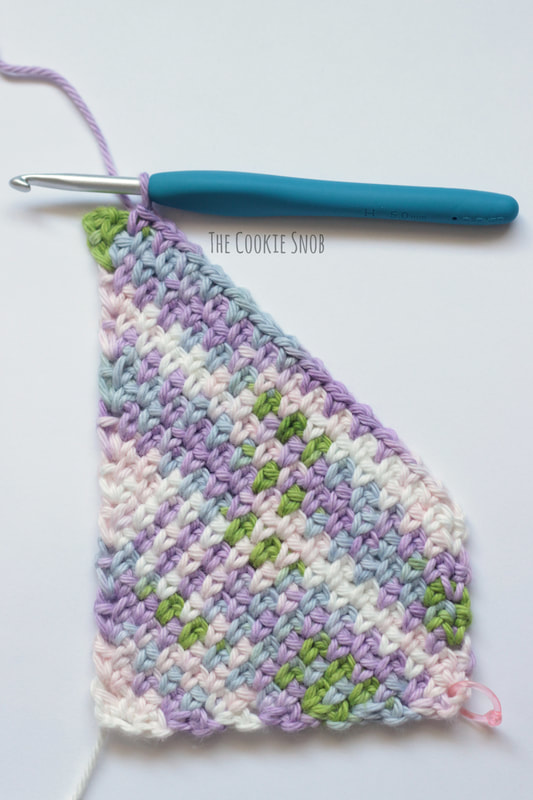 At the end of the row (on the "increase" side), sc in the last ch 1 space and then do NOT ch 1. Sc in the ch 3 space. 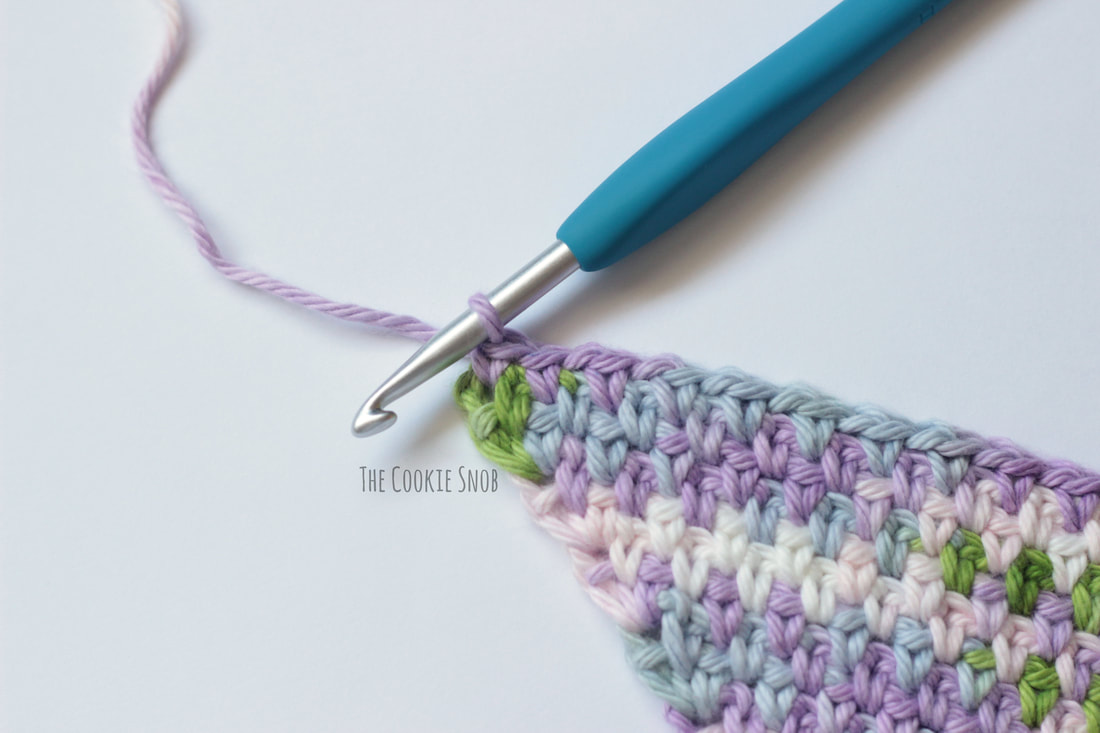 Turn. Ch 2, skip the first 2 stitches, [sc, ch 1] in the first ch 1 space, [sc, ch 1] in each ch 1 space across. 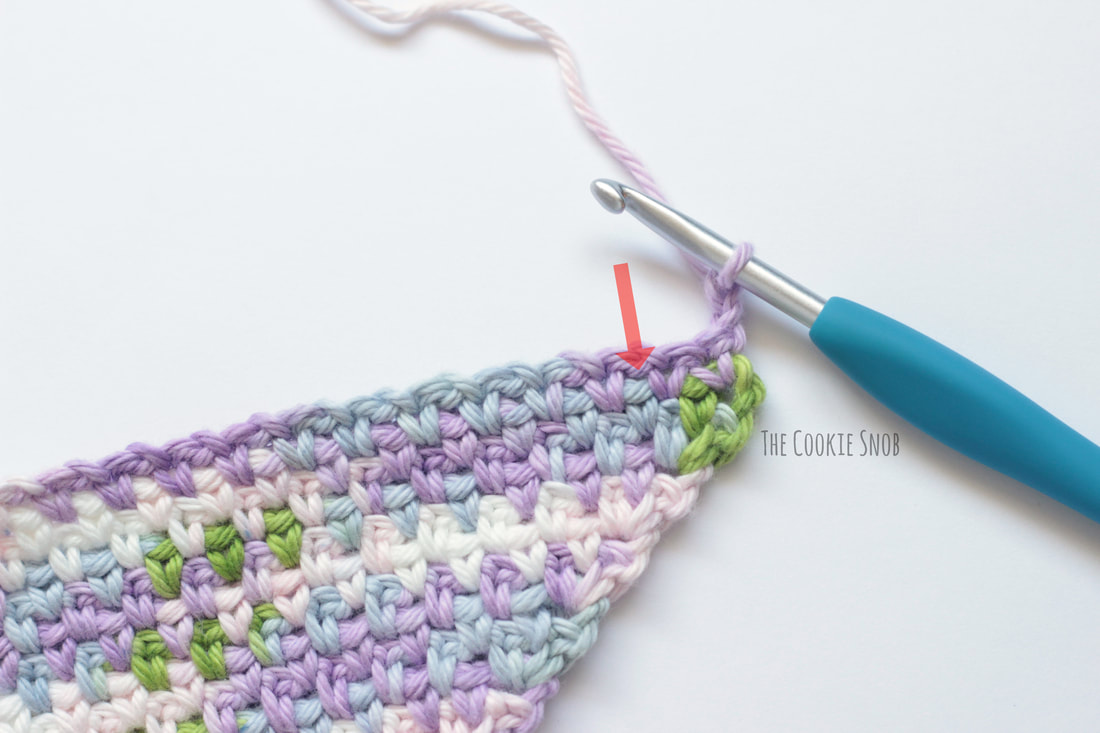 In the last ch 1 space, sc, do NOT ch 1, then sc in the ch 2 space. 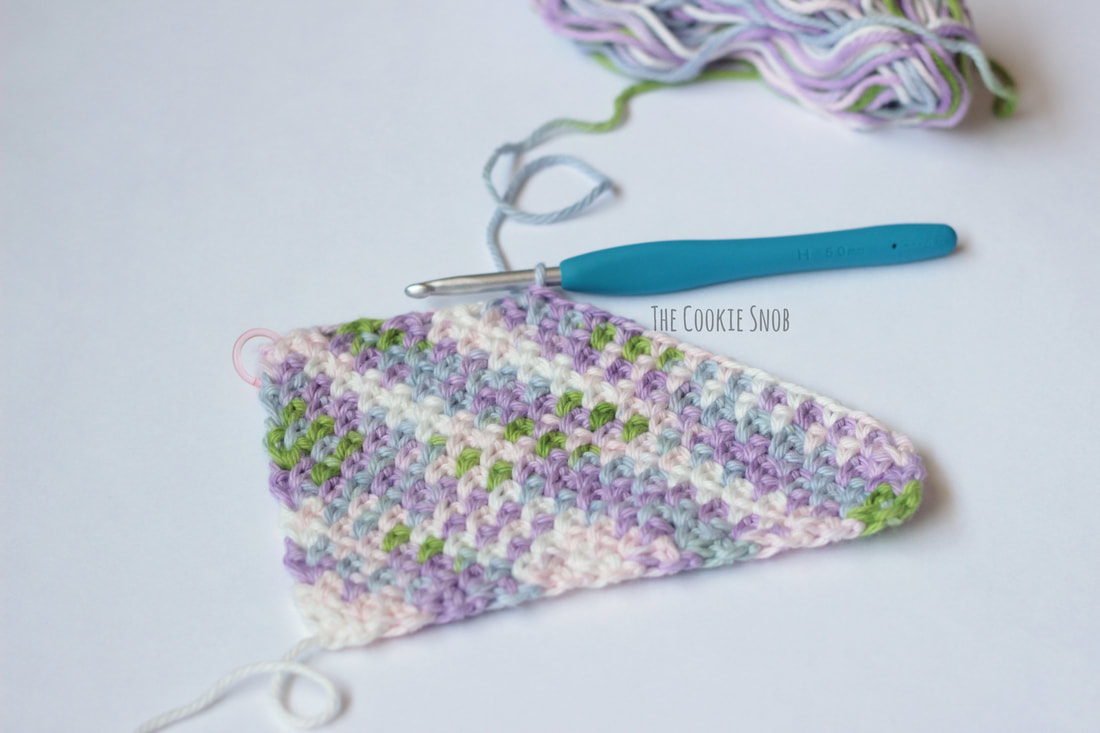 Repeat the last row, effectively decreasing on both sides. From here on out, everything is exactly the same as the decrease section of the square tutorial. But I'll repeat the last steps here so you don't have to click back over to the other page.  For the second to the last row (when there are only 3 sc), you'll ch 2, work a sc in the first ch 1 space, then sc in the ch 2 space (do NOT ch 1 in between).  For the final row, turn, ch 1, and sc in the ch 2 space. Ta-dah! You've now made a rectangle! You are now a c2c moss stitch superstar! 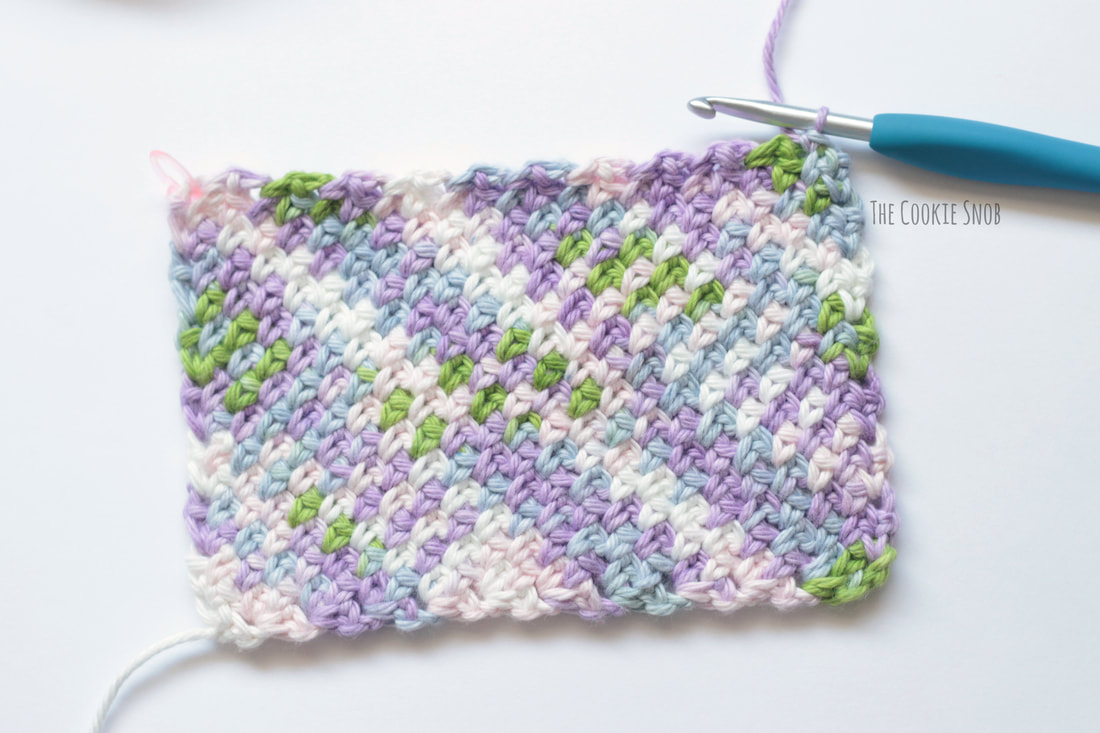 Hopefully this tutorial was helpful! If you have any comments or questions about it, you can reach me in the comments section below or on social media. Happy hooking! Want to make sure you don't miss out on any future blog posts? Join my mailing list! 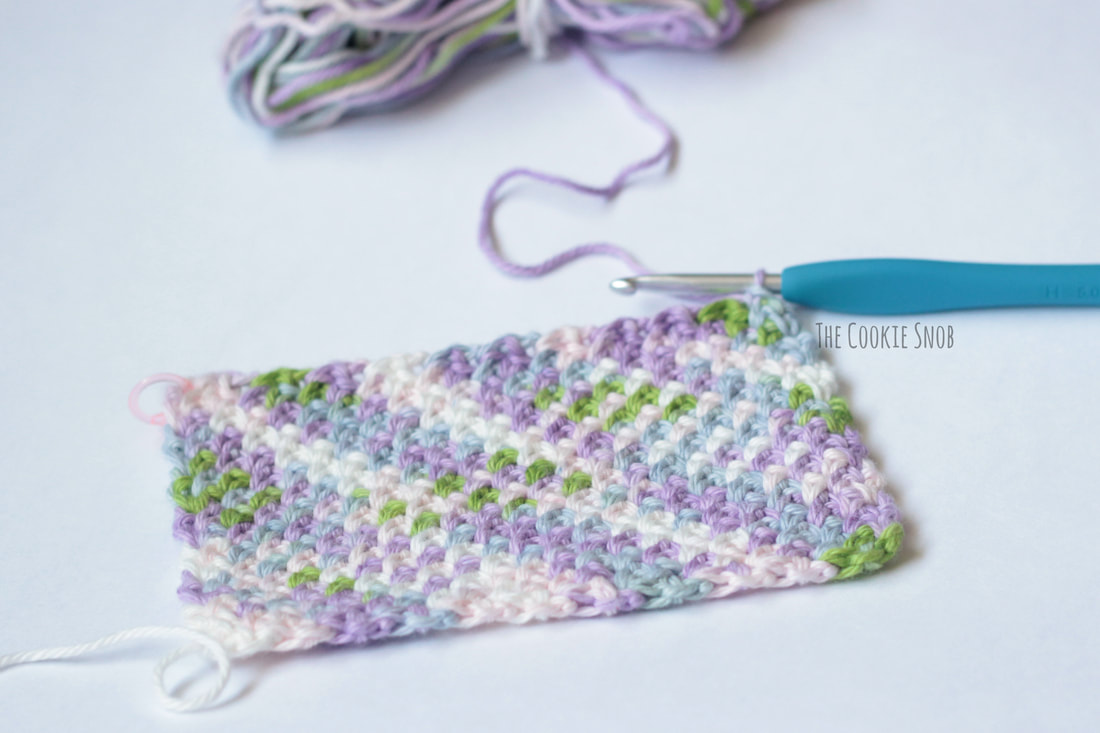 ***You may not use any photos on this site for your own use or repost the text of this post as your own. ***
4 Comments
Susan Hall
9/26/2019 08:04:16 am
Can you please let me know when the refund has been made as it is not showing in my account yet.
Adeline
7/23/2020 07:39:24 pm
What is the brand of yarn.
Dawn Simonides
8/2/2021 02:45:00 pm
Thanks so much for sharing your clear, concise directions, this is the best tutorial that actually makes sense 👌🏼🧶
Gail Coleman
9/29/2021 11:38:46 pm
thank you for the tutorial. I found it very helpful but I'm still confused. I'm knitting a blanket that increases every 2nd row. I'm up to the increase one side, decrease the other and every pattern says "until you reach your desired lenth" Leave a Reply. |
Welcome!Thank you for stopping by to visit my own personal corner of the web! Feel free to take a look around and check out what I've been crafting, crocheting, or baking. Hopefully you'll find something to inspire your own creativity!   
Archives
March 2024
|
 RSS Feed