
|
How NOT to design a new blanket pattern: 1. Sketch out a basic idea and start working on it, only to be distracted from working on it by moving cross-country with little kids during the peak of a global pandemic. Be sure to make the premise of the project unnecessarily complicated. 2. Put the project in a weird spot when you're unpacking your new home and promptly forget about it. Be sure to lose any notes you have on the project. 3. Remember about the blanket 3+ years later and pull it out. Start working on it, only to realize that you have no notes and can't remember the math you figured out to make the project possible. Pull your hair a little, but stubbornly persist by redoing all the math and redesigning it based on what you have already. Feel free to argue with a spouse about the mathematics behind it for bonus points. 4. Finish making the squares you think you need, then arrange them all so you can realize that one entire section of squares is the complete wrong size and now you have to remake them all. Cry a little over chocolate ice cream while rewatching North and South. 5. Doggedly persist in the project and remake said squares. Spend far too long arranging them and then finally start attaching them together. Realize partway through that if you calculate the number of stitches in each row, you'll have a completely different number at the top of the blanket than you will at the bottom, thus negating any rectangular properties you were going for. Come up with a methodology on the fly to hide this issue. 6. Add a border and do a happy dance because it's finished! Then realize that you didn't calculate the width correctly and now it's skinnier than you wanted it to be. But at this point, you are NOT remaking it. So do a happy dance in spite of it all, because even though it's not perfect, it's still a cozy lap blanket and it is finally DONE. Joking aside, this project was not exactly straightforward. I had a vision years ago for a "Growing Grannies" scrapghan and there were definitely some bumps along the way, but I finally pulled it off! And since I ran into all the issues, I can now give you the tips you need to avoid them, should you be interested in making your own. 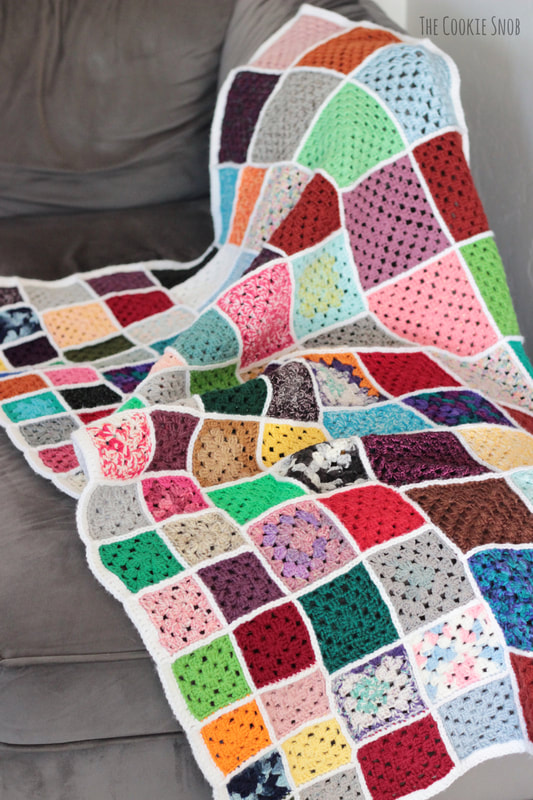 This post is really more of a concept than an exact pattern. My goal is to walk you through the different steps to make the blanket and then you can customize it to be the size/style you'd like. The end goal is to make a blanket from granny squares of different sizes, which is a really handy way to use up yarn scraps (since those little extra yarn balls leftover come in all sorts of different yardages). It's always satisfying to turn that little box of scrap yarn into something cozy you can actually use. Waste not, right? Plus, I find it fun to look at little squares and remember what I made from the rest of the skein. My kids like to point at a square and ask, "What did you make with that one?" 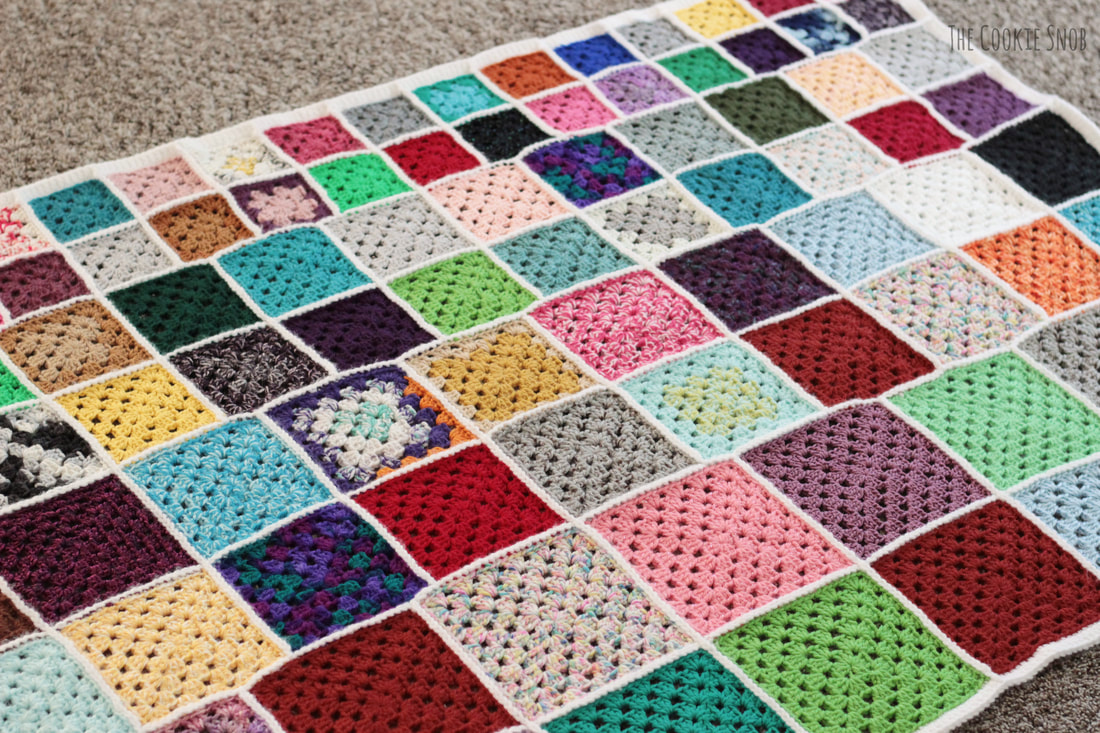 The first step is to figure out what size squares and how many of them you need. You can go rogue and do your own calculations if you'd like; if so, I recommend dusting off your knowledge of "least common denominators" from way back when. Or, if you want to use the numbers I did, you'll need 3-inch, 4-inch, 5-inch, and 6-inch squares. Since the blanket is designed to be 60 inches long, they'll all line up evenly at the edges without any awkward gaps. Here's a breakdown of the squares I used for mine:
Phew. Hopefully all those numbers make sense. Feel free to contact me if you have questions about the layout/math involved. There are also some pictures of the full blanket posted below if you're more a visual person. 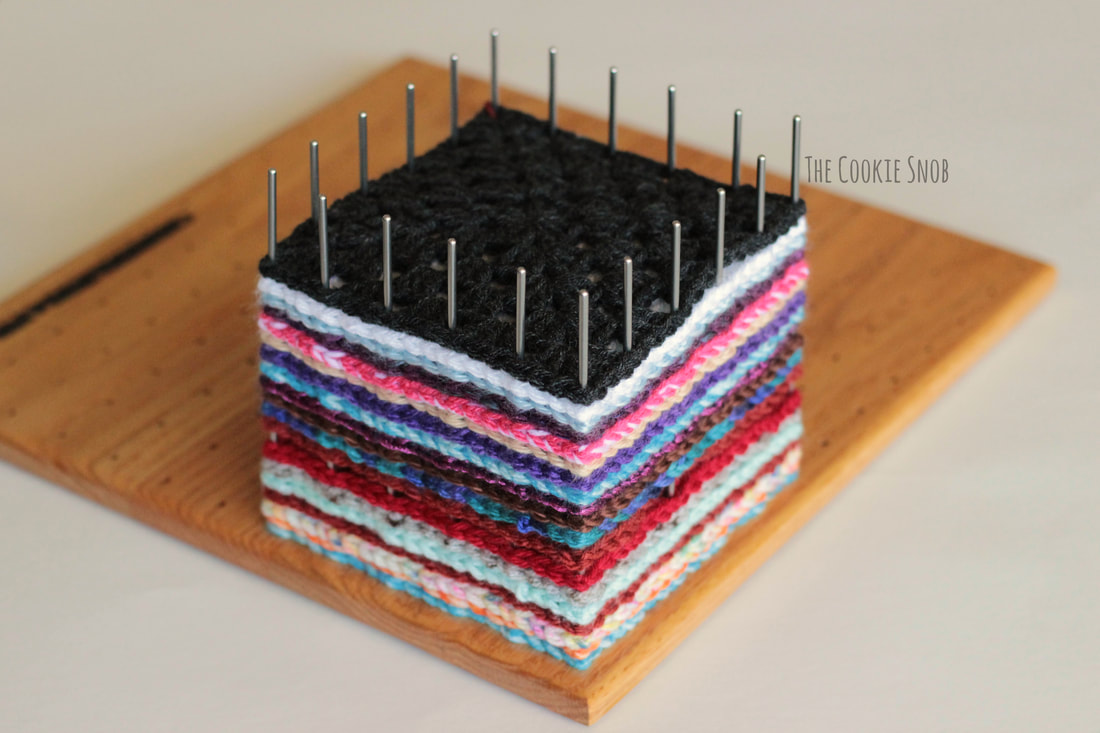 Once you have a plan in mind, you can make the squares. I just went with a basic granny square, but you can use any square pattern you'd like, as long as the sizes come out right. I like the basic granny because, with the correct gauge, one row is about 1-inch across, making it really easy to know how many rounds I need to make for each square. Your gauge will vary depending on how you crochet/what yarn you use, but I made almost all of my squares with worsted weight (4) yarn and an I (5.5 mm) crochet hook. If possible, I recommend trying to use the same gauge for all of your squares so that each square of one size has the same number of stitches for joining later. It's totally possible to incorporate squares with different numbers of stitches, but it takes a little bit of mental figuring during the joining process to make it turn out evenly. If you're new to granny squares, you can check out a basic granny square pattern I used for the base of a bunny lovey. The only difference is that you won't need to change colors for this scrapghan, so you can just slip stitch to the corner at the end of each row and keep going. I also highly recommend blocking your squares when you're done making them. I know it's an extra step, but it makes it nice and even when it's time to join them all together. 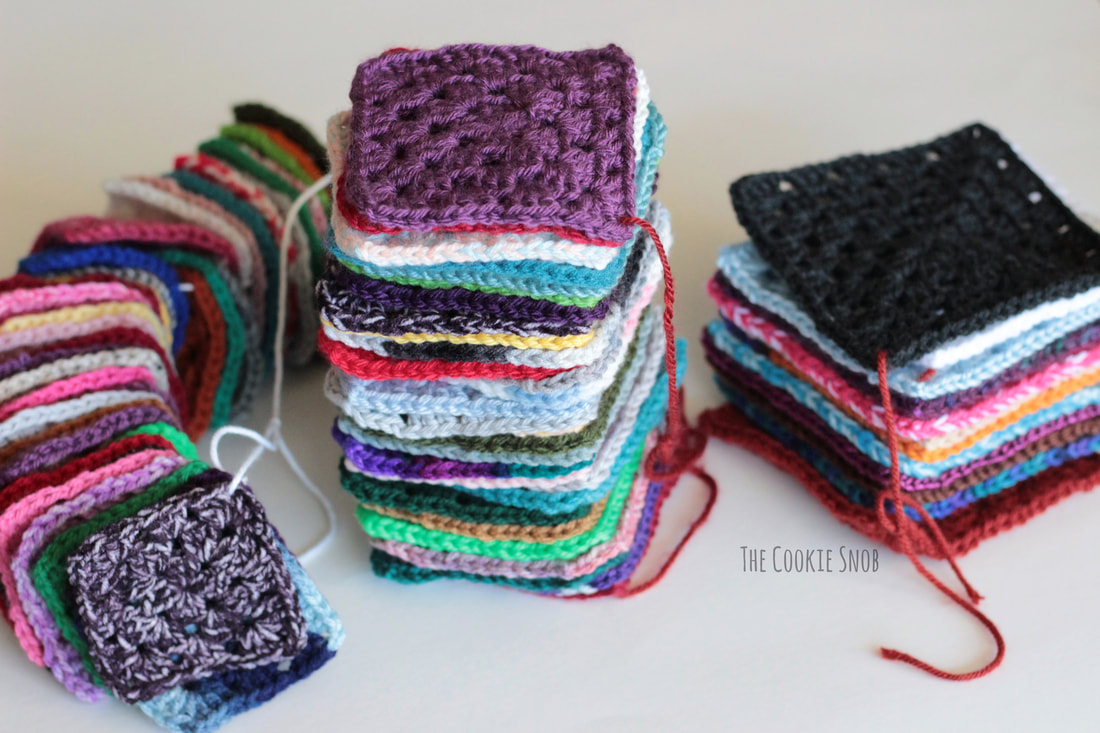 Once you have your squares, you can lay them out and decide how to want to arrange them. One helpful trick for storing the squares until you're ready to join them is to stack them up in the order you want them and then thread a piece of scrap yarn through the corner of each square in the stack and tie it shut. That way you can easily move around your stacks of squares without forgetting what order you want your squares in. I made one stack for each different square size. I also recommend that when you lay out your squares initially, you take a quick picture of it on your phone. That way you can reference it later if you forget what goes where. Once the arranging is done, it's time to join the squares. You can use whatever joining method you prefer. I thought it would look nice with a visible, flat join, so I used the flat slip stitch granny join. I'd never used this stitch before, but I found a handy tutorial by Craft Passion that did a great job explaining it. Because the squares are different sizes, I found that the best approach to joining was to first join the long side in between two rows of the same size (one of the horizontal lines in the picture below). Then once it was connected length-wise, I then made the vertical lines in between. There are a few spots in the blanket where the vertical line connects all the way through to the next size of squares (shown in red in the picture below). In those spots, I left the vertical line unworked until I finished attaching the next section of squares so that I could make the whole vertical line all at once. If you prefer, you could make all the horizontal lines first and leave the vertical lines until the very end, but when I tried that I found it was easier to navigate the crochet hook when there weren't so many other squares in the way (since there isn't one continuous line that goes all the way through vertically). 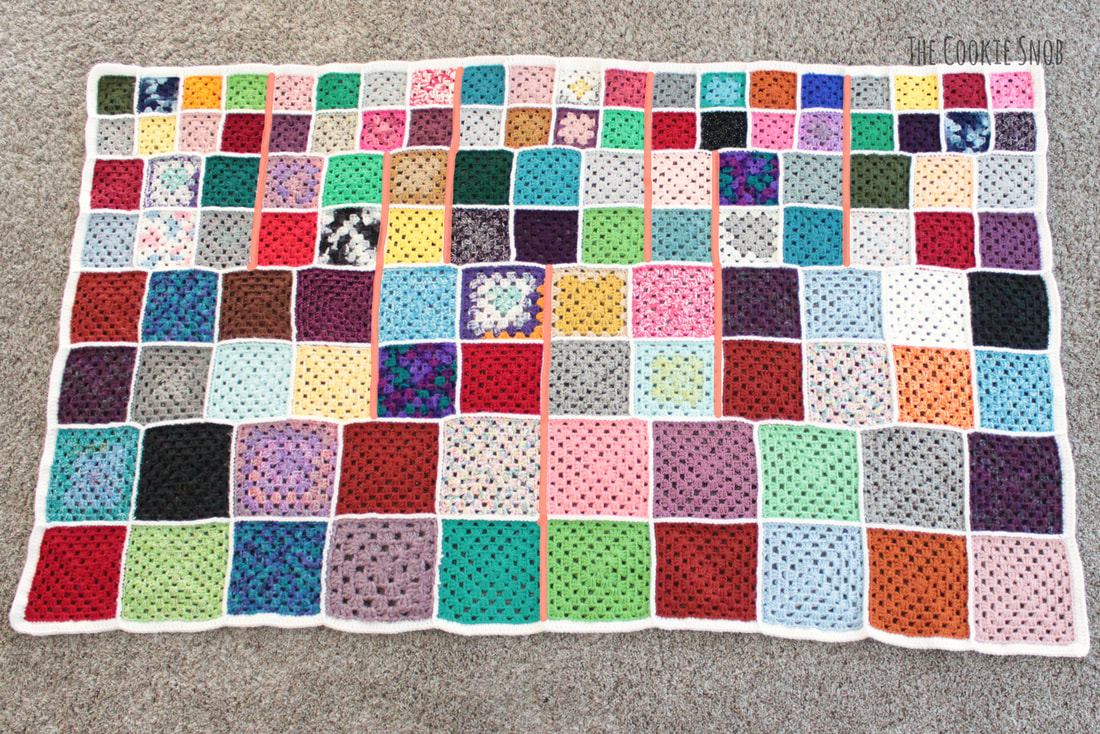 One more note about joining: because the squares are different sizes, you end up with a different number of stitches when you're joining sections of different sizes. This can vary depending on your gauge and how many stitches it took you to make each square. But if your gauge matches mine (6 rows for a 6-inch square, etc), you'll find that there are 250 stitches in the 6-inch row, 252 stitches in the 5-inch row, 255 stitches in the 4-inch row, and 260 stitches in the 3-inch row. I wanted to keep my rows as even as possible, so I decided to pick one of those numbers and then make all of the rows match. Since I had already finished joining the 6-inch rows before I noticed this, I decided to make each horizontal joining row 250 stitches. To make this work, I worked into every stitch across for the 6-inch rows. Then when I was joining the first 5-inch row, I dropped two stitches on the 5-inch side. When I joined the second 5-inch row, I also dropped two stitches, but from both sides. Then to add the first 4-inch row, I dropped two stitches from both sides and dropped an additional three stitches from just the 4-inch side. When I added the second 4-inch row, I dropped five stitches evenly from both sides. Finally, when adding the first 3-inch tow, I dropped five stitches from both sides and dropped five more stitches from just the 3-inch side. And for the final 3-inch row, I dropped ten stitches evenly from both sides. In retrospect, this may have been overly neurotic. I'm not sure how visible 10 stitches would be in a blanket this size. Certainly one or two stitches wouldn't make any difference, so you could easily get away with leaving the 5-inch rows alone (and probably the 4-inch as well). But I wanted it to be as exact as I could, so hopefully my explanation of how I made it match up is helpful if you want to do the same. 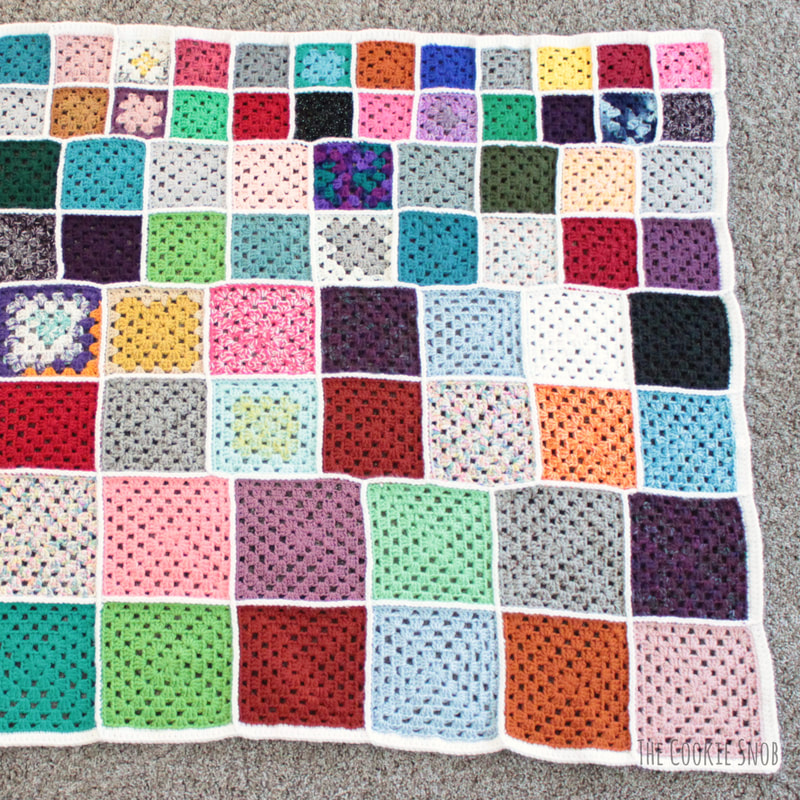 The final step is to add a border. I made a simple row of single crochet stitches all the way around, being sure to keep the number of stitches on the long sides identical (the short sides are already symmetrical, so you don't need to worry about them), then I added one more row of double crochet stitches to finish it off. Then weave in the ends, and you're good to go! 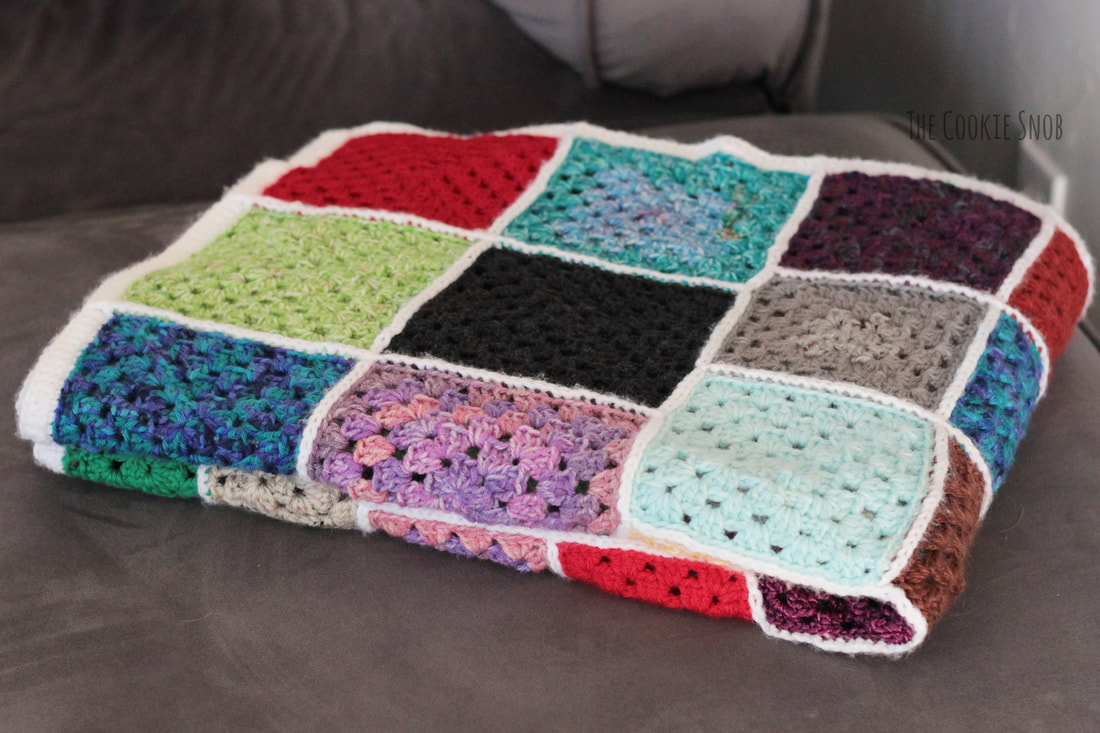 Whew! That was a lot of words for one little blanket. I hope that they were helpful and that my process makes at least a little bit of sense. If you have any questions about how I made this work or if you're reading my explanation of some step and think it makes no sense, feel free to get in touch and I can try to help you out. For all the bumps along the road, I actually really like how this blanket turned out. It definitely has the visual effect I was going for and it was a great way to use up some scrap yarn. And if you like the idea of a scrapghan, but don't feel like this one is your cup of tea, I recommend you check out my hexagon scrapghan from a while back. It's still one of my favorite makes and it gets a lot of love around our house. If you end up making a Growing Grannies Scrapghan, I'd love to hear about how it goes or see a picture! You can find me by email, in the comments section below, or on social media. I'll do my best to get back to you as soon as I can, although you may need to be a little patient with me since life is crazy. Happy hooking! Want to make sure you don't miss any future blog posts? Join my mailing list! (Spam-free, I promise!) 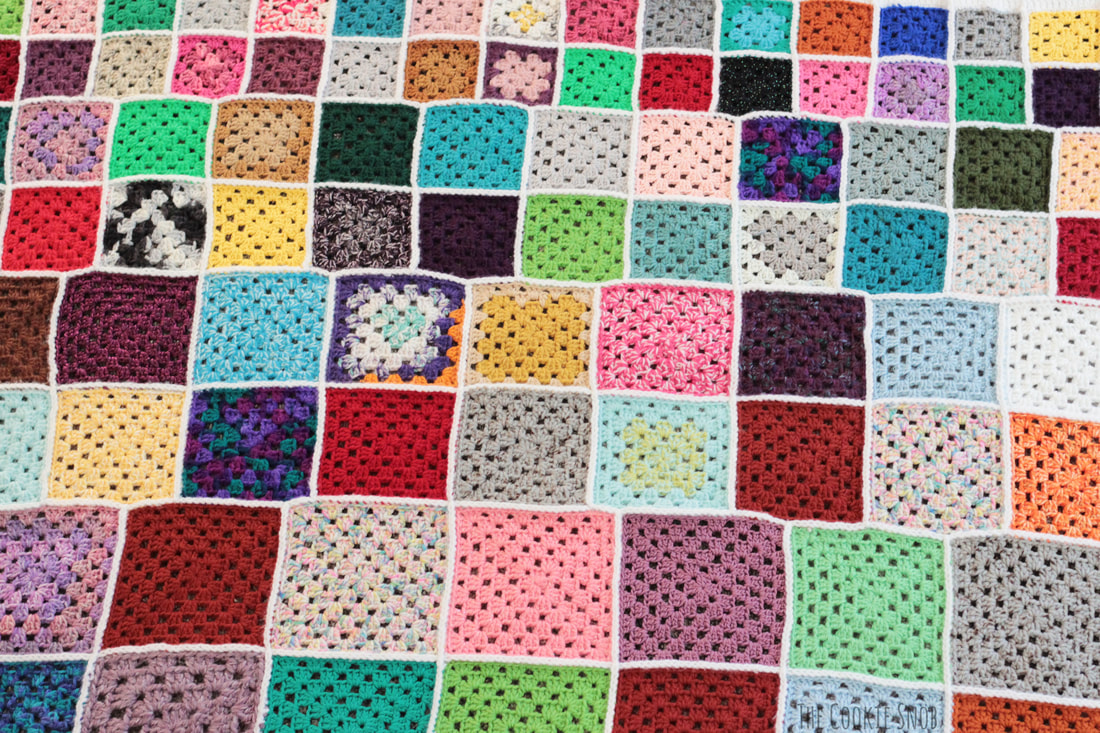 ***You're welcome to do whatever you'd like to with finished products made from this pattern but if you do sell them, I ask that you link back to my page. You may not copy this pattern, repost it anywhere (either altered or in its original form), or claim it as your own. You may not use any photos on this site for your own use. *** 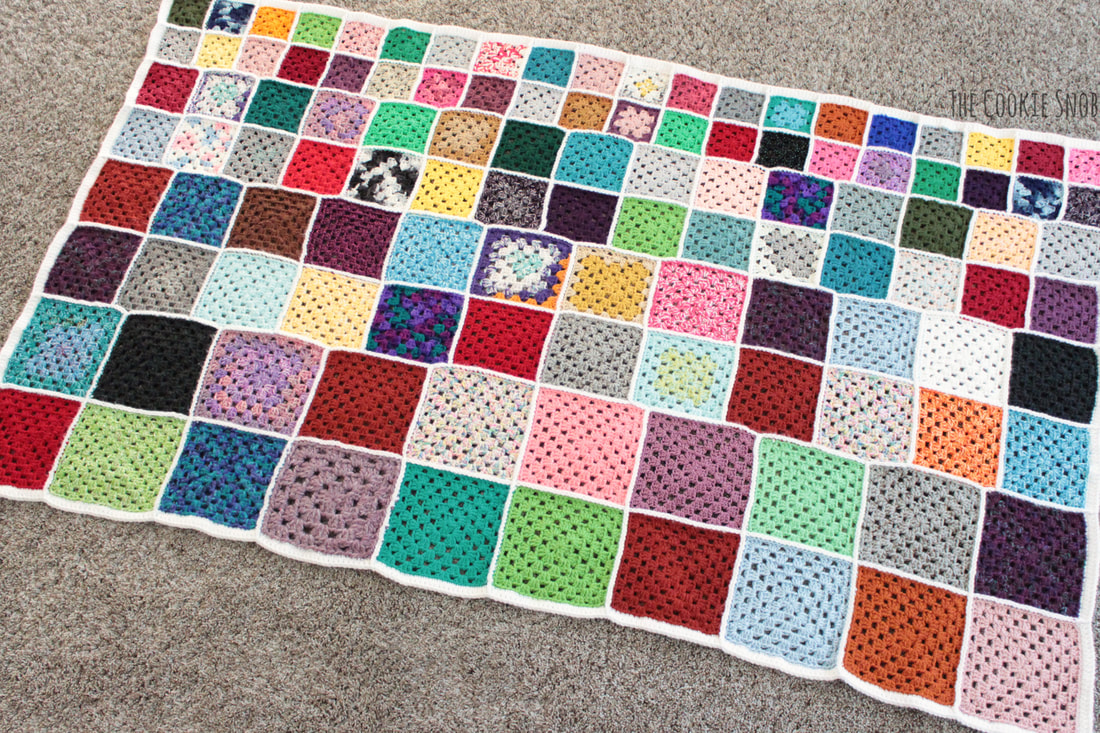
0 Comments
Leave a Reply. |
Welcome!Thank you for stopping by to visit my own personal corner of the web! Feel free to take a look around and check out what I've been crafting, crocheting, or baking. Hopefully you'll find something to inspire your own creativity!   
Archives
March 2024
|
 RSS Feed