|
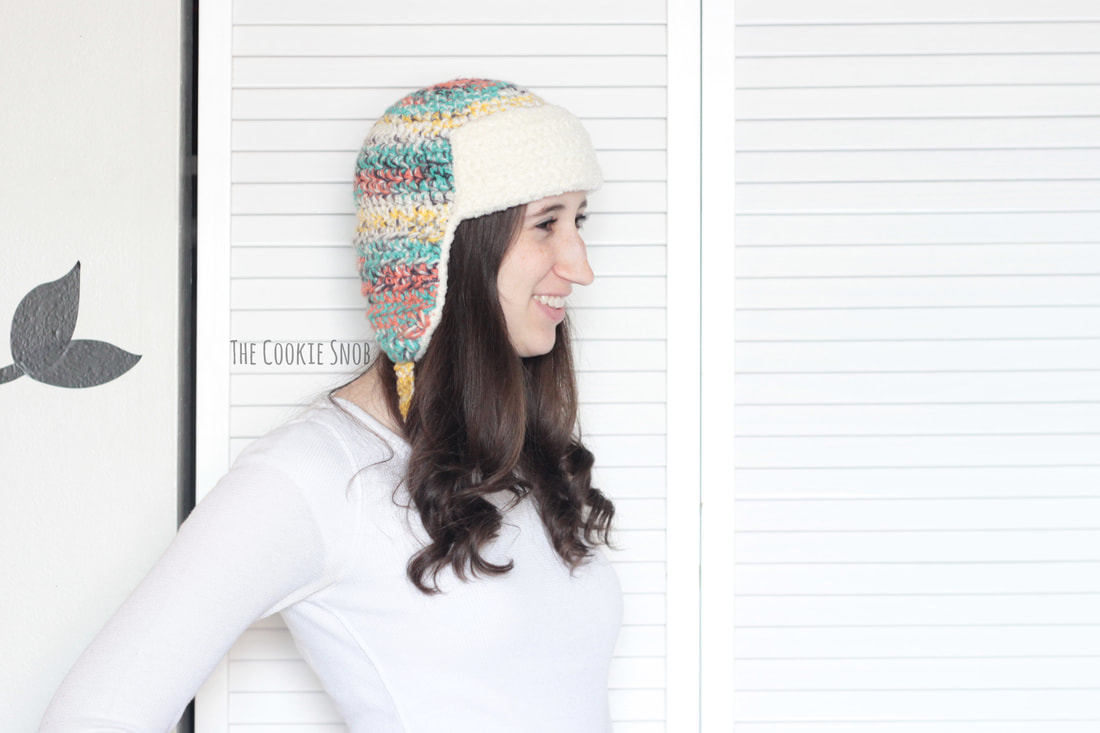
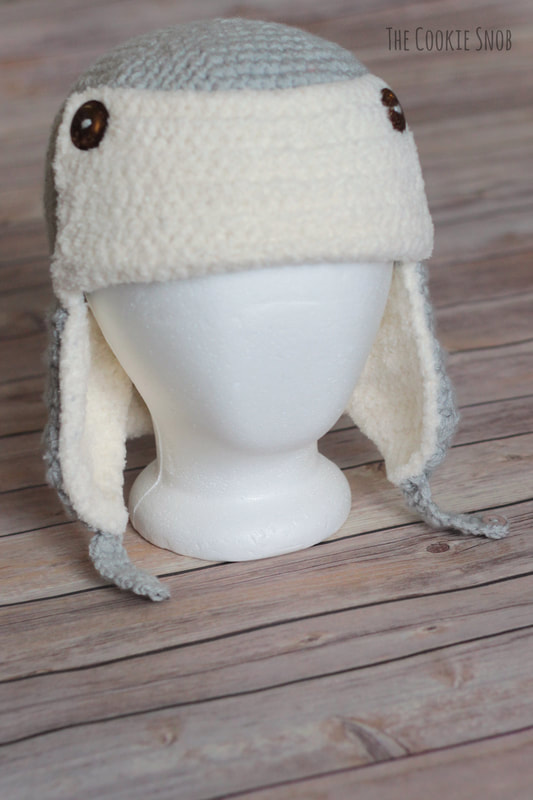
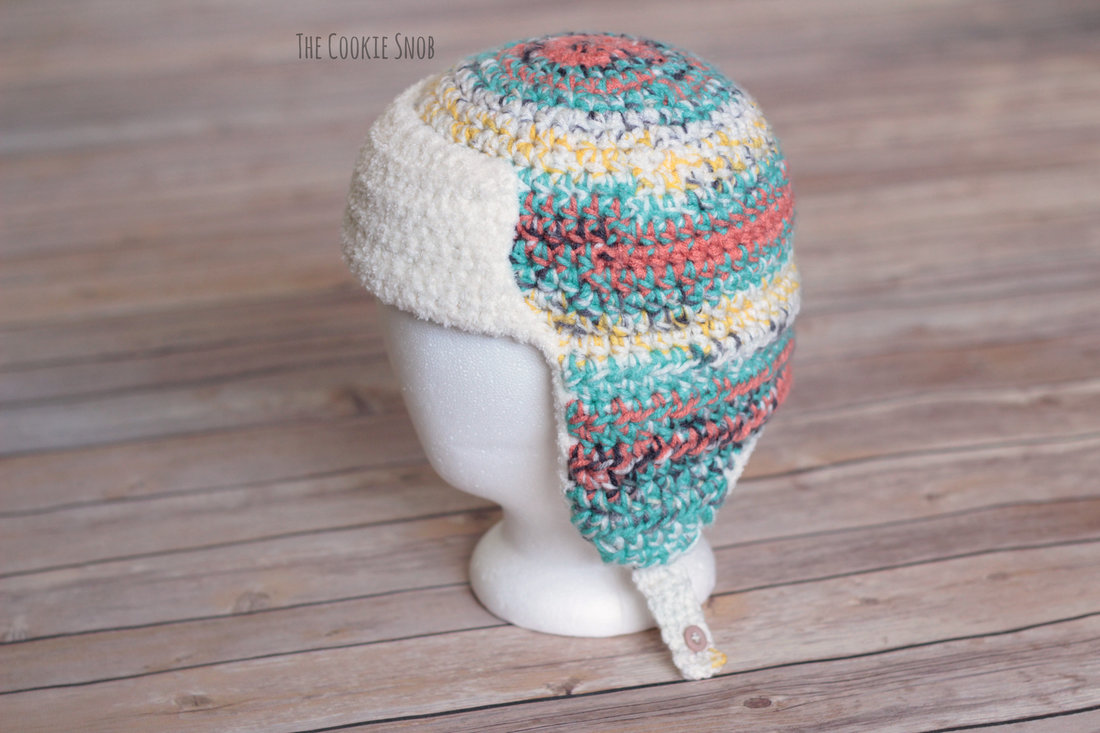
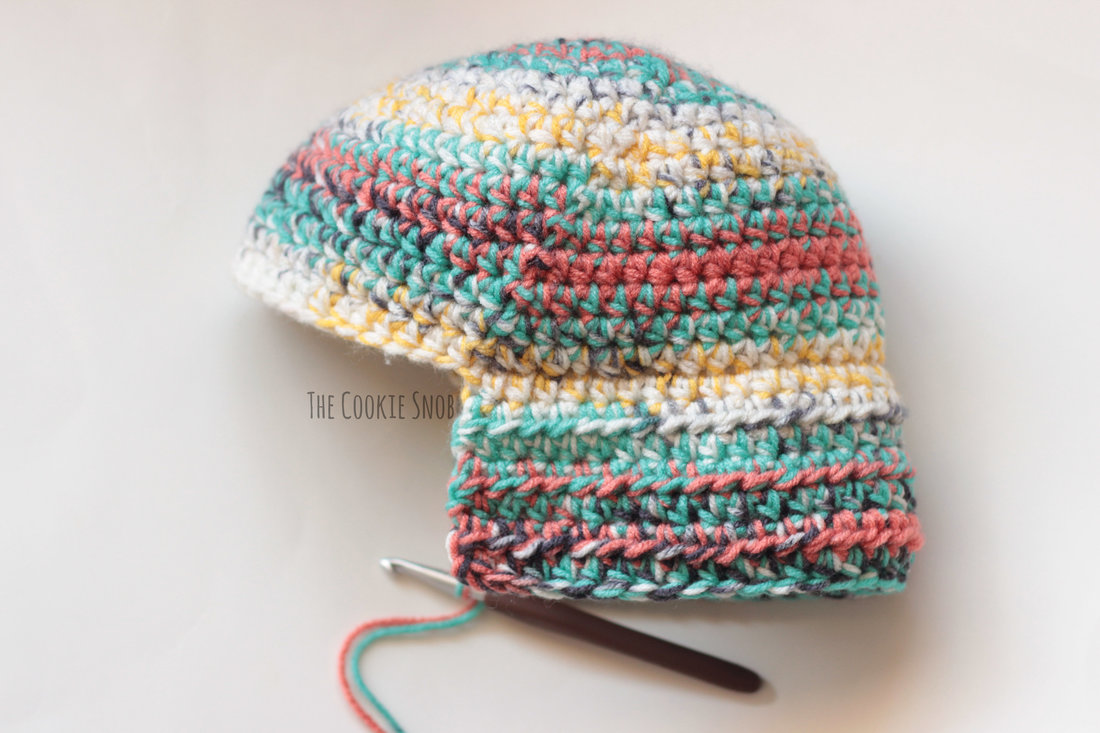
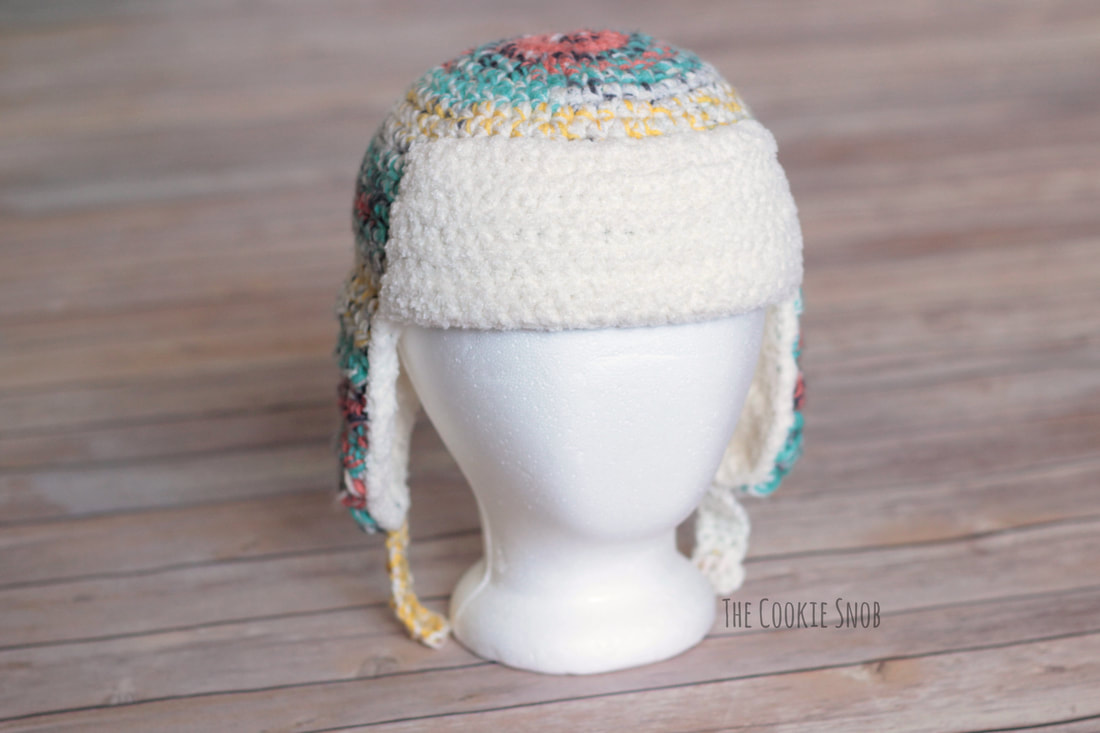
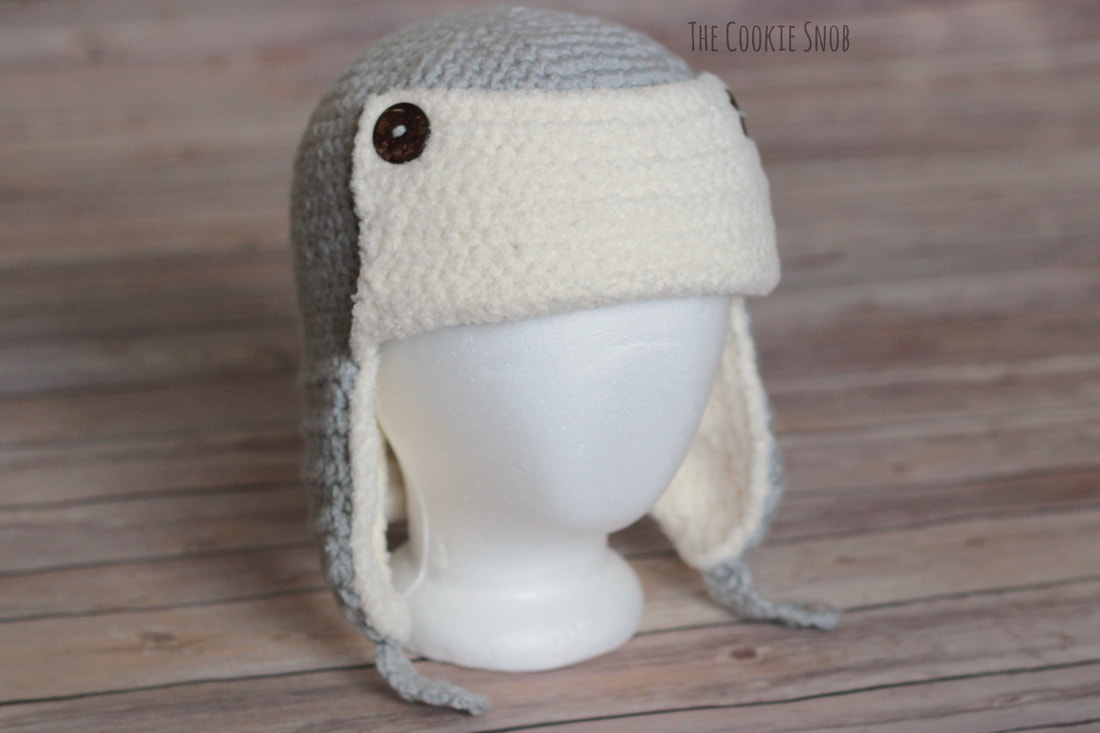
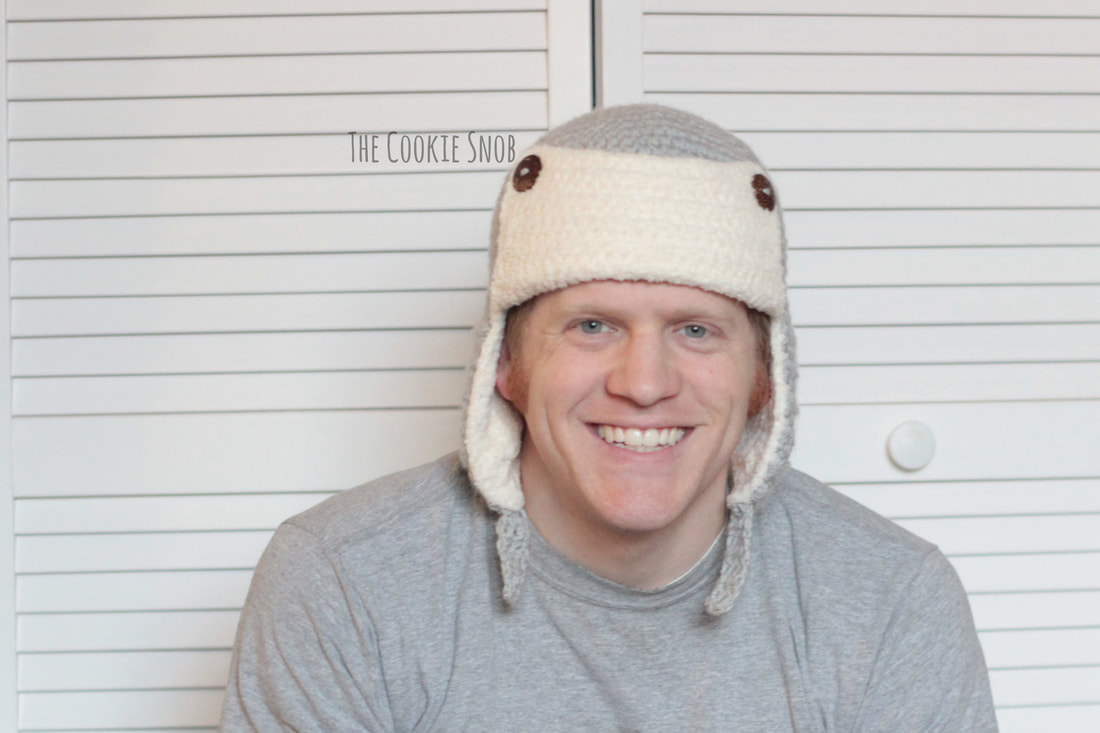
I know it's only the beginning of January, but I am already SO done with winter. Thank goodness it's starting to warm up a bit, because the last couple weeks have been brutal. I guess you can take the girl out of Southern California, but you can't take the Southern California out of the girl. I am just not built for the cold. Luckily, cozy crochet pieces always cheer me up a bit. And my favorite crochet-wear at the moment is definitely this awesome trapper hat. I originally designed this hat for my husband as a Christmas gift. He's got an extra large noggin, so I had a hard time finding any existing patterns that both fit him and met the requirements on his hat wish list. I actually ended up using the base I had to invent to make his knight helmet work and just tweaked it a bit to turn it into a trapper hat. Per his wishes, this hat is extra thick and covers both the neck and ears. And per my wishes, it has an extra soft and cozy lining at the bottom. I was so jealous of my husband's hat once I finished it that I had to make one to fit me too! So this trapper hat pattern is available in two different sizes: small/medium and large. We'll start with the smaller hat and then take a look at the larger version. The construction of both is the same, so the pictures of the smaller hat shown below should be a useful reference for either hat. Please make sure to check your gauge, because I tend to crochet tighter than average, so the odds are good you'll need to go down a hook size. ***Note: Both hats are made by holding two strands of yarn together as you go. If your skein has a center pull, you can work from both ends of the same skein, but it's usually easiest to use two different skeins to avoid tangles. You won't use 2 whole skeins' worth of yarn, but it makes it simpler to work on the hat, so I've listed 2 skeins in the materials below.*** If you'd like a printable PDF version (including both sizes), you can find one on Ravelry. Materials:
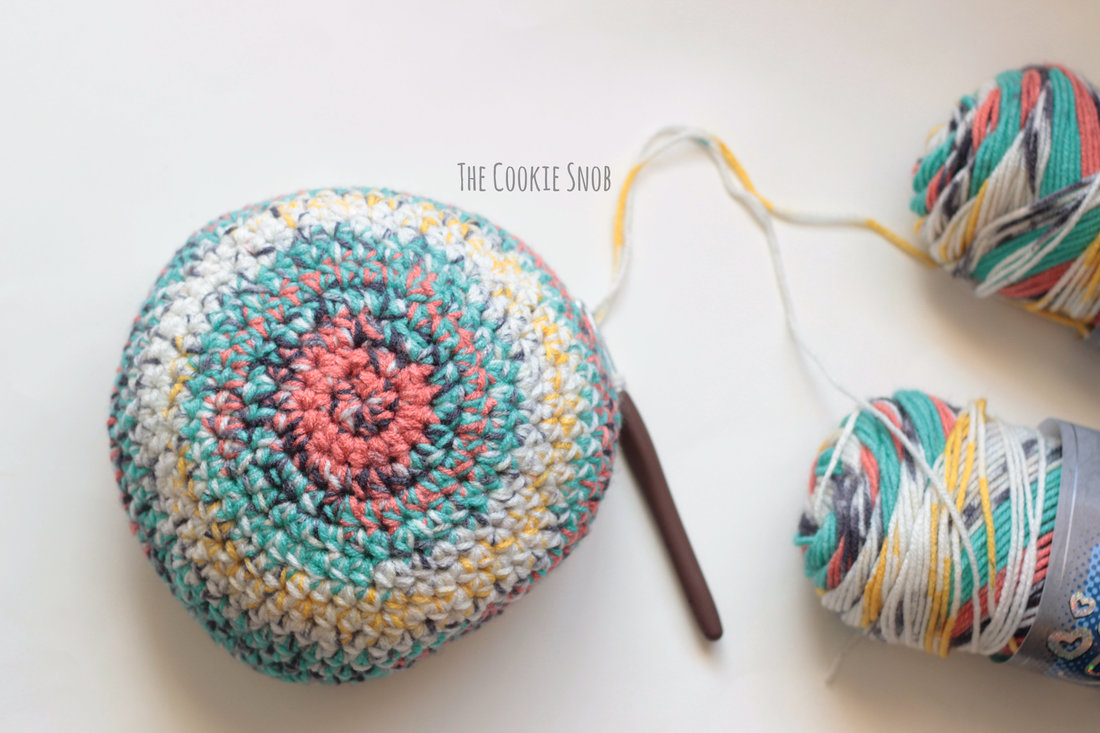
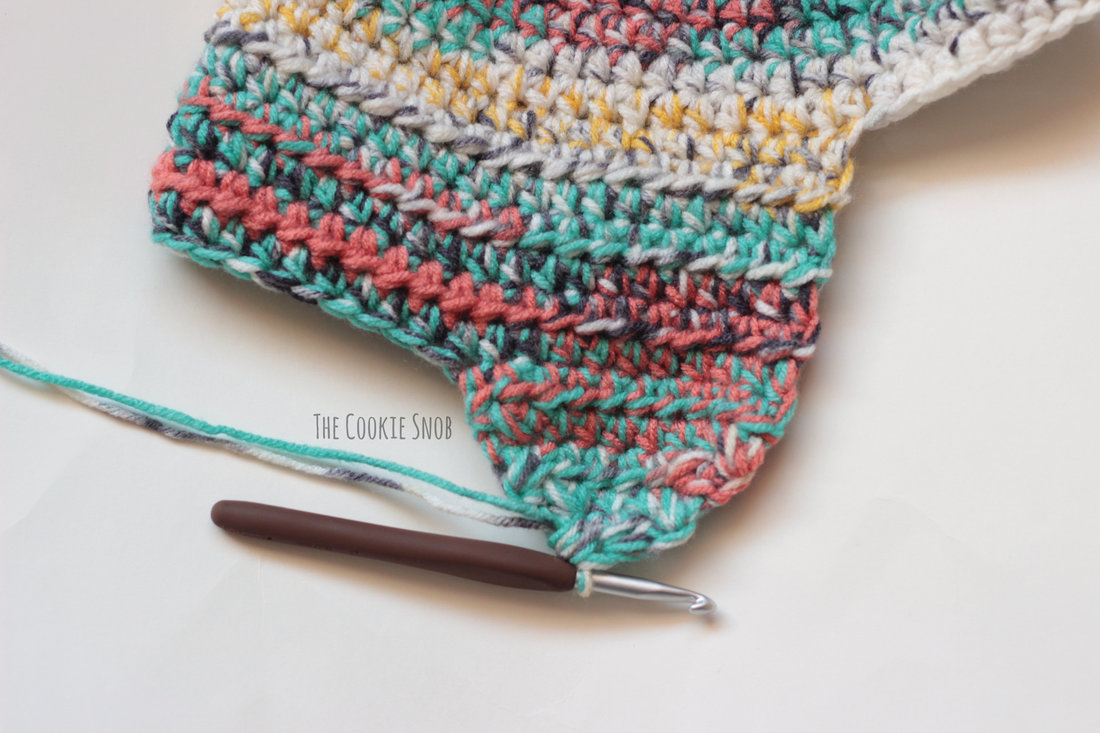
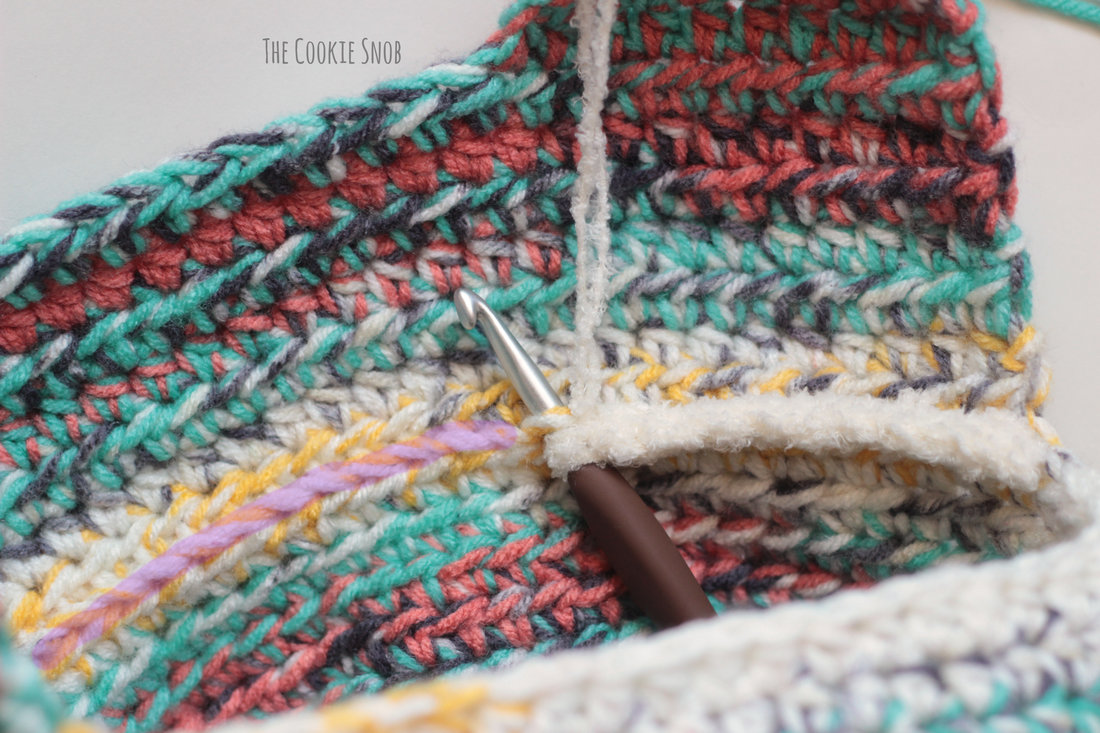
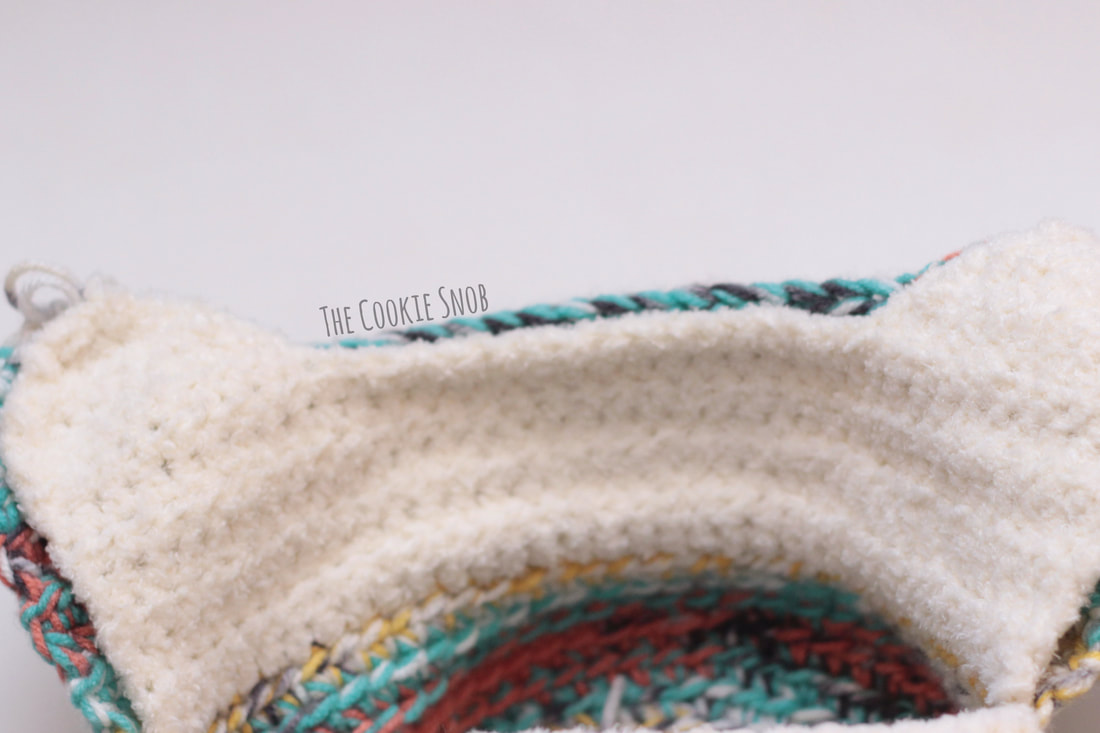
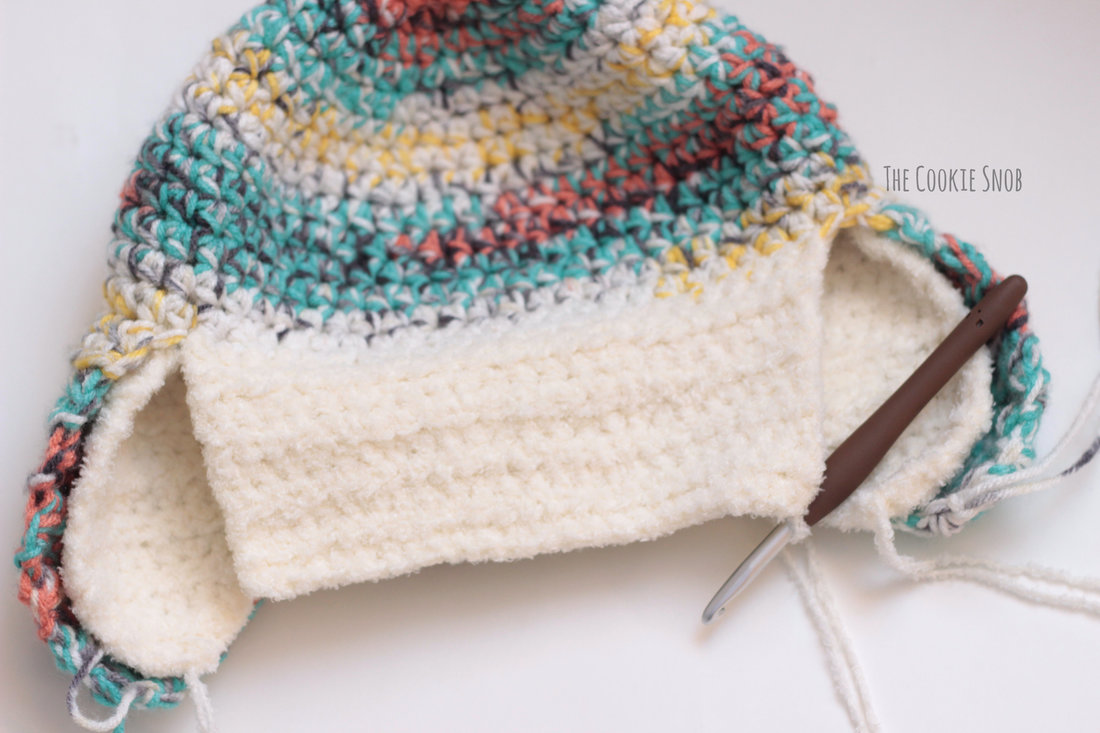
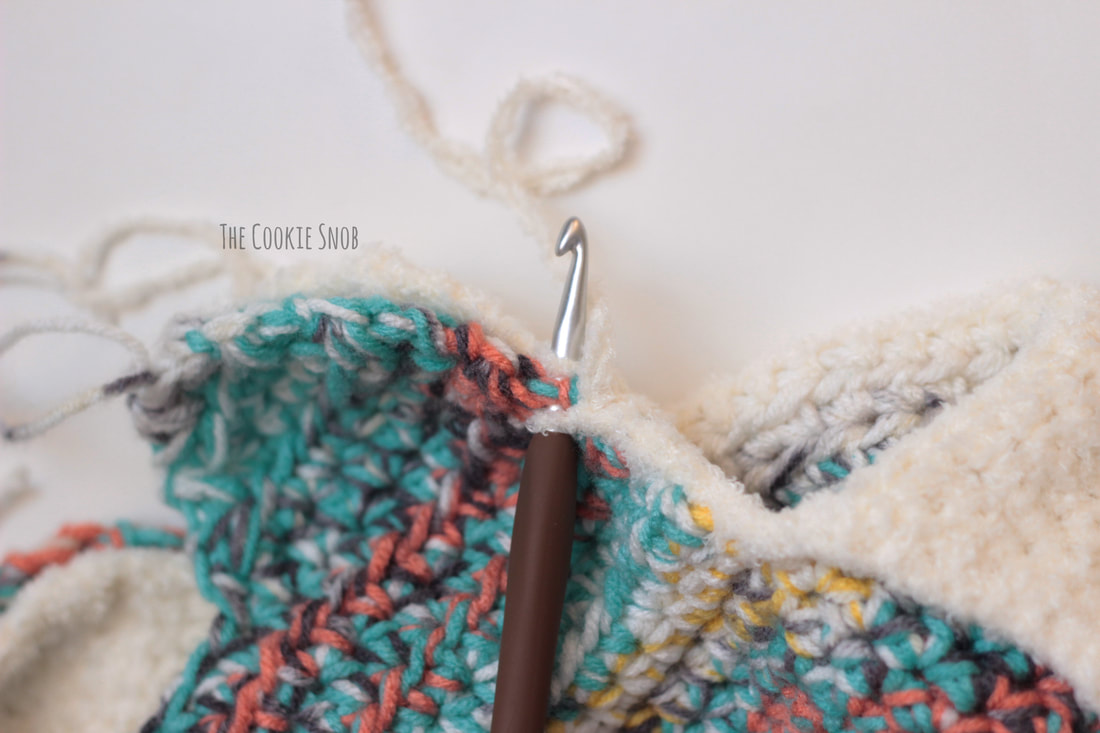
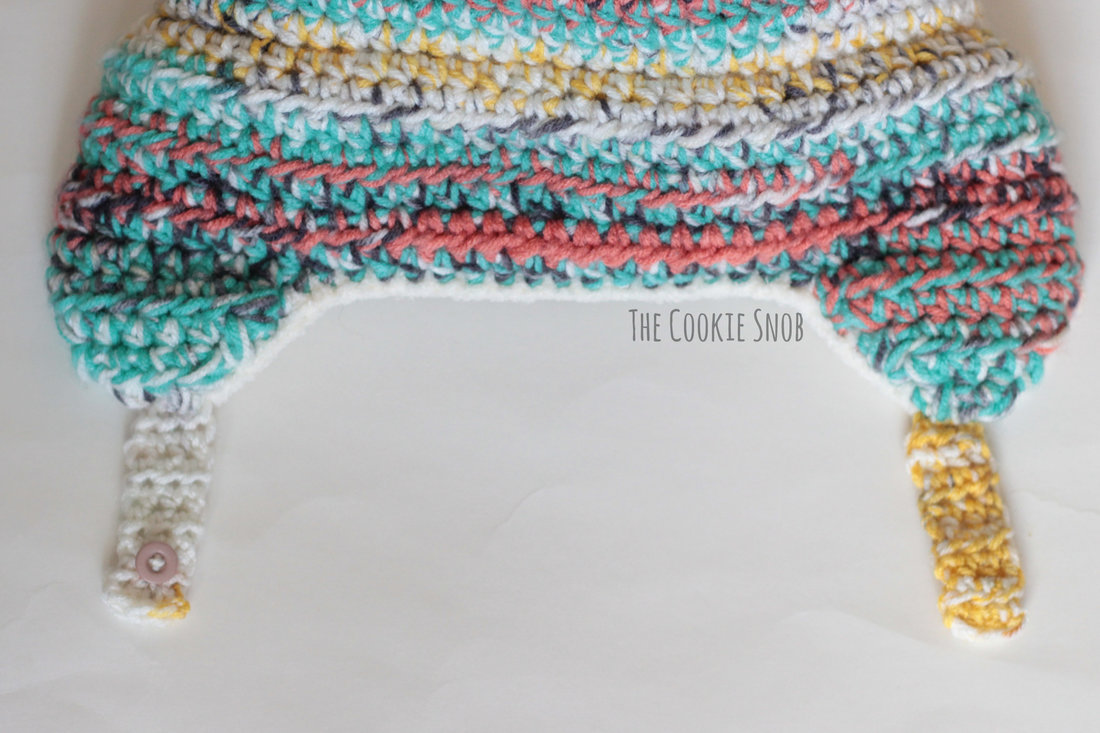
Stitch Glossary: st(s) = stitches ch = chain ss = slip stitch sc = single crochet hdc = half double crochet hdc inc = hdc increase (work 2 hdc into the same st) hdc dec = decrease over 2 hdc Gauge: 4" = 11 hdc, 4" = 10 rows Small Trapper Hat Begin with the main color yarn held double: Round 1: Make a magic circle and work 8 hdc into the circle, pull taut to close and ss to first hdc to join (8) Round 2: ch 1, hdc inc around, ss to join (16) Round 3: ch 1, [hdc inc, hdc in the next st] around, ss to join (24) Round 4: ch 1, [hdc inc, hdc in the next 2 sts] around, ss to join (32) Round 5: ch 1, [hdc inc, hdc in the next 3 sts] around, ss to join (40) Round 6: ch 1, [hdc inc, hdc in the next 4 sts] around, ss to join (48) Round 7: ch 1, hdc around, ss to join (48) Round 8: ch 1, [hdc inc, hdc in the next 5 sts] around, ss to join (56) Round 9: ch 1, hdc around, ss to join (56) Round 10: ch 1, [hdc inc, hdc in the next 13 sts] around, ss to join (60) Rounds 11-15: ch 1, hdc around, ss to join (60) Row 16: ch 1, hdc in the next 36 sts in the front loop only, turn (36) Rows 17-22: ch 1, hdc across, turn (36) To make the first earflap: Row 23: ch 1, hdc in the next 10 sts, turn (10) Row 24: ch 1, hdc dec, hdc in the next 6 sts, hdc dec, turn (8) Row 25: ch 1, hdc dec, hdc in the next 4 sts, hdc dec, turn (6) Row 26: ch 1, hdc dec, hdc in the next 2 sts, hdc dec, turn (4) Row 27: ch 1, hdc dec twice (2) Fasten off. Now attach the yarn at the opposite end of Row 22 and repeat Rows 23-27 to make the second earflap. Fasten off. Now it's time to add the fuzzy lining. Switch to the fuzzy accent color, held double. The first row is worked in the unworked back loops from Row 16 of the main color (highlighted in purple below) Row 1: Join the accent yarn, ch 1, hdc across in the remaining back loops, turn (36) Rows 2-8: ch 1, hdc across, turn (36) Row 9: ch 1, hdc in the net 10 sts, turn (10) Row 10: ch 1, hdc dec, hdc in the next 6 sts, hdc dec, turn (8) Row 11: ch 1, hdc dec, hdc in the next 4 sts, hdc dec, turn (6) Row 12: ch 1, hdc dec, hdc in the next 2 sts, hdc dec, turn (4) Row 13: ch 1, hdc dec twice (2) Fasten off. Now attach the yarn at the opposite end of Row 8 and repeat Rows 9-13 to make the second earflap. Fasten off. For the fuzzy front flap, join the accent color yarn, held double, to the unworked stitches from Round 15 of the main body of the hat. Rows 1-10: ch 1, hdc across, turn (24) OR, for the button version: Rows 1-8: ch 1, hdc across, turn (24) Row 9: ch 1, hdc, ch 1, skip the next st, hdc in the next 20 sts, ch 1, sk the next st, hdc in the last st, turn (22 hdc and 2 button holes) Row 10: ch 1, hdc, hdc in the ch 1 space, hdc in the next 20 sts, hdc in the ch 1 space, hdc in the last st (24) For the edging of the hat, work sc across the top of the front flap, work 2 sc in the corner, then sc down the side of the front flap. Continue to sc around the edge of the hat, holding the main outer and inner layers together to join them together as you go. (They have the same number of stitches, so they should line up precisely.) When you get back to the front flap, sc up the side of the flap, work 2 sc into the corner, and ss to join. Fasten off. For the straps (make 2): Using the main color yarn (one strand only): Ch 4. Row 1: hdc in the 2nd ch from the hook and in the next 2 sts, turn (3) Row 2: ch 1, hdc across, turn (3) Repeat row 2 until the strap is about 2.5" long. Fasten off, leaving a long yarn tail. Finishing: Using the yarn tail, stitch the straps to the bottoms of the earflaps. Stitch the 1/2" button to the end of one of the straps so that it can be used to fasten them together. Flip up the front flap. Using the fuzzy accent yarn, stitch around the edges of the flap to join to the main body of the hat. Weave in ends. OR, for the button version: Flip up the front flap. Place the 1" buttons over the buttonholes to help you find the correct placement. Then stitch the buttons to the body of the hat; the buttons will hold the front flap in place. Great work! Now let's take a look at the larger version. Large Trapper Hat Begin with the main color yarn held double: Round 1: Make a magic circle and work 8 hdc into the circle, pull taut to close and ss to first hdc to join (8) Round 2: ch 1, hdc inc around, ss to join (16) Round 3: ch 1, [hdc inc, hdc in the next st] around, ss to join (24) Round 4: ch 1, [hdc inc, hdc in the next 2 sts] around, ss to join (32) Round 5: ch 1, [hdc inc, hdc in the next 3 sts] around, ss to join (40) Round 6: ch 1, [hdc inc, hdc in the next 4 sts] around, ss to join (48) Round 7: ch 1, [hdc inc, hdc in the next 5 sts] around, ss to join (56) Round 8: ch 1, [hdc inc, hdc in the next 13 sts] around, ss to join (60) Round 9: ch 1, [hdc inc, hdc in the next 9 sts] around, ss to join (66) Rounds 10-18: ch 1, hdc around, ss to join (66) Row 19: ch 1, hdc in the next 40 sts in the front loop only, turn (40) Rows 20-26: ch 1, hdc across, turn (40) To make the first earflap: Row 27: ch 1, hdc in the net 10 sts, turn (10) Row 28: ch 1, hdc dec, hdc in the next 6 sts, hdc dec, turn (8) Row 29: ch 1, hdc dec, hdc in the next 4 sts, hdc dec, turn (6) Row 30: ch 1, hdc dec, hdc in the next 2 sts, hdc dec, turn (4) Row 31: ch 1, hdc dec twice (2) Fasten off. Now attach the yarn at the opposite end of Row 26 and repeat Rows 27-31 to make the second earflap. Fasten off. Now it's time to add the fuzzy lining. Switch to the fuzzy accent color, held double. The first row is worked in the unworked back loops from Row 19 of the main color Row 1: Join the accent yarn, ch 1, hdc across in the remaining back loops, turn (40) Rows 2-8: ch 1, hdc across, turn (40) Row 9: ch 1, hdc in the next 10 sts, turn (10) Row 10: ch 1, hdc dec, hdc in the next 6 sts, hdc dec, turn (8) Row 11: ch 1, hdc dec, hdc in the next 4 sts, hdc dec, turn (6) Row 12: ch 1, hdc dec, hdc in the next 2 sts, hdc dec, turn (4) Row 13: ch 1, hdc dec twice (2) Fasten off. Now attach the yarn at the opposite end of Row 8 and repeat Rows 9-13 to make the second earflap. Fasten off. For the fuzzy front flap, join the accent color yarn, held double, to the unworked stitches from Round 18 of the main body of the hat. Rows 1-13: ch 1, hdc across, turn (26) OR, for the button version: Rows 1-11: ch 1, hdc across, turn (26) Row 12: ch 1, hdc, ch 1, skip the next st, hdc in the next 22 sts, ch 1, sk the next st, hdc in the last st, turn (24 hdc and 2 button holes) Row 13: ch 1, hdc, hdc in the ch 1 space, hdc in the next 22 sts, hdc in the ch .1 space, hdc in the last st (26) For the straps (make 2): Using the main color yarn (one strand only): Ch 4. Row 1: hdc in the 2nd ch from the hook and in the next 2 sts, turn (3) Row 2: ch 1, hdc across, turn (3) Repeat row 2 until the strap is about 2.5" long. Fasten off, leaving a long yarn tail. Finishing: Using the yarn tail, stitch the straps to the bottoms of the earflaps. Stitch the 1/2" button to the end of one of the straps so that it can be used to fasten them together. Flip up the front flap. Using the fuzzy accent yarn, stitch around the edges of the flap to join to the main body of the hat. Weave in ends. OR, for the button version: Flip up the front flap. Place the 1" buttons over the buttonholes to help you find the correct placement. Then stitch the buttons to the body of the hat; the buttons will hold the front flap in place. If you're interested in a printable PDF version of this pattern, or if you just want to help support my blog, you can find one available on Ravelry. I hope that you enjoy this extra cozy trapper hat! If you have questions or comments, you can reach me in the comments section below or on social media. Happy hooking!
***You're welcome to do whatever you'd like to with finished products made from this pattern but if you do sell them, I ask that you link back to my page. You may not copy this pattern, repost it anywhere (either altered or in its original form), or claim it as your own. You may not use any photos on this site for your own use. ***
9 Comments
1/30/2018 12:15:39 pm
Caron Cakes chunky yarn be used to make this hat. Would I need to use one or two strands.
Reply
Erin
1/30/2018 08:31:27 pm
Hi Debbie,
Reply
Luci
2/1/2018 07:44:27 am
Great hat pattern! Can’t wait to try it out!
Reply
Stephanie
2/18/2019 12:56:56 pm
Hi there,
Reply
Becky
6/24/2023 03:23:24 pm
What is meant by hdc in the net?
Reply
Erin
7/12/2023 12:53:52 pm
Whoops! You caught a typo. That should say "next." Thanks for finding that!
Reply
Ashley
9/17/2023 02:18:29 pm
Hi! I am doing my hat in a thinner yarn and using SC. Can you tell me the diameter of what my flat circle should be before I move to just crocheting without increases?
Reply
Erin
9/26/2023 01:04:49 pm
Hi, Ashley! It's hard to get an exact measurement without remaking the hat, but doing my best estimate measuring the finished hat, it looks like it's about 5.5" at the end of Round 6 and about 8" at the end of Round 10 for the small hat (I wasn't sure which measurement you were looking for). Hopefully that helps!
Reply
Catherine W
12/29/2023 06:39:20 pm
How big is your husband's head? Mine has a huge head too, just wondering if this will fit him?
Reply
Leave a Reply. |
Welcome!Thank you for stopping by to visit my own personal corner of the web! Feel free to take a look around and check out what I've been crafting, crocheting, or baking. Hopefully you'll find something to inspire your own creativity! Archives
March 2024
|



 RSS Feed