
|
I've been struggling to find the creative energy/motivation to crochet anything lately, but I still wanted to make some sort of wall hanging for my daughter's room. And if there's one craft material I have on hand, it's yarn. So I created a super simple design by braiding together some of my scrap yarn! This wall hanging is ridiculously easy and quick and can be made in any color combo you feel like using, and you can personalize it with as many (or as few) braids as you'd like to add. So if you don't feel up to crocheting or if you just want something unique, you can make your own braided wall hanging!  All you need is a wooden dowel and some yarn. I used one 1/2" by 12" wooden dowel (but other widths will work as well) and a bunch of different scrap yarns I had on hand. I love rainbows, so of course I had to go with a rainbow color theme for this wall hanging. To make it just a bit more interesting, I decided to mix and match different shades of each color and tried to incorporate different textures/weights of yarns. Basically, any yarn is fair game. (Not having to worry about gauge = the BEST.) 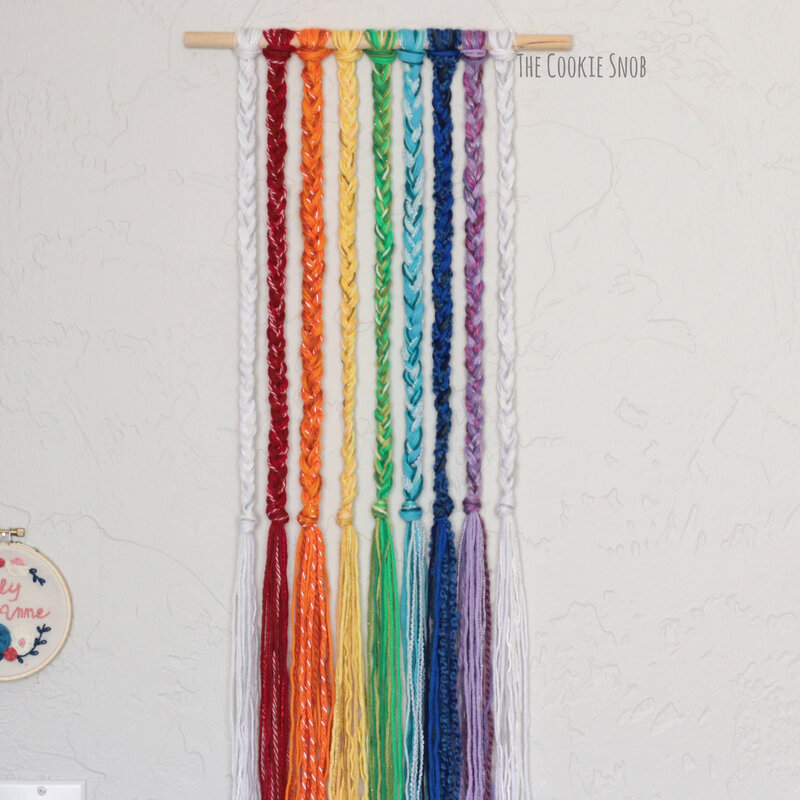 For each color, you'll need 9 separate strands of yarn. Here you can see the yarn I used for the light blue braid. I wanted an extra long wall hanging, so I cut each strand to be about 96" long. The simplest way I found for measuring each piece of yarn consistently is to lightly wrap the yarn around a 12" ruler 8 times. You'll trim the ends at the very end, so you don't need to be super panicky about making each piece exactly the same, but it helps for things be in the same general ballpark. 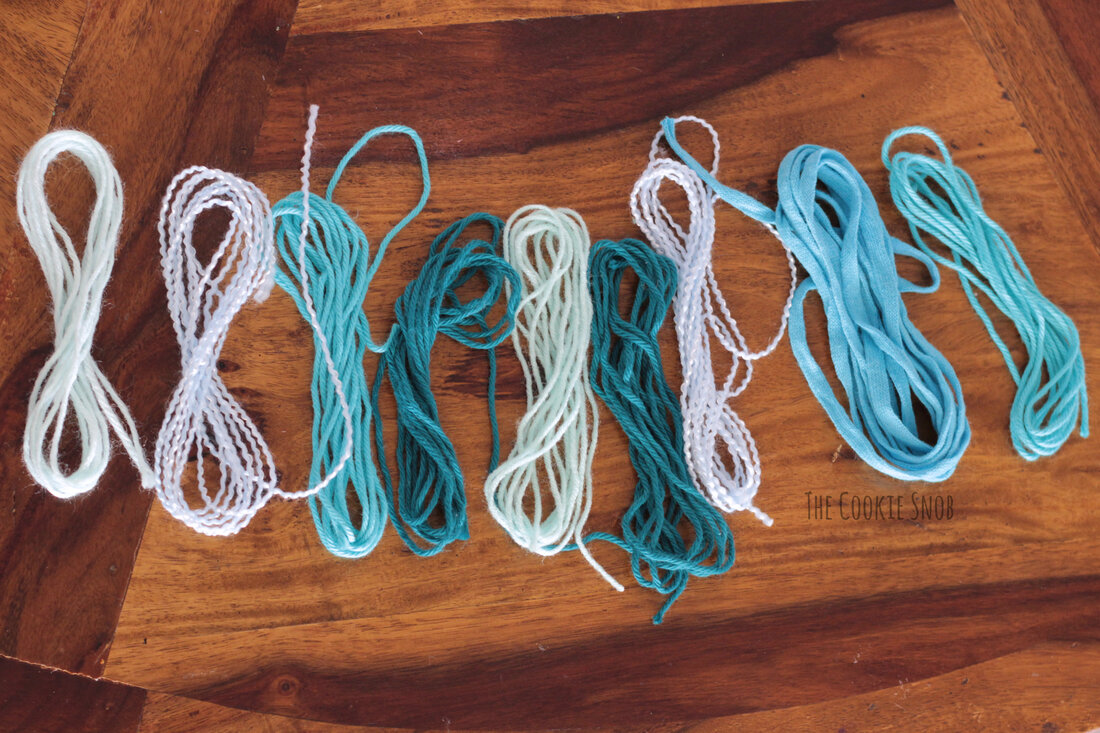 Holding all of the 9 strands of yarn together, fold the yarn in half. Grab the center and pull it over the wooden dowel far enough to see a loop form... 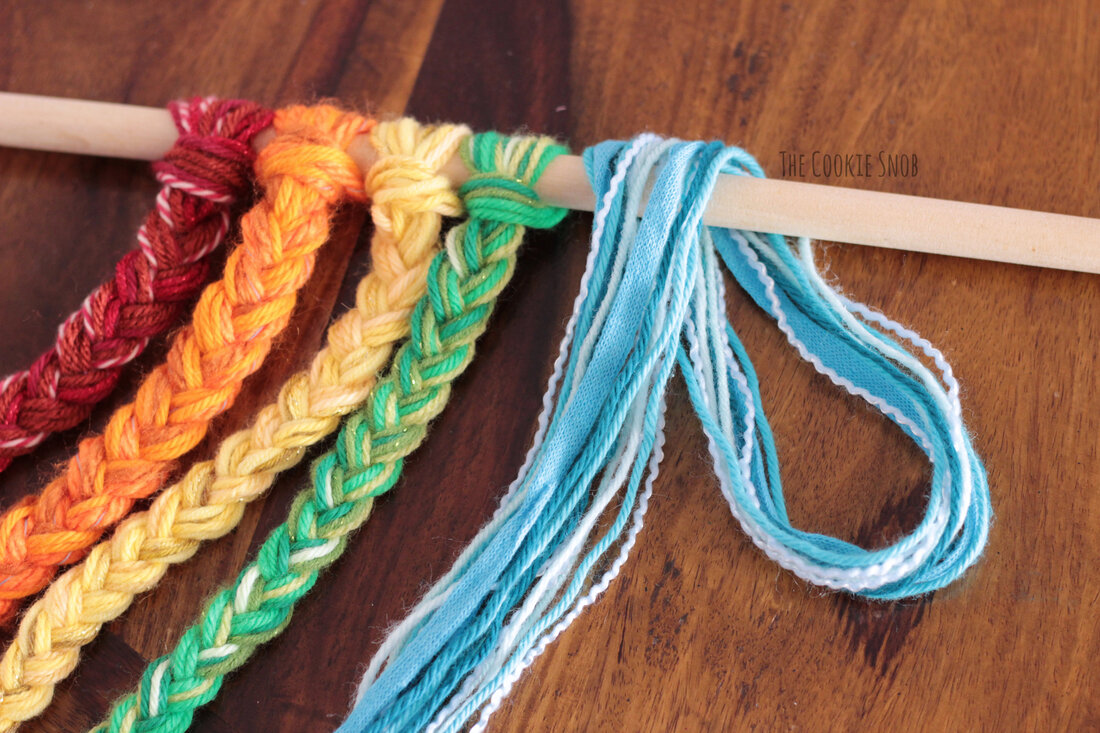 ...then pull the long ends of the yarn through the loop you just made and pull taut to form a knot around the dowel. 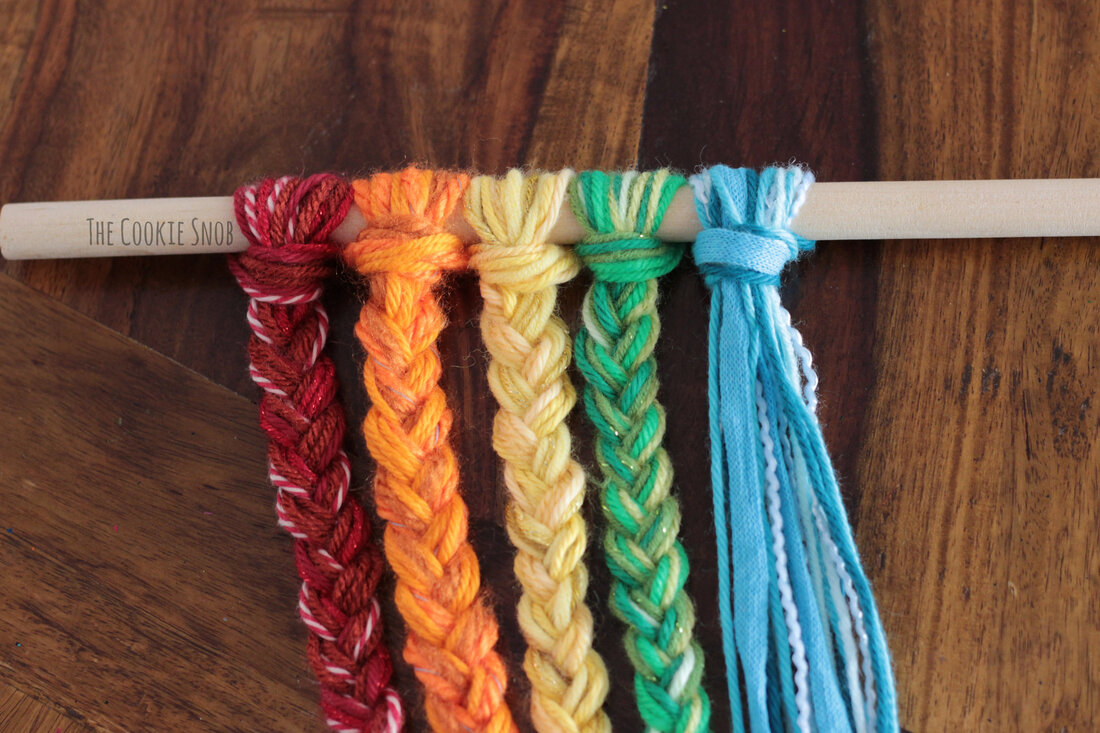 Now for the fun part! You should now have 18 strands to work with. Divide them into 3 groups of 6 strands each, then braid! Once it's the length you want, tie off the ends in a knot. Repeat for each color braid you want to add to your design. Then trim the fringe to your desired length. I made my braids about 14" long each with a 13" fringe. But you can make them any size you'd like. 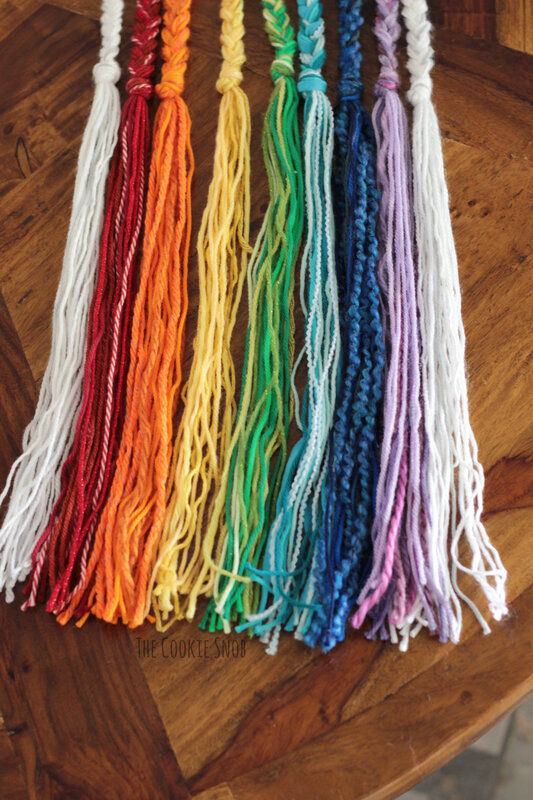 One tip: If you want to make your braids a little fuller looking, you can "pancake" them. (Seriously, that's what it's called! Just ask Google if you don't believe me.) Basically, just gently tug on the sides of the braid to flatten them a little. I was pretty conservative with mine, so it's not super noticeable, but you can decide how much you want to flatten yours.  Then it's time for the final step: adding a loop for hanging. I used a strand of cotton crochet thread, but you can use regular yarn or whatever you have on hand. Tie one end of your yarn onto each side of the dowel with a secure knot. Tuck the ends through the backs of the braids to hide them. And now you're done! 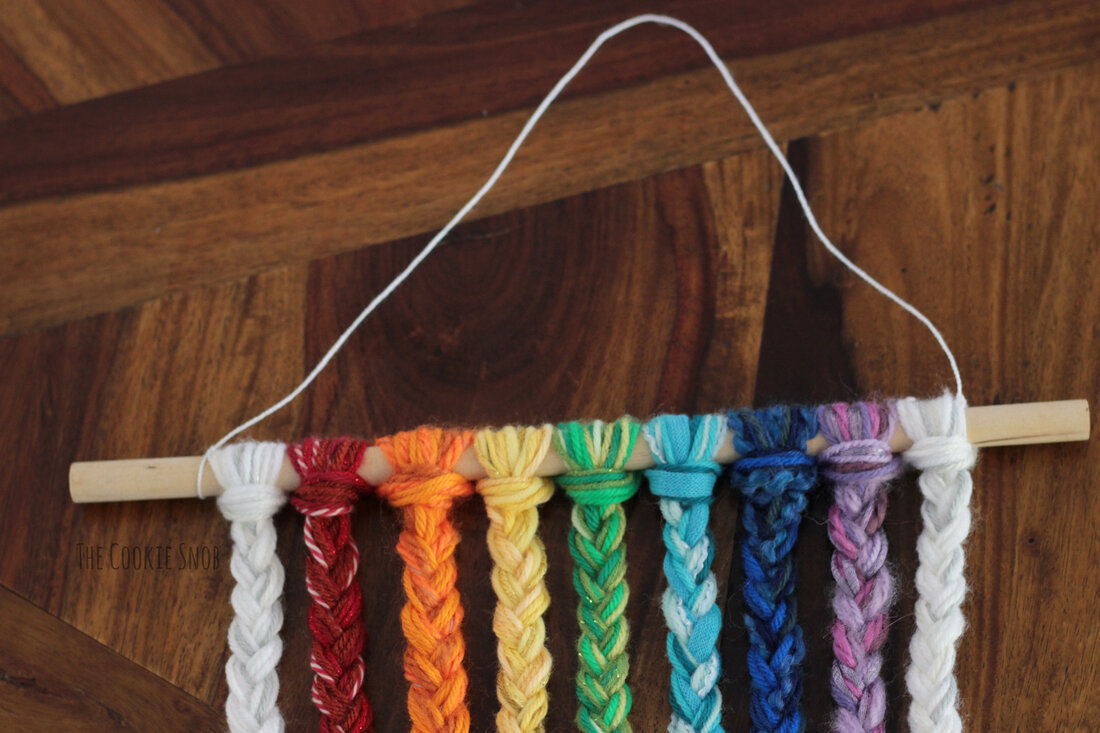 I hope that you enjoyed this simple tutorial! I had fun with this quick and easy project and hope that you do too! If you have any comments or questions about this tutorial, feel free to contact me in the comments section below, by email, or on social media. Happy crafting, friends! 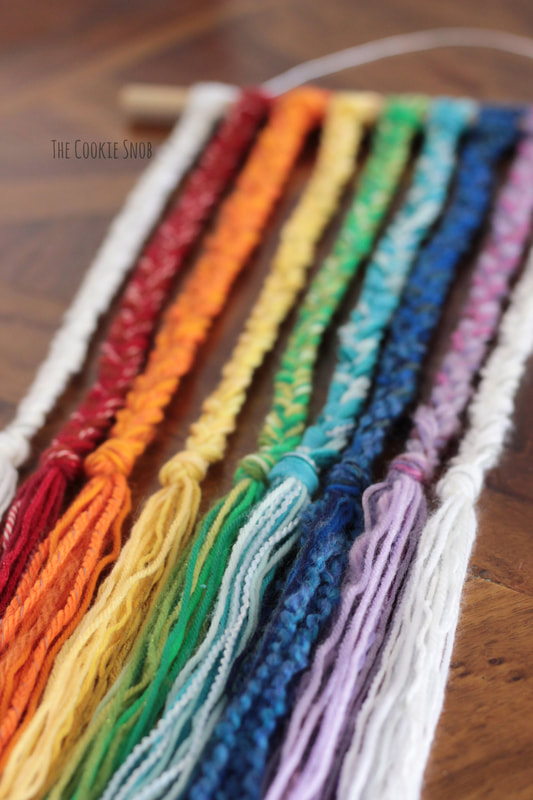 Want to make sure you don't miss any future blog posts? Join my mailing list! (Spam-free, I promise!) 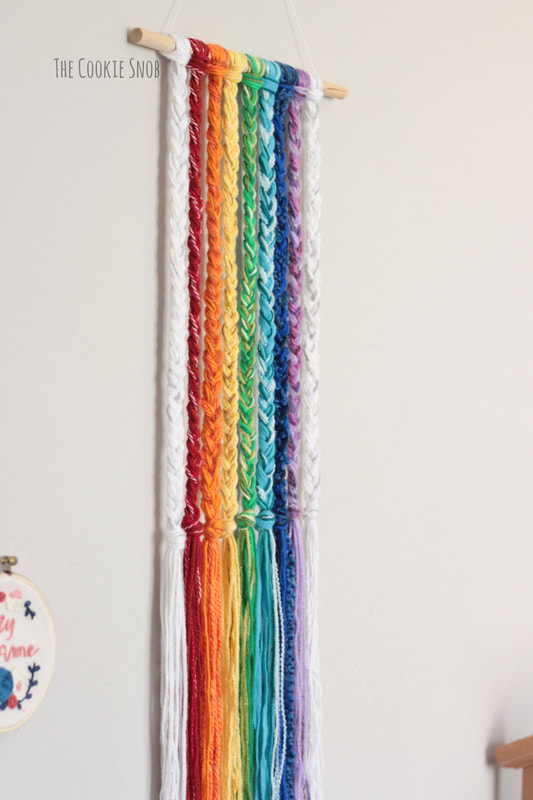 ***You're welcome to do whatever you'd like to with finished products made from this tutorial but if you do sell them, I ask that you link back to my page. You may not copy this tutorial, repost it anywhere (either altered or in its original form), or claim it as your own. You may not use any photos on this site for your own use. ***
0 Comments
Leave a Reply. |
Welcome!Thank you for stopping by to visit my own personal corner of the web! Feel free to take a look around and check out what I've been crafting, crocheting, or baking. Hopefully you'll find something to inspire your own creativity!   
Archives
March 2024
|
 RSS Feed