
|
Valentine's Day is right around the corner, and we all know what that means: candy! Which is awesome. . . except when it's not. Now, don't get me wrong, I'm not opposed to sweets (cookies are one of my very favorite things, after all), but sometimes it seems like any holiday celebrated at school turns into a crazy sugar fest. So why not put my yarn stash to good use? These crocheted candies are just as festive and cute as candy without adding to the sugar mountain. Further proof that yarn is the answer to all of life's quandaries. 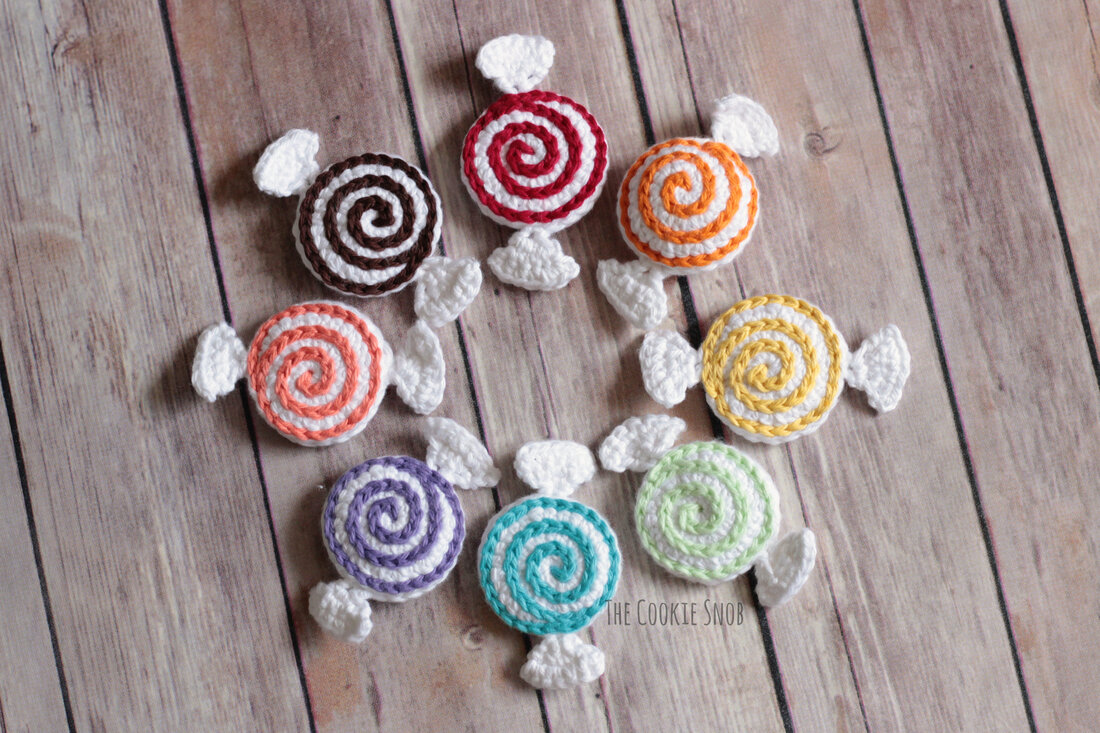 These little crocheted candies work up quickly and make great stash busters. And, since we all know that I'm always looking for crochet shortcuts, you won't have to do any sewing and the ends to weave in are minimal. I'm planning to turn mine into keychains, so I opted to leave most of mine flat, but you can also stuff them for a 3D effect; they're adorable either way!. These also make great play candies any time of the year (I'm sure my kids aren't the only ones who insist on throwing birthday parties for their toys). Or, with a simple tweak, it's a perfect candy appliqué. Basically, if you need something that looks like candy, I've got you covered. 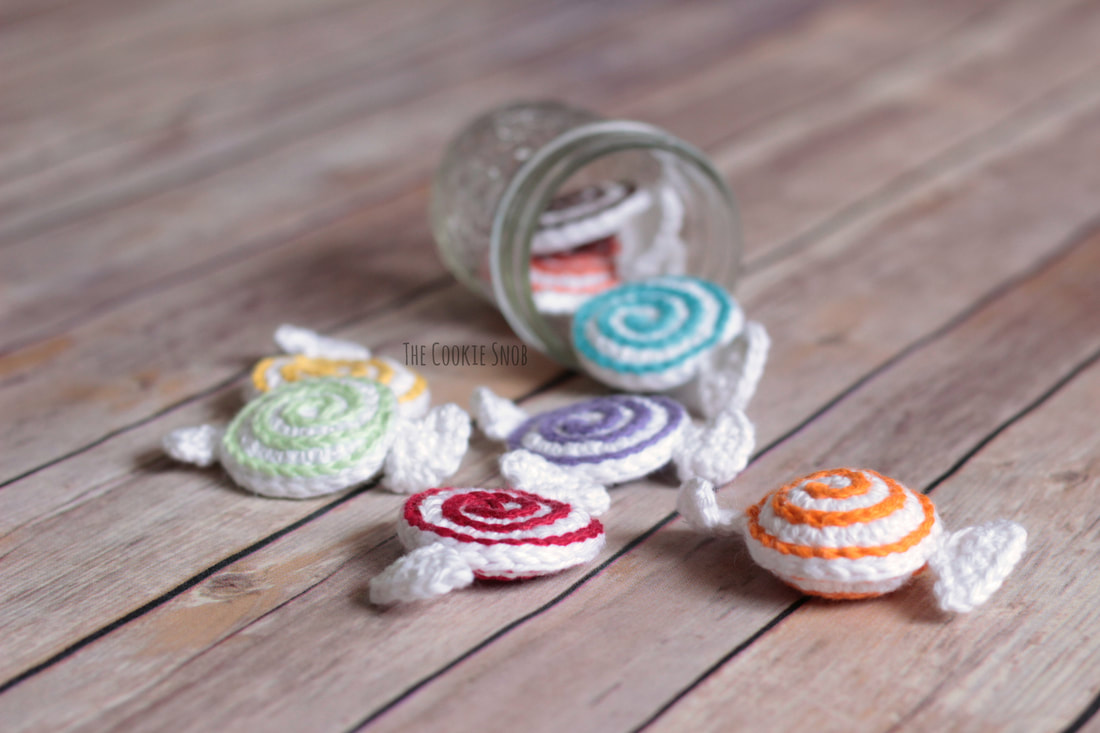 Gauge isn't super crucial for this pattern, but you should be aware of potential sizing issues. I crochet tightly and the centers of mine are 1-3/4" across. So if you're a looser crocheter, yours will be larger unless you size down a hook or two. Just something to be aware of if you're making these for a specific purpose. Also, you should be aware that this pattern uses surface crochet. It's one of my favorite crochet tricks, but if you've never used it before, you can find a tutorial from one of my favorite crochet designers here. Now let's check out the pattern! 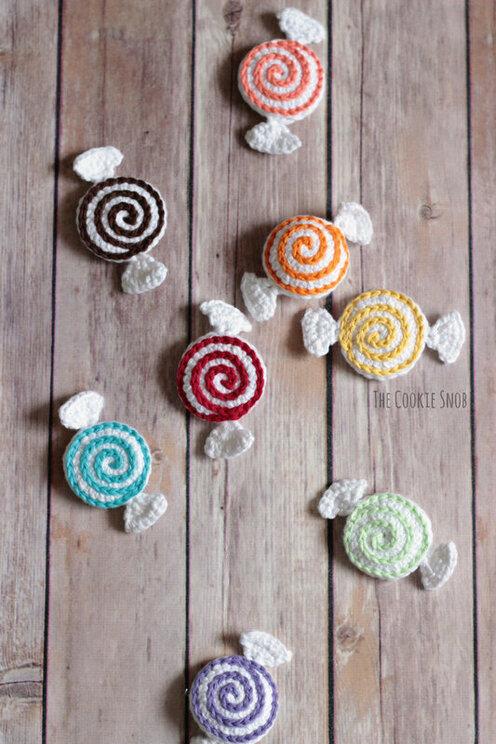 If you'd like an ad-free printable PDF version of this pattern, you can find one on Ravelry. Materials:
Stitch Glossary: st(s) = stitch(es) ch = chain ss = slip stitch sc = single crochet inc = sc increase (work 2 sc sts into the same st) hdc = half double crochet hdc inc = hdc increase (work 2 hdc sts into the same st) Note: The center of this pattern is worked in a continuous round, meaning the stitches are worked in a spiral without turning or joining. I recommend using a stitch marker to help you keep your place. Starting with the white yarn: Round 1: Make a magic circle, ch 2 and work 8 hdc into the circle, pull taut to close (8) Round 2: hdc inc around (16) Round 3: [hdc inc, hdc in the next st] 8 times (24) Sc in the next st, then ss in the next st to even off the circle. Don't fasten off quite yet. 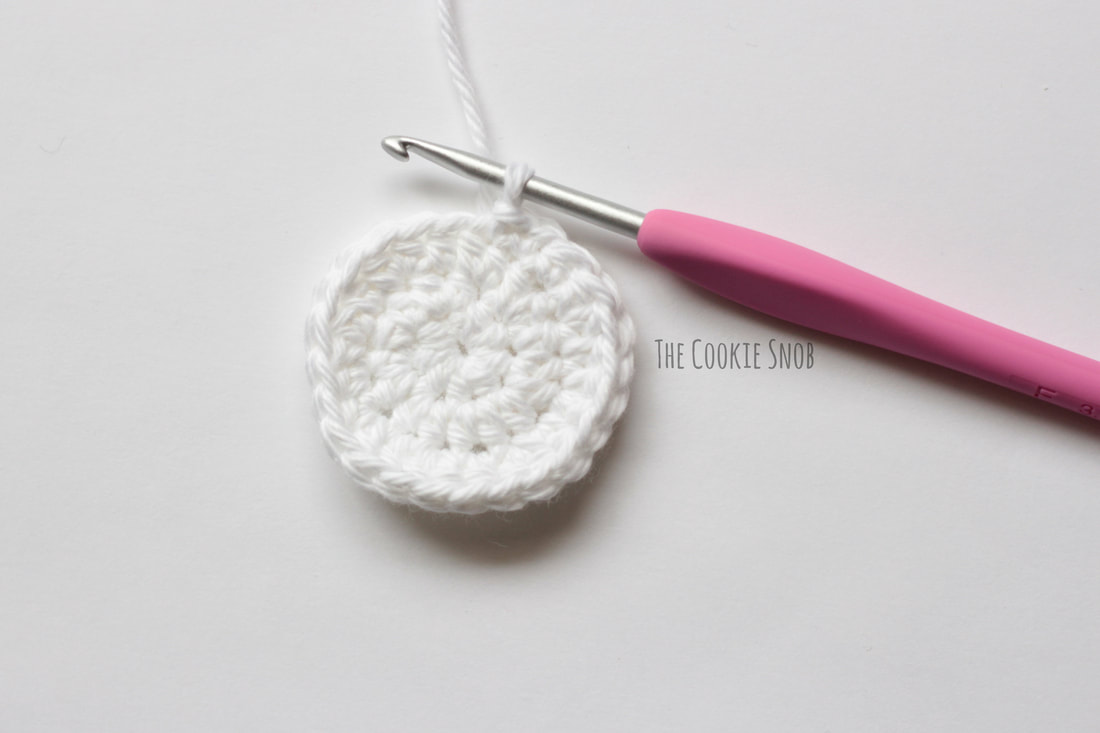 To make the "wrapper" on one end of the candy: Row 1: ch 1, sc in the same st, turn (1) Row 2: ch 1, sc 3 times in the next st, turn (3) Row 3: ch 1, inc, sc, inc, turn (5) Row 4: ch 1, inc, sc in the next 3 sts, inc (7) Fasten off. 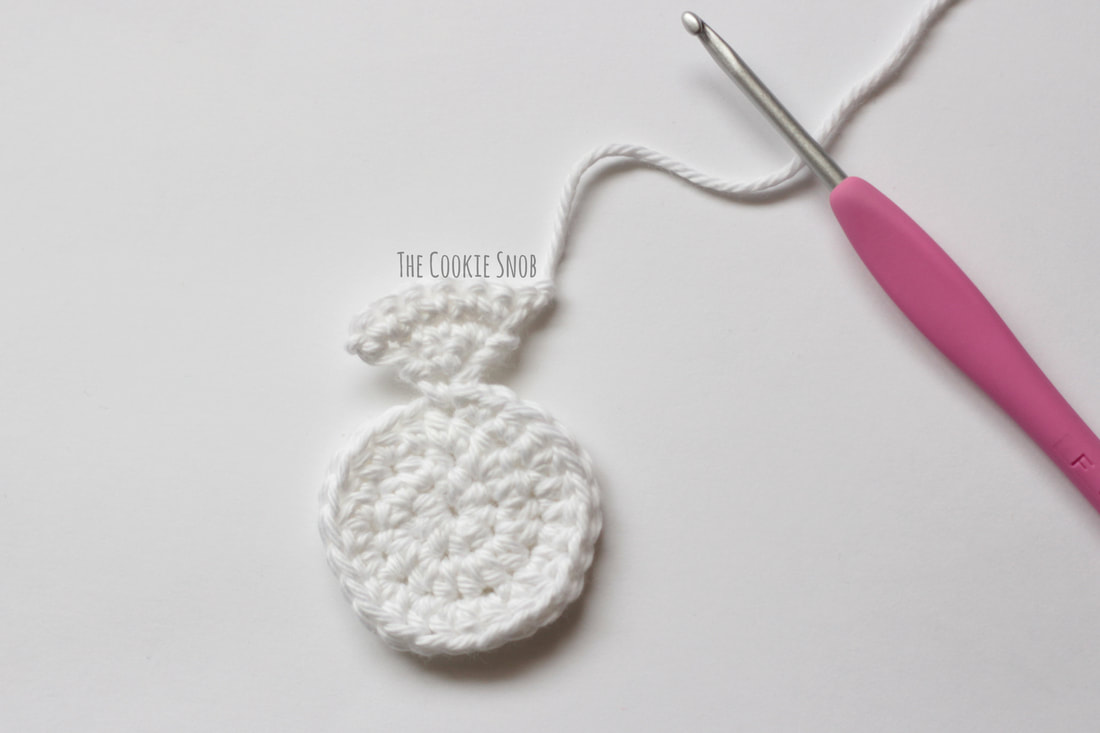 To make the spiral, we're going to switch to the accent color yarn. Starting in the center and following along the path in between Rounds 1-3 of the candy center, surface crochet a spiral until you reach the white edge. Fasten off. 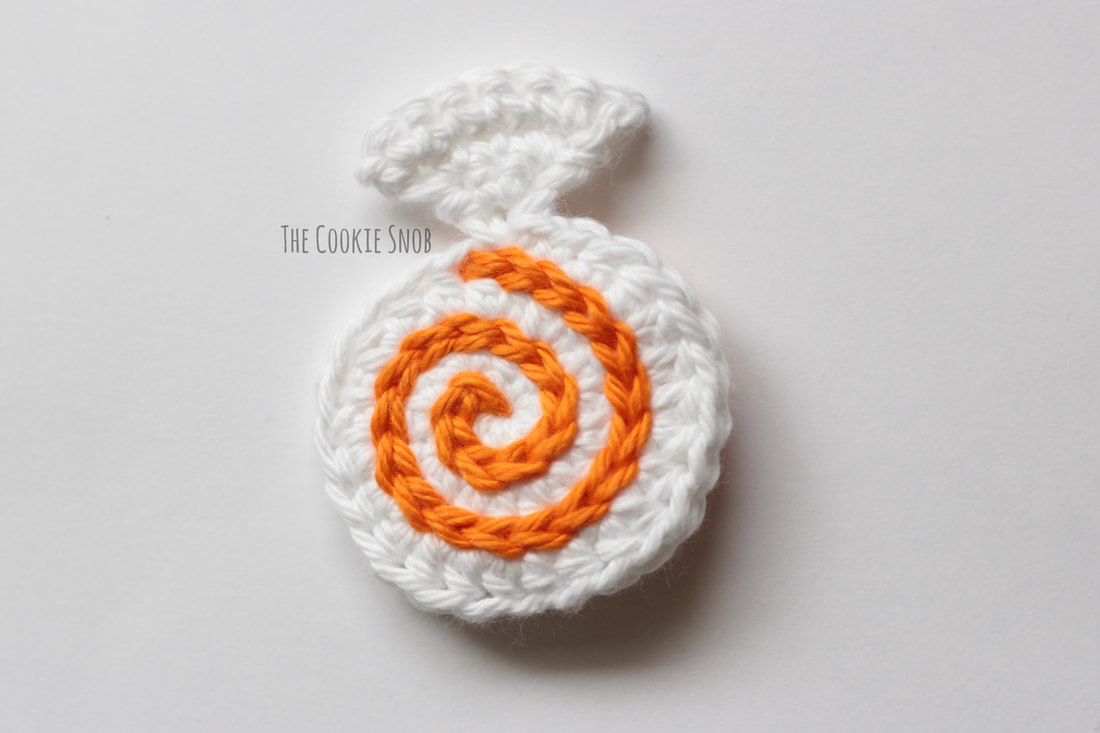 Repeat the process of making the candy center, the wrapper on one end, and the spiral, but this time don't fasten off your accent colored yarn. We're going to keep using it to join the two candy halves together. With the right side of the spiral facing out on both halves, hold the halves together so that the wrappers are on opposite sides of each other. 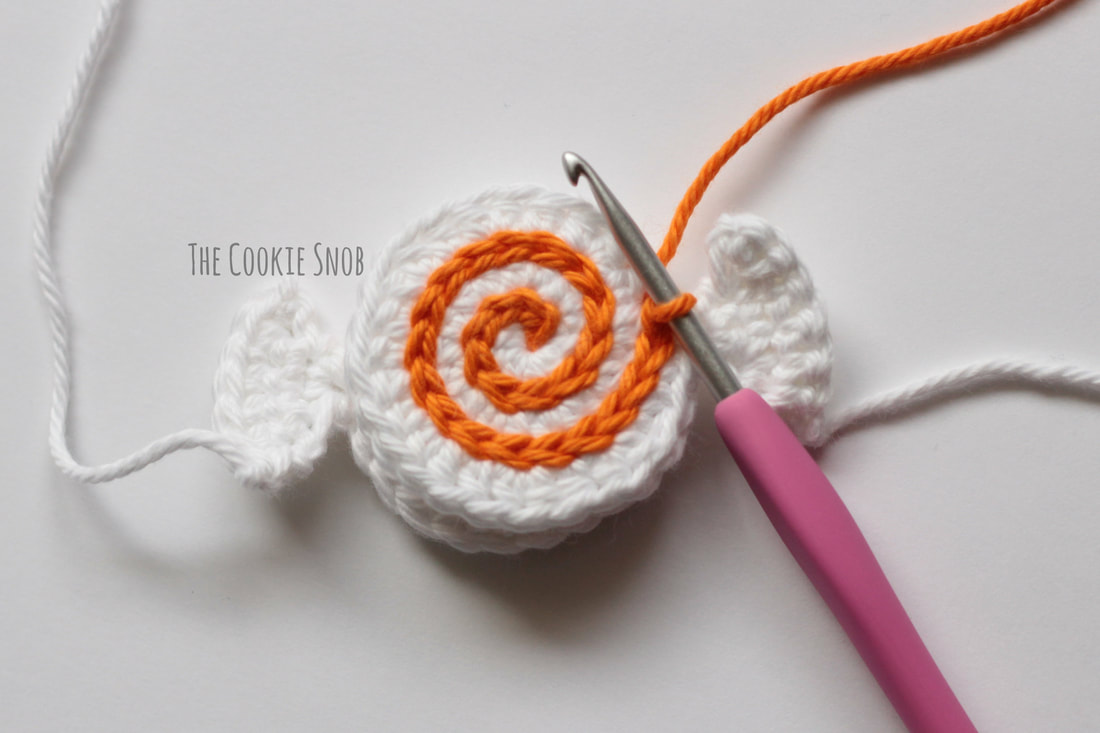 Working through both halves held together, continue to surface crochet all the way around the outer edge of the candy. Tuck in your extra yarn ends as you go so you won't have to worry about weaving them in later. And if you want to stuff your candy for the 3D effect, feel free to lightly stuff when you're about 2/3 of the way through closing it off. Either way, once you're done surface crocheting all the way around with the accent color yarn, fasten off and weave in any remaining ends.  For anyone who wants a visual reference, once you're done the spiral should look like the candies below and the candy should be completely sealed off, with both halves attached to each other. If you left yours flat, it'll look like the blue candy below and if you stuffed it, it'll look more like the orange candy below. 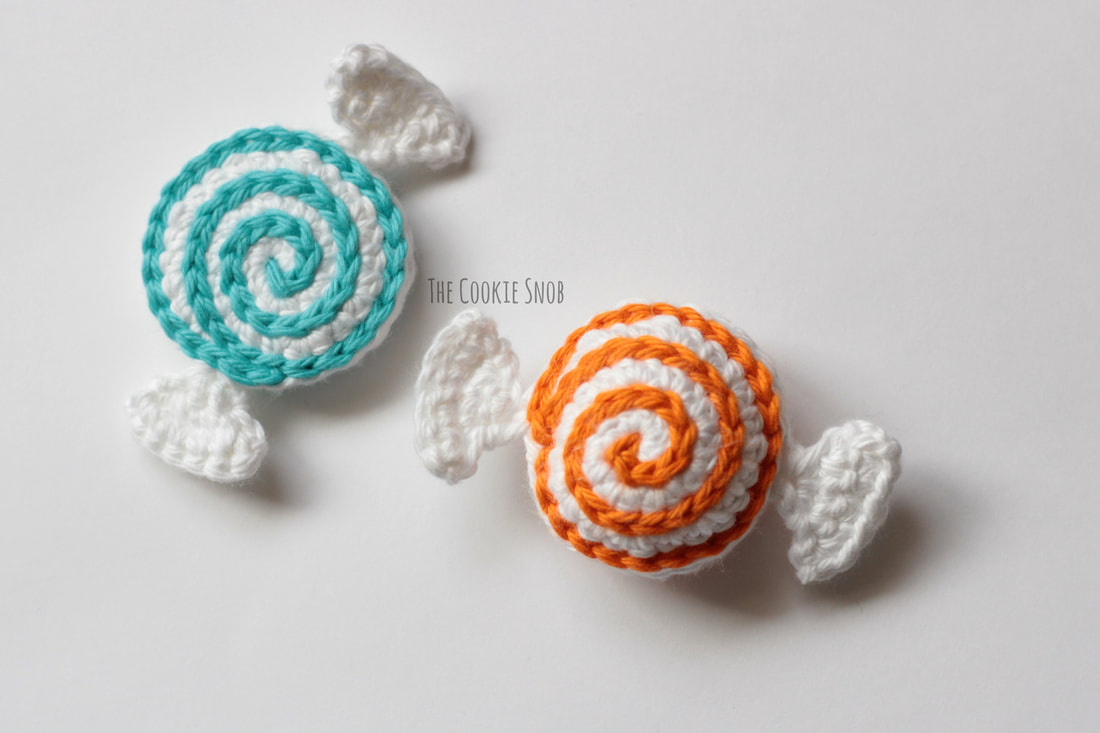 And there you have it! Quick and simple, but oh so sweet. (Ha! Pun!) And for anyone who wants the appliqué variation, you'll follow the instructions for making one half of the candy as written above. Then instead of making a second half of the candy, you can just join your white yarn to the spot opposite the first wrapper and then follow the wrapper instructions to make a second one. You can decide whether or not you want your spiral to go all the way around the outside edge when you're surface crocheting, depending on the look you want. 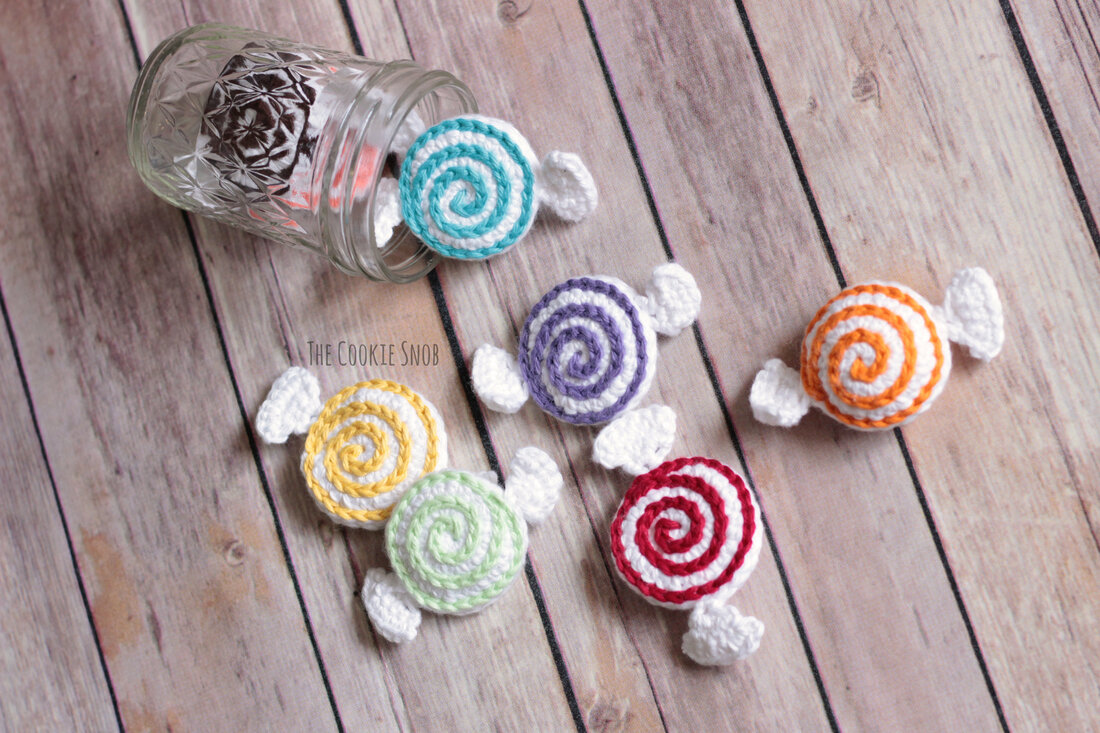 I hope you enjoy this simple pattern! If you have any questions or comments about it, you can reach me in the comments section below or on social media. And, as always, if you make something from this pattern, I would LOVE to see it! Seeing your creations really does make my day. Happy hooking! Want to make sure you don't miss any future blog posts? Join my mailing list: 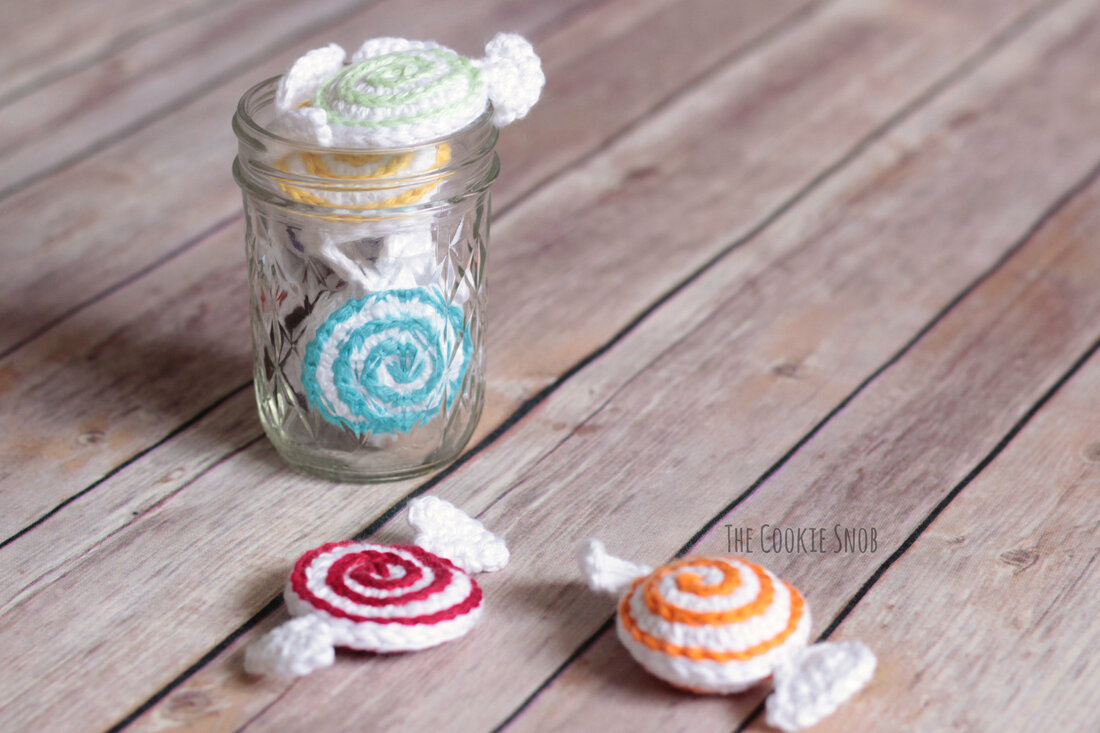 ***You're welcome to do whatever you'd like to with finished products made from this pattern but if you do sell them, I ask that you link back to my page. You may not copy this pattern, repost it anywhere (either altered or in its original form), or claim it as your own. You may not use any photos on this site for your own use. ***
8 Comments
Lottie Lewis
9/12/2020 01:25:03 am
Hi,
Carmela Isabella
12/8/2020 11:33:39 pm
I think she meant to do slip stitches on the surface of the candy.
Jenny
3/30/2021 11:58:24 pm
Thank you for this pattern, I added a little bit of weight inside with metal washers just a bit smaller than the size of the candy and planning to give them as a bag of lollies to my grandchild's school teacher. They can be used as paper weights on her desk in the classroom. Always struggling for something unique to give the teachers at Christmas time.
Marilyn Langley
6/18/2021 07:17:54 am
Hi, what a fabulous pattern to work from. I just loved the satisfaction they gave me when I’d put them together! I’m making them to go towards a teddy bears picnic for our village yarn bomb and they’ll look great in a little bowl x
Karen
11/9/2021 07:51:49 am
Beautiful crochet and just what I need for our Christmas Tree Festival. Thanks!! 🎄
Munira
1/16/2022 10:26:12 pm
I want video tutarial for easy crochet can u send me plz
Hanna
11/25/2022 05:07:04 am
I come to this pattern every year for Christmas. Every year using different color. It's so charming and elegant. Thank you! Leave a Reply. |
Welcome!Thank you for stopping by to visit my own personal corner of the web! Feel free to take a look around and check out what I've been crafting, crocheting, or baking. Hopefully you'll find something to inspire your own creativity!   
Archives
March 2024
|
 RSS Feed