
|
It's been a while since I've picked up my crochet hooks (morning sickness has totally kicked my butt), but I'm back and I've got a free pattern to share with you all! A special thank you to everyone who participated in the contest on my Facebook page to name this little bunny. It was so hard to pick just one! 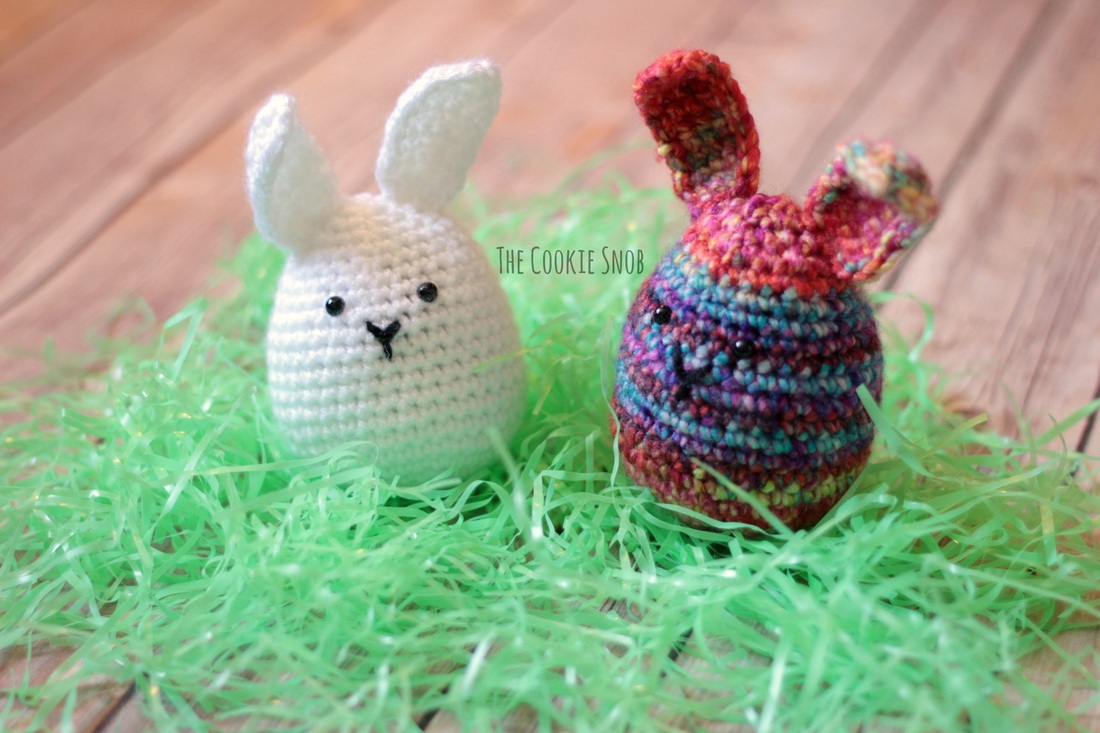 The Eggster Bunny works up quickly and makes the perfect addition to a little one's Easter basket. It's also a great stash buster, for those of you looking for ideas for the #stashbusting2016 challenge (see, I didn't forget about it!), since it uses less than a skein of yarn. You can use any color or colors you love to get the look you want. I made mine with worsted weight yarn leftovers, but you can use any weight as long as you adjust your hook size accordingly. 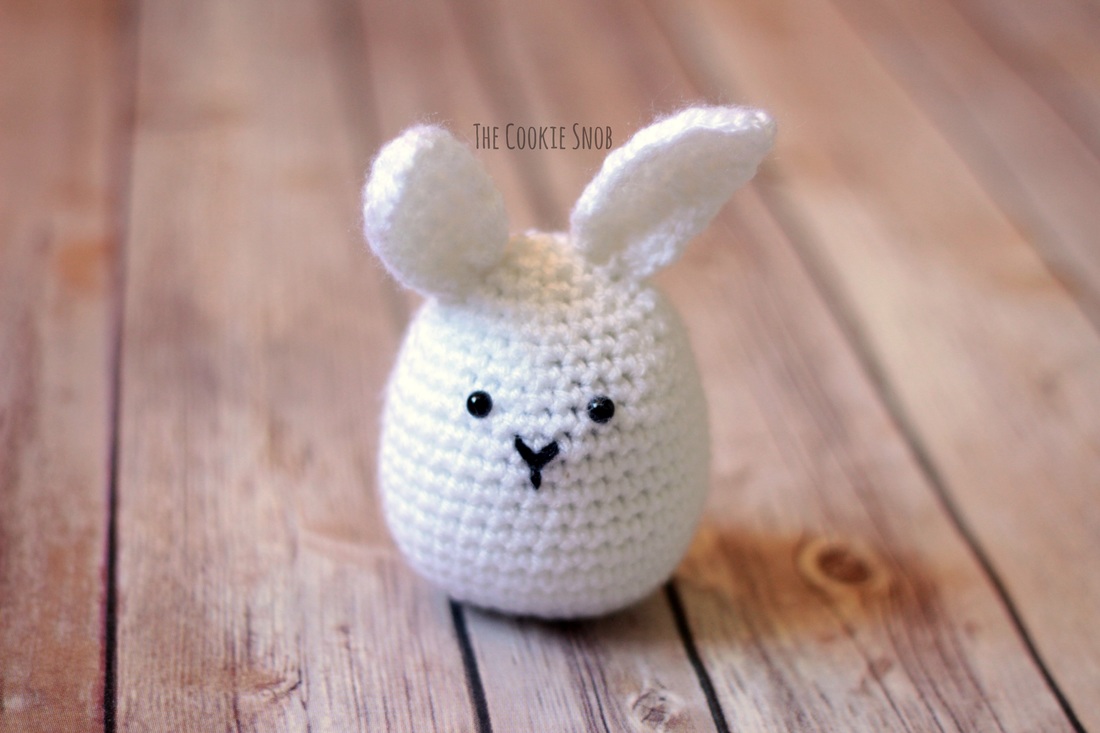 And if plain stuffing isn't exciting enough for you, I made one quick modification to my "tie-dye" bunny to turn it into a rattle of sorts. Just take a small plastic easter egg, fill it part of the way with dry popcorn kernels (or something similar) and securely tape it shut. Add it to the stuffing and, voilà! A cute little noise maker. 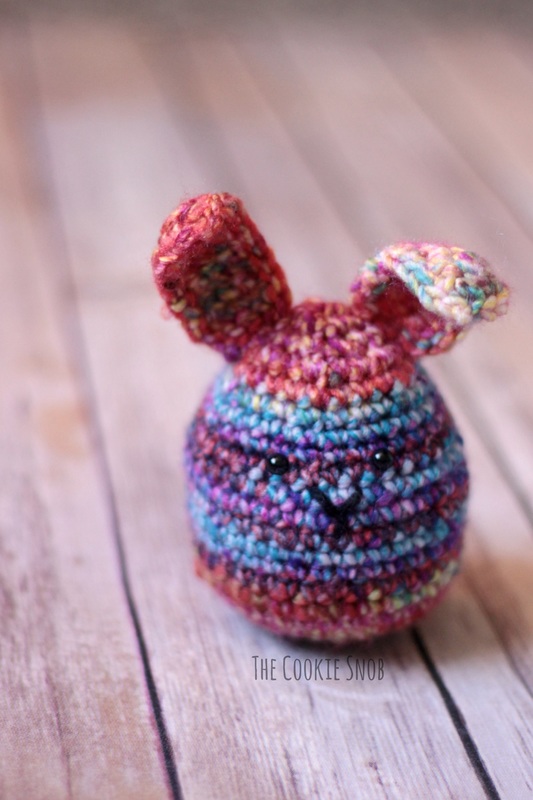 Materials:
Stitch Glossary: st(s) = stitch(es) ch = chain ss = slip stitch sc = single crochet inc = work 2 sc in the same st dec = sc decrease (I prefer to use the invisible decrease stitch) Bunny Body: Note: This pattern is worked in the round (meaning the stitches are worked in a continuous spiral). I recommend using a stitch marker and moving it after every round to help you keep track of which round you're working on. Round 1: Make a magic circle and work 6 sc into the magic circle (6) Round 2: inc around (12) Round 3: [inc, sc] around (18) Round 4: [inc, sc in the next 2 sts] around (24) Round 5: [inc, sc in the next 3 sts] around (30) Round 6: [inc, sc in the next 4 sts] around (36) Rounds 7-15: sc around (36) Round 16: [dec, sc in the next 4 sts] around (30) Round 17: sc around (30) At this point, I like to add the face and then begin stuffing. I placed the safety eyes between round 15 and 16, with approximately 4 stitches between them. I stitched the nose using a small bit of black yarn and the tapestry needle across rounds 13 and 14, in between the eyes. If you're going to add the "rattle" feature, I recommend adding a small amount of stuffing to the bottom, placing the sealed egg, and then adding additional stuffing around it. 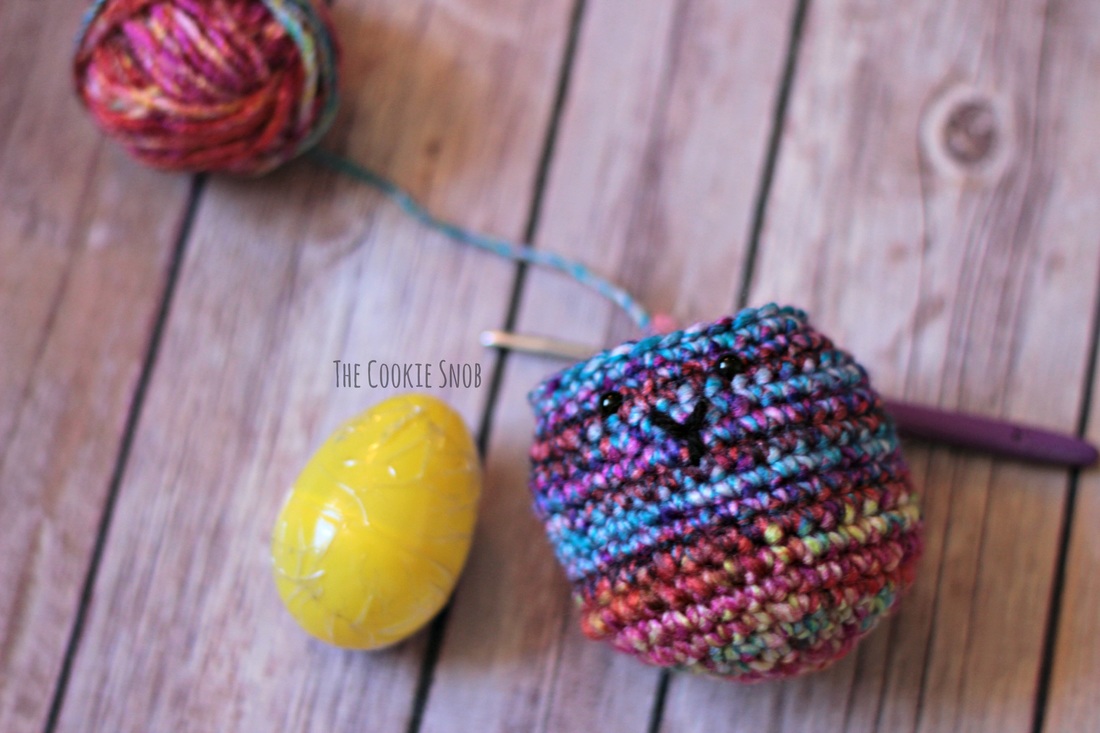 Round 18: [dec, sc in the next 3 sts] around (24) Round 19: sc around (24) Round 20: [dec, sc in the next 2 sts] around (18) Round 21: [dec, sc] around (12) Round 22: dec around (6) Fasten off, leaving long tail. Weave the tail through the remaining stitches and pull taut to close. Weave in ends. (If you're unfamiliar with this finishing technique, Planet June has an excellent tutorial). Bunny Ears (Make 2): Ch. 5 Row 1: sc in the 2nd chain from the hook and in each remain ch across, turn (4) Rows 2-9: ch 1, sc across, turn (4) Row 10: ch 1, dec twice, turn (2) Row 11: ch 1, dec (1) At this point you can either fasten off, or you can ss around the entire edge of the ear first. This will give a cleaner edge and help shape the ears by creating a slight curve. Assembly: Using the yarn ends from the ears, attach ears to the top of the body. Weave in ends. If you'd like to add a tail, cut four or more 2-3 inch strands of yarn. Attach the yarn by folding the yarn pieces in half and pulling the centers of each strand through the stitch where you'll be attaching the tail. Pull the yarn part of the way through the stitch and then pull the ends of the yarn through the loop you just made, pulling taut to secure. Trim the tail yarn to desired length and separate strands of the yarn to make the tail fluffier.  I hope you enjoy this cute little pattern! If you make one of your own, I would love to hear about it. And it would make my day to see a picture. You can reach me in the comments section below or on social media. Happy hooking!
***You're welcome to do whatever you'd like to with finished products made from this pattern but if you do sell them, I ask that you link back to my page. You may not copy this pattern, repost it anywhere (either altered or in its original form), or claim it as your own. You may not use any photos on this site for your own use. ***
11 Comments
MARY
3/3/2016 08:38:24 pm
thanks a very cute little bunny my grand-kids will love them!
Theresa
3/3/2016 09:17:39 pm
The 'eggster' bunny-cute name for a cute bunny. Thanks for sharing the pattern.
Nancy
3/12/2016 11:41:49 am
I am doing your Easter Bunny and rnd 16 said to dec, sc in next 4 sts around and I will have 30. The previous round was 36 but I get 32 instead of 30 could you please tell me what I'm doing wrong. Thank you so much
Erin
3/13/2016 07:17:26 pm
It's hard to know exactly what the problem is without seeing it in person, but I have a couple of ideas that may be helpful.
Pamela Hermanson
3/22/2017 02:30:42 pm
Cute and simple! I love it!
Wende Wise
3/22/2017 09:31:00 pm
Would you mind sharing what yarn you used in the colorful bunny, it's so pretty! Thank you in advance! :)
Erin
3/23/2017 01:52:16 pm
Isn't it pretty? I only had a tiny bit of it, but I just had to use it for something! It's Yarn Bee Aurora Borealis in Fruit Punch. I'm pretty sure Hobby Lobby still sells it if you want to find a skein of your own :)
Wende Wise
3/23/2017 01:53:44 pm
Thank you so much! :)
Cindy
3/27/2017 11:04:01 am
Thank you for sharing this pattern ! It is adorable! 3/28/2017 03:19:44 pm
Thank you for the pattern. I will be making them for my school.
Mayte
4/3/2017 05:36:46 pm
Thank you for sharing. Lovely!! Leave a Reply. |
Welcome!Thank you for stopping by to visit my own personal corner of the web! Feel free to take a look around and check out what I've been crafting, crocheting, or baking. Hopefully you'll find something to inspire your own creativity!   
Archives
March 2024
|
 RSS Feed