
|
Lately I have been loving the star stitch. Also known as the marguerite stitch, the star stitch consists of rows of tiny little spiked stars. Although it's most often seen in certain types of patterns because it generally makes a fairly stiff stitch, with a bit of creativity you can adapt it for lots of different designs. It has the loveliest texture, and I've been having fun playing around with it. I designed a couple of new crochet patterns featuring the star stitch that I'm excited to share with you all, but decided that it was worth posting a spotlight on just the stitch itself first. The star stitch is pretty simple to learn, but it does require a bit of precision because stitch placement is key to getting the lovely stars; this spotlight includes a step by step photo tutorial to help you along. 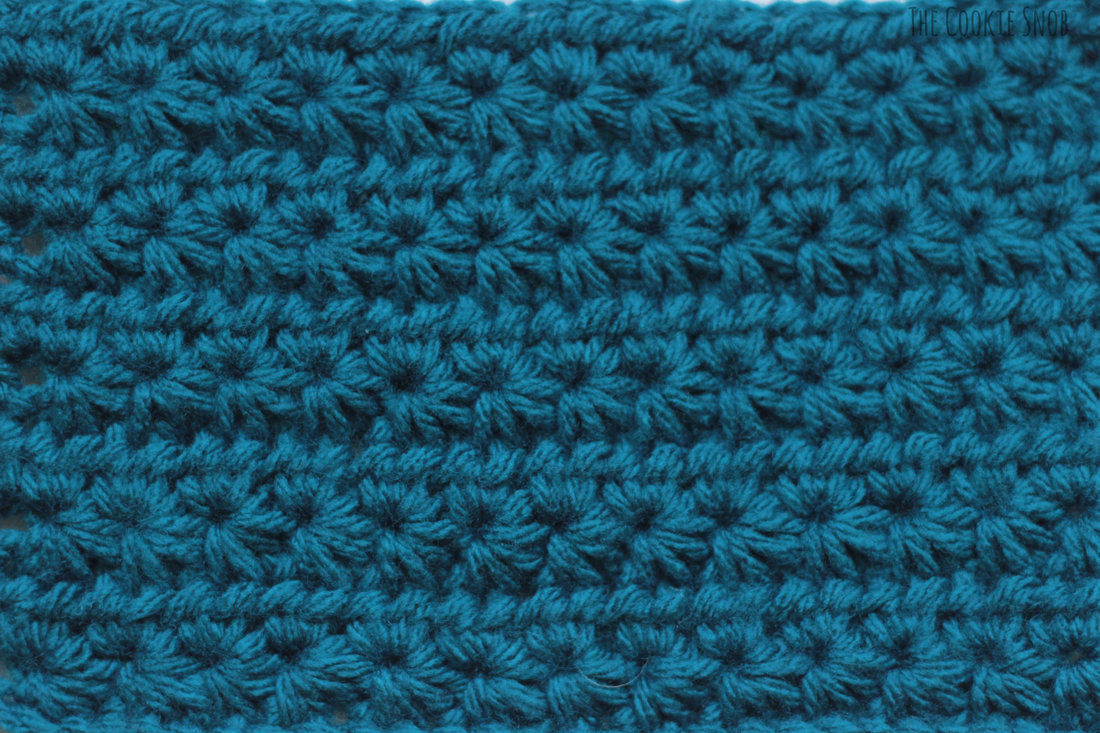 Before we get into the nitty gritty details of how to make the star stitch, I wanted to share some examples of things you can make with it to get those creative juices flowing. Several wonderful crocheters were awesome enough to share pictures of their finished star stitch projects with you all to give you a small glimpse into this stitch's potential. So take a look through this slideshow and be sure to send these awesome crocheters some love as well (if you click the image it'll take you to their personal page). Aren't those awesome? I just love seeing the versatility of star stitch in the hands of a talented crocheter. Thanks again to Julie, Rachel, Kim, Jessie, Deborah, Betty, and Sharon! Now on to the photo tutorial! If you'd like to follow along, I'm using worsted weight yarn and a size H (5.0mm) crochet hook. Begin by chaining an odd number of stitches. I chained 31, but any odd number will work.  Row 1: Insert your hook into the 2nd chain (ch) from the hook and then pull up a loop. Then insert your hook into the next st and pull up a loop. Repeat 3 more times until you have 6 loops on your hook. 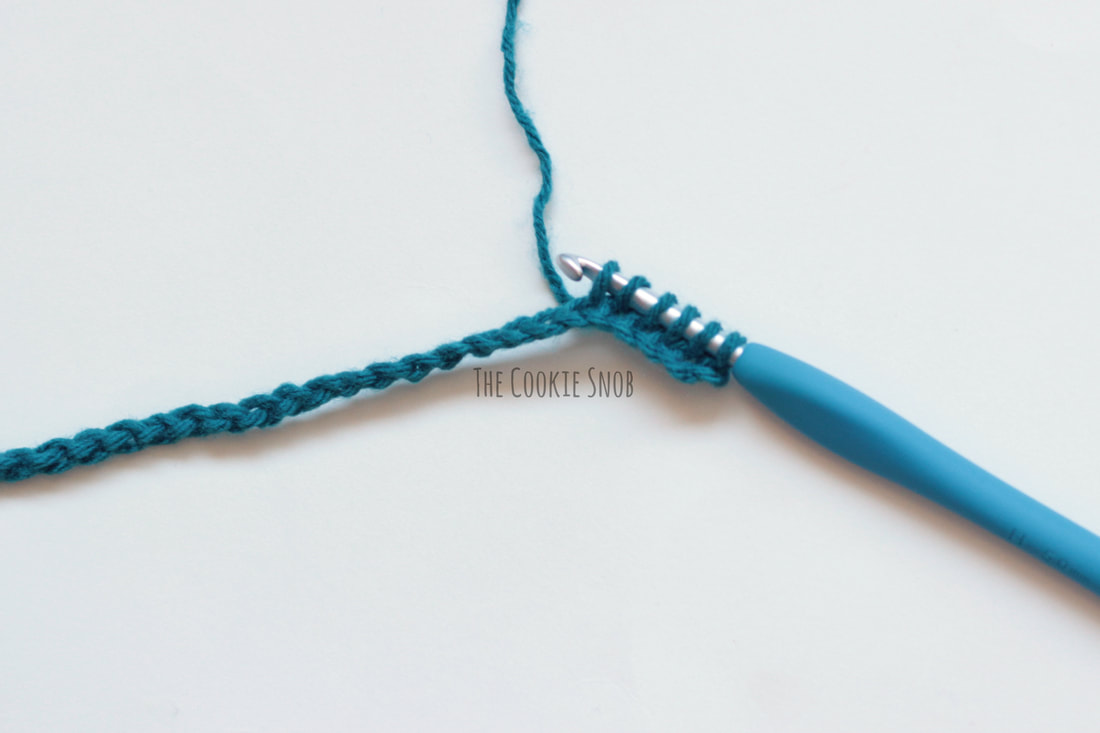 Yarn over and pull through all 6 loops.  Ch 1 to finish off your first star. Note that this creates a small gap in the middle, aka the eye of the star (indicated by the arrow). The next star will be built off of the first star. This is where stitch placement really matters, so be sure to pay close attention to where you're inserting your hook. Insert your hook into the eye of the star you just created (again, indicated by the arrow), and pull up a loop. 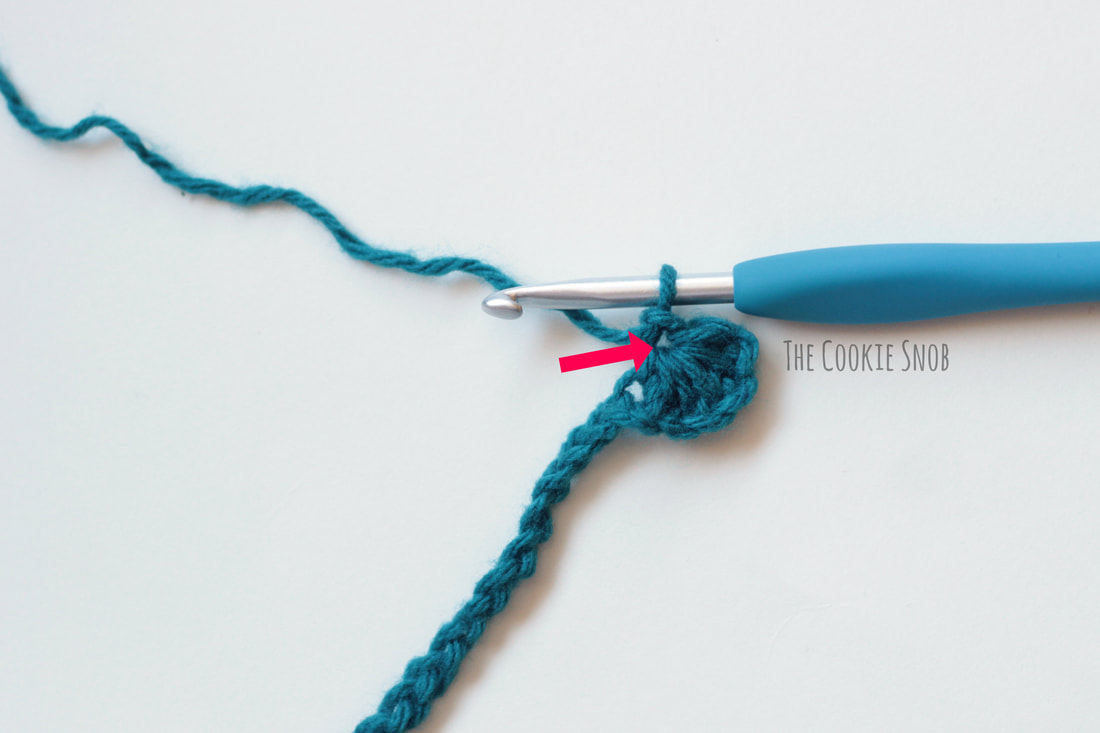 Now insert your hook in between the last two "legs" of the star (highlighted in red) and pull up a loop. 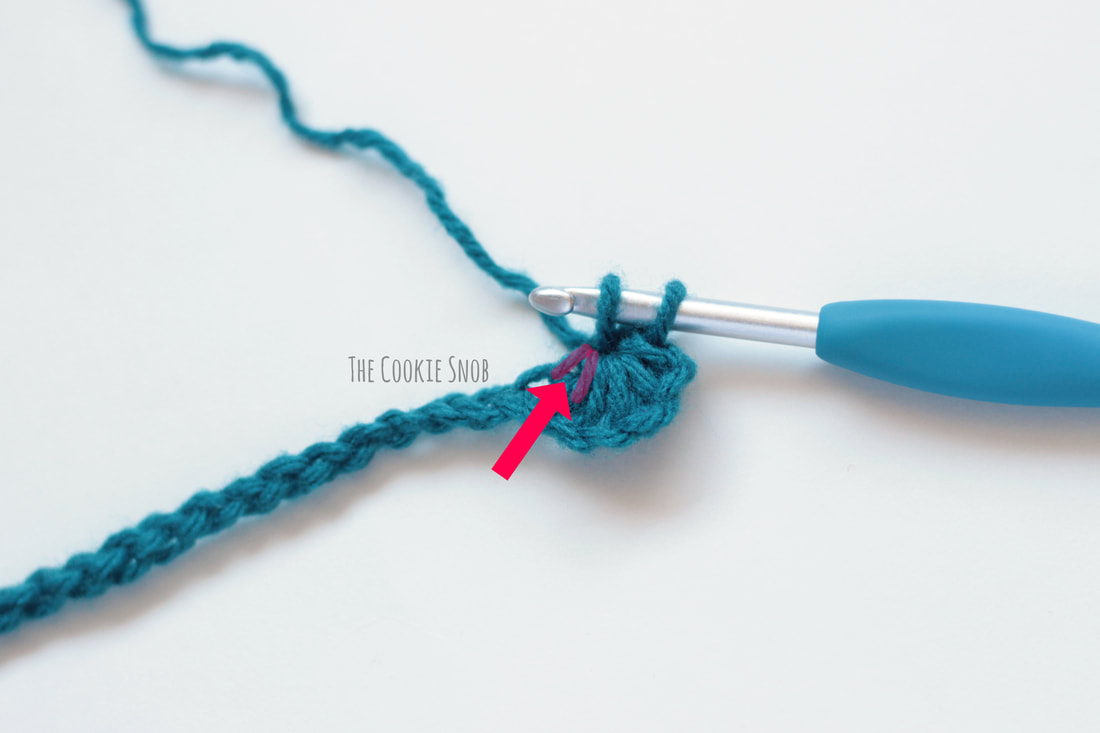 Then insert your hook into same stitch where the last loops of previous star were worked (in the gap indicated by the red arrow) and pull up a hook. 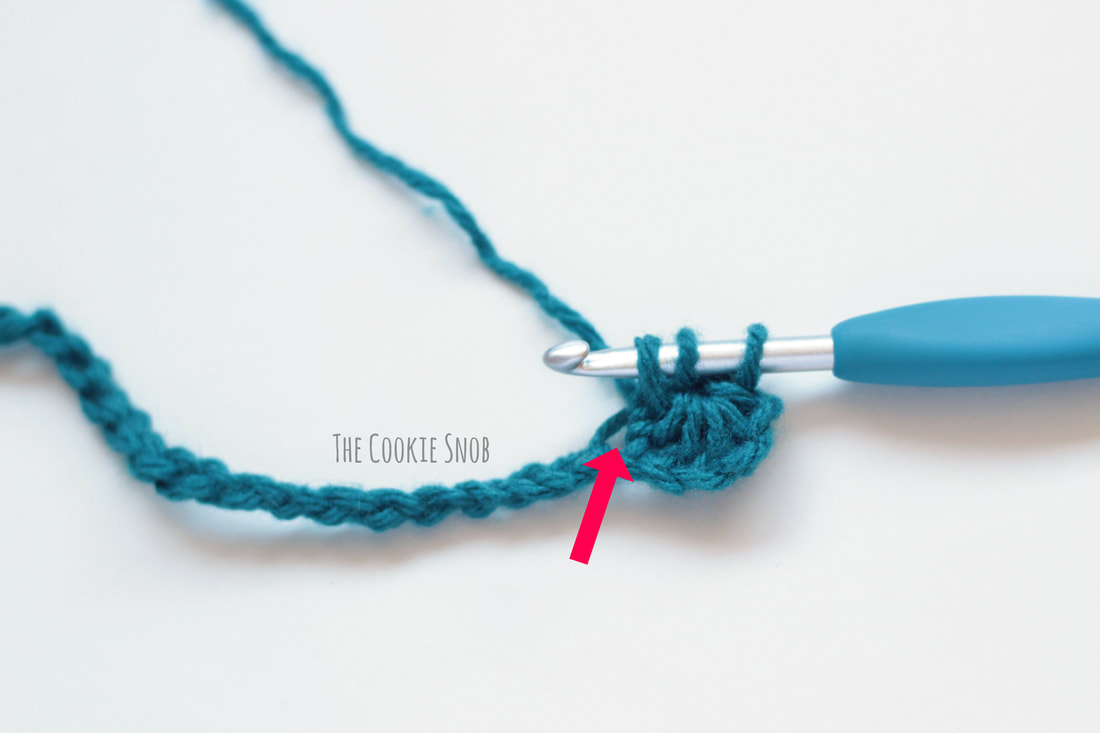 Insert your hook into the next st and pull up loop. And then insert your hook into the next st and pull up a loop. This will give you the 6 loops on your hook you need to make the star. 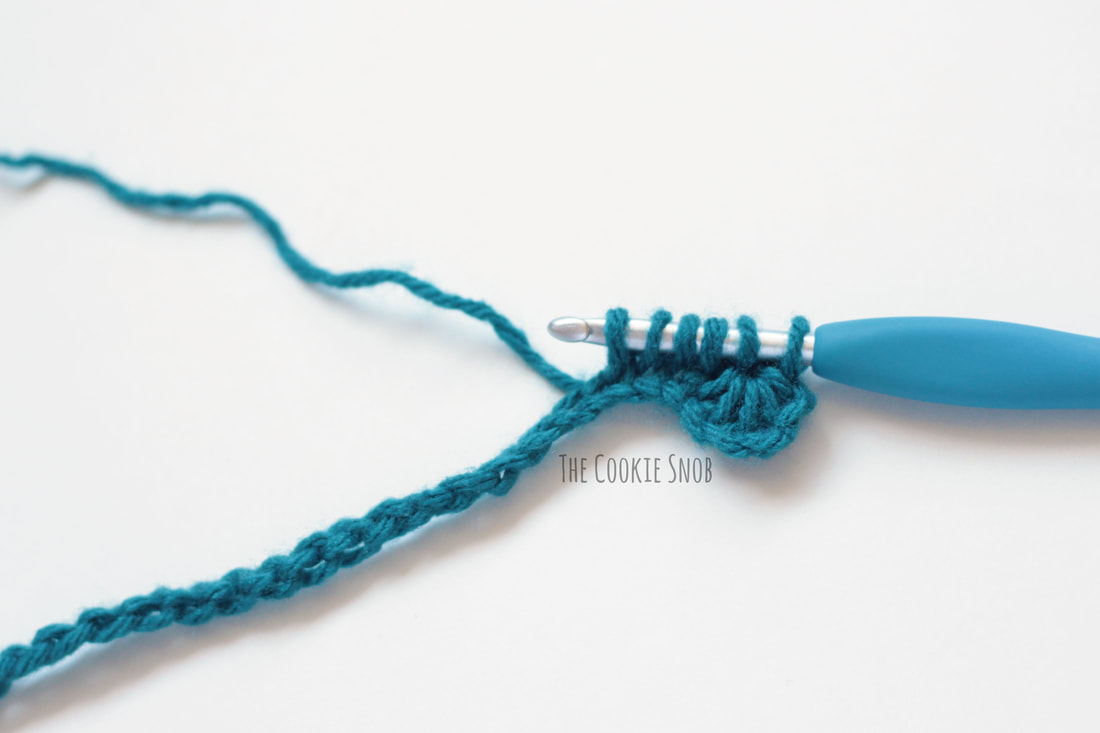 As with the first star, yarn over and pull through all 6 loops. Then ch 1 to finish. You've made another star! You're doing great! 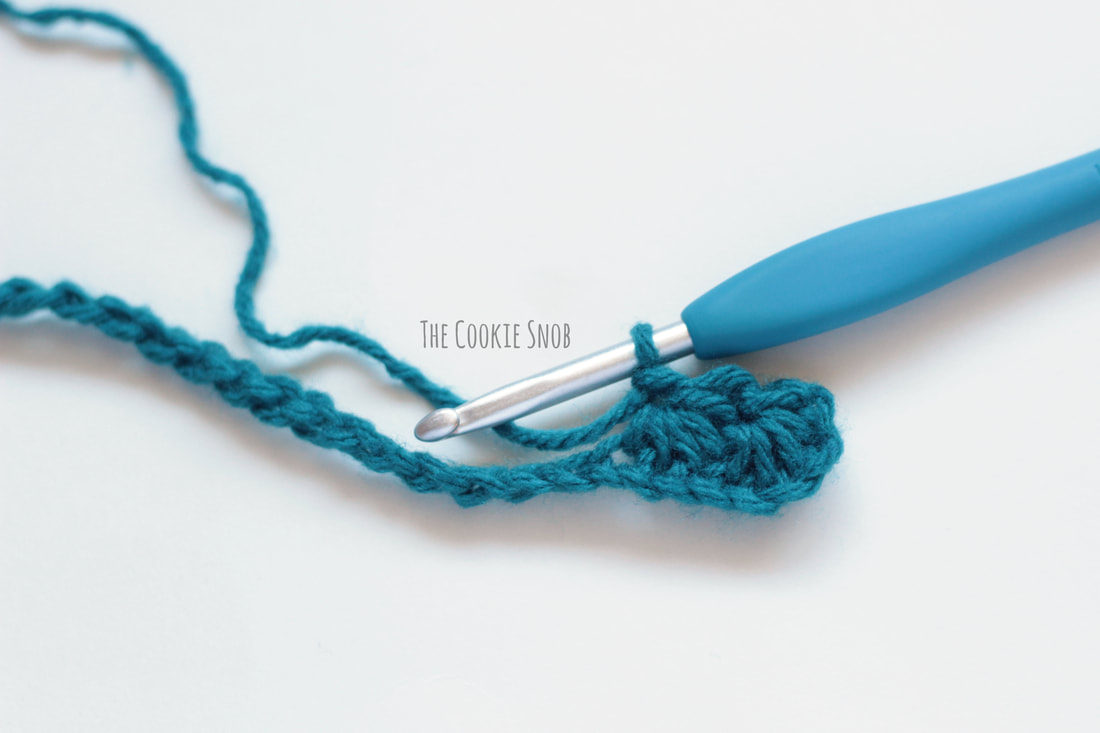 Repeat the steps for making the second star across the remaining sts. Remember, you insert into the eye of the previous star and draw up a loop, insert between the last two legs and draw up a loop, insert into the last ch of the previous star and draw up a loop, and then insert into the next two sts and draw up a loop for each, giving you 6 loops on the hook. Then yarn over and pull through all the loops and ch 1 to finish off. 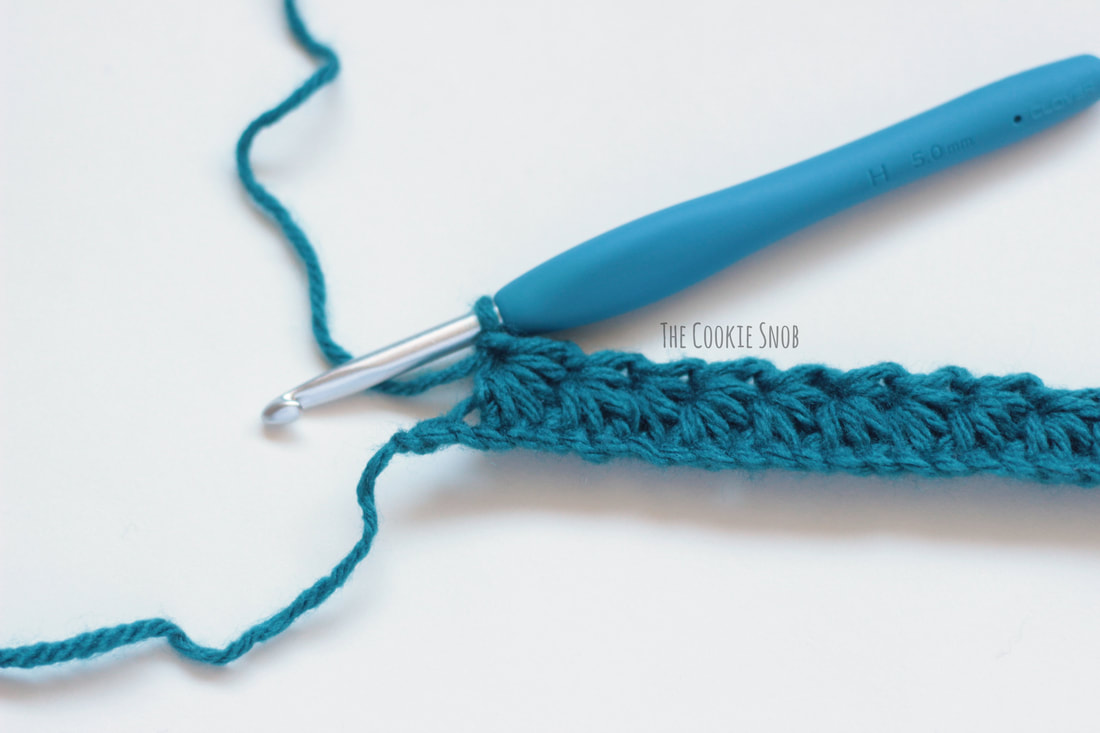 When you get to the end, you should have one last ch leftover. Work a half double crochet (hdc) into this last stitch. Turn. 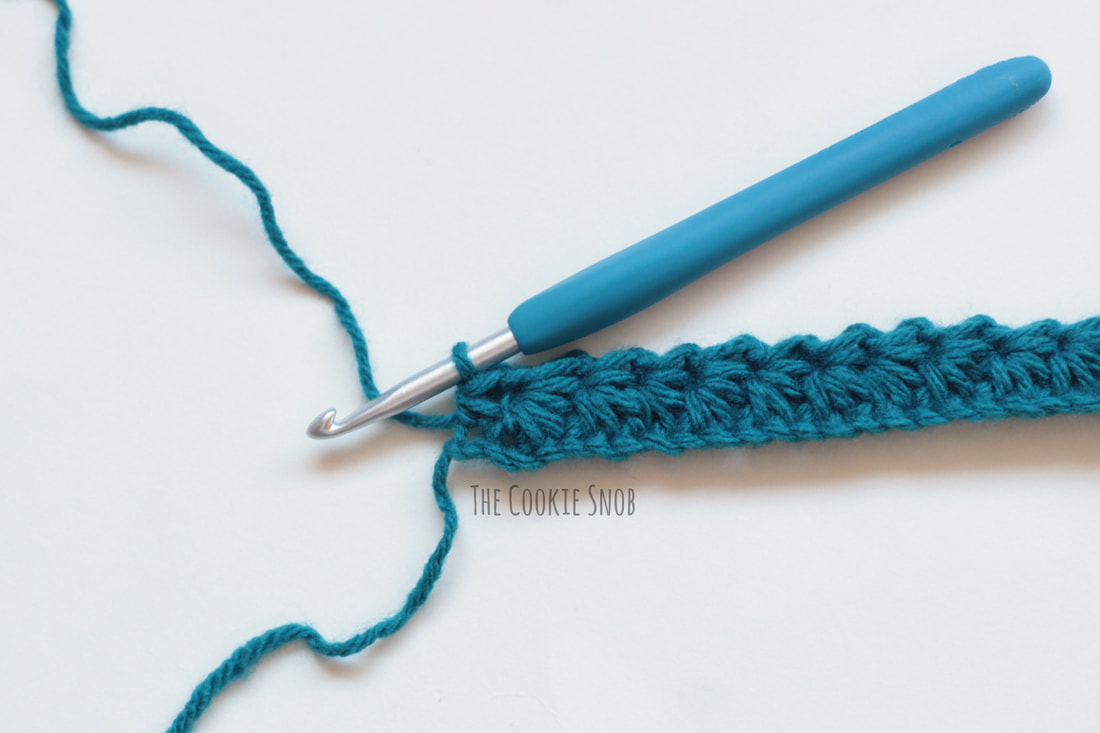 For the next row, I'm going to give you a couple of options. Option A is the typical way of finishing off the star stitch (although some people use single crochet instead, the arrangement of stitches is usually the same). You're more likely to come across this in patterns you find, so it's helpful to know. BUT, using this approach will make your piece begin to slant diagonally if you're working star stitch for multiple rows. So, to counter that problem, I've come up with my own variation that I'm calling Option B. It's not as traditional, but I think it works better since it's much straighter. Either option should work, just pick one you like and stick with it. Row 2: We'll start with Option A. Ch 2. Work 2 hdc into the eye of the first star from the previous row. 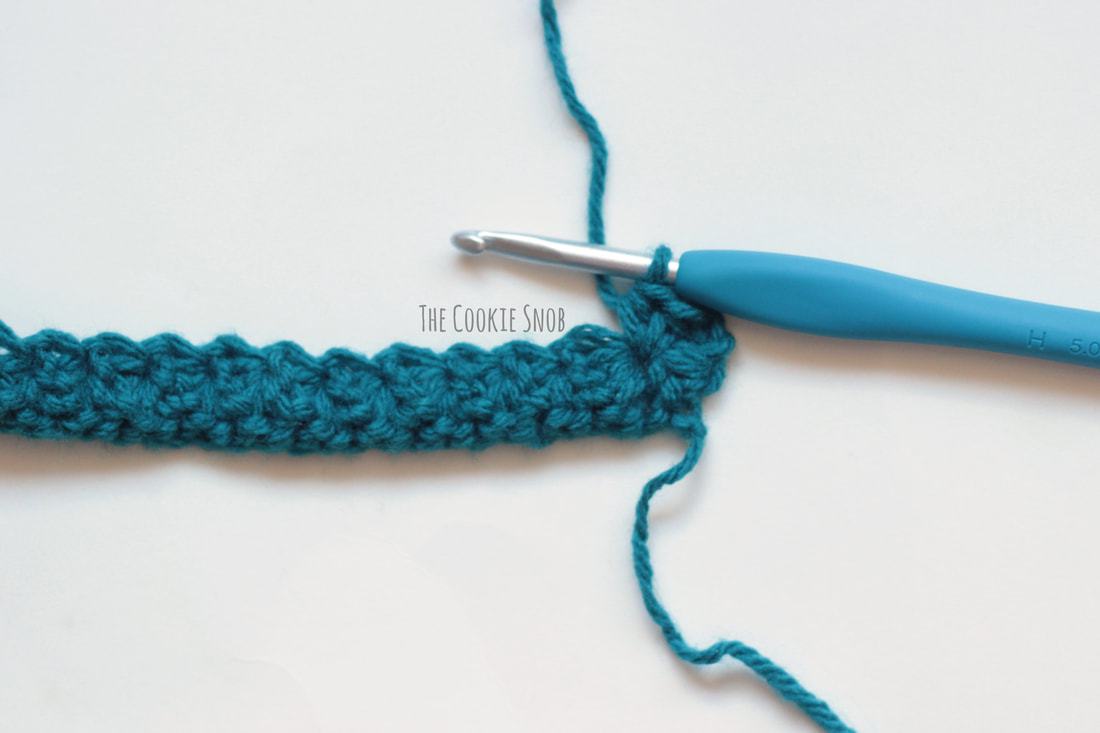 Continue down the row, working 2 hdc in the eye of each star. 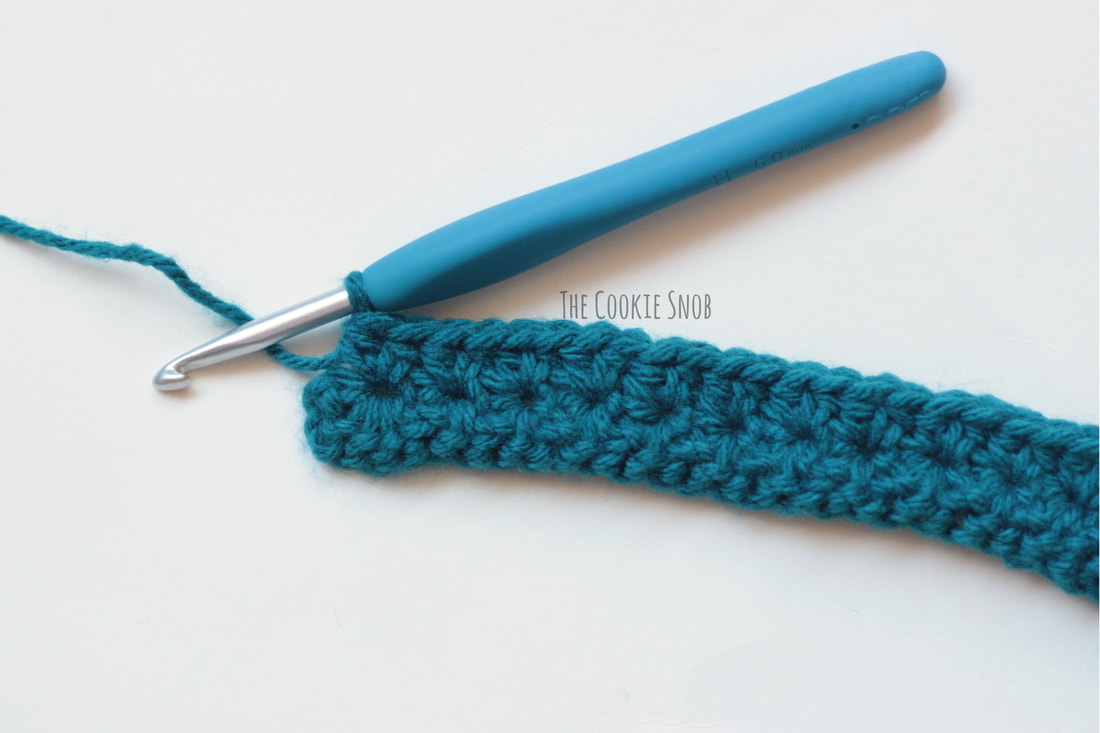 At the very end of the row, work 2 hdc into the last st. Turn. 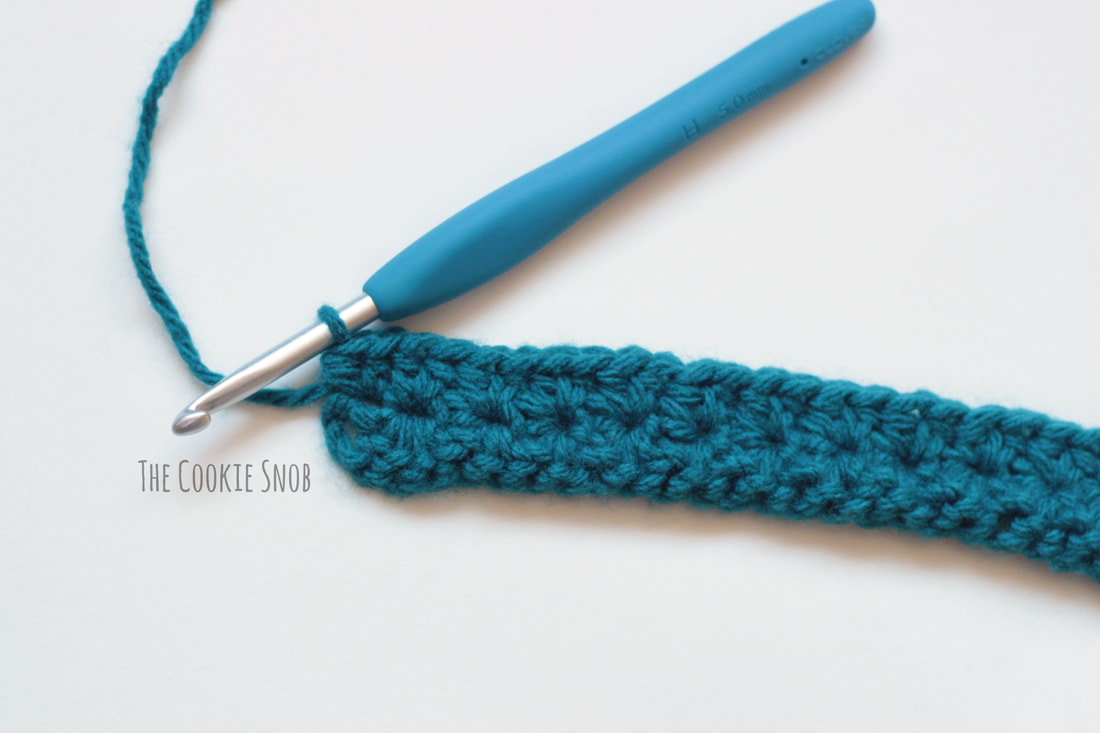 Now for Option B. (Remember, don't do both A and B; just pick ONE.) Ch 2. Work 1 hdc into the first st. 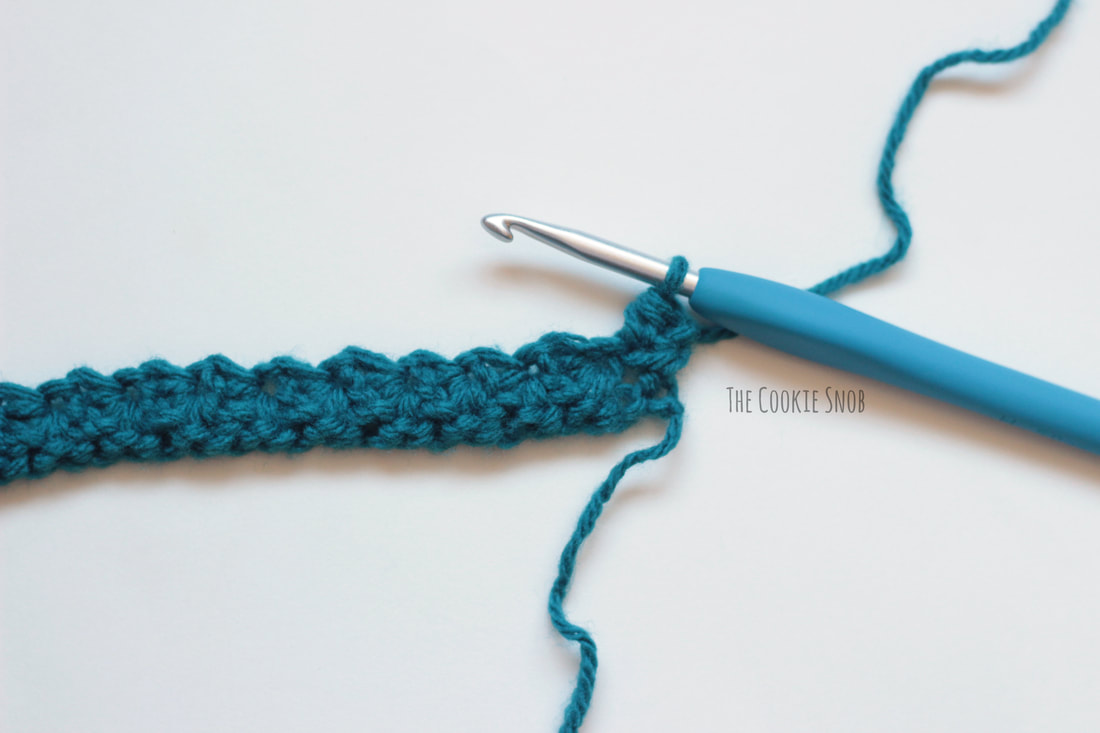 Then work 2 hdc into the eye of the star from the previous row. 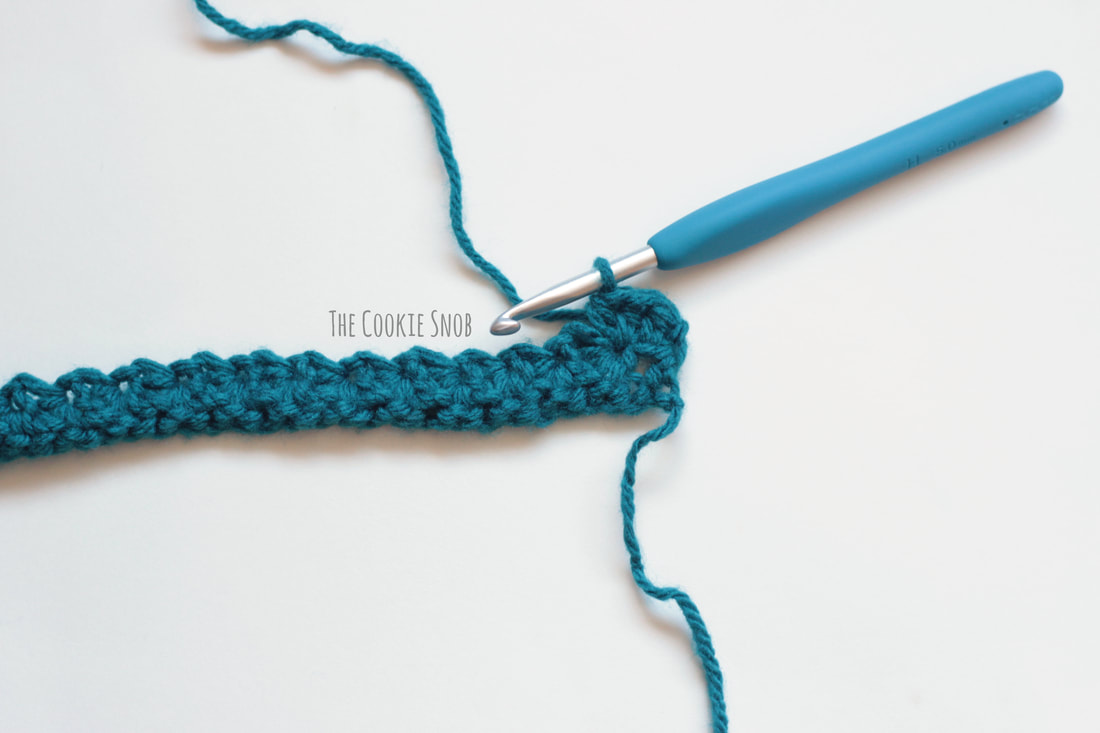 Continue down the row, working 2 hdc in the eye of each star. When you get to the end of the row, work just 1 hdc into the last st. Turn. 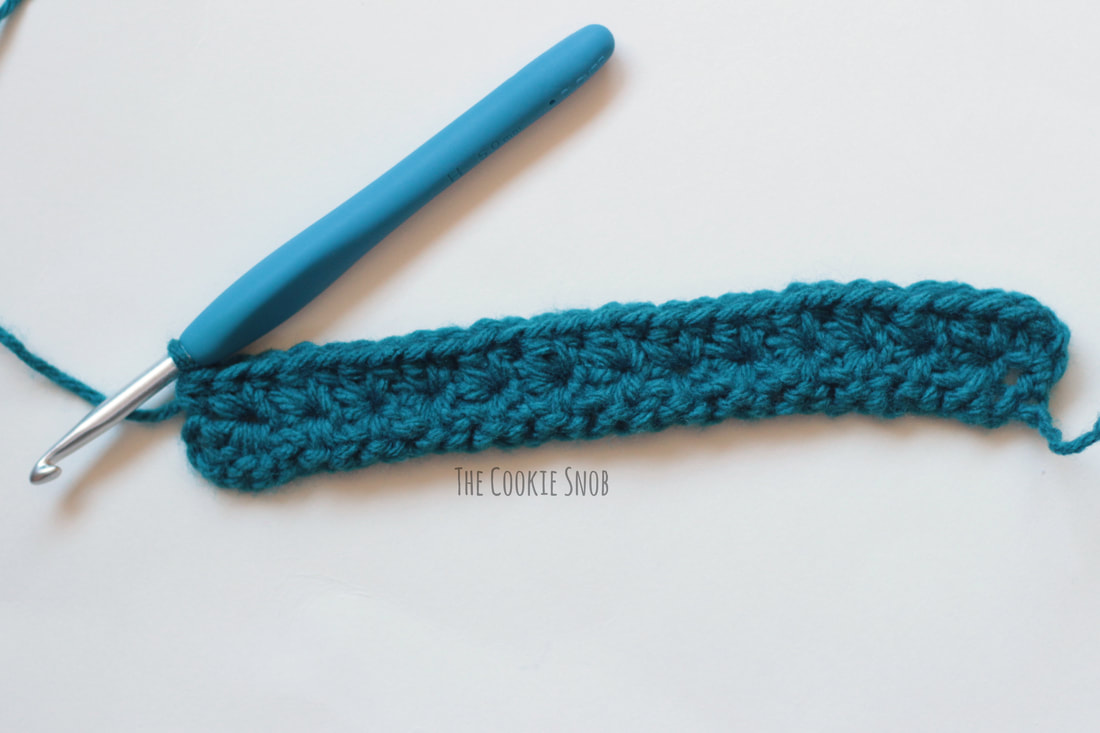 Regardless of which option you chose, the next row will be worked the same way. You're just repeating Row 1, but you're working into the previous row instead of into the foundation ch. Row 3: Ch 3 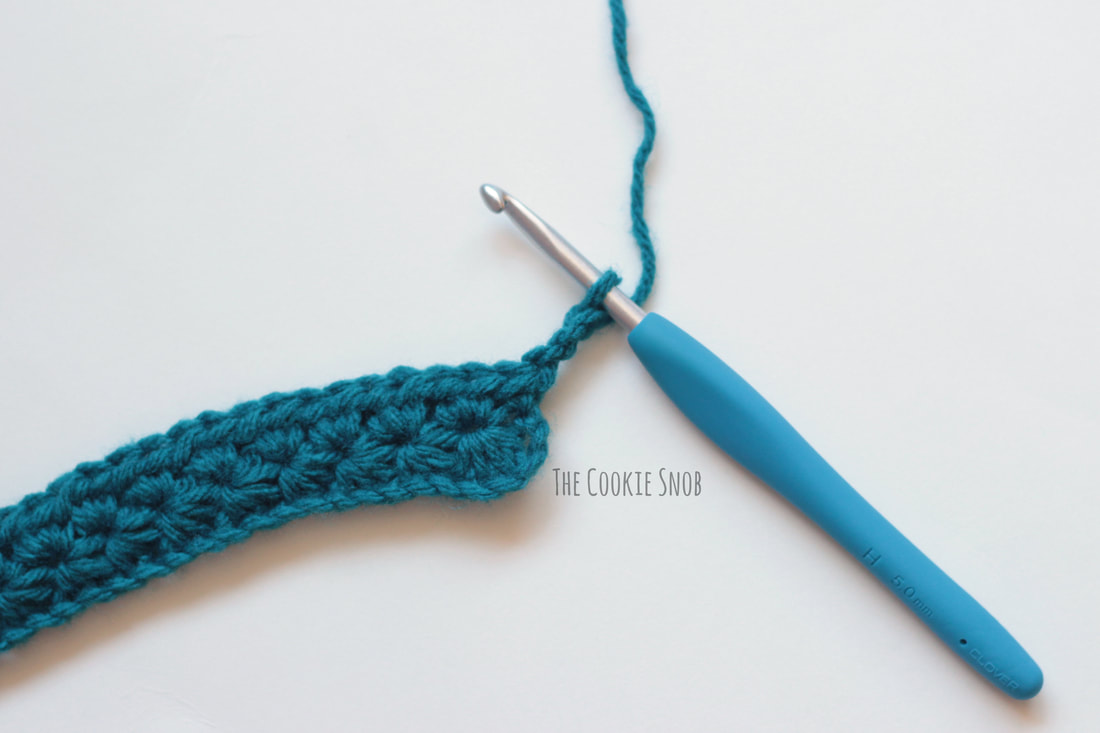 Insert the hook into the 2nd ch from the hook and draw up a loop. Then insert your hook into the next st and pull up a loop. Repeat 3 more times until you have 6 loops on your hook. 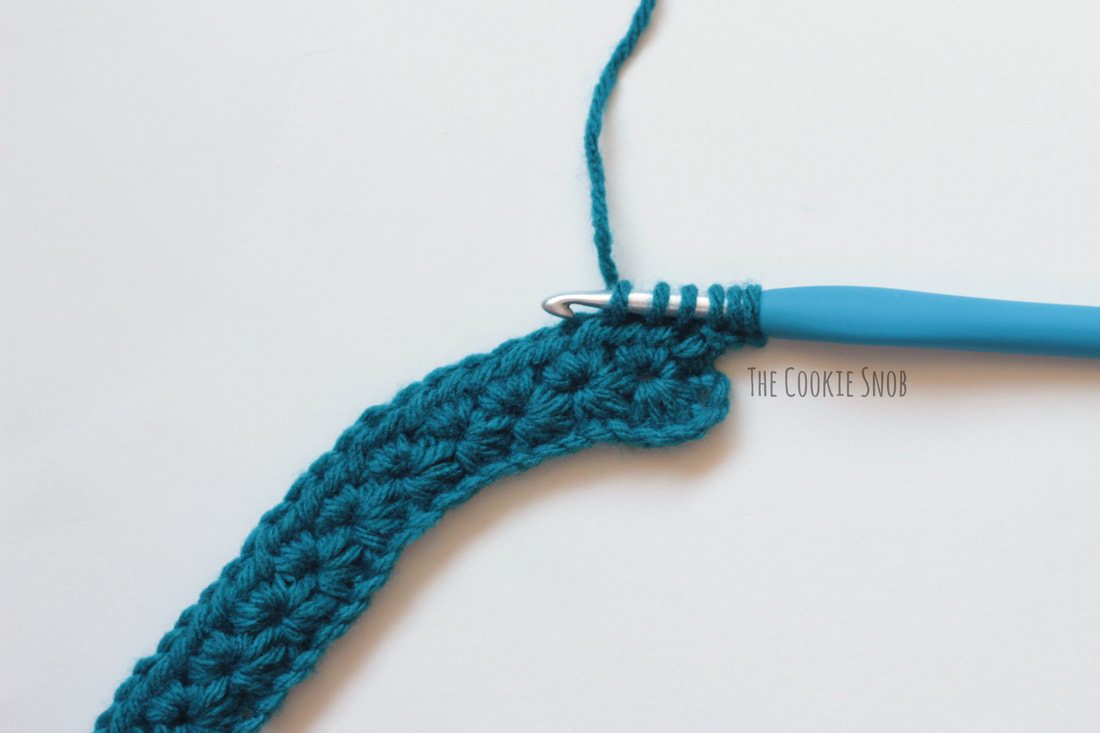 As before, yarn over and pull through all 6 loops. Ch 1. This completes the first star. Then repeat the usual method for making the next star across the remaining sts. (One more time: you insert into the eye of the previous star and draw up a loop, insert between the last two legs and draw up a loop, insert into the last ch of the previous star and draw up a loop, and then insert into the next two sts and draw up a loop for each, giving you 6 loops on the hook. Then yarn over and pull through all the loops and ch 1 to finish off.) Hdc in the last st to finish off the row. Turn 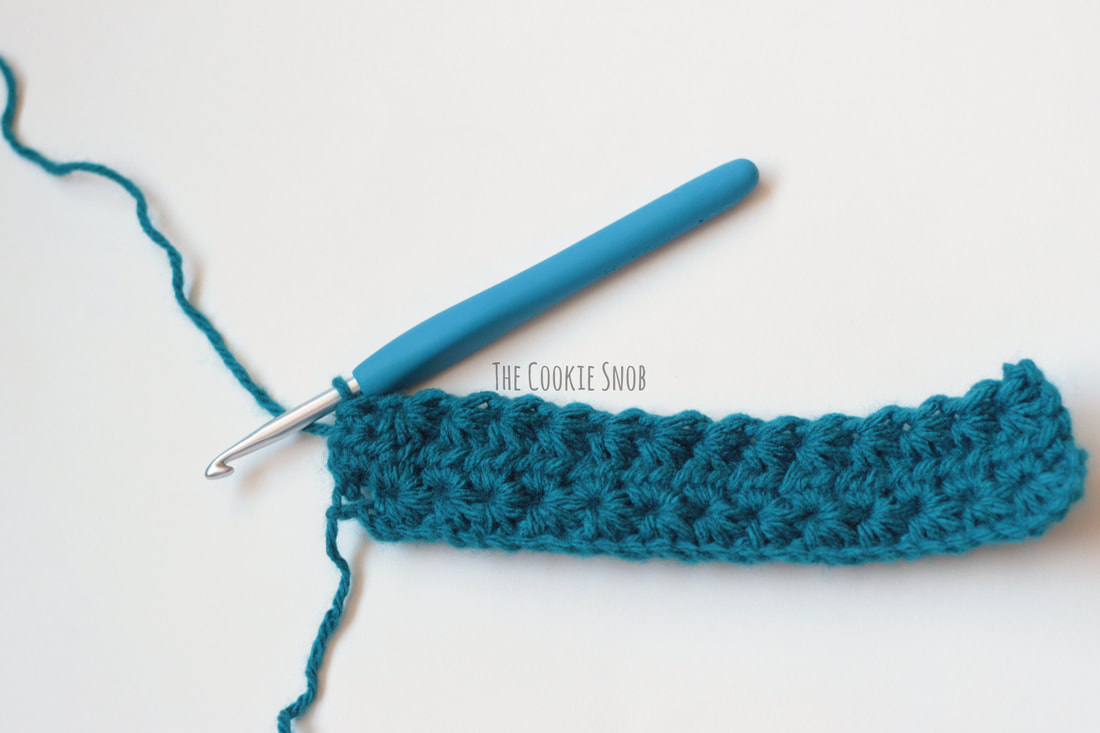 Row 4: Repeat Row 2 (using either Option A or B). 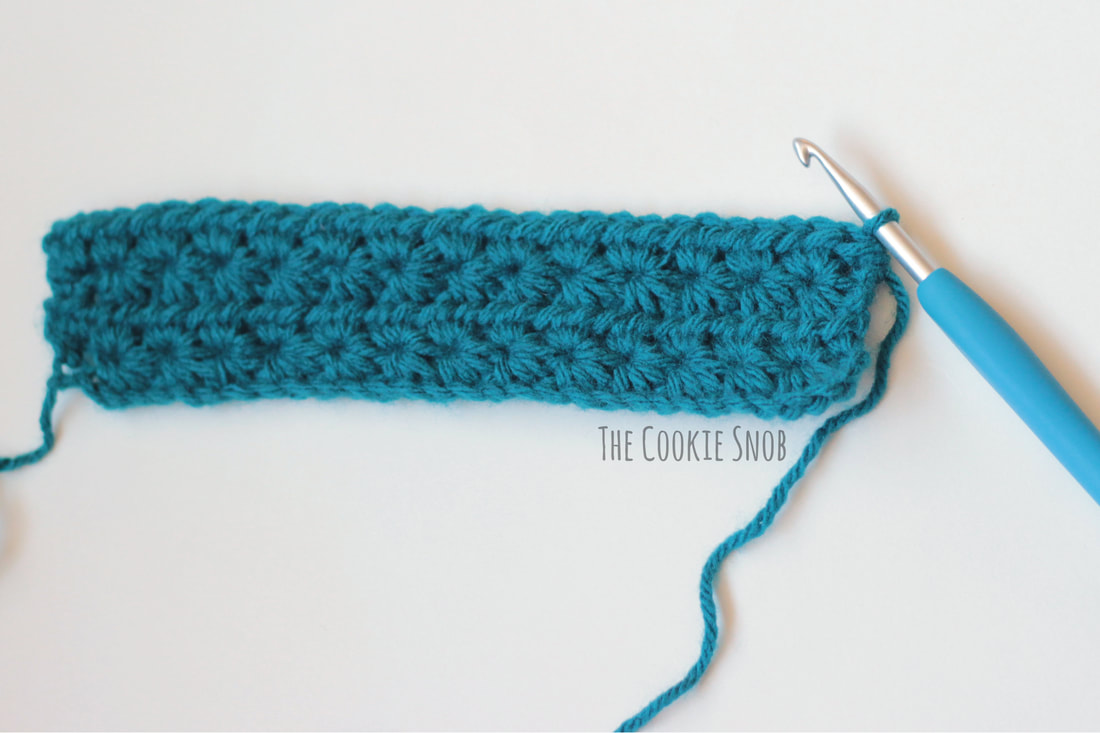 Repeat Rows 3 and 4 until the piece is the size you'd like. Congratulations! You're now a star stitch pro! 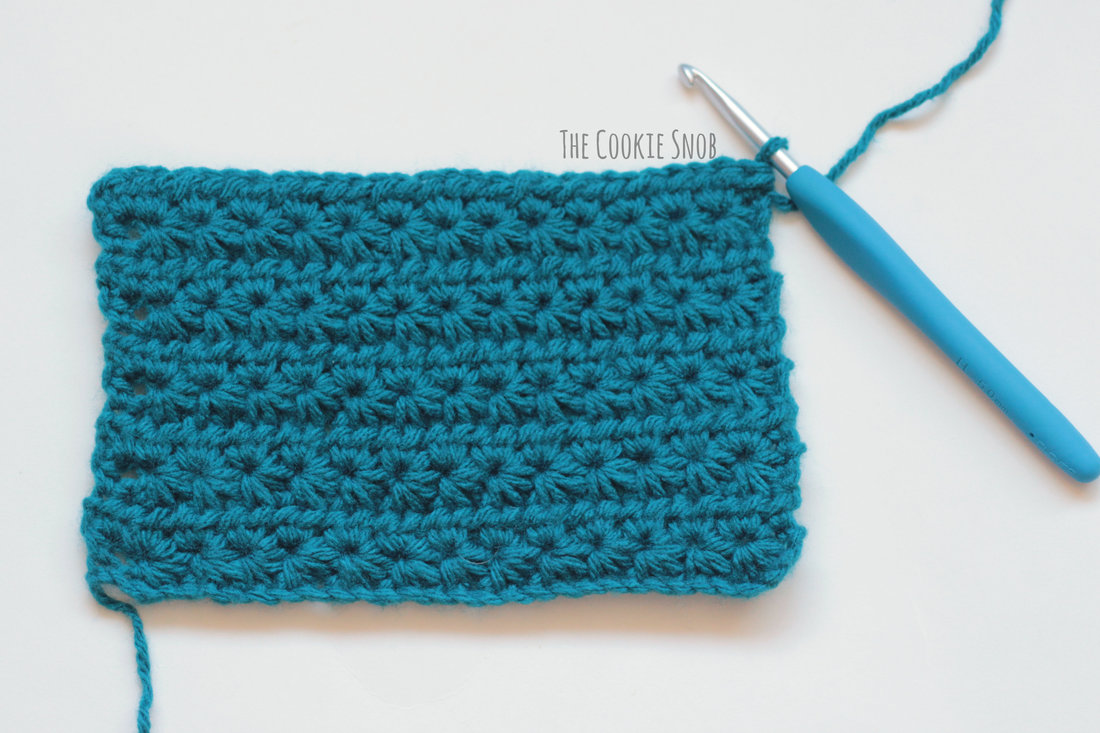 If you're antsy to start using your new star stitch skills but aren't quite ready to freehand it yet, here are some free project ideas to get you started (NOTE: There are several variations of the star stitch out there; I showed you the one that seems to be the most common to get you started. Individual projects should have information on how to do any variations.)
I hope that you enjoyed this spotlight! If you have more questions about the tutorial or have any tips you want to share, you can reach me in the comments section below or on social media. And be sure to keep an eye out for my upcoming star stitch patterns. Happy hooking!
4 Comments
Jinese
12/10/2018 11:09:17 pm
Thank you so much!
Lisa belk
9/18/2020 02:06:59 pm
Can you help me with this stitch?
Erin
9/25/2020 10:38:22 pm
Hi Lisa! I wish I could sit down with you in person to figure it out, since it's really hard to pinpoint the exact issue over the internet. It sounds like you must be adding an extra stitch somewhere if it keeps growing, but it's hard to say where. If I were you, I'd keep a really careful eye on the first and last stitches of the row as you're working it. There's probably somewhere you're adding something you shouldn't. Sorry I can't be of more help! I tried to think of a likely source of the problem, but nothing comes to mind at the moment. I hope you can get it figured out! You may also want to find a video tutorial. Sometimes seeing someone else do it in live action can make it click. Good luck! Leave a Reply. |
Welcome!Thank you for stopping by to visit my own personal corner of the web! Feel free to take a look around and check out what I've been crafting, crocheting, or baking. Hopefully you'll find something to inspire your own creativity!   
Archives
March 2024
|
 RSS Feed