
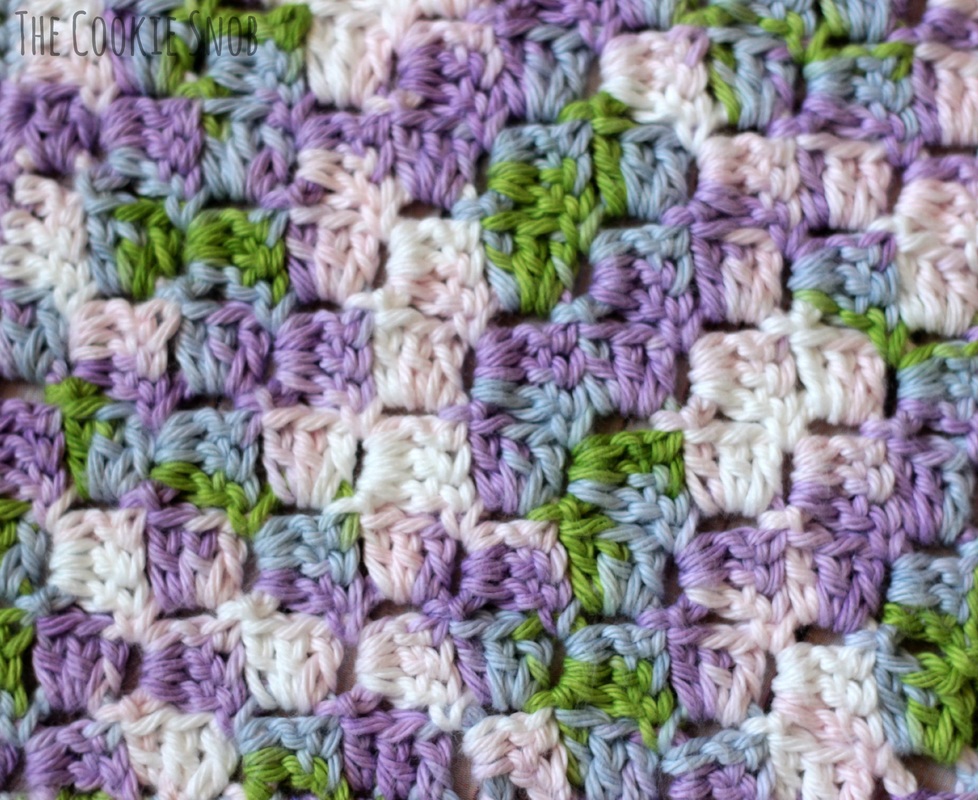
 If you've spent much time hanging out with other crocheters, either online or in person, you've probably at least heard someone mention "corner-to-corner" or "c2c" crochet. Rather than working across typical rows or rounds, this technique works the stitches diagonally across the piece from one corner to the next (hence the name). Although it's not a brand new technique, it's definitely been gaining popularity in recent years and people have gotten really creative with it, resulting in some pretty amazing projects. Want to see what I mean? Check out some of these amazing crocheted pieces created by fellow crochet artists using the c2c technique. For lack of a better system, the images are organized alphabetically by creator, so be sure to check them all out for a full dose of crochet inspiration! Most of these wonderful ladies have their own crochet pages or websites, so be sure to click on their picture to link to their pages (or copy and paste the written URL) and show them some crochet love! Pretty awesome, right? So much talent squished into one webpage! Now that you're feeling inspired, let's try it out! C2c can be done with a variety of stitches, but is most commonly done with the diagonal box stitch. I'm going to walk you step-by-step through the process of increasing and decreasing the number of box stitches so that you can get started on your own c2c projects. And if you follow along with this post, you can make your very own c2c washcloth! Fancy, right? I'm using a size H (5.00mm) crochet hook and worsted weight cotton yarn for mine. 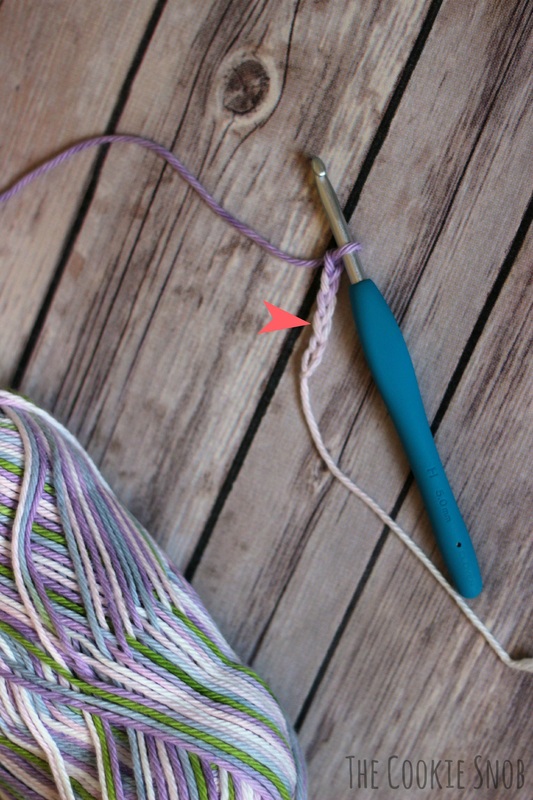 Start by chaining 6. Pay special attention to the 4th stitch from the hook because we're about to use it. 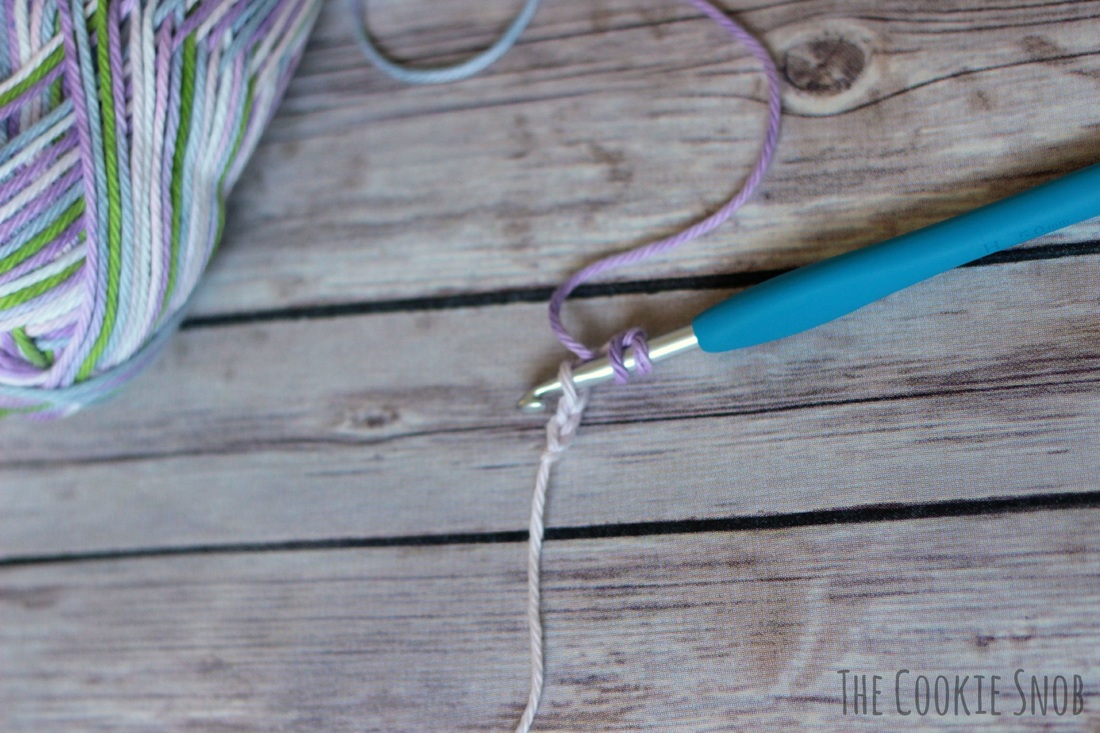 Work a double crochet into the 4th stitch from the hook... 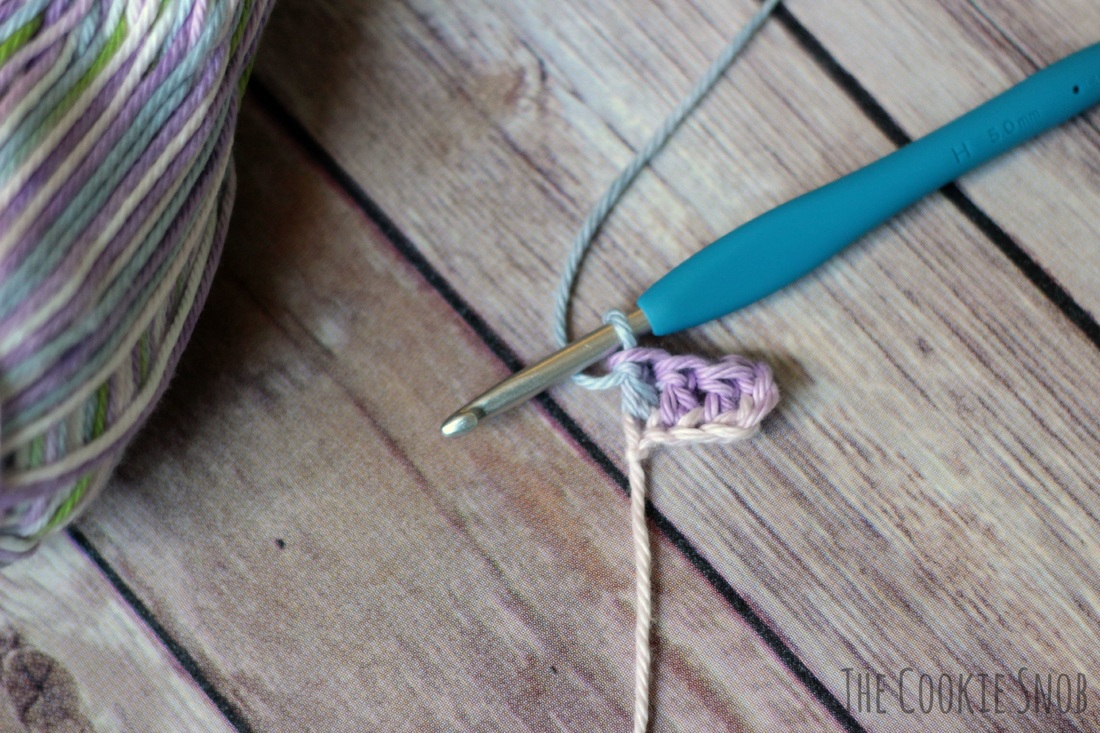 ...and in the next 2 stitches. This will give you the basic "box" of the diagonal box stitch. What you've just made will be the corner of the piece (this will become clear once it starts getting bigger). 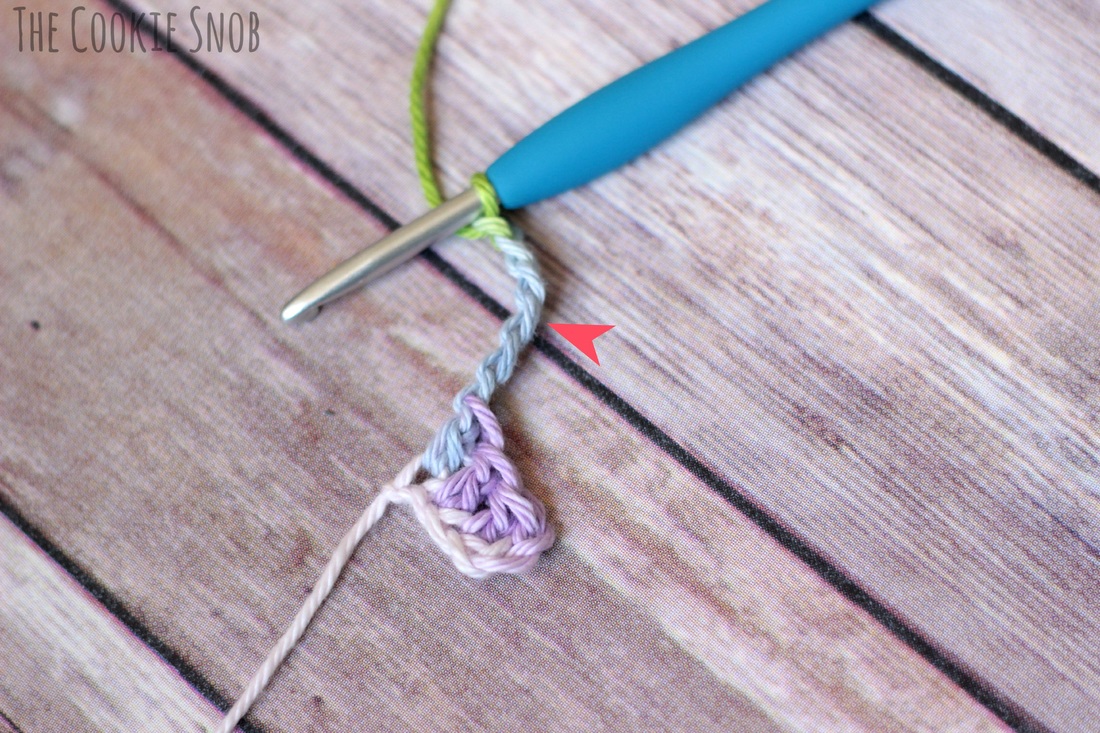 Now we're going to start the next row by adding another "box." We're going to do the exact same thing we just did: start by chaining 6 (again, note the 4th stitch from the hook)... 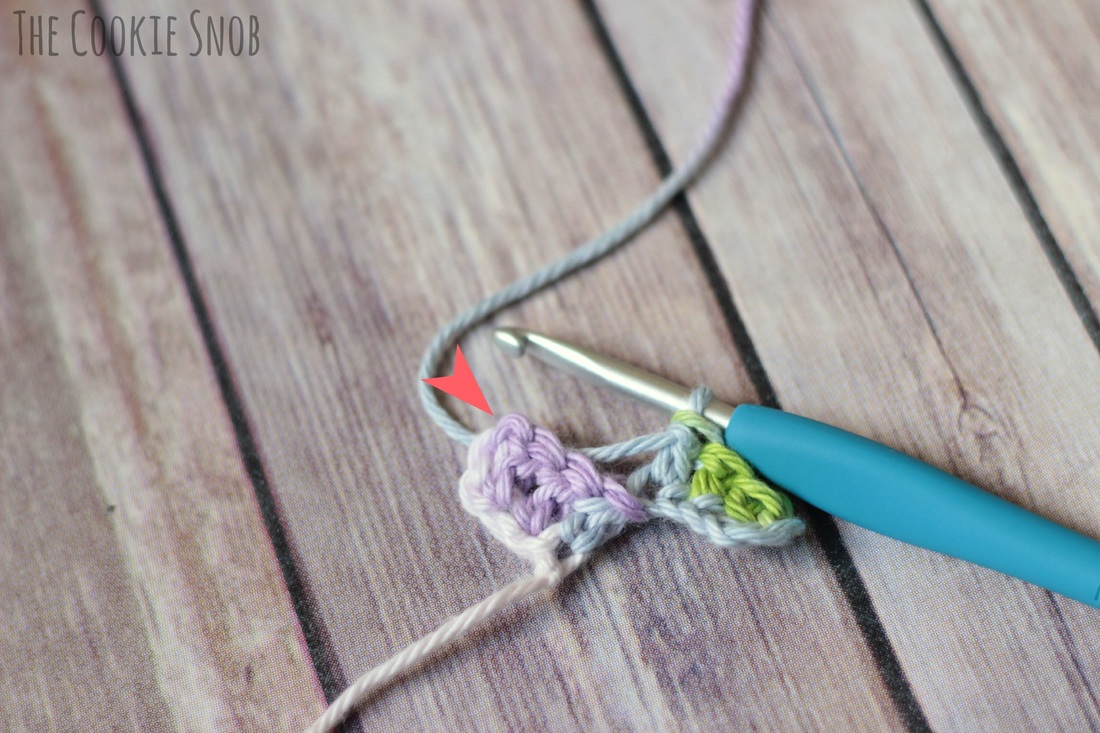 ...and then work a double crochet into the 4th stitch from the hook and in the next 2 stitches. You've now made another box. But it needs to be attached so it's not just dangling into space. Turn your attention to the chain 3 from the previous round... 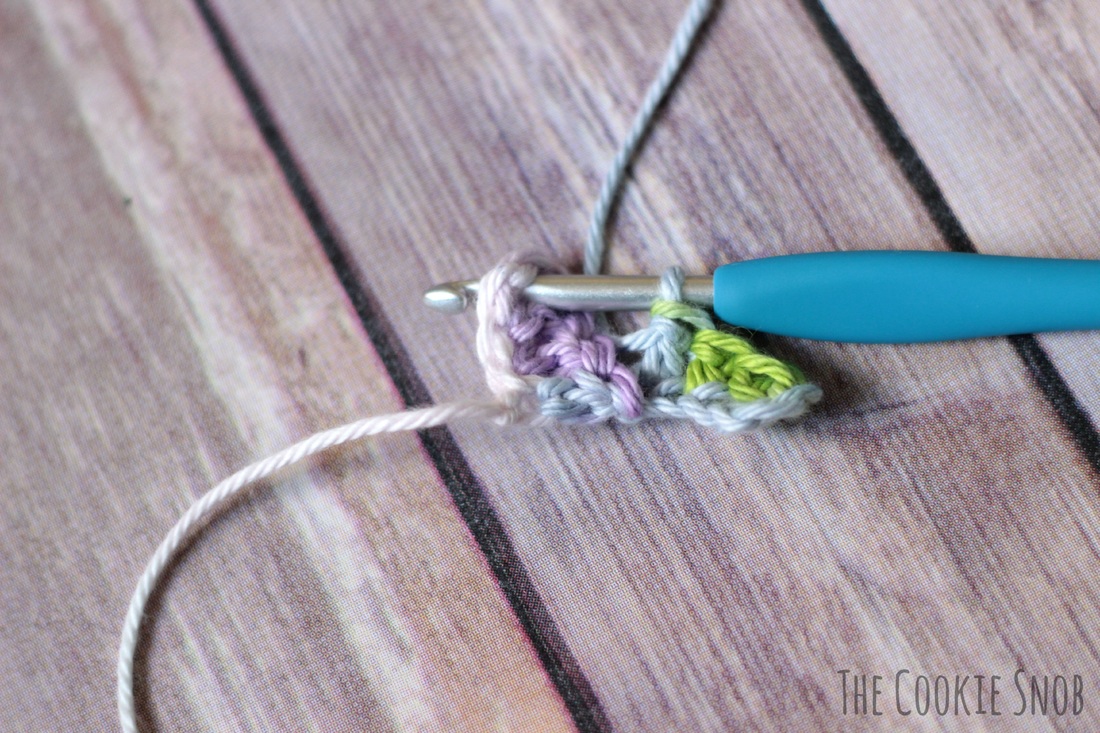 ...and slip stitch into it. Any time you need to add a box to the beginning of a row, you'll follow the basic increase protocol of chaining 6, working a double crochet in the 4th stitch from the hook and in the next 2 stitches, and then slip-stitching it to the chain 3 of the previous row. 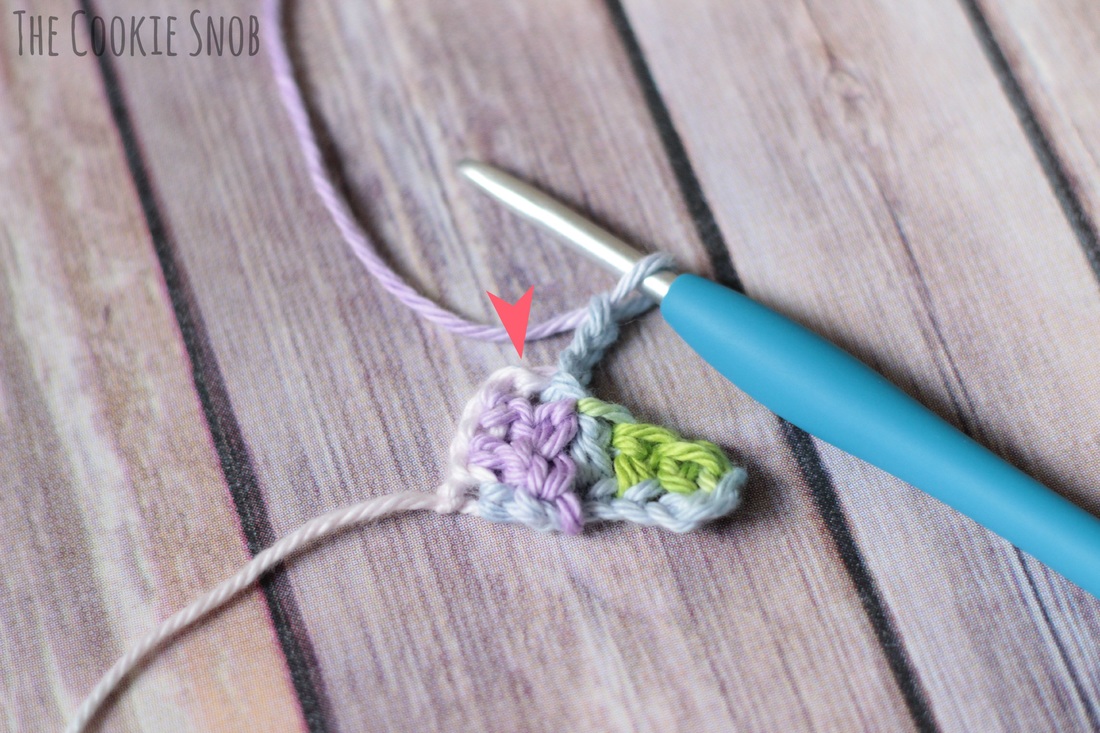 Now we need to add another box on top of the previous row. Instead of chaining 6, we're going to chain 3 and then (looking at the chain 3 we just slip-stitched into)... 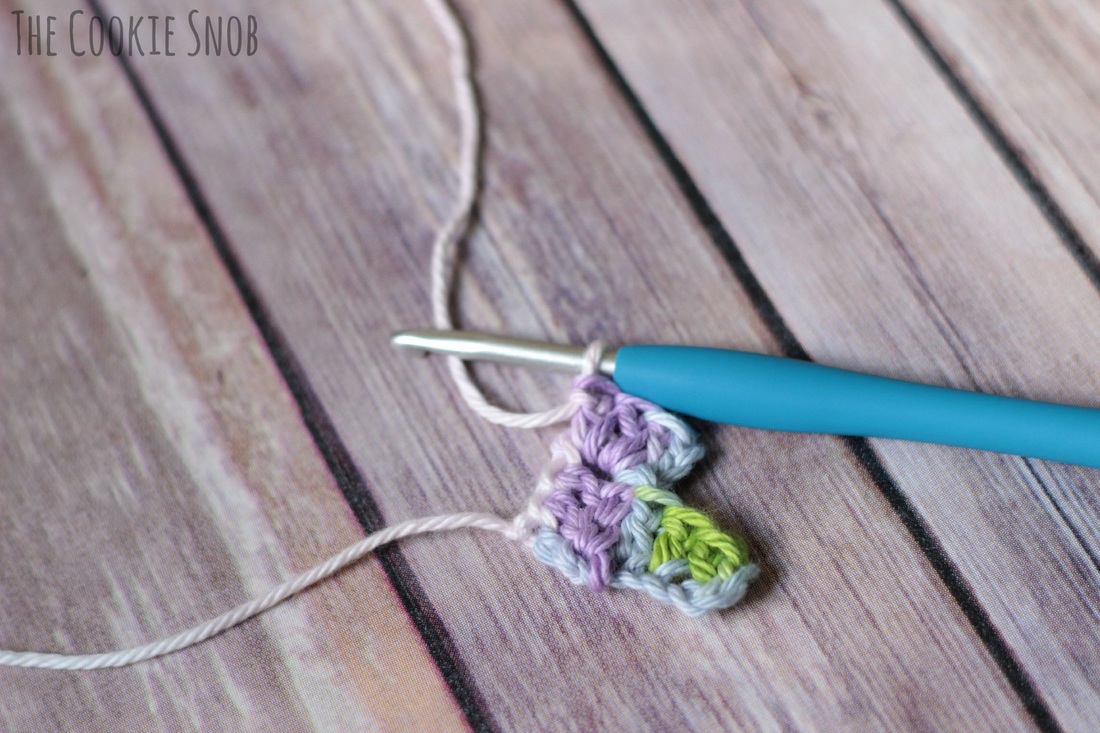 ...work 3 double crochets across the chain. You've just made another box! This is the procedure you'll follow for making most of your boxes, so you'll get good at it pretty quickly.  Still with me? On to the next row! We're going to follow the same pattern for increasing (again: chain 6, work a double crochet into the 4th stitch from the hook and into the next 2 stitches, slip stitch to join)...  ...then we're going to add on to the boxes from the previous rows using the same basic box pattern (chain 3, work 3 double crochets across the chain 3 from the previous row)... 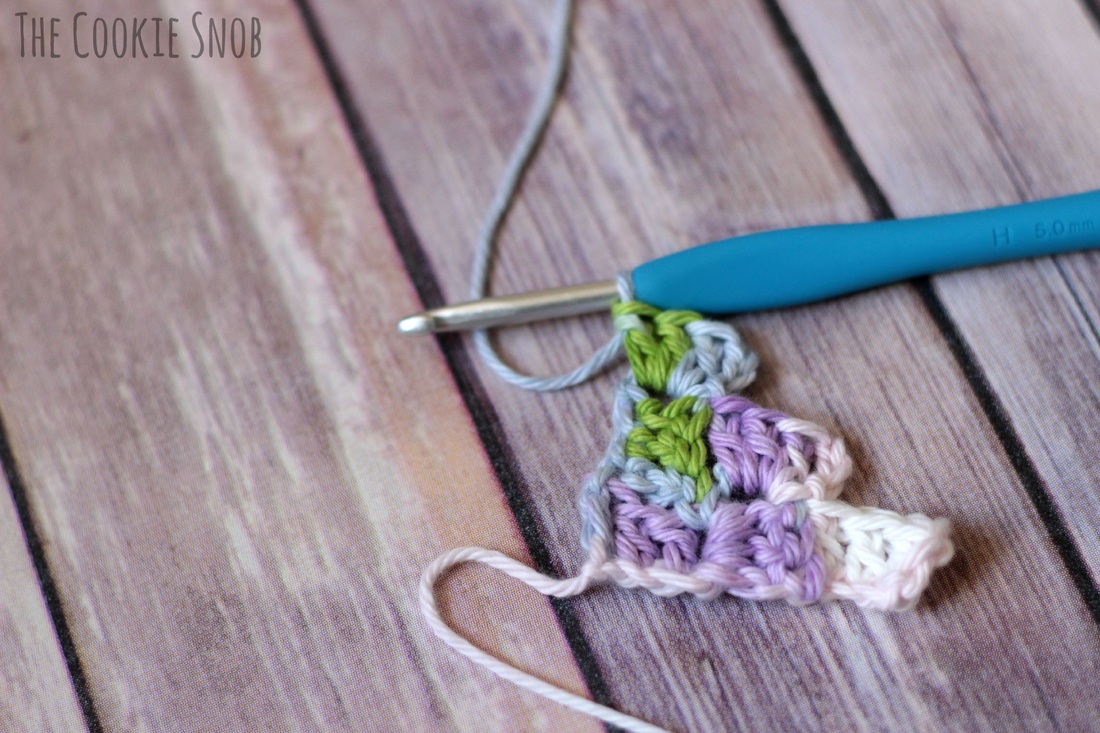 ...until you get all the way across the row. 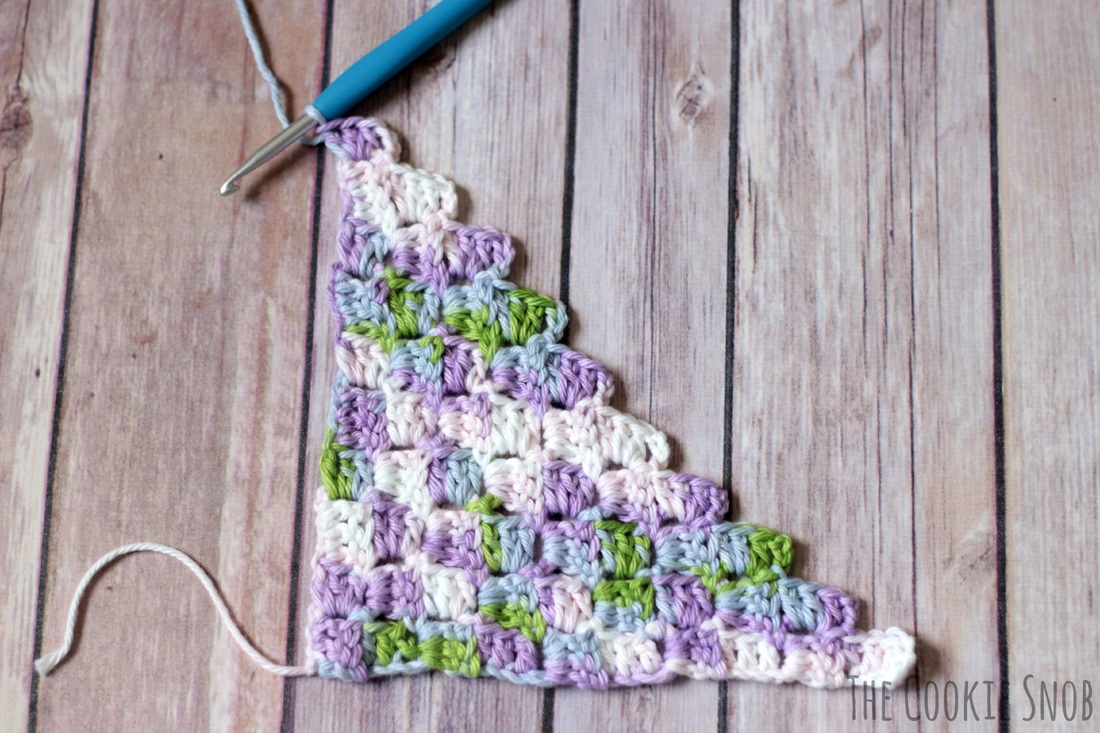 Continue working each row the same way until you get the size you want. If you're making a small washcloth like I am, you'll want to continue until your row measures 10 boxes across. Now we're going to start decreasing, which is where a lot of people seem to get lost, but I promise you can do it! It's a cinch once you know what you're doing. 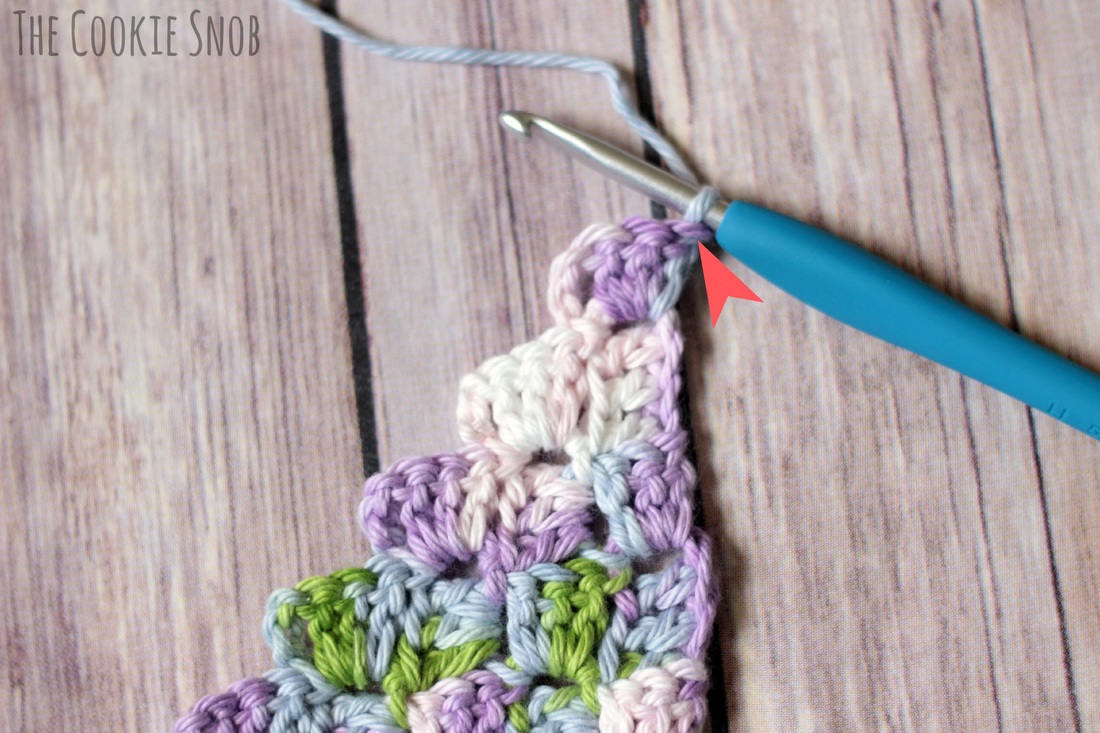 This is where we start doing things differently. We're NOT going to chain 6 because we don't want to add any more boxes to this side. Instead, take a look at the top of the box you just made at the end of the previous row. 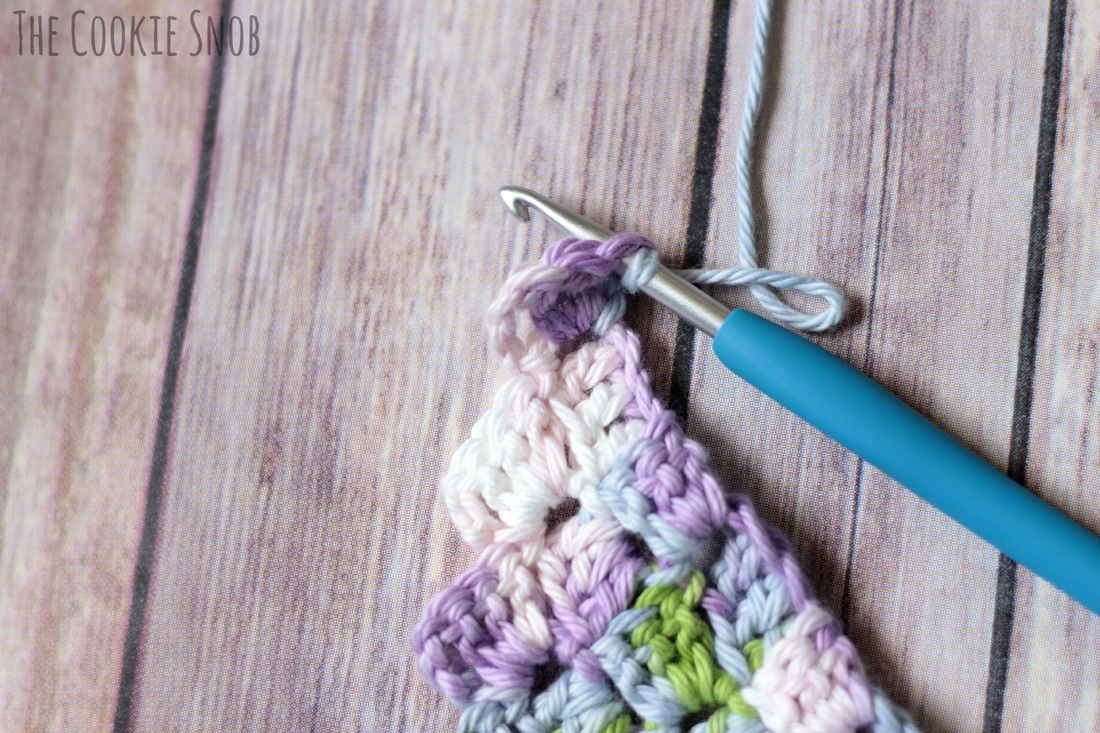 Insert your hook into the top of the double crochet nearest the edge... 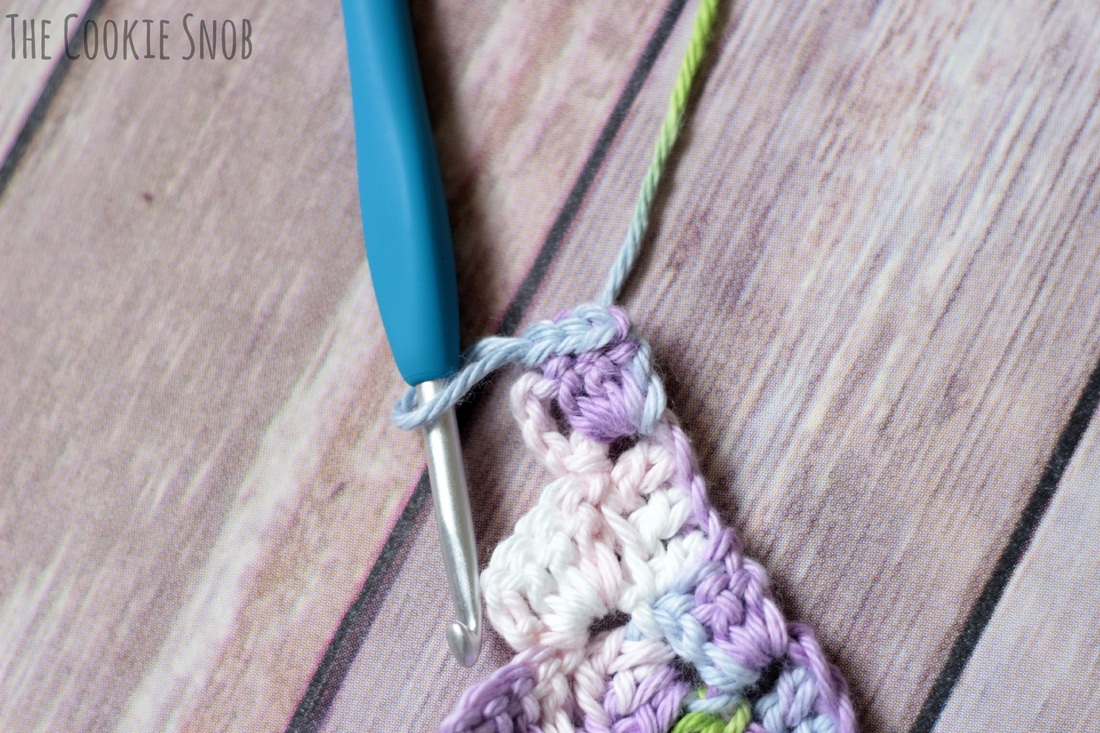 ...and work a slip stitch into it. Work a slip stitch into the tops of the next 2 double crochets as well. 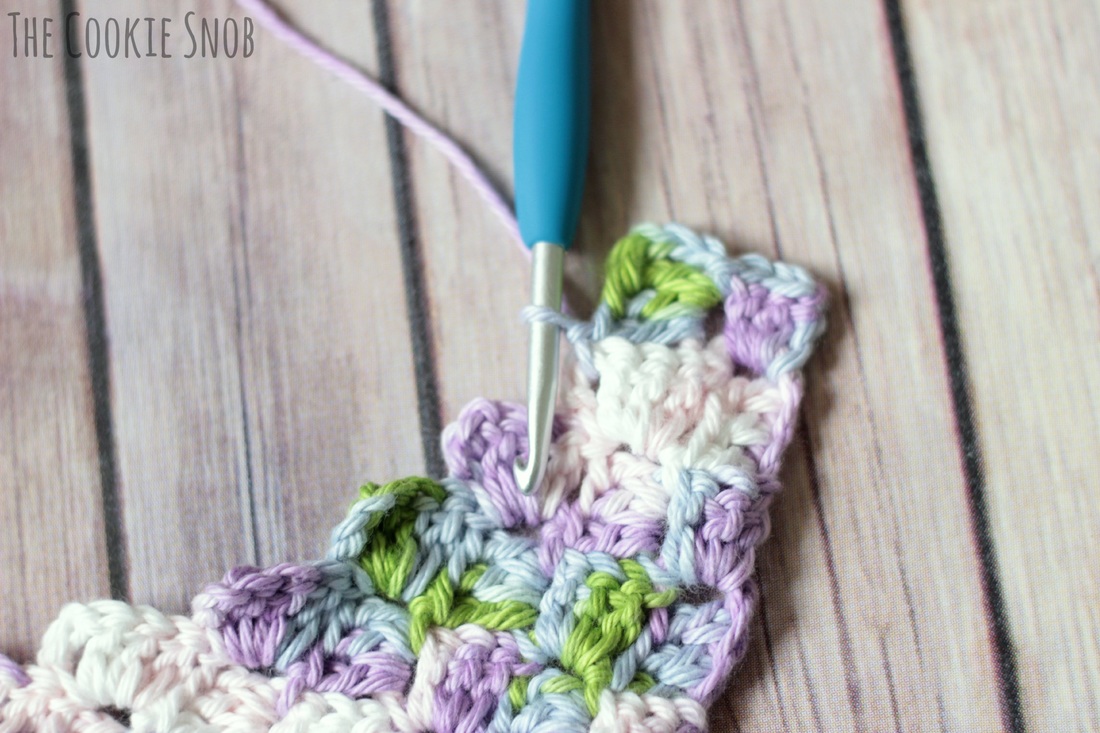 Slip stitch into the chain 3 space right next to the double crochets you were just slip-stitching into, then work a basic box: chain 3, work 3 double crochets across the chain 3 from the previous row, and then join with a slip stitch. Do you see how you've just created another corner? This is as wide as the piece will get (remember, you've been working diagonally). 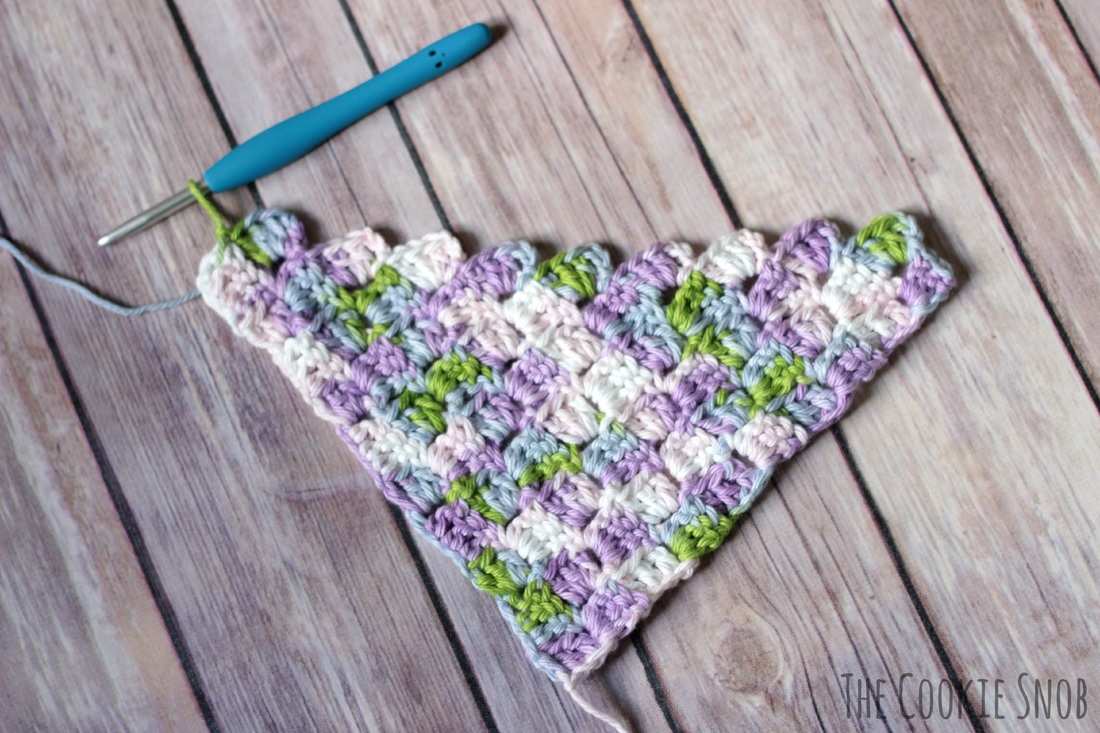 Continue to work normally across the piece until you get to the end. If you want your piece to be square, then when you get to the last box just stop instead of adding one more like you have been. This decreases it on both sides (but if you're making a rectangle, you should add that last square so you'd effectively be increasing on one side and decreasing on the other). 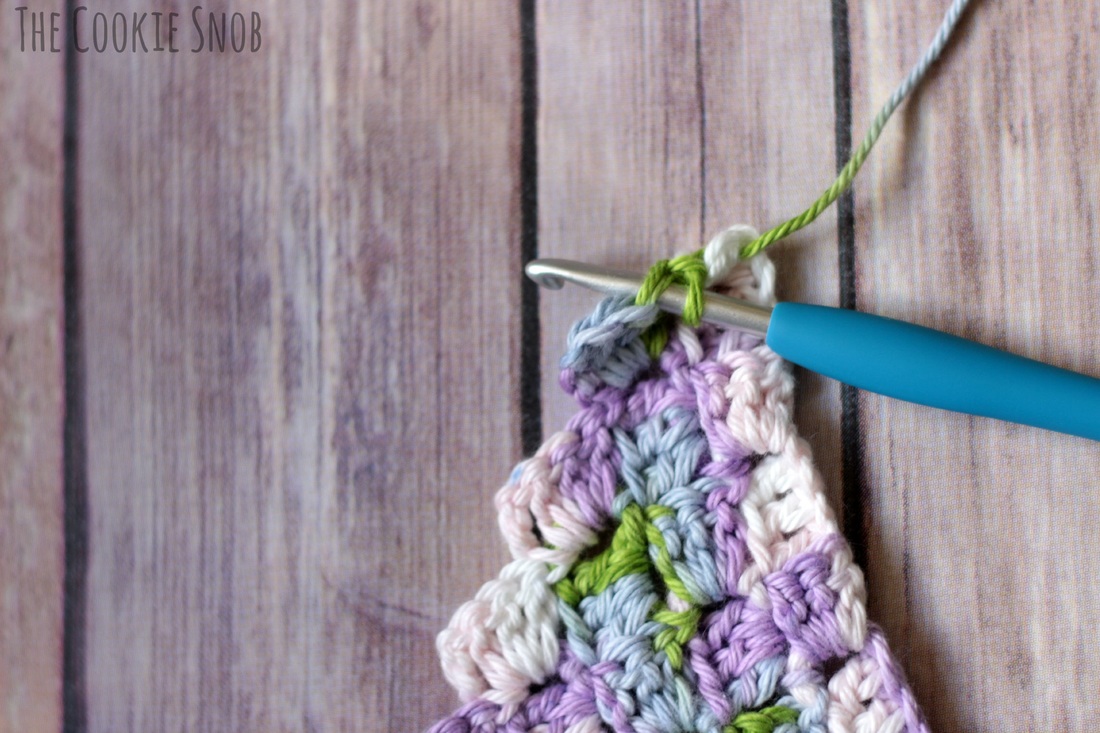 For the next decrease row, we're going to the same thing. Turn the piece and slip stitch across the last box of the previous row. 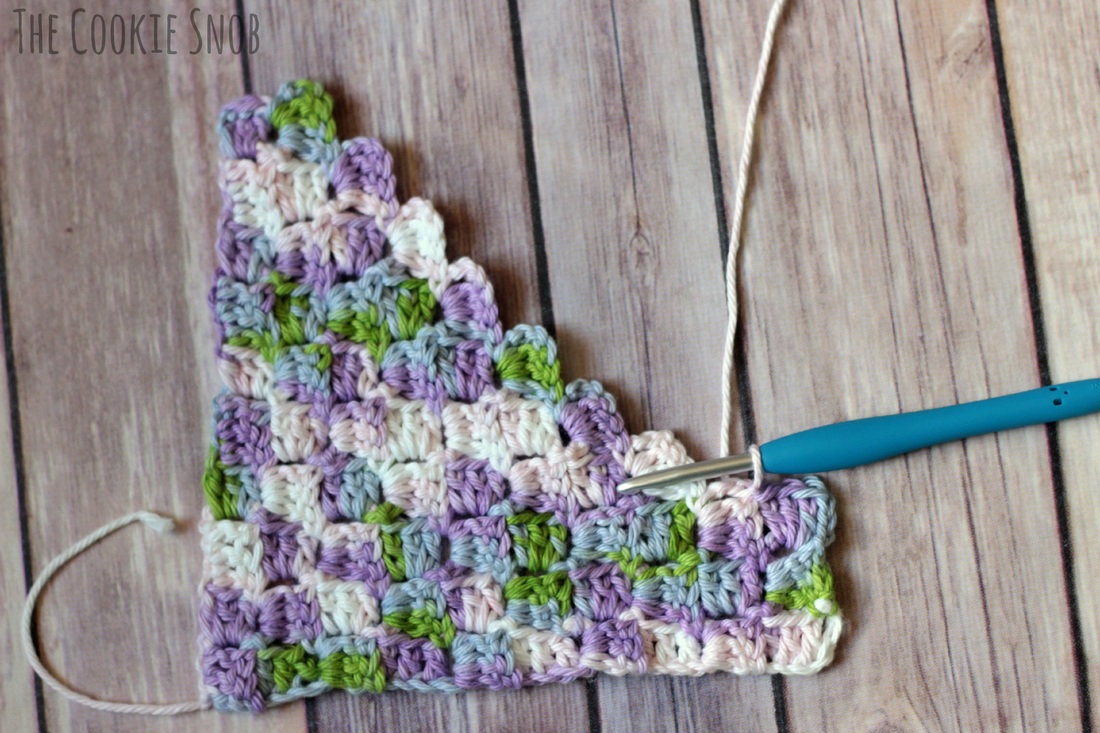 Then continue making boxes like normal (chain 3, work 3 double crochets across the chain 3 from the previous row, and then join with a slip stitch). Do you see how the other sides of the square are starting to take shape? Remember, when you get to the end of the row do NOT add the last box. This will decrease the stitches on both sides and make a nice straight edge. 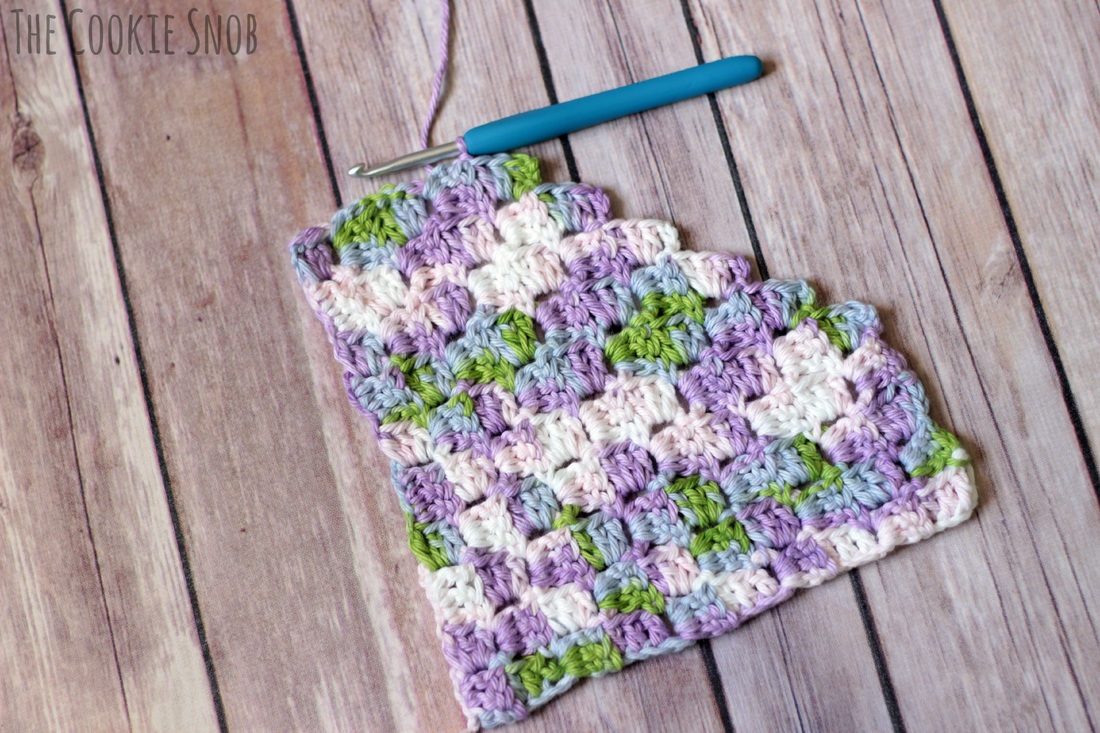 Continue decreasing in the same way... 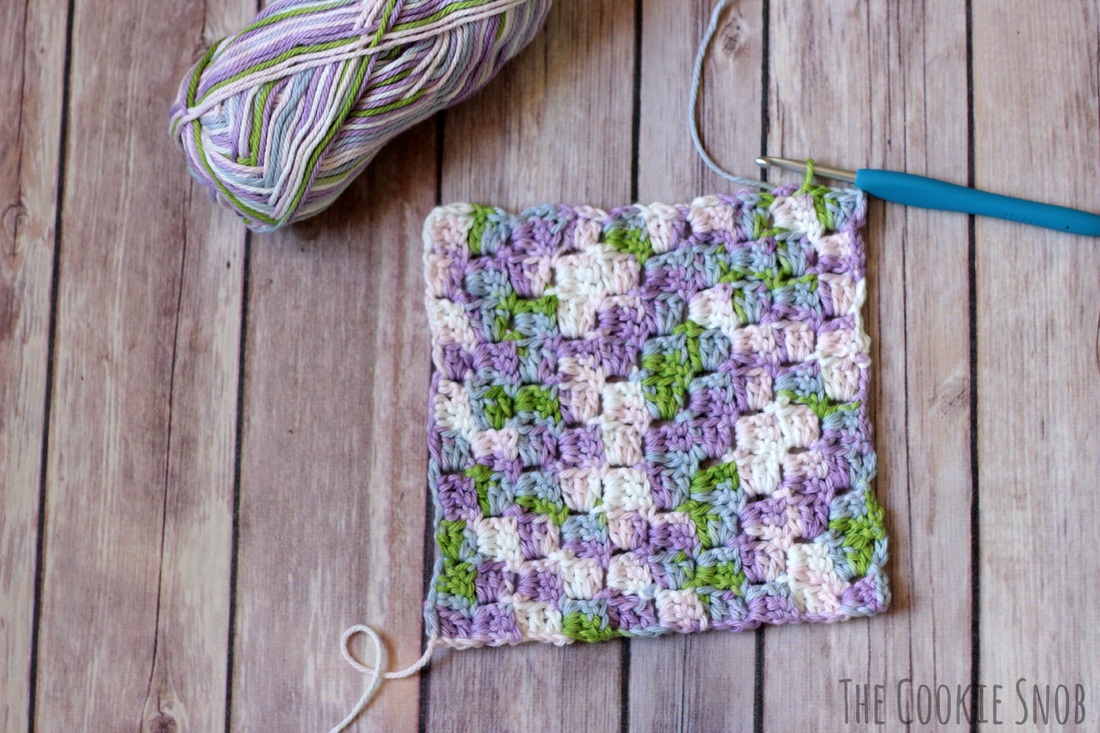 ...until you get to the end! Ta-dah! You can now finish it off and either leave it like it is or add a border to give it a cleaner edge. Congratulations! If you've made it this far, you now know how to make a diagonal box stitch! Give yourself a hand while I go find the party hats. 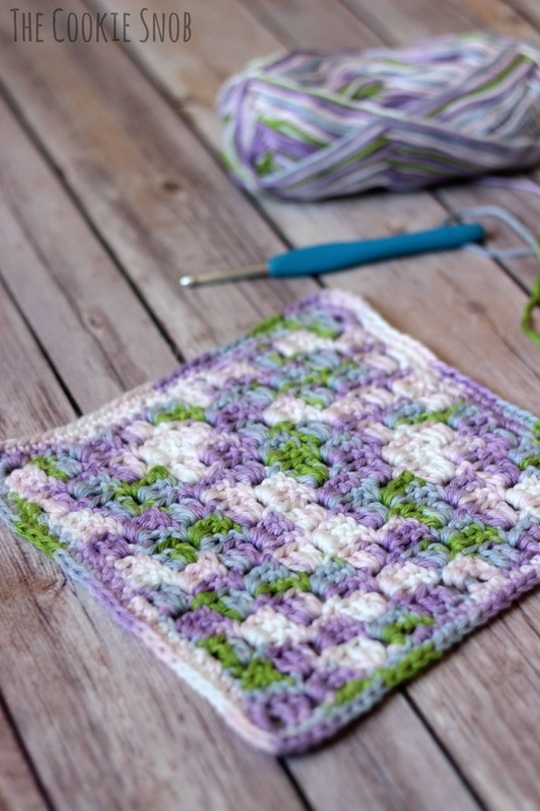 Now that you've got the basics down, here are a few helpful hints to keep you going on trickier c2c projects. If anyone comments with more tips I'll be adding them here, so be sure to check back!
And if you're not quite ready to make up your own project but are eager to get going, here are some links to free patterns that use the c2c technique:
What c2c projects do you have your eye on? Do you have any helpful c2c hints you'd like to add? What did you think of the tutorial? You can reach me in the comments section below or on Twitter, Facebook, Ravelry, Pinterest, Instagram, or by email. Happy hooking!
18 Comments
Marianne Mendonca
8/10/2015 02:54:11 am
Well written, easy to understand and follow 😊
Lavina
8/10/2015 02:59:45 am
I LOVE decreasing!! It's so rewarding (and slightly exciting) seeing the progress in finishing it! As for a border, I just do a simple sc around. Easy peasy! lol
Claudia
8/10/2015 03:00:30 am
Excellent post! The instructions are so easy to follow. Thanks for sharing all the creativity out there, so glad to be a part of it :)
Lorainne
8/20/2015 12:49:06 am
Thank you so much for sharing. Really appreciate it
Erin
8/28/2015 05:07:59 am
Thank you so much! I'm glad to hear that you like it :)
Fernanda
9/4/2015 02:04:50 am
I liked it a lot! Thank you
Deb Julien
9/5/2015 04:51:06 pm
Thank you for writing this out its a big help
Erin
9/5/2015 07:27:59 pm
I'm glad it was helpful! If this was useful for even one person then it's done its job :)
Kathleen Kobreek
5/17/2017 04:31:13 am
Thanks! I've been crocheting/knitting 50 years and just recently saw this. Your instructions with great pics are the best explanation I've seen so far. I can visualize each step as l read it. You're fab!
Erin
5/17/2017 10:26:32 am
Thanks! I'm glad it was helpful! This sort of tutorial works the best for me personally, so I was hoping it might work for someone else out there too :)
Sandra Jones
6/15/2018 07:53:27 am
I like doing the C2C pattern, now more to it. Thank you so much. Brilliant.
Mardell
7/10/2018 06:37:20 pm
I love this pattern and can't wait to try it out! Thank you for sharing
Marny CA
1/3/2019 12:18:57 am
When I do a copy/paste of your instructions everything has to be 'formatted' - so am wondering if there is a way to not have to manually fix it. Sorry, don't know how to ask the right question.
Carly Corkill
6/8/2019 06:20:39 am
Thank you so much for this instruction page! Its helped me make my c2c project. Really simple and clear instructions. Saved! :) 11/15/2020 04:39:06 am
In a regular c2c afghan with cake yarn: does the decrease side use less yarn than the increase side?
Erin
11/24/2020 10:59:30 pm
Great question! I haven't measured it exactly, but I find it usually comes out about the same. I split a ball of yarn in half once and used the first half to increase and then the second half to decrease and it worked great. So I think it's about even. Leave a Reply. |
Welcome!Thank you for stopping by to visit my own personal corner of the web! Feel free to take a look around and check out what I've been crafting, crocheting, or baking. Hopefully you'll find something to inspire your own creativity!   
Archives
March 2024
|
 RSS Feed