
|
With a big move for our family looming ahead, I've been trying to be really good about not acquiring any new yarn. Instead, I've been working my way through my yarn stash. To put my partial skeins to good use, I decided to make some beanies to donate, but I had some very specific requirements in mind before I started. I wanted a pattern that was warm, easy, worked up quickly, looked good when made with leftover yarn, had minimal sewing, and was fairly one-size-fits-all. So instead of sifting through all the patterns out there, I created my own! I haven't designed many knitting patterns in my day, but my yarn-lovin' heart says that this one is definitely a winner. 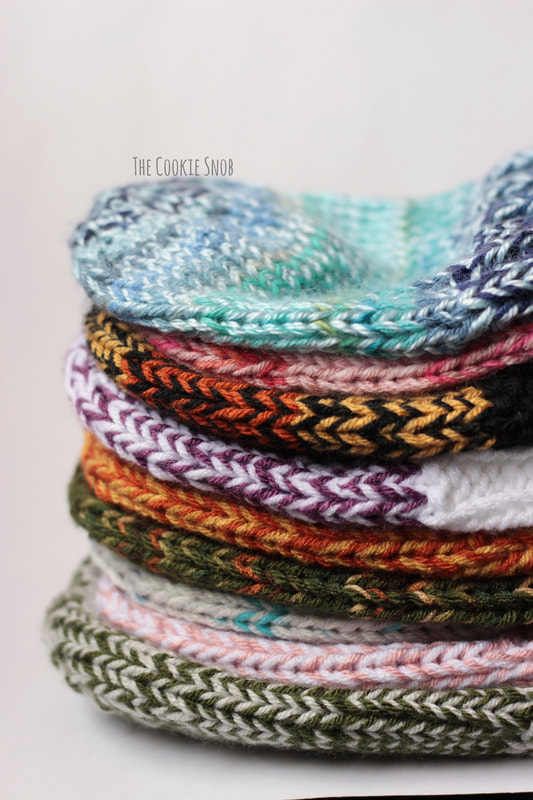 The key to this pattern was finding a way to use up leftover yarn of all sizes, from the large partial skeins to the tiny balls of scrap yarn, while still looking totally presentable. (Making ugly hats to donate = uncool.) But I think I cracked it! Just to make sure, I tested it with different combos of scrap yarn. Does it work with large balls of scrap yarn? Check! 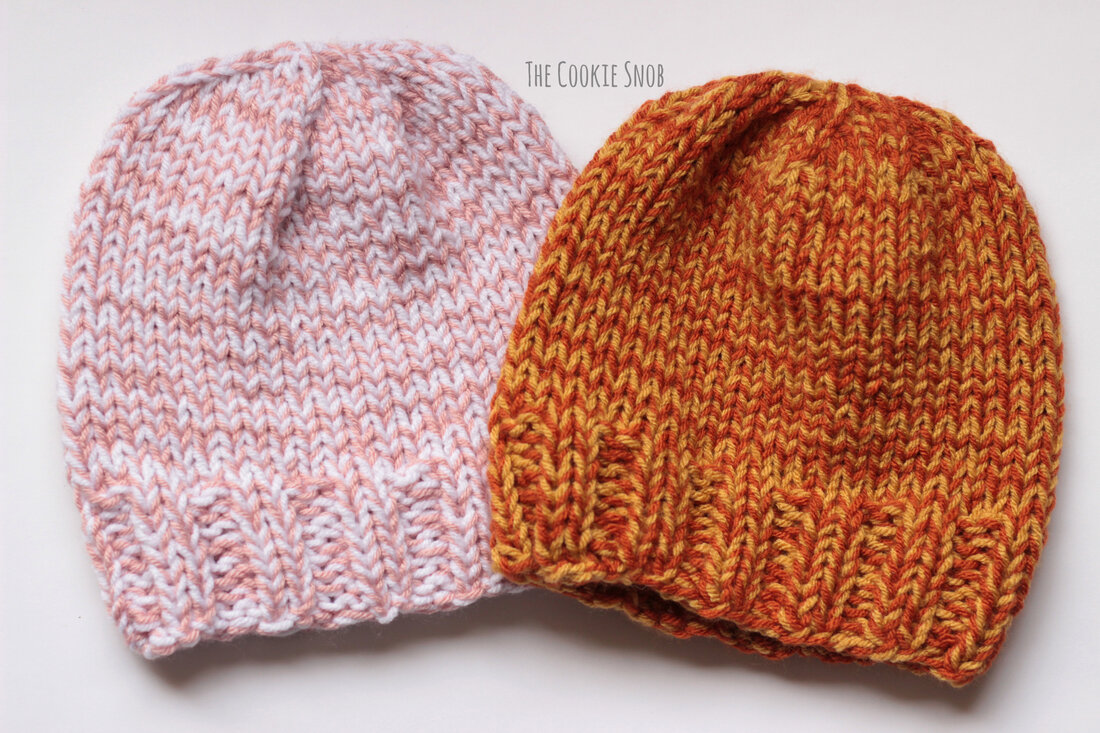 Does it work with the ever tricky variegated yarn? Check! 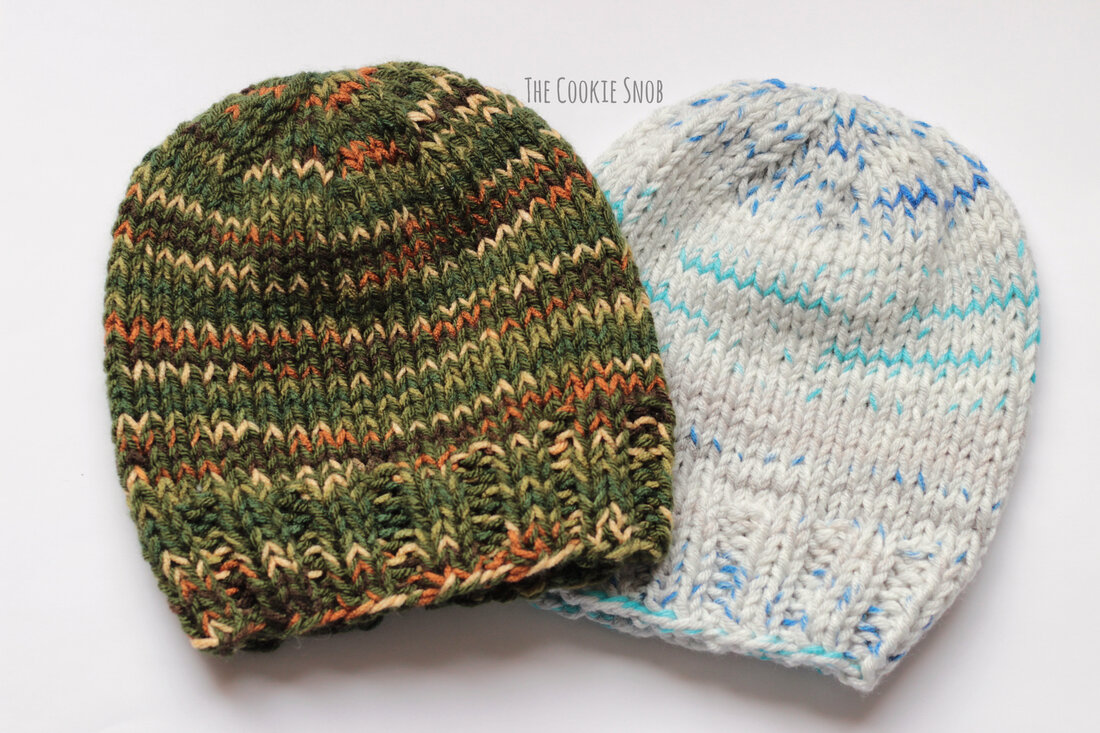 Does it work with mid-sized balls of scrap yarn? Check! 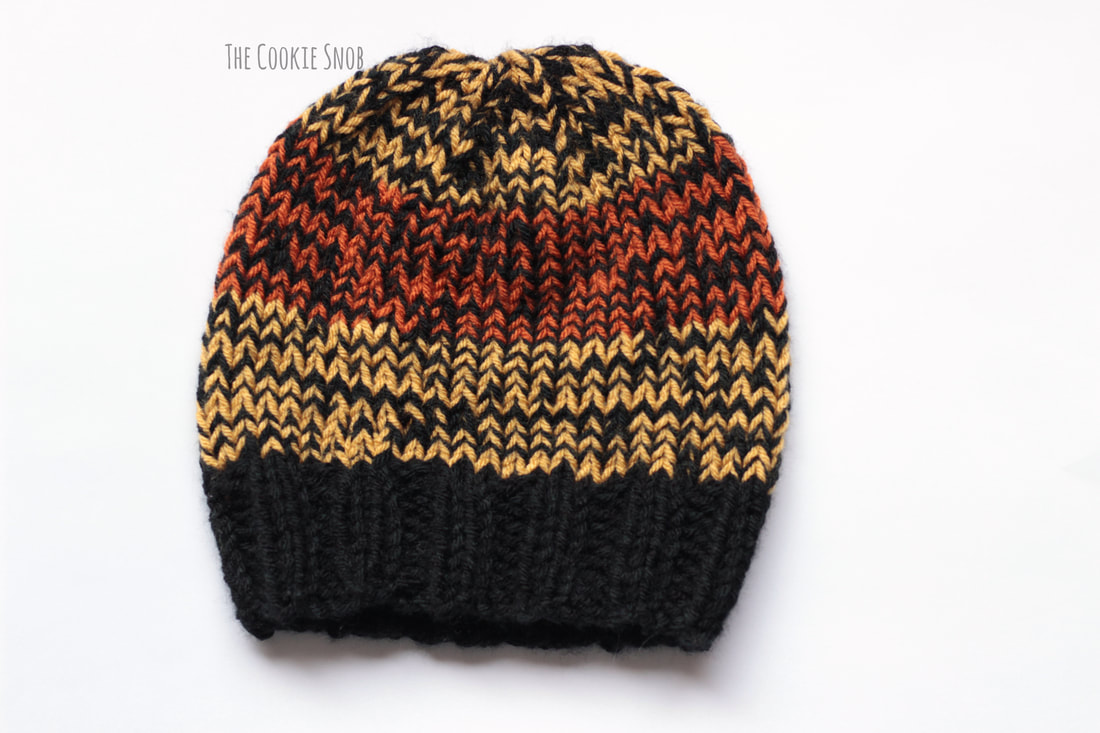 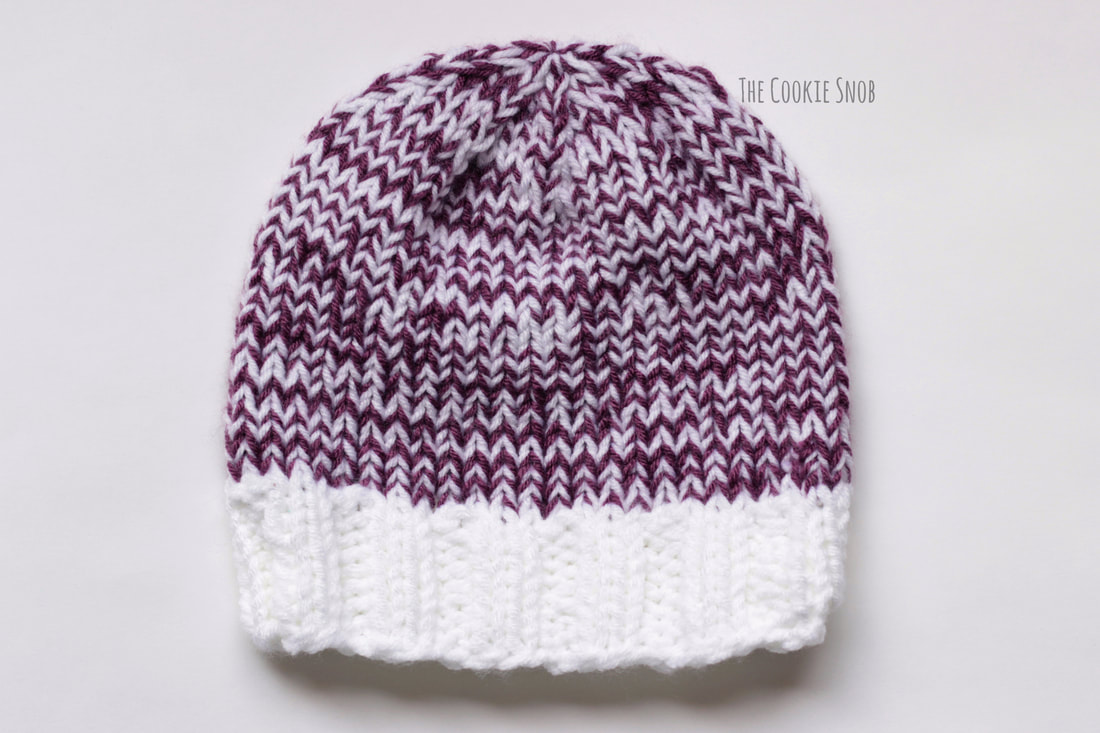 And (the clincher), does it work with tiny bits—and I mean seriously tiny bits—of scrap yarn? CHECK! 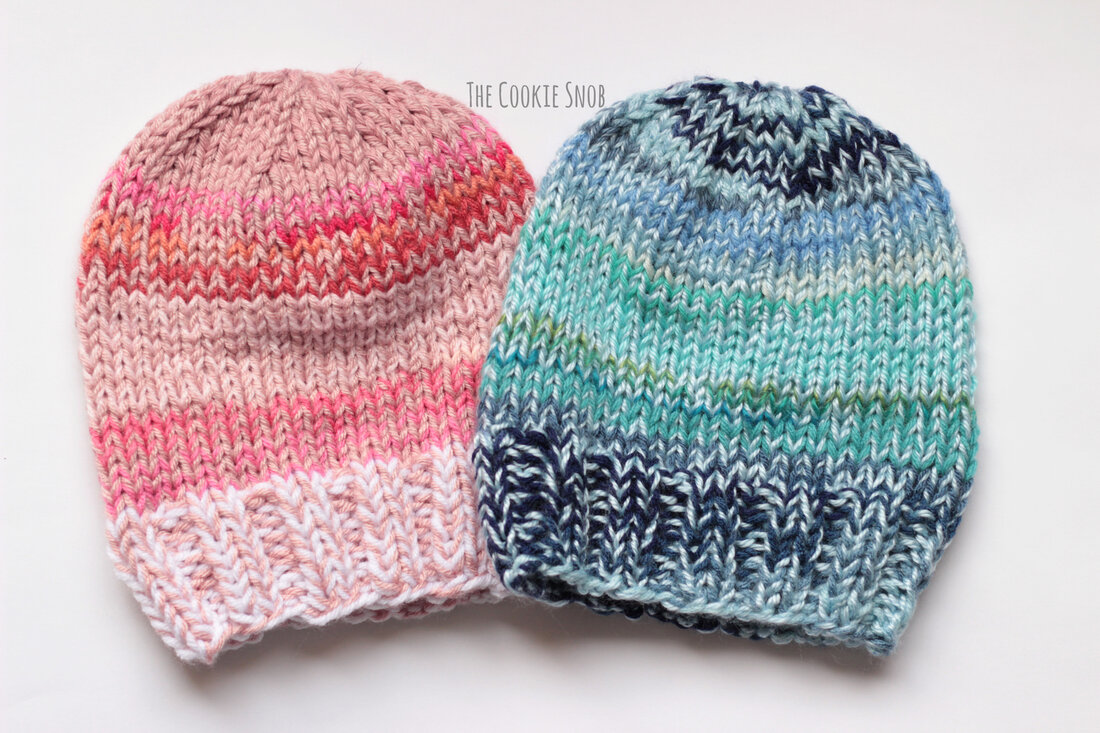 Sounds like a success to me! This beanie is super simple. If you can knit in the round, you can whip up a beanie in no time. The only "trick" to it is that it's made with 2 strands of aran (4) weight yarn. One strand stays the same color throughout the beanie while the second strand can change color as often as you'd like. This gives a unified look to the beanie, even when you're switching between different scrap yarns. As written, the hat should fit most people. It fits my smaller-than-average head, with lots of stretch to spare. And it fits decently well on my husband's larger-than-average head. So that should cover most teens and adults. But I also designed a larger version for the giant noggins among us (this version fits better for my husband). The smaller version is about 8.5" wide and 8.25" tall and the larger version is about 9" wide and 9" tall. These beanies have a LOT of stretch in them. 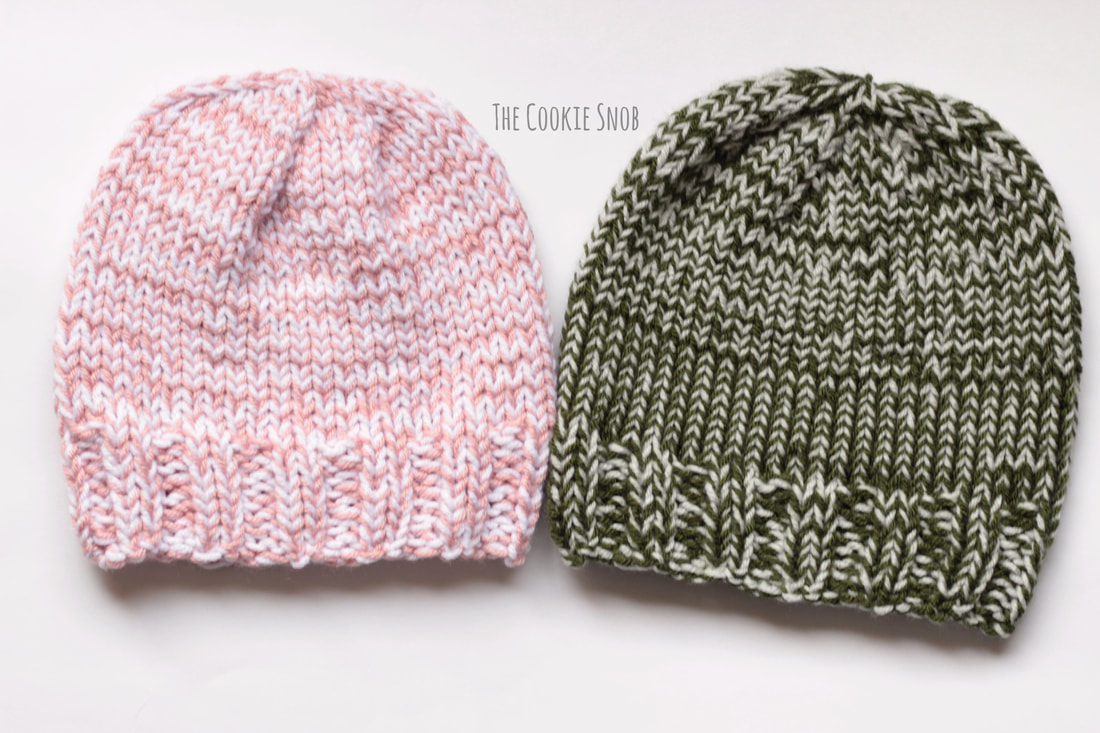 Alright, I think that's more than enough introduction. Let's get to it! If you'd like an ad-free printable PDF version of this pattern, you can find one on Ravelry. Stitch Glossary: CO = cast on k = knit k2tog = knit 2 together Materials:
Gauge: 4" = 12 sts, 16 rows Small/Medium Beanie: With the 16" circular needles and the yarn held double, CO 48. Join in the round. Use a stitch marker to mark the beginning of the round. Brim: Round 1: [k2, p2] around (48) Repeat round 1 until the brim measures 2" Body: Round 1: k around (48) Repeat round 1 until the entire piece measures 7" Decrease Round 1: [k4, k2tog] around (40) Decrease Round 2: k around (40) Switch to double pointed needles or to long circular needles (for the magic loop method) Decrease Round 3: [k3, k2tog] around (32) Decrease Round 4: k around (32) Decrease Round 5: [k2, k2tog] around (24) Decrease Round 6: k around (24) Decrease Round 7: [k1, k2tog] around (16) Decrease Round 8: k2tog around (8) Cut the yarn, leaving a long yarn tail. Using the tapestry needle, weave the yarn tail through the remaining stitches and pull taut to close. Fasten off and weave in ends. 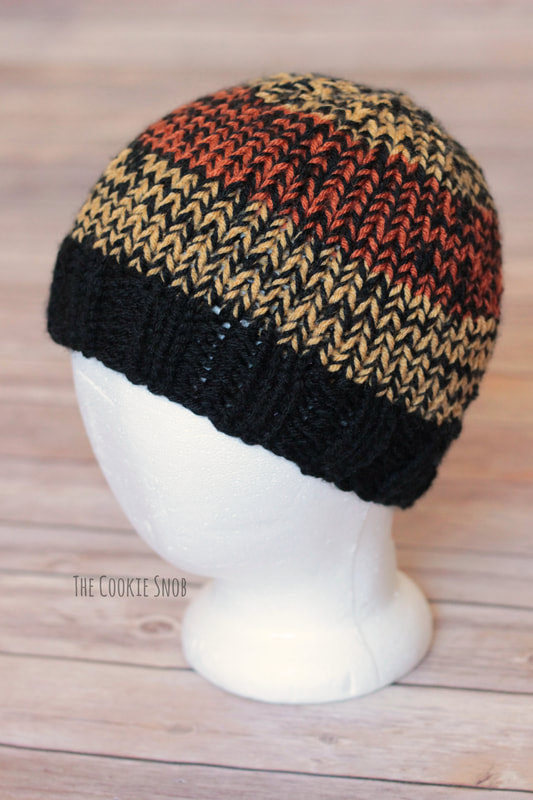 Large Beanie: With the 16" circular needles and the yarn held double, CO 52. Join in the round. Use a stitch marker to mark the beginning of the round. Brim: Round 1: [k2, p2] around (52) Repeat round 1 until the brim measures 2" Body: Round 1: k around (52) Repeat round 1 until the entire piece measures 7" Decrease Round 1: [k11, k2tog] around (48) Decrease Round 2: k around (48) Decrease Round 3: [k4, k2tog] around (40) Decrease Round 4: k around (40) Switch to double pointed needles or to long circular needles (for the magic loop method) Decrease Round 5: [k3, k2tog] around (32) Decrease Round 6: k around (32) Decrease Round 7: [k2, k2tog] around (24) Decrease Round 8: k around (24) Decrease Round 9: [k1, k2tog] around (16) Decrease Round 10: k2tog around (8) Cut the yarn, leaving a long yarn tail. Using the tapestry needle, weave the yarn tail through the remaining stitches and pull taut to close. Fasten off and weave in ends. 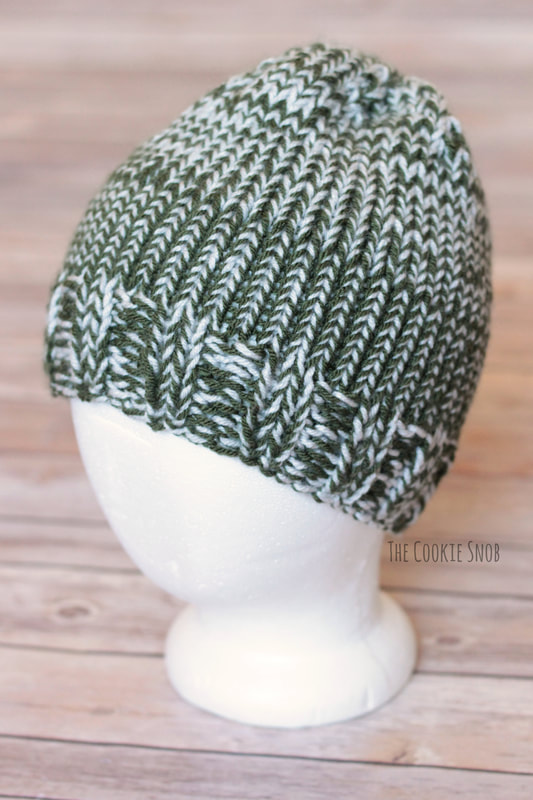 Great work! I hope that you enjoyed making this pattern! If you have any comments or questions about the pattern, you can reach me in the comments section below, by email, or on social media. Every beanie should be unique, so I'd love to see how yours turns out! Want to make sure you don't miss out on any future blog posts? Join my mailing list! (Spam free, I promise!) 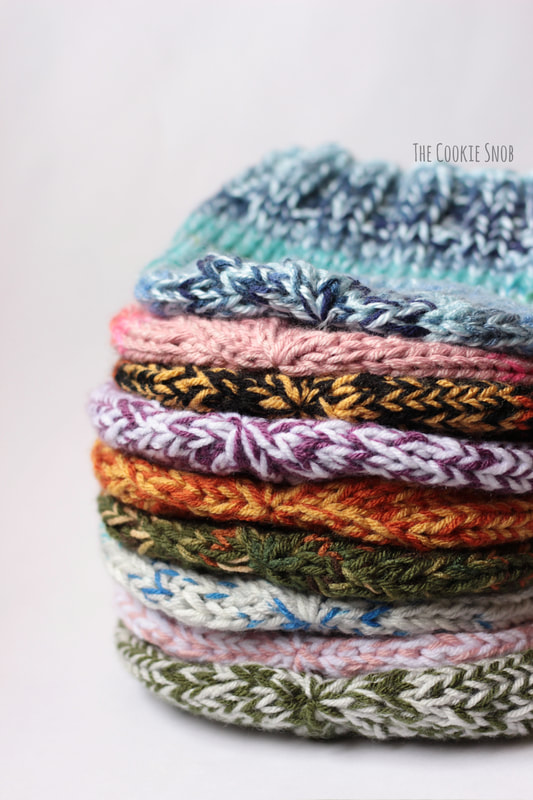 ***You're welcome to do whatever you'd like to with finished products made from this pattern but if you do sell them, I ask that you link back to my page. You may not copy this pattern, repost it anywhere (either altered or in its original form), or claim it as your own. You may not use any photos on this site for your own use. ***
5 Comments
Sue Yamada
9/7/2020 12:57:58 pm
Enjoying using your pattern to make hats to donate. Used up all my scrap yarn.
Sciakath
11/11/2020 05:16:54 pm
What a smart and simple way to use up worsted-weight yarn! I am definitely stitching a few of these up for a warm clothing collection at work. Single strands of worsted weight don't seem to cut it, but doubling up will surely do the trick. Thanks!
Bobetta Krueger
10/27/2021 08:39:36 pm
Am knitting a bunch of these to donate to abused and needy children.
Christina
10/29/2021 10:13:37 pm
Thank you so much for this pattern. I tried two hat patterns like this before and neither turned out. I’ve made 2 and 1/2 hats so far!!
Kat
1/3/2024 09:27:28 am
Thanks for the pattern! Would it work with bulky yarn? Leave a Reply. |
Welcome!Thank you for stopping by to visit my own personal corner of the web! Feel free to take a look around and check out what I've been crafting, crocheting, or baking. Hopefully you'll find something to inspire your own creativity!   
Archives
March 2024
|
 RSS Feed