|
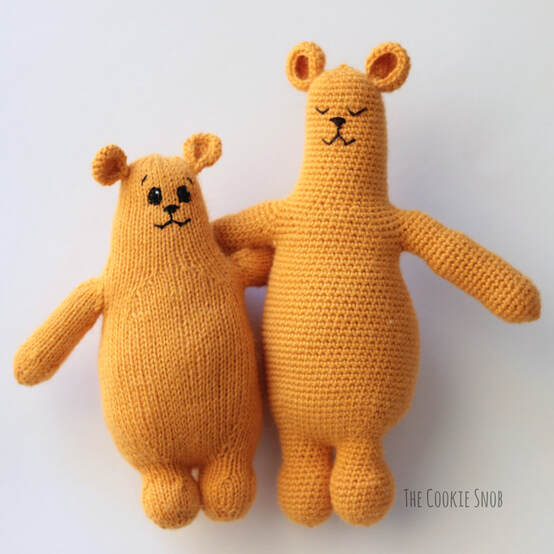
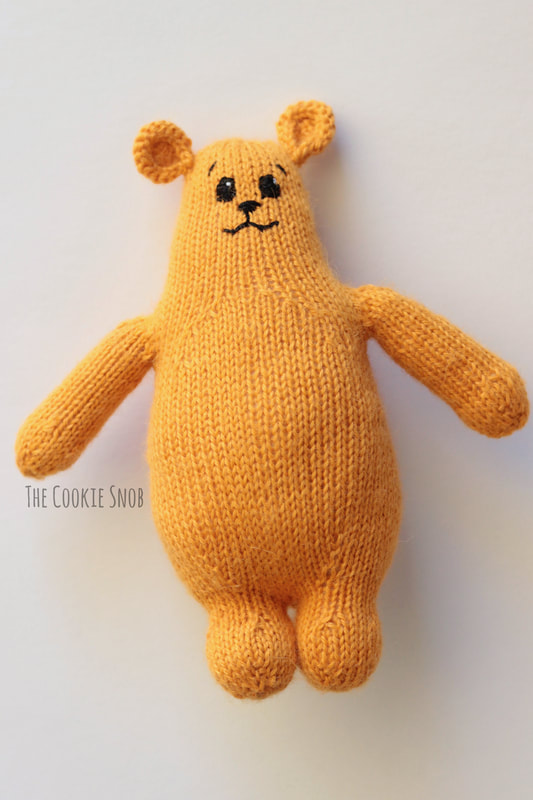
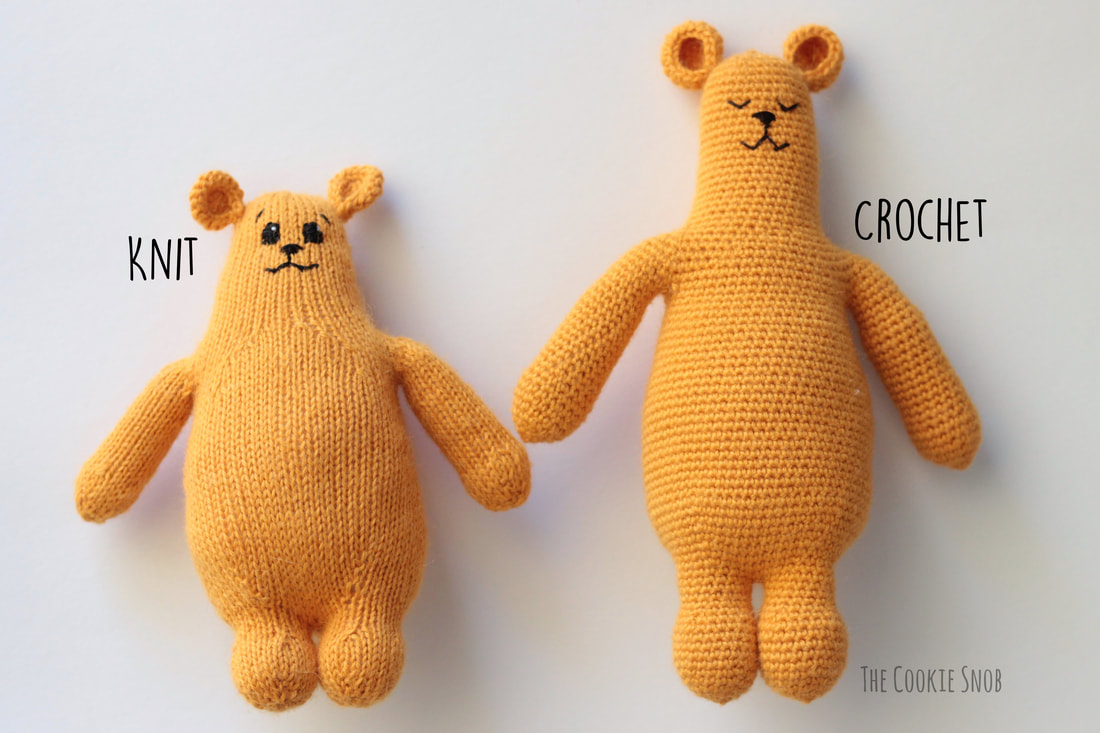
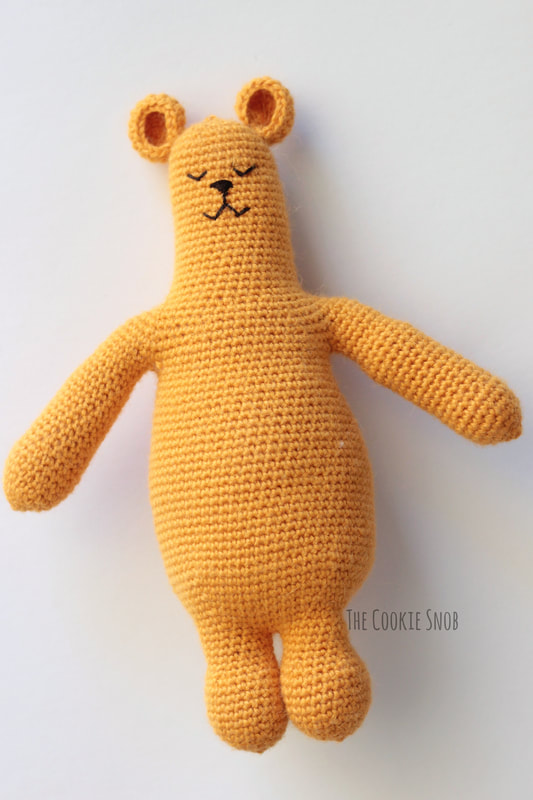
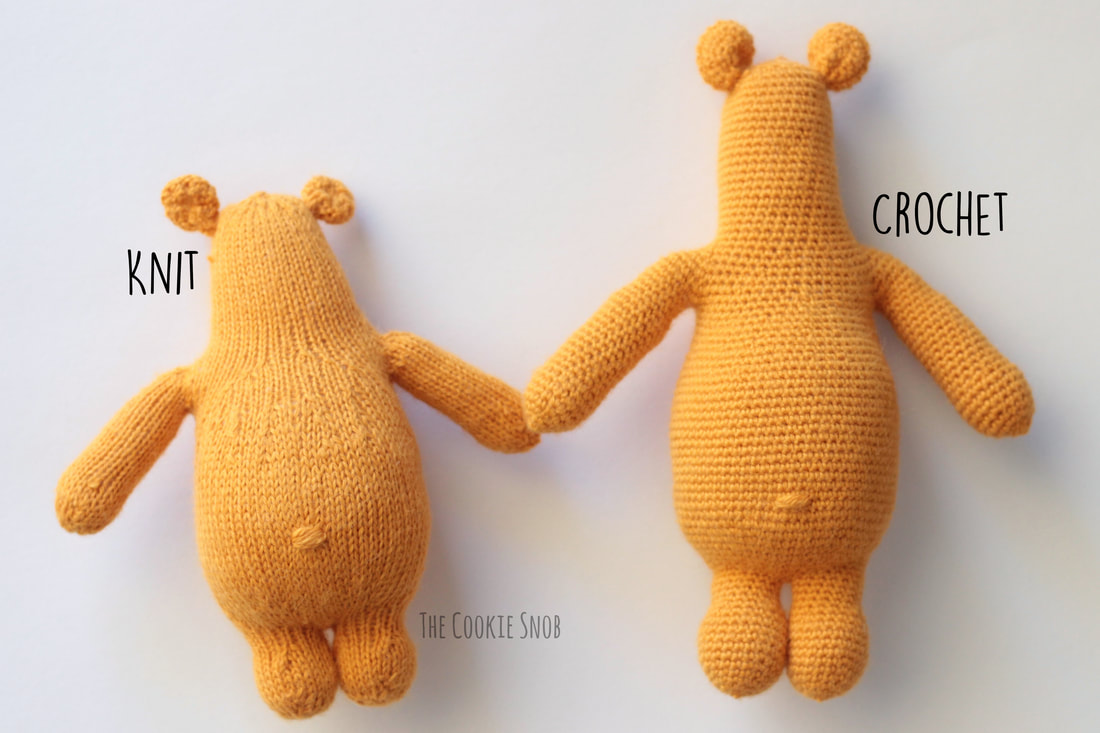
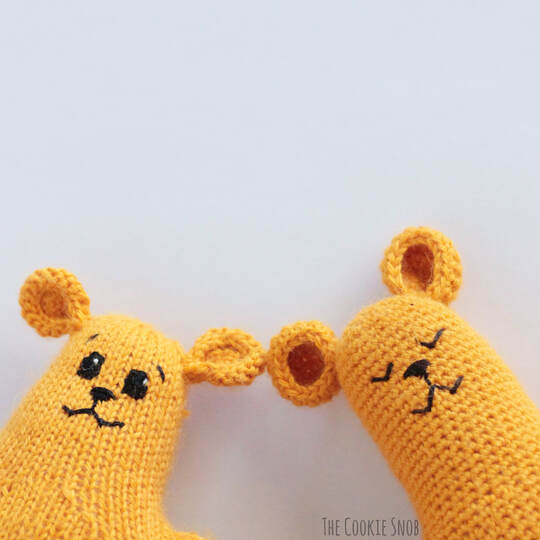
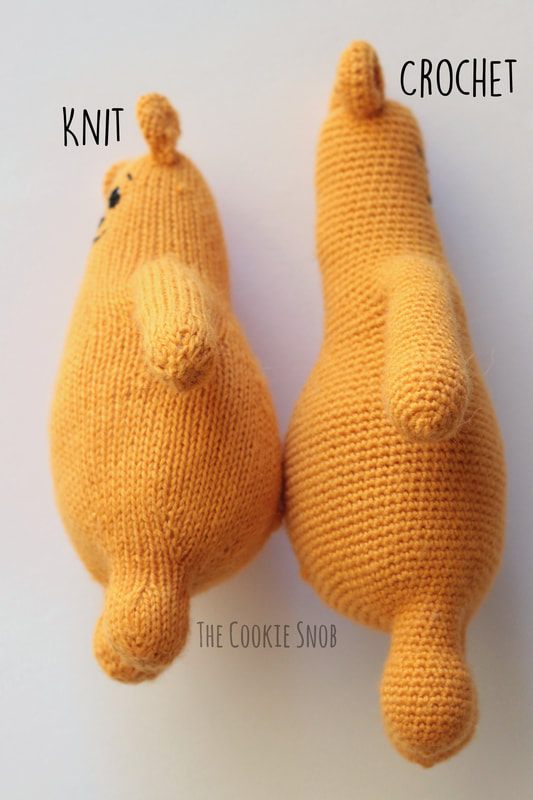
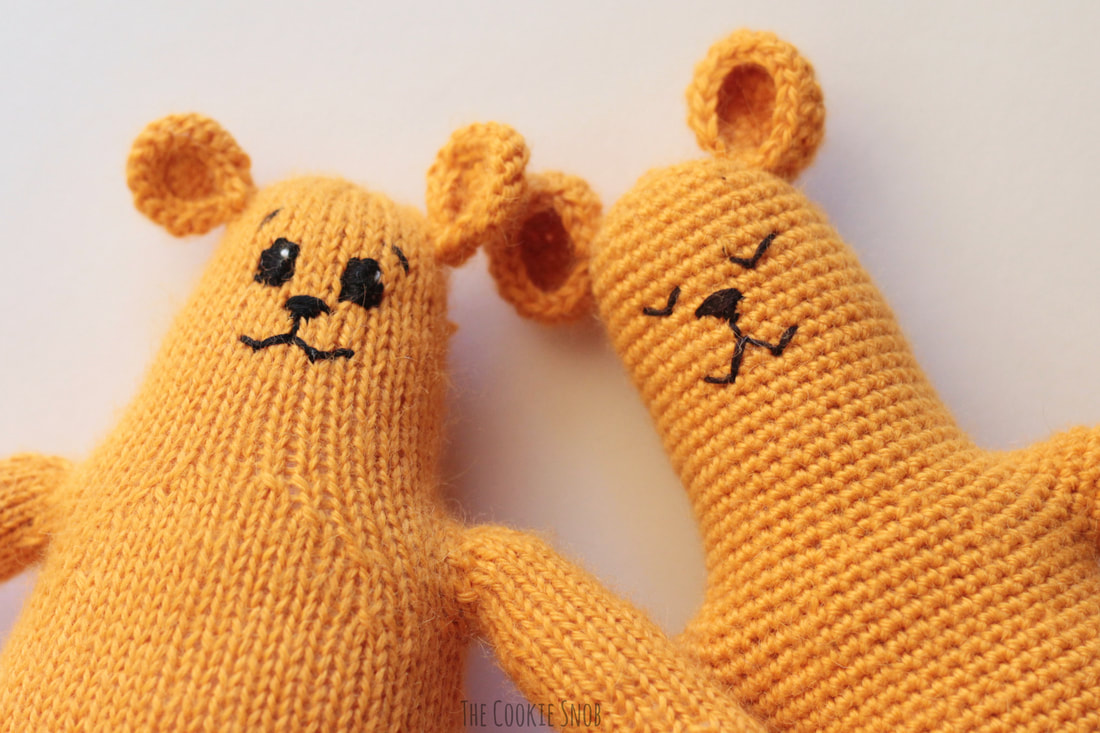
Have you ever wanted to crochet a knit pattern? I don't mean just finding a crocheted version, but actually reading the knit stitches and then crocheting them? Can you translate knitting directly into crochet? The idea came to me the other idea when I was knitting this super cute Otso bear pattern from London Loop Knit Lounge, so I decided to try it! I'm not an expert knitter, but I have enough crochet amigurumi experience that this seemed like the perfect pattern to try it out on. I found it to be a fascinating experiment, so I couldn't resist writing up some thoughts about what happened when I tried it. Before I get in to the (k)nitty gritty, I want to give a quick shoutout to this adorable knit pattern. If you are a knitter, I highly recommend making one of these sweet little bears. I made the version in the round on circular knitting needles and it came together really quickly. The bear is extra soft and huggable and my kids love it. Also, thank you to London Loop Knit Lounge for giving me the okay to use your pattern for this blog post! Now let's take a look at what happened. I knew before I started that the biggest issue would be knit stitches that don't translate into crochet, because they don't have equivalents. Knit stitches have a lot more to do with directionality than crochet stitches do. While knit stitches can lean in different directions depending on how you make them, crochet stitches are more for building vertically and (except for specialized decorative stitches) don't usually lean one way or the other. The good news is that for this pattern, the slant of the stitches isn't key for the final shape. They're necessary for the knit version, since it makes the final result look neater (basically, if you haven't knit before, when you increase or decrease in knitting it leans in one direction, so you'll want to keep an eye on the symmetry of those stitches and switch between the left-leaning and right-leaning to make the final design look prettier). You can see a pretty good example of this symmetrical shaping on the belly and back of the knit bear. But when you're crocheting amigurumi, you can just use an invisible decrease stitch and the final result will look nice without the extra effort. This seemed like the perfect pattern to test out this theory, since directionality didn't matter much and I could mostly ignore it. The next issue I suspected I'd have was scale. My gut instinct was that crochet stitches are taller than knit stitches, just based on the way they're constructed. To help compensate for this, I sized down a hook. While I used a 3.0 mm needle for the knit version (I sized down from the original pattern since I was using a dk weight yarn), I ended up using a C hook (2.75 mm) for the crochet version. Keep in mind that my knitting has a pretty average tension but my crochet stitches tend to be extra tight, so this effect could be even more exaggerated if you're a loose crocheter. I suppose I could have used an even smaller hook, but I don't dislike my hands that much. Based on my final products, I'm going to say that my hunch was correct; the crochet version is noticeably larger and more "stretched" looking than the knit version (kind of a "Mike Teavee" thing going on). Or, as my 4 year old told me, "It's a teenager bear." If I wanted to get more similar proportions for the crocheted bear, I would have gotten rid of some of the rows that just build the bear in height (without increasing the number of stitches or creating any shaping), but I left all the rows in for this example so that you could see the overall effect of directly swapping the stitches. So with those caveats in mind, how did crocheting the knit pattern work? Since this pattern was worked in the round (another advantage of using this particular pattern), I substituted the cast ons for the arms and legs for magic circles and just worked the same number of cast on stitches as single crochet stitches into the magic circle. Then anywhere the pattern told me to knit, I worked an equivalent number of single crochet stitches. The kfb (knit front and back) stitch means that two knit stitches are worked in the same spot, which makes it almost exactly equivalent to a standard increase stitch. So anywhere that I saw a kfb, I made a single crochet increase. Similarly, the two types of knit decreases stitches used (ssk and k2tog), were essentially equivalent to a standard single crochet decrease (ignoring the directionality I mentioned earlier, which doesn't matter for this sort of crocheted shaping), so I just worked an invisible decrease stitch when I came across one of those. This system worked pretty well until I came across a different type of increase: the M1R (make 1 right) and M1L (make 1 left). As you can probably guess by the name, these are some of those leaning stitches I talked about. The end goal of these stitches is to create an extra stitch where there was none before (by picking up a spot between stitches). At first I thought that I would just substitute them for increase stitches, since that's essentially what's happening. But I quickly realized that my stitch count came out all wrong that way. That's because the M1R and M1L stitches aren't working twice in the same stitch like the kfb. Rather, they create something new in between existing stitches, which doesn't really have a great crochet equivalent. After puzzling over it for a minute, I realized that I could still use an increase stitch in the same spot, I just had to make one less single crochet stitch afterwards to compensate, since a M1R/L is only stitch and not two. This is slightly hard to explain, so apologies if this is confusing. But let's say the pattern told me to knit 6, M1R, knit 25 (which is a random sequence I just made up, so don't bother trying to spot it in the pattern haha). Instead I would single crochet 6, increase, single crochet 24. Then the stitch count comes out correct while still leaving the increases in the same (approximate) spot in the pattern. I came across another subtle difference between knitting and crochet that required me to adjust the pattern slightly. While knit stitches stay in a straight vertical line from one row to the next, crocheting in the round creates stitches that spiral to the right. For a small number of rows, it doesn't matter much. But after working a lot of rows for the body of the bear, the beginning of my round had noticeably shifted to the right from where I started (whereas in the knit version, the start of the round stays firmly in the center). This was going to be an issue for joining the arms, since they would be in the completely wrong place if I just followed the knit pattern exactly. Luckily, this was an easy fix. I just added a few more more single crochet stitches until I was at the center again and made that the new beginning of the round, then kept following the pattern from there. For the ears, which are not worked in the round, I chained the number of cast on stitches it asked for, then added one more for the turning chain. Next I turned the piece and continued to work back and forth in rows, adding an extra turning chain at the end of each row. As before, I used single crochet in place of any knit stitch or purl stitch and used a single crochet increase for any kfb or pfb (purl front and back). Then I assembled everything according to the instructions. The body construction works great either way and I didn't have any issues. I decided against using safety eyes, in case my baby got her hands on these, and embroidered the eyes on instead. I noticed that it was much easier to embroider the knit version, which isn't surprising since knitting produces a much thinner and more flexible fabric, whereas crocheting is thicker and holds its own shape better, regardless of how it's stuffed. So the knit version got a more complicated face design and the crochet version got a simpler face, but both turned out really cute. If I were making it again, I would stitch the crocheted face on before I finished closing off the head, since it's easier to manage the needle when you have access to both sides of the crocheted fabric at once. Overall, this was a fun experiment and I learned a few interesting takeaways:
I wouldn't recommend trying to crochet any knit pattern you can get your hands on. There are certain things that just work better with knitting (and certain things that work better with crochet). Each yarn craft has its own unique attributes and they're not completely interchangeable. But it was fun to see that I could successfully turn a basic 3D shape from a knit object into a crochet object without much effort on my part. If someone else wanted to try this, I would recommend making sure you have a basic understanding of what the knit stitches are and how they work so that you can make the best choices about what substitutions to make. And I would also recommend being smart about what type of pattern you're using; a knit sweater would not directly translate well into a crocheted one because the fabrics are so unique, cables have to be approached completely differently if you're crocheting versus knitting, etc. But for a simple object like this, it's doable. I hope you all enjoyed reading about my little knitting translation experiment! What do you think? Would you give it a try? If you have any questions or comments about it, you can reach me in the comments section below, by email, or on social media. I look forward to hearing your thoughts! Happy hooking!
Want to make sure you don't miss any future blog posts? Join my mailing list! (Spam-free, I promise!)
1 Comment
LUZ MIRYAM VILLA GONZALEZ
11/12/2023 02:40:32 pm
Gracias por compartir, y sobre todo en estos temas tejeriles tan especiales. Un saludo desde Colombia
Reply
Leave a Reply. |
Welcome!Thank you for stopping by to visit my own personal corner of the web! Feel free to take a look around and check out what I've been crafting, crocheting, or baking. Hopefully you'll find something to inspire your own creativity! Archives
March 2024
|



 RSS Feed