
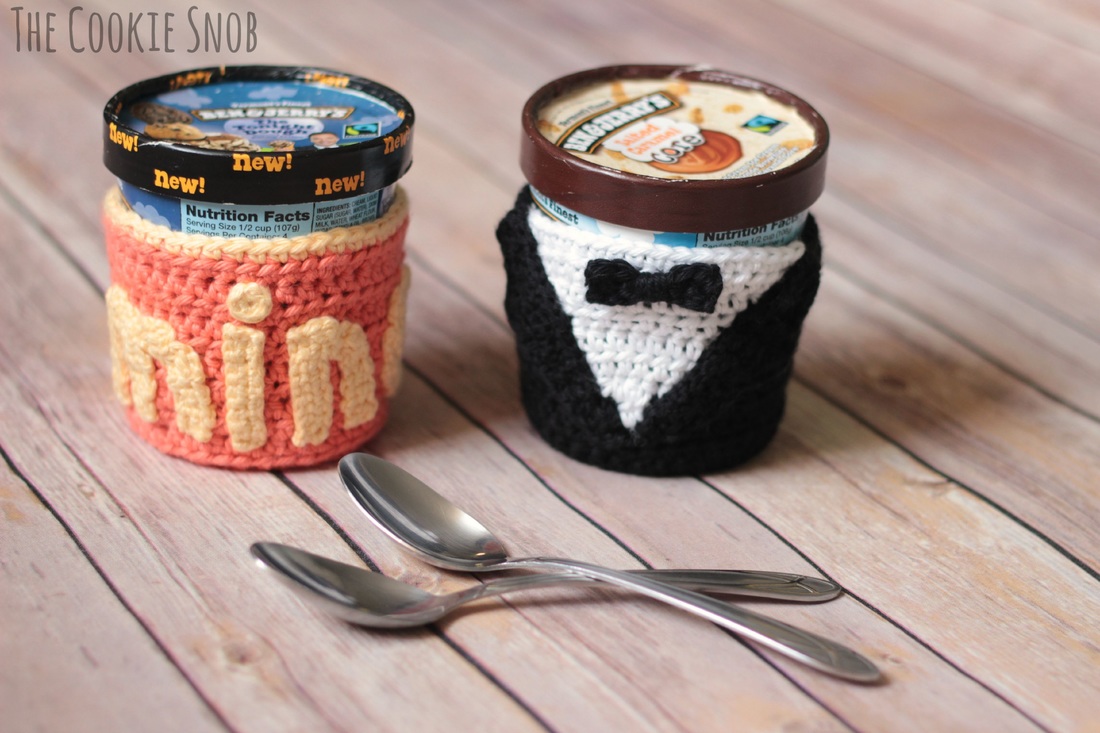
 Digging straight into a pint of ice cream is one of the most decadent experiences out there. It's basically the epitome of self-indulgence (but in an oh-so-good way). However, there's a problem with eating it straight from the container. Imagine you're sitting on the couch, you've got your Netflix queued up, and then you start excavating an ice cream tunnel straight through the middle with your spoon. Glorious, right? Until suddenly your hands start freezing up. So cold! But it's ice cream so you have to persevere...but it's so cold...but ice cream...but frost bite...dilemma. Well now I have a solution for you: ice cream pint cozies! 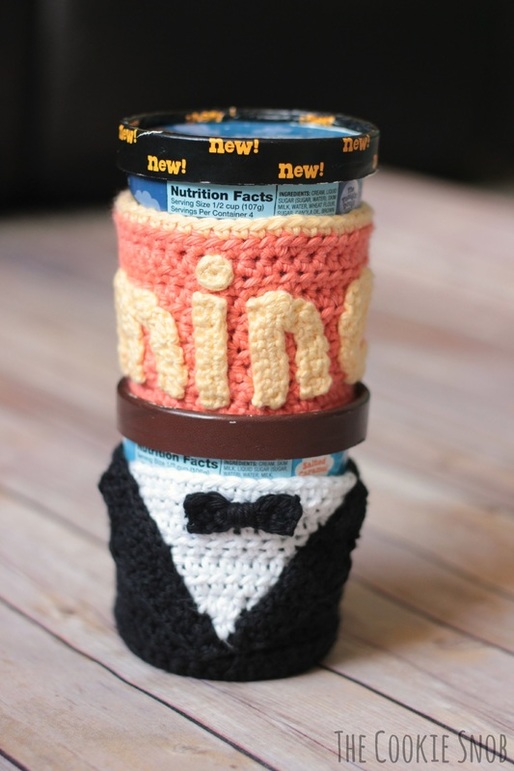 To make things a bit more fun, I have two different versions of the pattern for you to use. The first version is the simpler of the two, but that doesn't make it boring. You can make it in your favorite colors, add stripes, or add any decorations you can think of! Dress it up and personalize it to fit your ice cream philosophy. Simple Ice Cream Cozy Pattern Materials:
Stitch Glossary: st(s) = stitch(es) ch = chain ss = slip stich sc = single crochet hdc = half double crochet hdc inc = 2 hdc in same st 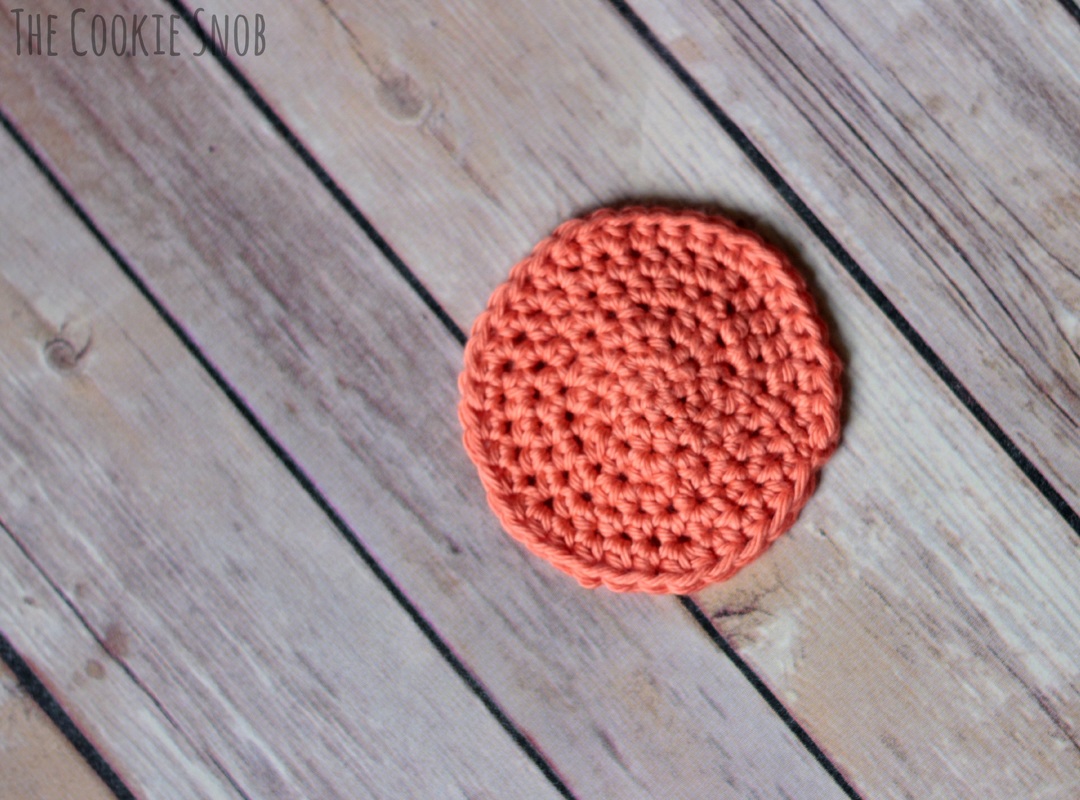 Bottom: Note: The bottom is worked in joined rounds, meaning that at the end of round you'll join the last stitch to the first stitch of the round with a slip stitch and then begin the next round without turning the piece. This creates a more uniform appearance for the base of the cozy Begin with main color Round 1: Make a magic circle and work 6 hdc into the magic circle. Join with a ss to the first hdc. (6) Round 2: ch 2, hdc inc in the same st and in each st around. Join with a ss to the first hdc. (12) Round 3: ch 2, hdc inc in the same st, hdc in the next st, [hdc inc, hdc in the next st] around. Join with a ss to the first hdc. (18) Round 4: ch 2, hdc inc in the same st, hdc in the next 2 sts, [hdc inc, hdc in the next 2 sts] around. Join with a ss to the first hdc. (24) Round 5: ch 2, hdc inc in the same st, hdc in the next 3 sts, [hdc inc, hdc in the next 3 sts] around. Join with a ss to the first hdc. (30) Round 6: ch 2, hdc inc in the same st, hdc in the next 4 sts, [hdc inc, hdc in the next 4 sts] around. Join with a ss to the first hdc. (36) Fasten off, leaving a long tail for sewing 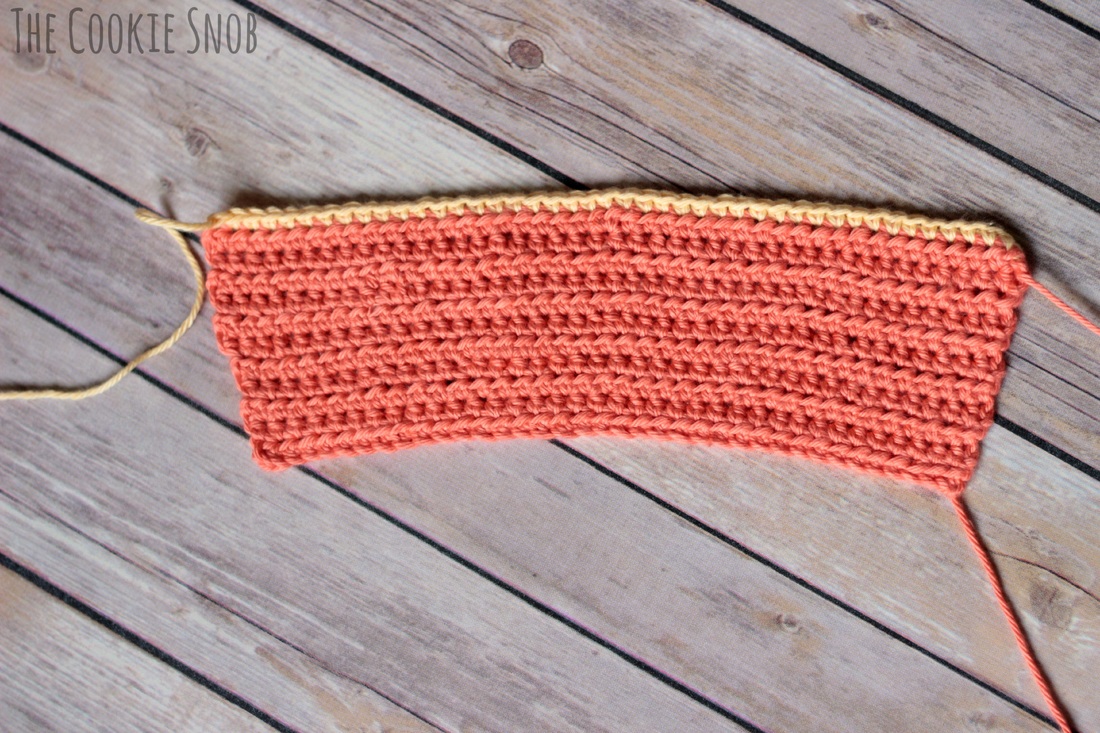 Sides: Begin with main color. Ch 38. Row 1: hdc in the third chain from the hook and in each ch across; ch 2 and turn (36) Rows 2-3: hdc in each st across; ch 2 and turn (36) Row 4: hdc in the next 11 sts, hdc inc, hdc in the next 12 sts, hdc inc, hdc in the next 11 sts; ch 2 and turn (38) Row 5: hdc in each st across; ch 2 and turn (38) Row 6: hdc in the next 18 sts, hdc inc, hdc in the next 18 sts, hdc inc; ch 2 and turn (40) Row 7: hdc in each st across; ch 2 and turn (40) Row 8: hdc in the next 9 sts, hdc inc, hdc in the next 20 sts, hdc inc, hdc in the next 9 sts; ch 2 and turn (42) Row 9: hdc in each st across; ch 2 and turn (42) Row 10: hdc in the next 20 sts, hdc inc, hdc in the next 21 sts. Switch to contrasting yarn color; ch 1 and turn (43) Row 11: sc in each st across (43) Fasten off, leaving a long tail for sewing 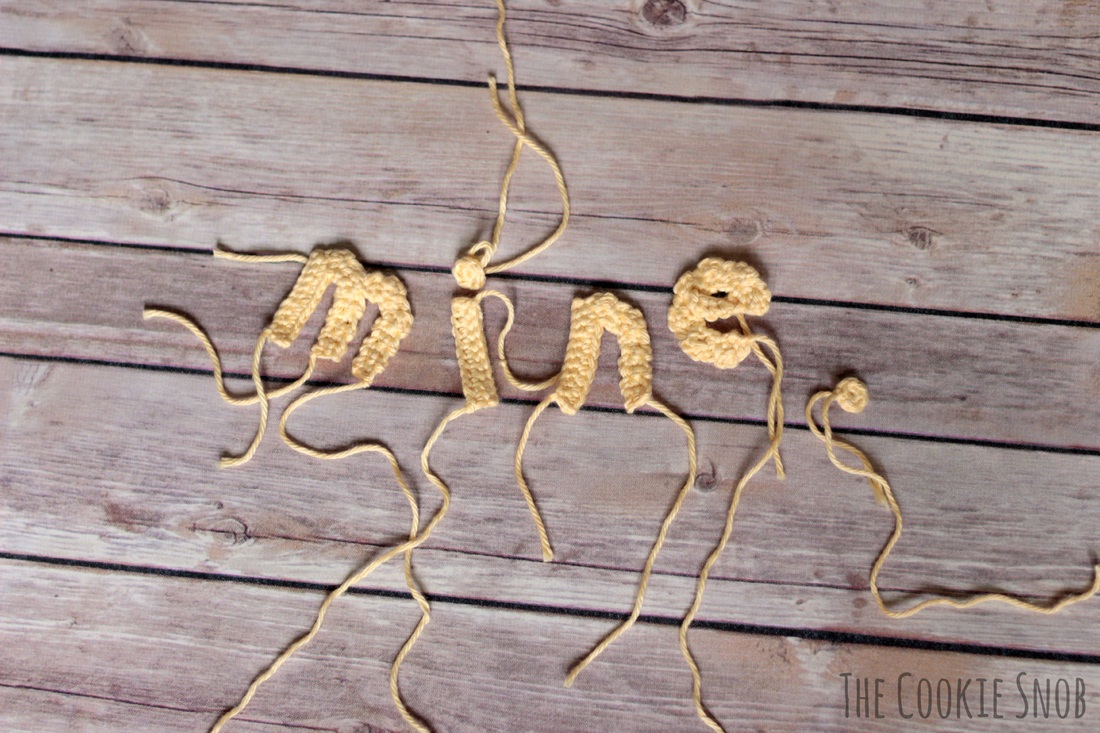 At this point, you can make any embellishments you'd like to add to your cozy. I chose to crochet letters based on Moogly's lowercase alphabet. In order to make the letters smaller, I used a size B (2.25mm) hook and made the letters thinner by making them only 2 rows thick (for the curves I omitted the hdcs). If you want to write words on yours, you could also try surface crochet or hand-stitching with a contrasting yarn color. 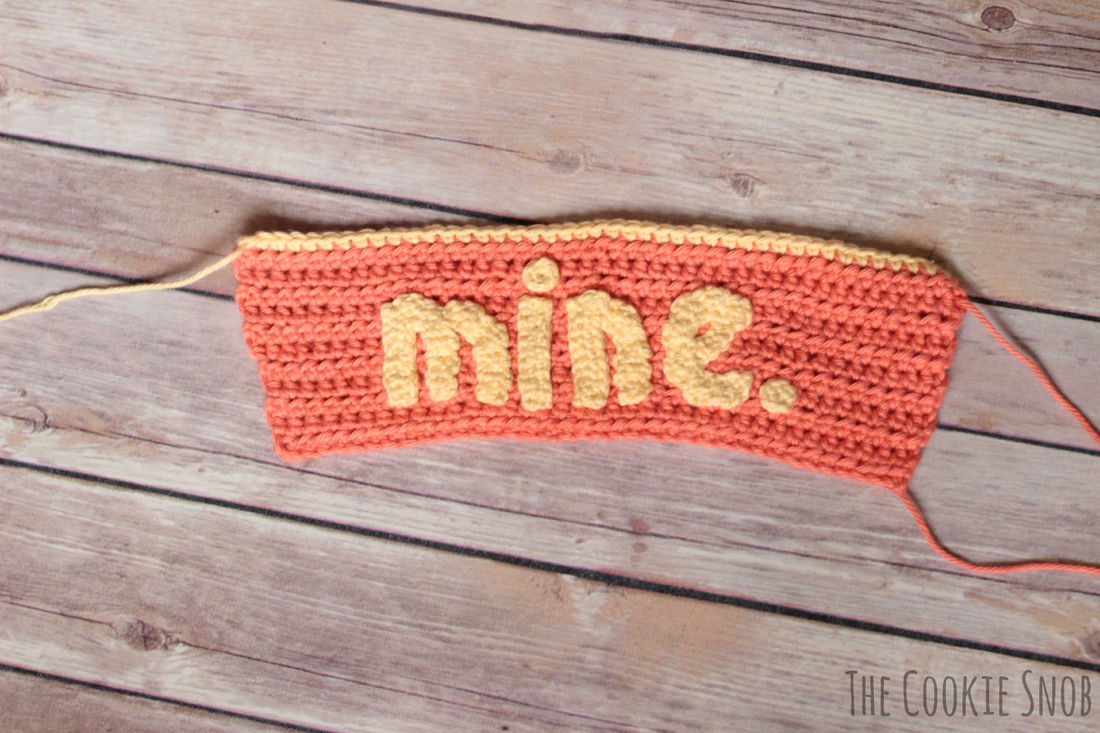 Once your embellishments are made, sew them onto the cozy sides. Now you're ready to assemble the pieces. 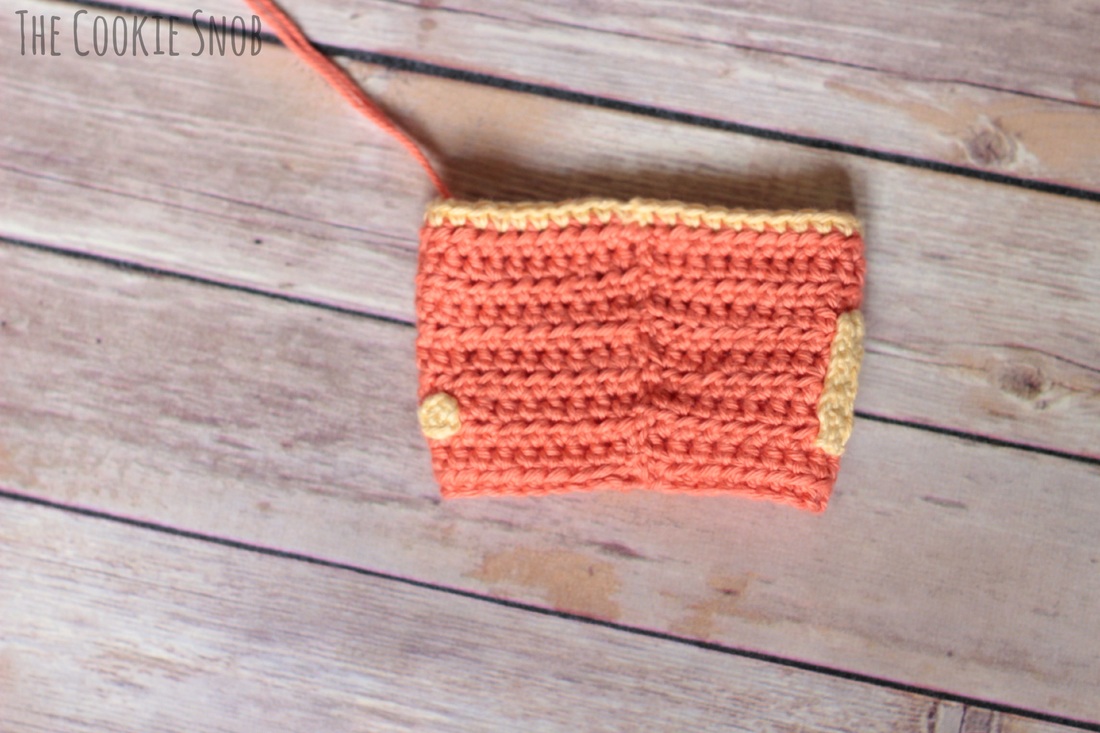 Assembly: Using a tapestry needle and the long end of yarn you left after finishing off the cozy sides, sew the ends of the sides together to form a cylinder. Then, using a tapestry needly and the long end of yarn you left after finishing off the bottom, sew the bottom to the sides (each has the same number of sts, so they should match up perfectly). Weave in remaining ends. Ta-dah! You now have a completed ice cream pint cozy! 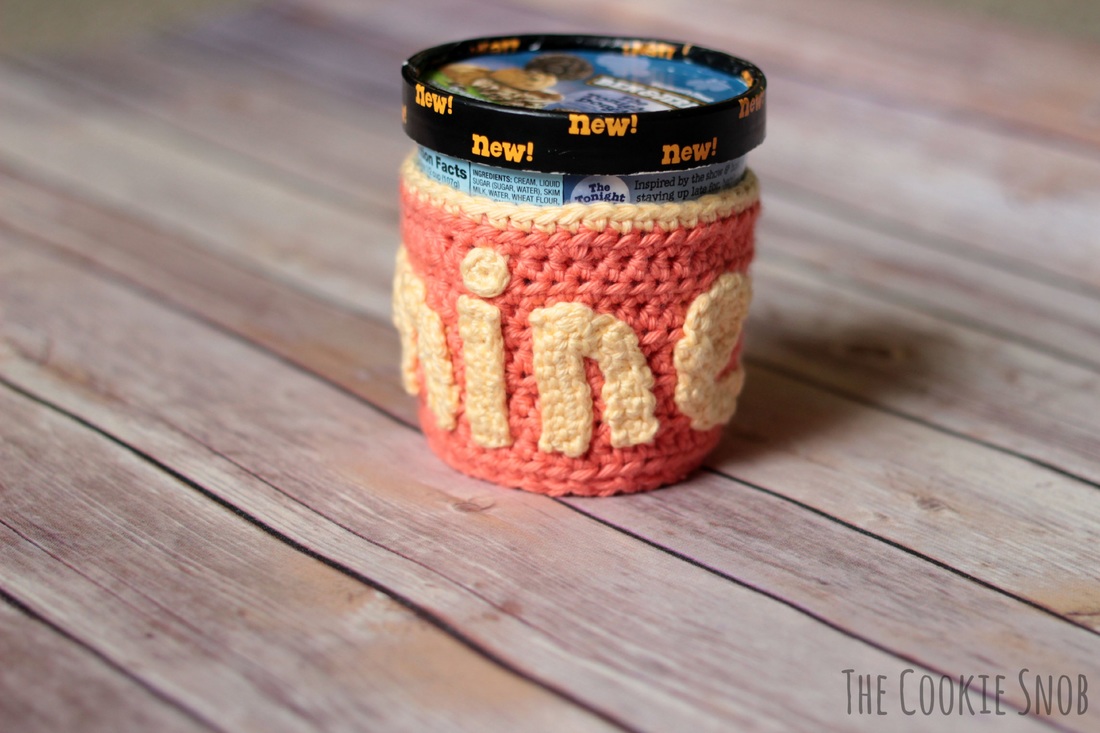 But what if you're looking for something a little fancier? Let's say you have a hot date with Ben and Jerry. That calls for more than just sweatpants. So I also made up a pattern for a tuxedo ice cream pint cozy. This pattern requires color changes mid-row, so if you're not familiar with the technique take a look at this tutorial. Tuxedo Ice Cream Cozy Pattern: Materials:
Stitch Glossary: st(s) = stitch(es) ch = chain ss = slip stich sc = single crochet inc = 2 sc in same st sc tog = single crochet together hdc = half double crochet hdc inc = 2 hdc in same st Bottom: Use the same pattern for the bottom of the cozy (see the "Simple Cozy" pattern above). 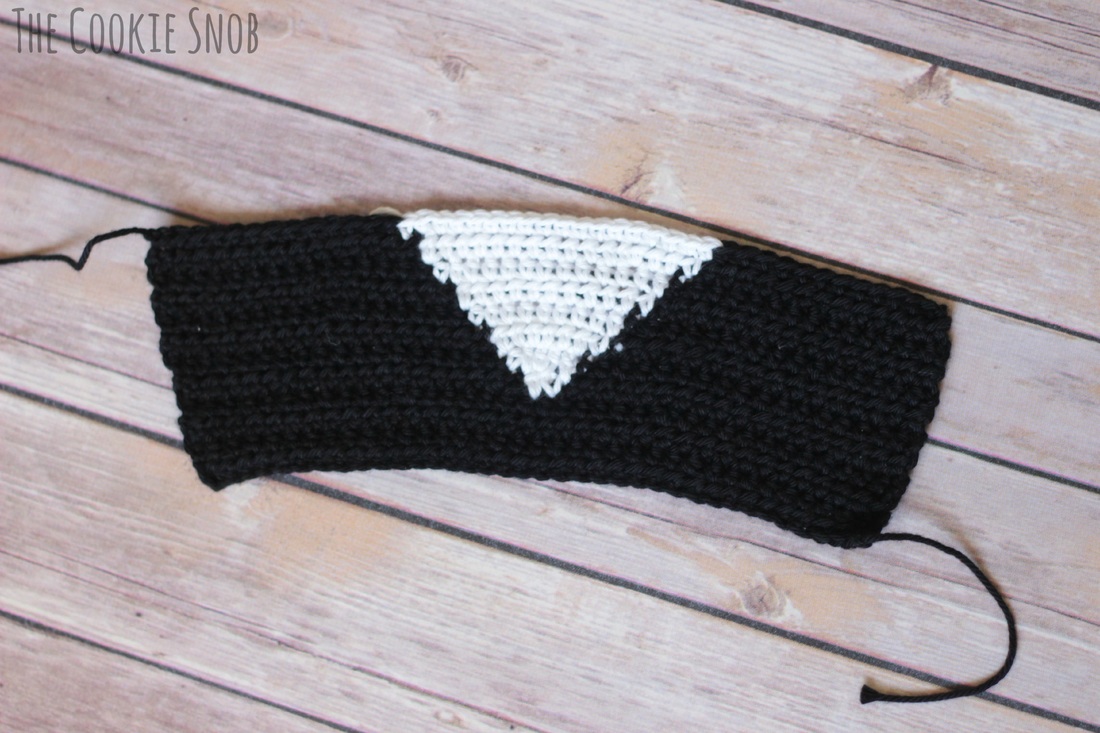 Sides: Note: As you change colors, you will either need to carry the yarn you're not using with you or fasten off and weave in the ends of the yarn you're not using so that the color changes are not apparent. Begin with black. Ch 38. Row 1: hdc in the third chain from the hook and in each ch across; ch 2 and turn (36) Rows 2-3: hdc in each st across; ch 2 and turn (36) Row 4: hdc in the next 11 sts, hdc inc, hdc in the next 12 sts, hdc inc, hdc in the next 11 sts; ch 2 and turn (38) Row 5: hdc in the next 18 sts, change to white yarn, hdc in the next 2 sts, change back to black yarn, hdc in the remaining sts; ch 2 and turn (38) Row 6: hdc in the next 17 sts, change to white yarn, hdc, hdc inc, hdc in the next 2 sts, change back to black yarn, hdc in the next 16 sts, hdc inc; ch 2 and turn (40) Row 7: hdc in the next 17 sts, change to white yarn, hdc in the next 7 sts, change back to black yarn, hdc in the remaining sts; ch 2 and turn (40) Row 8: hdc in the next 9 sts, hdc inc, hdc in the next 5 sts, change to white yarn, hdc in the next 9 sts, change back to black yarn, hdc in the next 6 sts, hdc inc, hdc in the next 9 sts; ch 2 and turn (42) Row 9: hdc in the next 16 sts, change to white yarn, hdc in the next 11 sts, change back to black yarn, hdc in the remaining sts; ch 2 and turn (42) Row 10: hdc in the next 14 sts, change to white yarn, hdc in the next 6 sts, hdc inc, hdc in the next 5 sts, change back to black yarn, hdc in the next 16 sts; ch 1 and turn (43) Row 11: sc in the next 15 sts, change to white yarn, sc in the next 15 sts, change back to black yarn, sc in remaining sts (43) Fasten off, leaving a long tail for sewing 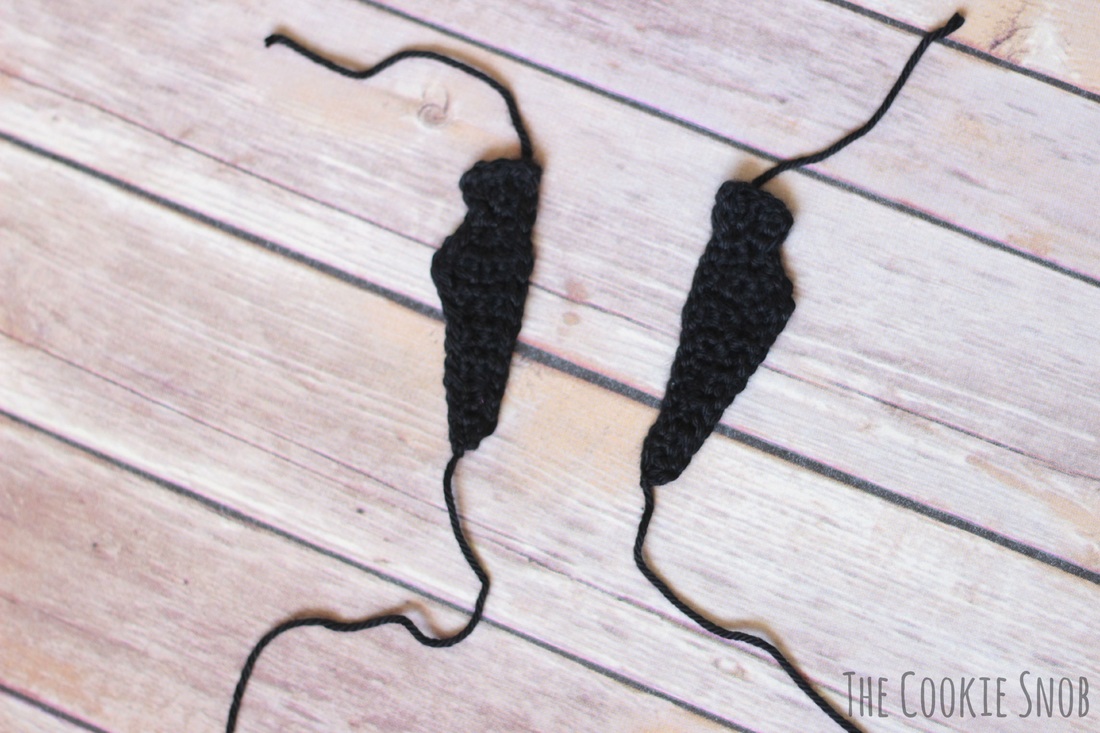 Lapel: (make 2) Ch 2 Row 1: sc in the second chain from the hook; ch 1 and turn (1) Row 2: inc; ch 1 and turn (2) Row 3: inc twice; ch 1 and turn (4) Row 4: sc in next 2 sts; ch 1 and turn (2) Row 5: inc, sc; ch 1 and turn (3) Row 6: sc, inc in next 2 sts; ch 1 and turn (5) Row 7: sc tog, sc in next 3 sts; ch 1 and turn (4) Row 8: sc in next 2 sts, sc tog; ch 1 and turn (3) Row 9: sc tog, sc; ch 1 and turn (2) Rows 10-12: sc across; ch 1 and turn (2) Row 13: sc tog; ch 1 and turn (1) Rows 14-15: sc across; ch 1 and turn (1) For a cleaner edge, ss around the entire border of the lapel; fasten off, leaving long tail for sewing. 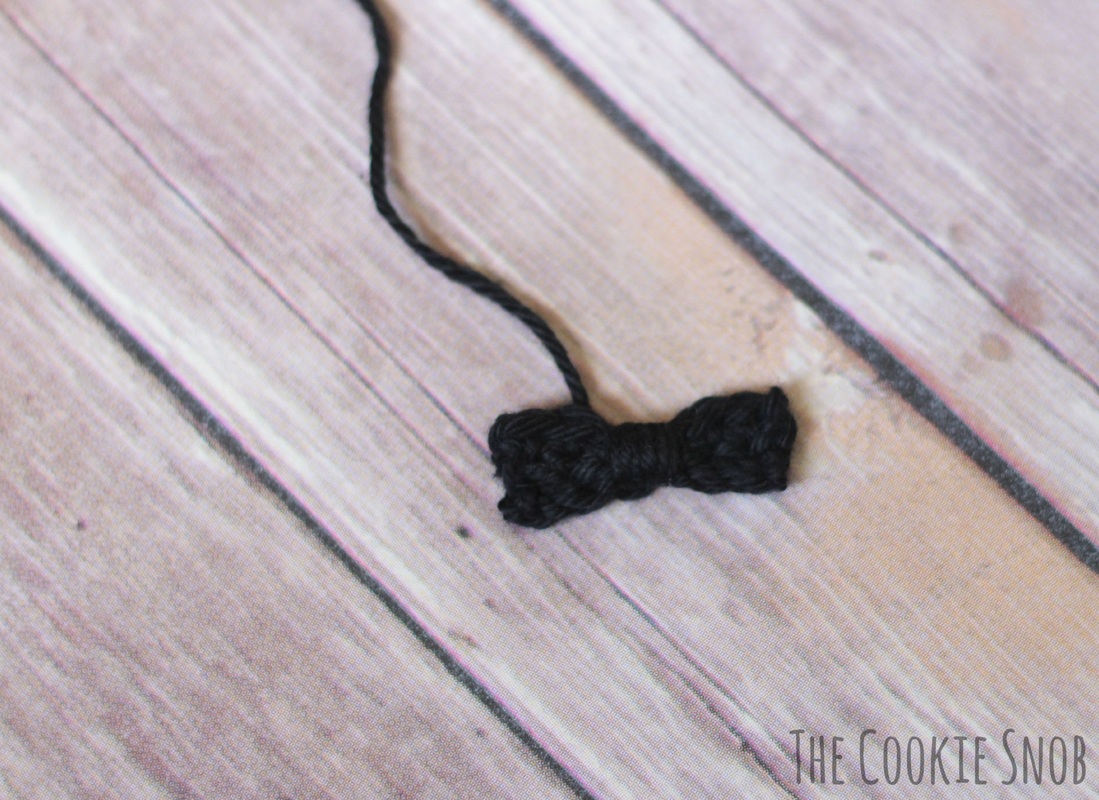 Bow tie: Ch 7 Row 1: sc in the second chain from the hook and in each st across; ch 1 and turn (6) Row 2: sc across (6) Fasten off, leaving long end for sewing. Wrap yarn around the center of the bow 5-6 times, or as many times as needed to cinch the center into a bow shape; tie off yarn in back of the bow tie. 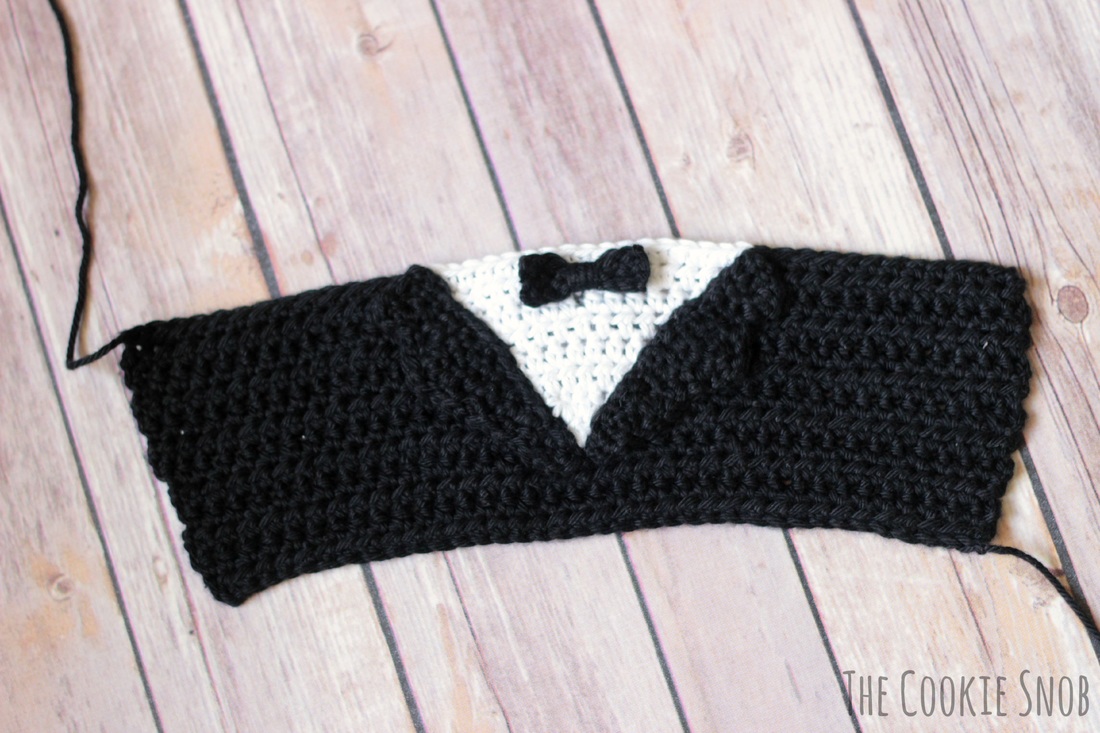 Assembly: Sew the lapels and bow tie in place, as shown. Follow assembly instructions for the simple cozy in order to attach all pieces together. Weave in remaining ends. Voilà! C'est magnifique. (And yes, that's just about all the French I know other than "baguette.") 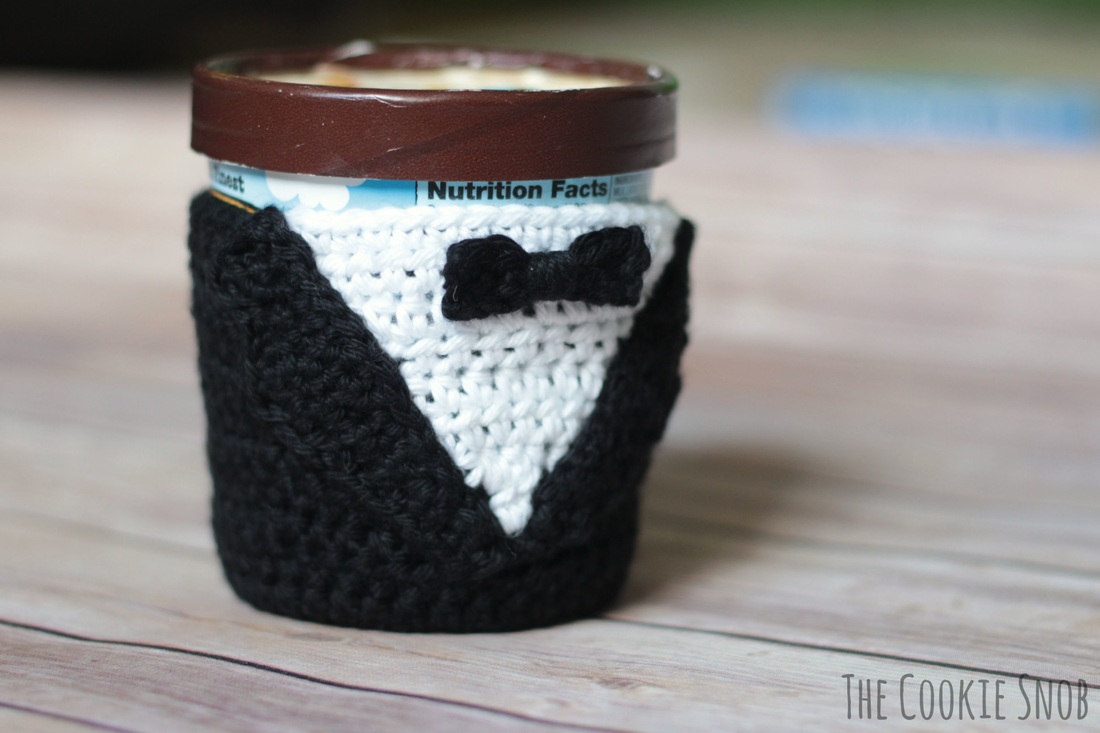 There you have it! If you decide to make one of these ice cream pint cozies, I'd love to see a picture of it and hear about how it went. If you're having problems please drop me a line and I'll try to help you out! I try my best to post error-free patterns, but if you find a problem I'd like to correct it, so please let me know. You can reach me in the comments section below or on Twitter, Facebook, Ravelry, Pinterest, Instagram, or by email. Happy hooking! 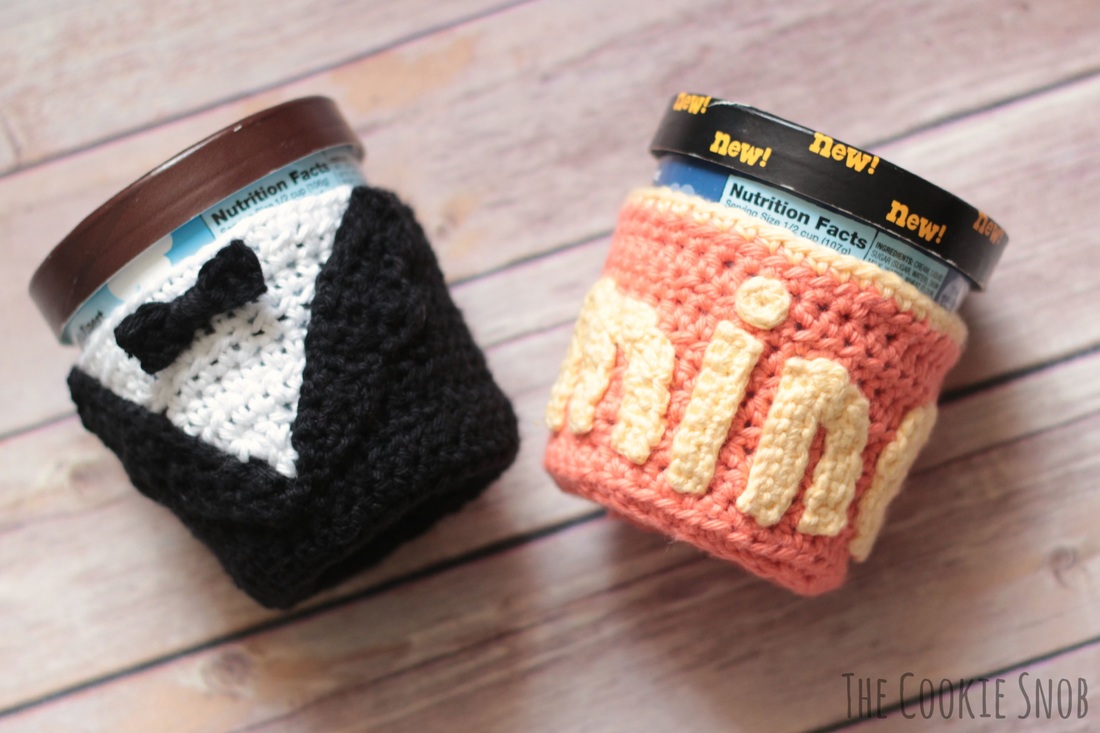 ***You're welcome to do whatever you'd like to with finished products made from these patterns but if you do sell them, I ask that you link back to my page. You may not copy these patterns, repost them anywhere (either altered or in their original form), or claim them as your own. You may not use any photos on this site for your own use. ***
2 Comments
5/14/2016 01:51:16 pm
I have done basic crochet for years but I don't know what "Make a magic circle" means. Can you explain. How many chains do you need to start. These cozies are darling!
Erin
5/14/2016 10:05:22 pm
Hi Catherine! Leave a Reply. |
Welcome!Thank you for stopping by to visit my own personal corner of the web! Feel free to take a look around and check out what I've been crafting, crocheting, or baking. Hopefully you'll find something to inspire your own creativity!   
Archives
March 2024
|
 RSS Feed