
|
Happy spring, yarn friends! It feels like we're already creeping into summer around here in Arizona (we hit our first 90 degree day last week), but I'm determined to enjoy spring for as long as I can. There's nothing quite like watching all of the trees grow new leaves and seeing all the flowers blossom. It's seriously magical. So in honor of spring, I have a spring-themed crochet pattern for you all: a hatching chick plushy! 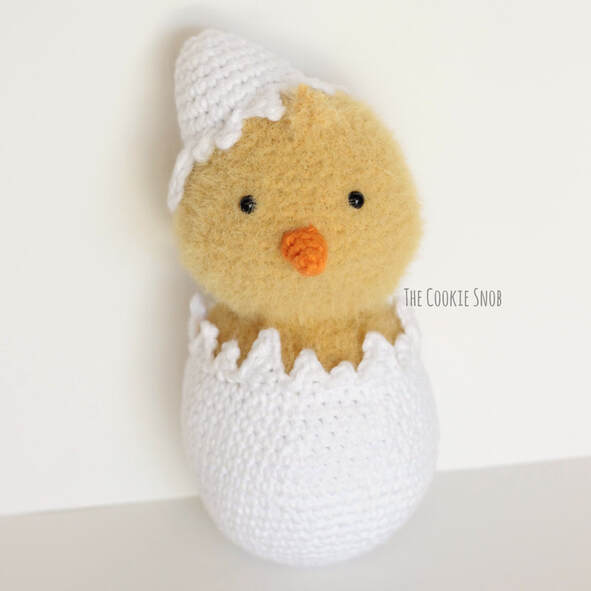 This pattern is definitely kid-approved. My kids instantly claimed this one (and may or may not have already fought over it . . . keeping it real, guys) and have had lots of fun playing with this chick. My youngest especially loves the "egg hat." So I hope you all love this fuzzy little hatchling as well! Even if you don't a kid in mind, this pattern would make an adorable addition to your spring decor (move over, bunnies). Let's make one! 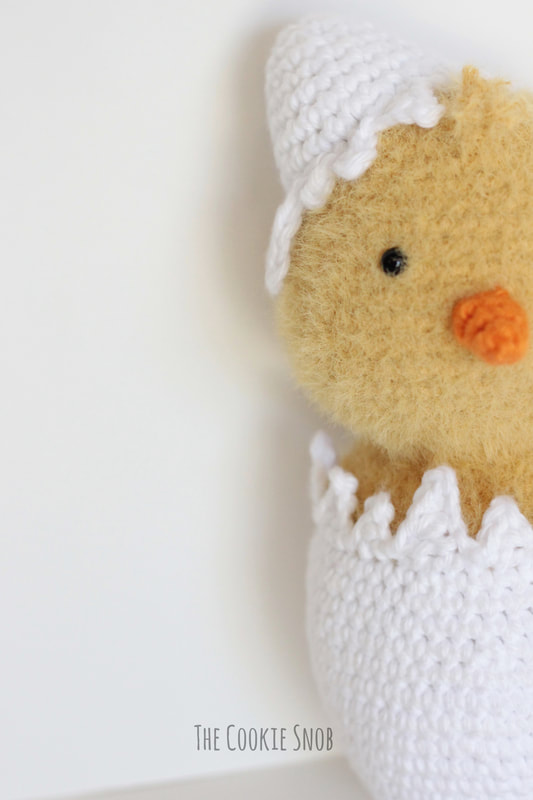 If you'd like an ad-free printable PDF version, you can find one on Ravelry. Thank you to everyone who buys pattern PDFs and helps keep this blog going! Stitch Glossary: st(s) = stitch(es) ss = slip stitch ch = chain sc = single crochet inc = sc increase (work 2 sc in the same st) dec = sc decrease (work 2 sc together) hdc = half double crochet dc = double crochet FLO = front loop only BLO = back loop only Special sts: T2 = Triangle 2 (ch 2, ss in the 2nd ch from the hook, skip the next st, ss to join) T3 = Triangle 3 (ch 3, ss in the 2nd ch from the hook, sc in the next ch, skip the next st, ss to join) T4 = Triangle 4 (ch 4, ss in the 2nd ch from the hook, sc in the next ch, hdc in the next ch, skip the next 2 sts, ss to join) T5 = Triangle 5 (ch 5, ss in the 2nd ch from the hook, sc in the next ch, hdc in the next ch, dc in the next ch, skip the next 3 sts, ss to join ) Here are step-by-step photos for Triangle 4 to give you the idea of how it works, in case there's any confusion about it:  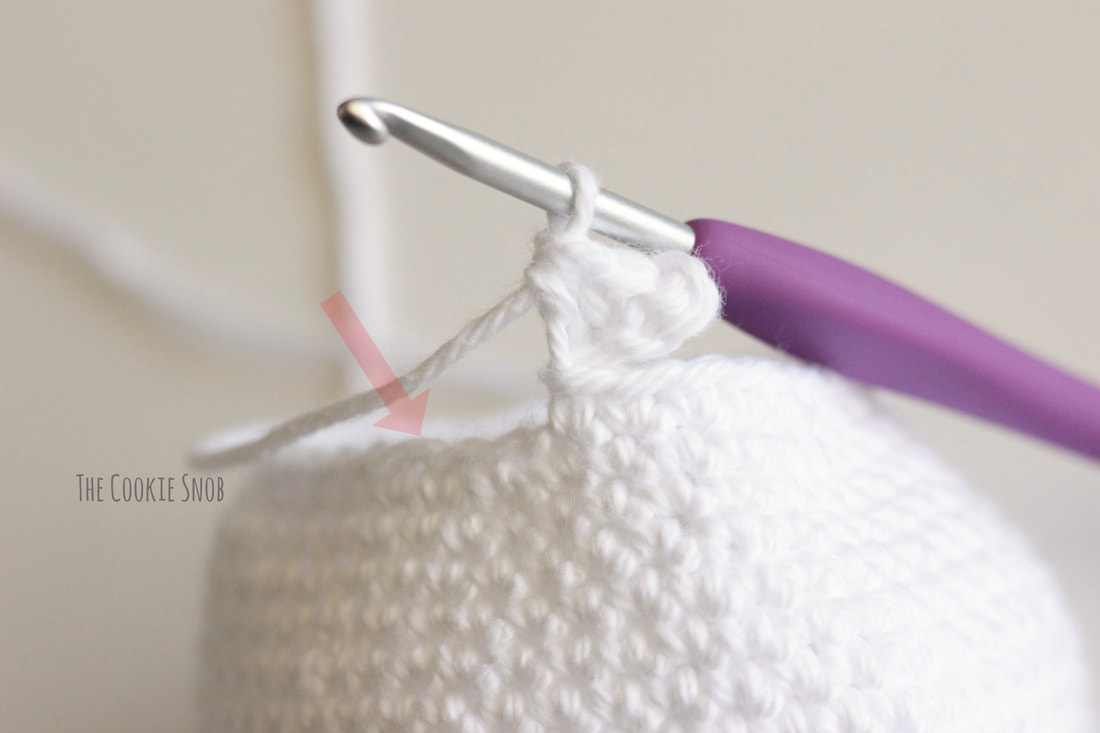 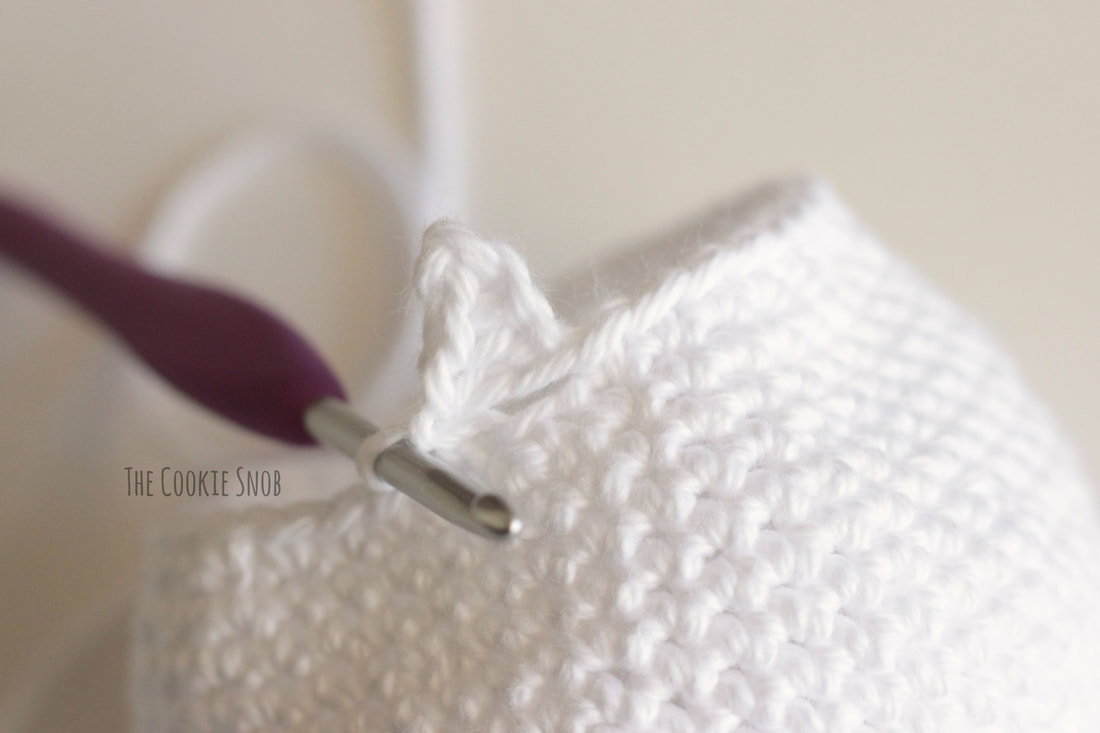 Materials:
2" = 10 sc sts, 2"= 11 rows of sc This creates a chick about 7.5" tall and 4" wide Note: This pattern is worked in continuous rounds without joining or turning. I recommend using a stitch marker and moving it after each round to help you keep your place. Beak: Using the orange yarn: Round 1: make a magic circle and work 4 sc into the circle, pull taut to close (4) Round 2: sc around (4) Round 3: [inc, sc] 2 times (6) Round 4: sc around (4) Fasten off, leaving a long yarn tail for sewing Note: if you prefer a shorter beak, you can omit Round 4 Shell + Body: Starting with the white yarn: Round 1: make a magic circle and work 6 sc into the circle, pull taut to close (6) Round 2: inc 6 times (12) Round 3: [inc, sc] 6 times (18) Round 4: [sc, inc, sc] 6 times (24) Round 5: [inc, sc in the next 3 sts] 6 times (30) Round 6: sc around (30) Round 7: [sc in the next 2 sts, inc, sc in the next 2 sts] 6 times (36) Round 8: sc around (36) Round 9: [inc, sc in the next 5 sts] 6 times (42) Round 10: sc around (42) Round 11: [sc in the next 3 sts, inc, sc in the next 3 sts] 6 times (48) Round 12: sc around (48) Round 13: [inc, sc in the next 7 sts] 6 times (54) Rounds 14-16: sc around (54) Round 17: [dec, sc in the next 7 sts] 6 times (48) Rounds 18-19: sc around (48) Round 20: [sc in the next 3 sts, dec, sc in the next 3 sts] 6 times (42) 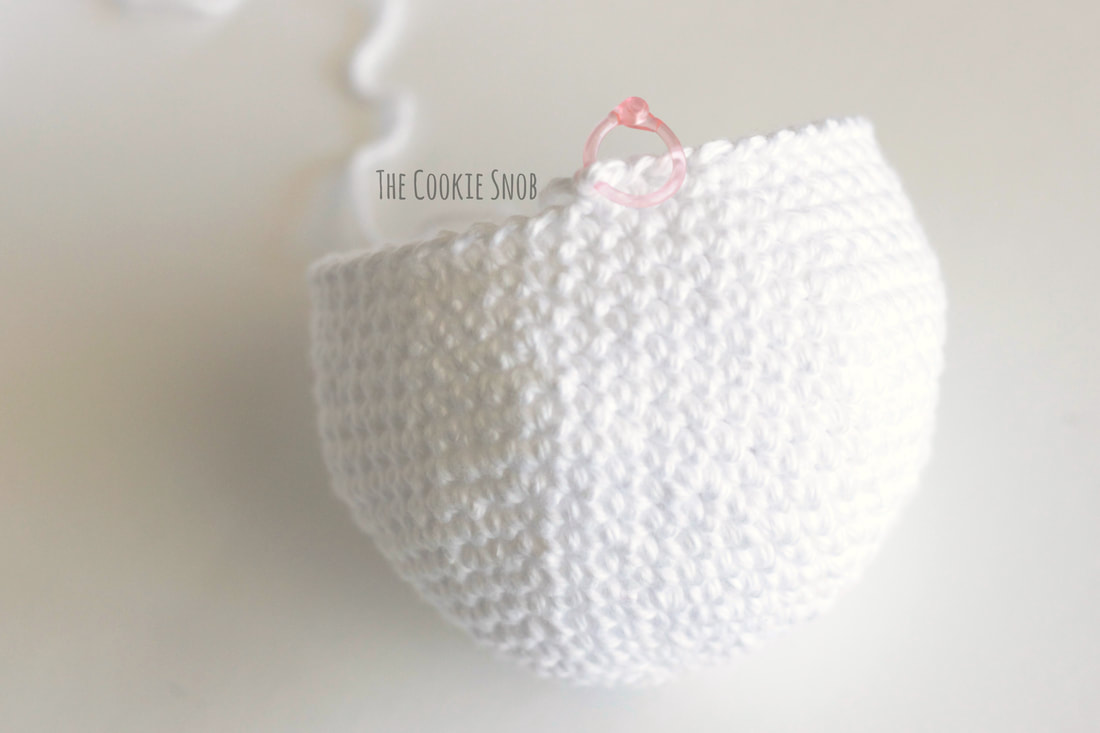 Now we're going to make the cracked edge of the shell. Remember to reference the "special stitches" section of the stitch glossary for instructions on how to the make the different sized triangles along the edge. I'll walk you through the Triangle 4 shape with step-by-step photos to give you the idea of how it works, in case you're confused. Round 21: working in FLO: T4, T5, T3, T4, T2, T3, T5, T3, T4, T4, T2, T3, T5, T4, T4 (15 triangles) Fasten off. If you'd like to sew the bottoms of the triangles to the shell edge (totally optional), leave a long yarn tail for sewing. 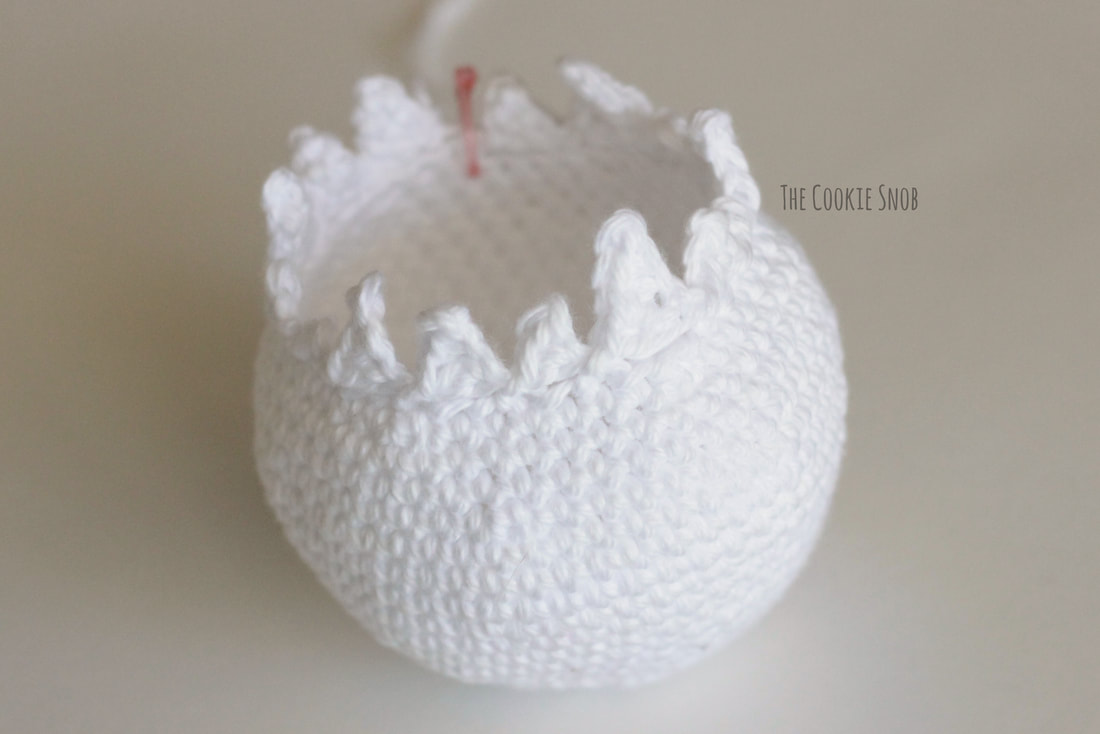 Using the yellow yarn: Round 22: working in BLO from Round 20: sc around (42) 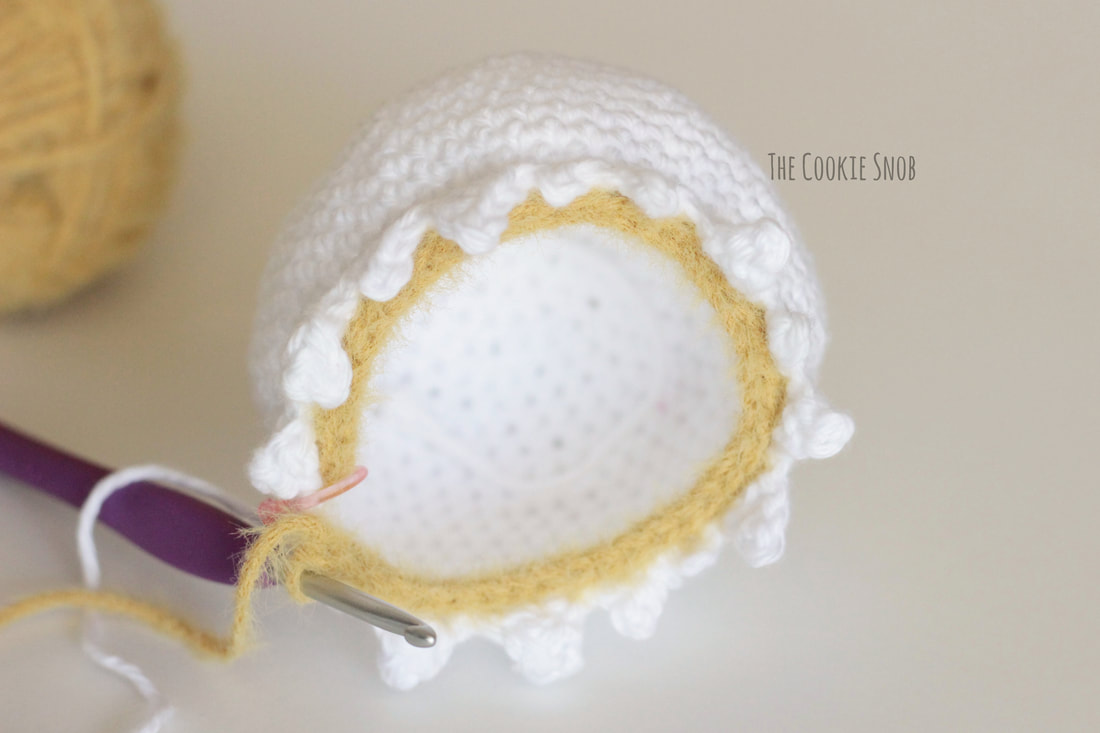 Round 23: [dec, sc in the next 5 sts] 6 times (36) Round 24: [sc in the next 2 sts, dec, sc in the next 2 sts] 6 times (30) Round 25: [dec, scin the next 3 sts] 6 times (24) Round 26: [sc, dec, sc] 6 times (18) Begin stuffing. Continue to stuff as you go. Round 27: sc around (18) Round 28: [sc, inc, sc] 6 times (24) Round 29: [inc, sc in the next 3 sts] 6 times (30) Round 30: [sc in the next 2 sts, inc, sc in the next 2 sts] 6 times (36) Round 31: [inc, sc in the next 5 st] 6 times (42) Round 32: sc around (42) Round 33: [sc in the next 3 sts, inc, sc in the next 3 sts] 6 times (48) Rounds 34-36: sc around (48) Round 37: [sc in the next 3 sts, dec, sc in the next 3 sts] 6 times (42) Rounds 38-39: sc around (42) Round 40: [dec, sc in the next 5 sts] 6 times (36) Round 41: sc around (36) Pause and add the face details. Place the safety eyes between round 38 and 39, about 8 sts apart. Sew the beak centered between the eyes, across rounds 35-37. Remember to continue to stuff as you go. 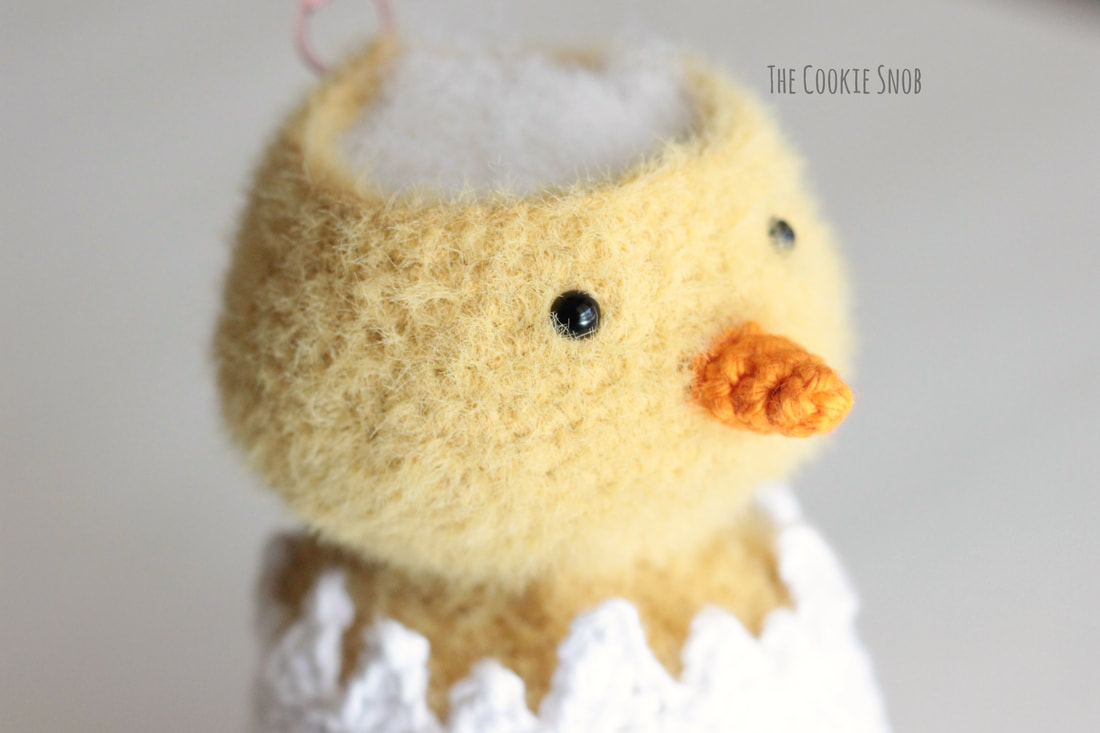 Round 42: [sc in the next 2 sts, dec, sc in the next 2 sts] 6 times (30) Round 43: sc around (30) Round 44: [dec, sc in the next 3 sts] 6 times (24) Round 45: [sc, dec, sc] 6 times (18) Round 46: [dec, sc] 6 times (12) Round 47: dec 6 times (6) Fasten off, leaving a yarn tail. Finish stuffing. Using a tapestry needle, thread the yarn tail through the front loops of the last round and pull taut to close. Fasten off and weave in ends. 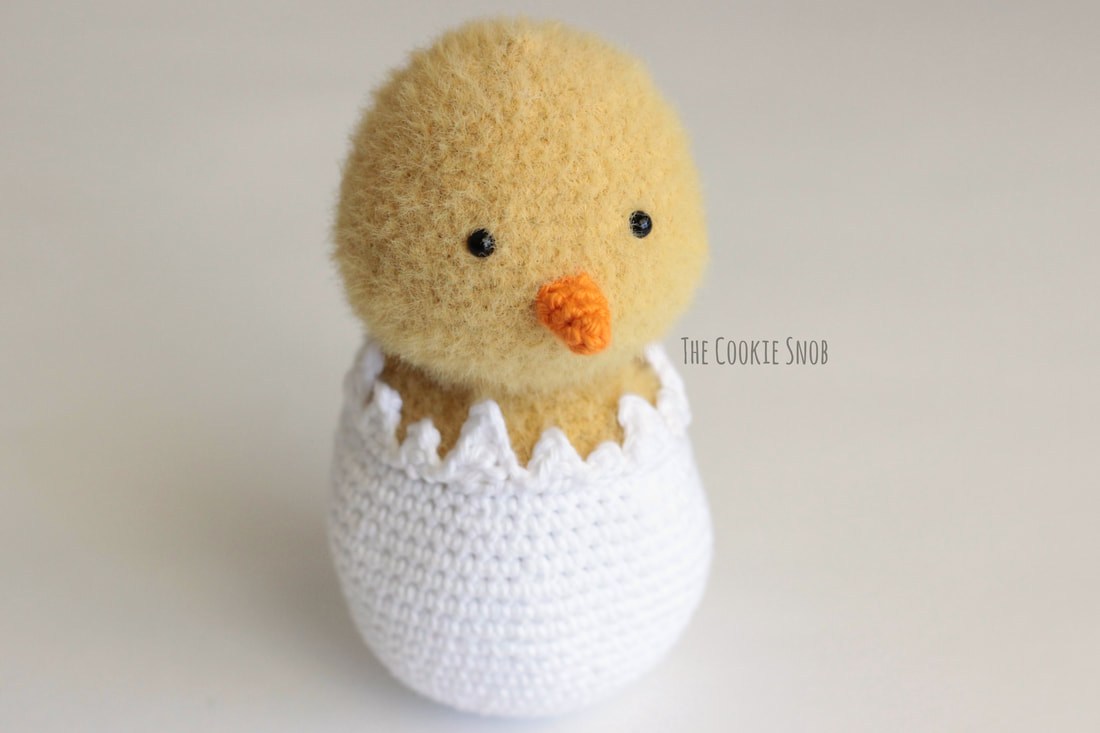 Top Shell: Using the white yarn: Round 1: make a magic circle and work 6 sc into the circle, pull taut to close (6) Round 2: inc 6 times (12) Round 3: sc around (12) Round 4: [inc, sc] 6 times (18) Round 5: sc around (18) Round 6: [sc, inc, sc] 6 times (24) Round 7: sc aroud (24) Round 8: [inc, sc in the next 3 sts] 6 times (30) Round 9: T3, T4, T3, T5, T2, T3, T4, T2, T3, T4, T4, T2 (12 triangles) Fasten off, leaving a long yarn tail. 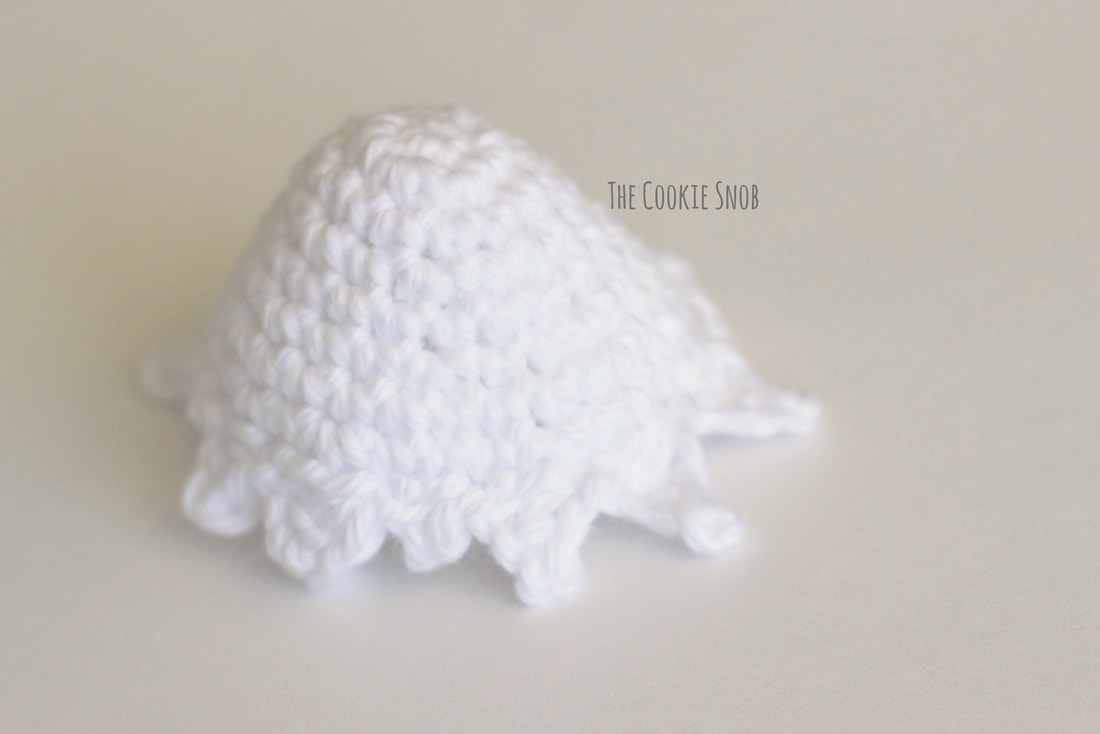 Assembly: Lightly stuff the top shell. Using a tapestry needle and the long yarn tail, sew the top shell onto the chick's head. You can sew it on wherever you'd like, but I sewed mine off-center, tilted slightly to the chick's right side. Weave in any remaining ends. Optional: For the feather tuft, cut 3 small pieces of the yellow yarn. Holding all 3 together, insert your crochet hook in the center of the forehead and pull the center of the yarn pieces partway through until a look forms. Using your fingers, pull the loose ends of the strands through the loop and pull taut to close the loop. Trim to your desired length and then gently separate the strands to fray them. 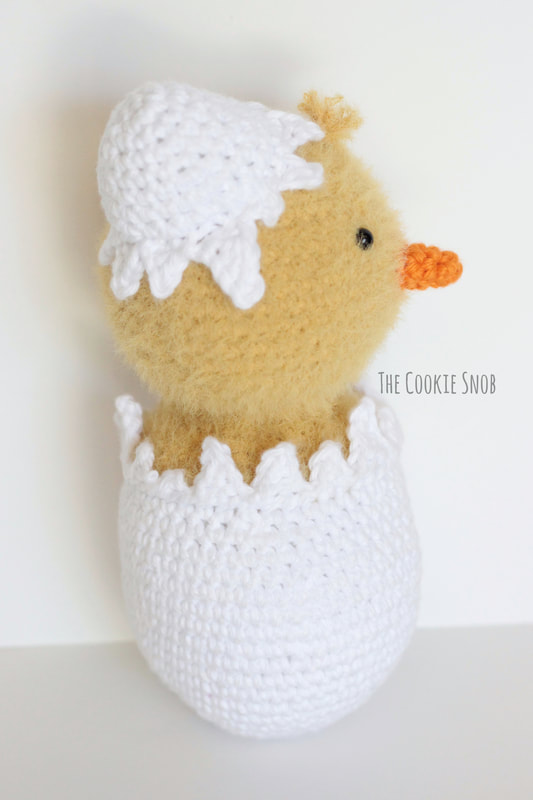 Ta-dah! You did it! I hope that you enjoyed this sweet hatching chick pattern! If you have any comments or questions about it, you can reach me in the comments section below, by email, or on social media. And, as always, if you end up making one, I'd love to see how it turns out, so feel free to tag me or email me a photo! Happy hooking! Want to make sure you don't miss any future blog posts? Join my mailing list! (Spam-free, I promise!) 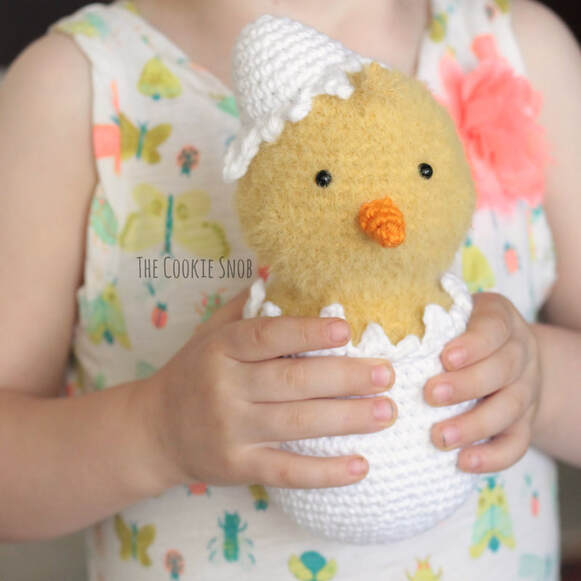 ***You're welcome to do whatever you'd like to with finished products made from this pattern but if you do sell them, I ask that you link back to my page. You may not copy this pattern, repost it anywhere (either altered or in its original form), or claim it as your own. You may not use any photos on this site for your own use. *** 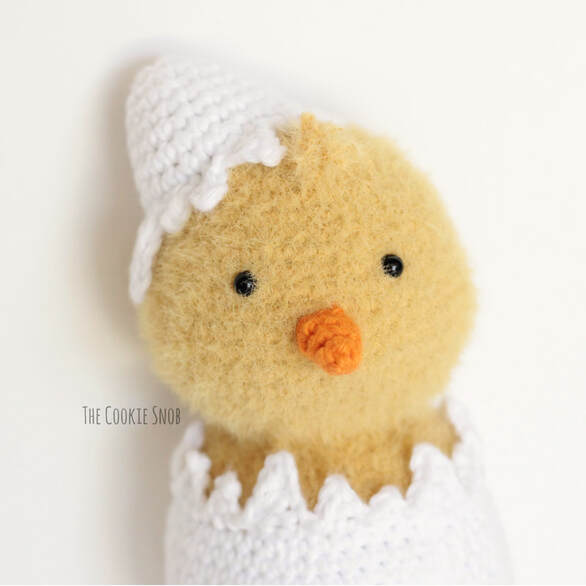
0 Comments
Leave a Reply. |
Welcome!Thank you for stopping by to visit my own personal corner of the web! Feel free to take a look around and check out what I've been crafting, crocheting, or baking. Hopefully you'll find something to inspire your own creativity!   
Archives
March 2024
|
 RSS Feed