
|
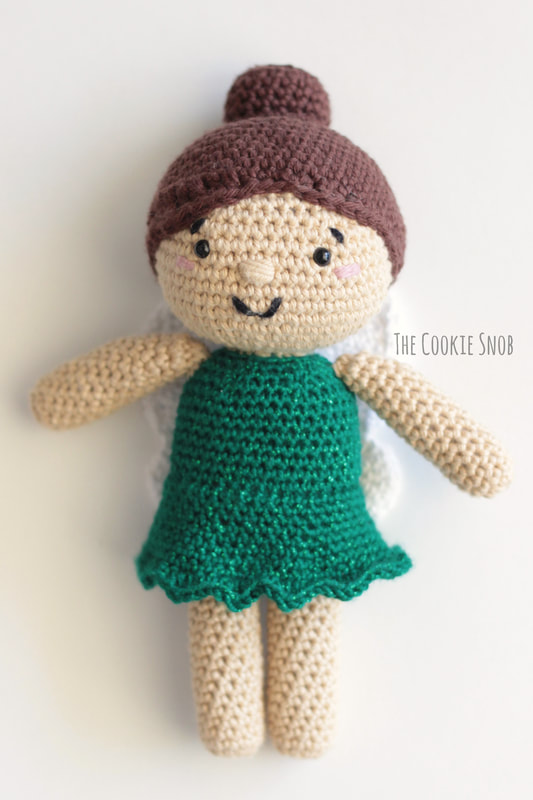
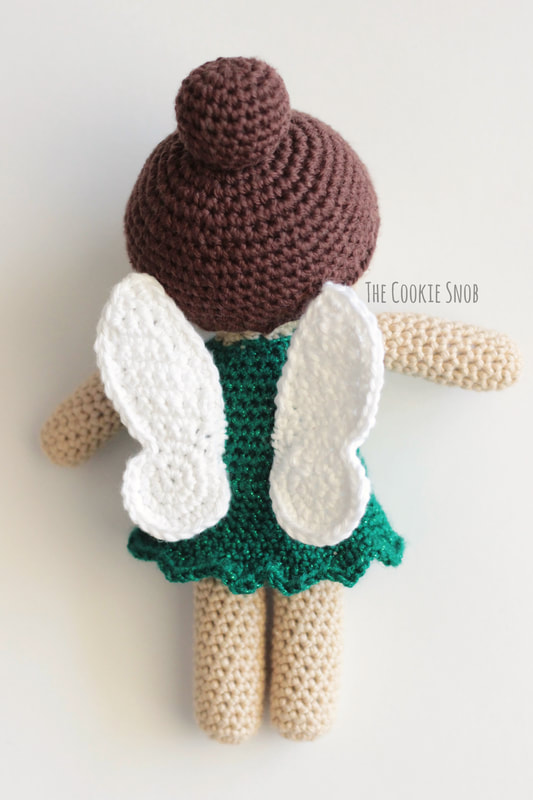
I'm excited to share a new pattern with you for a customizable fairy doll! I had lots of fun making this pattern in different color combos, so this one is perfect for personalizing to get the look you want. And, as an added bonus, you can watch a video tutorial for this pattern as part of the You.Make 2023 Crochet Summit. I don't usually make videos, so this was a new experience for me, but I hope that you'll check out my Crochet Summit class and make one of these fairies for yourself! It's free to sign up and you'll be able to watch my class on Day 3 (Wednesday, November 8th). If you're interested, you can sign up here. There are lots of other awesome projects by great crocheters, so I hope you'll check it out! 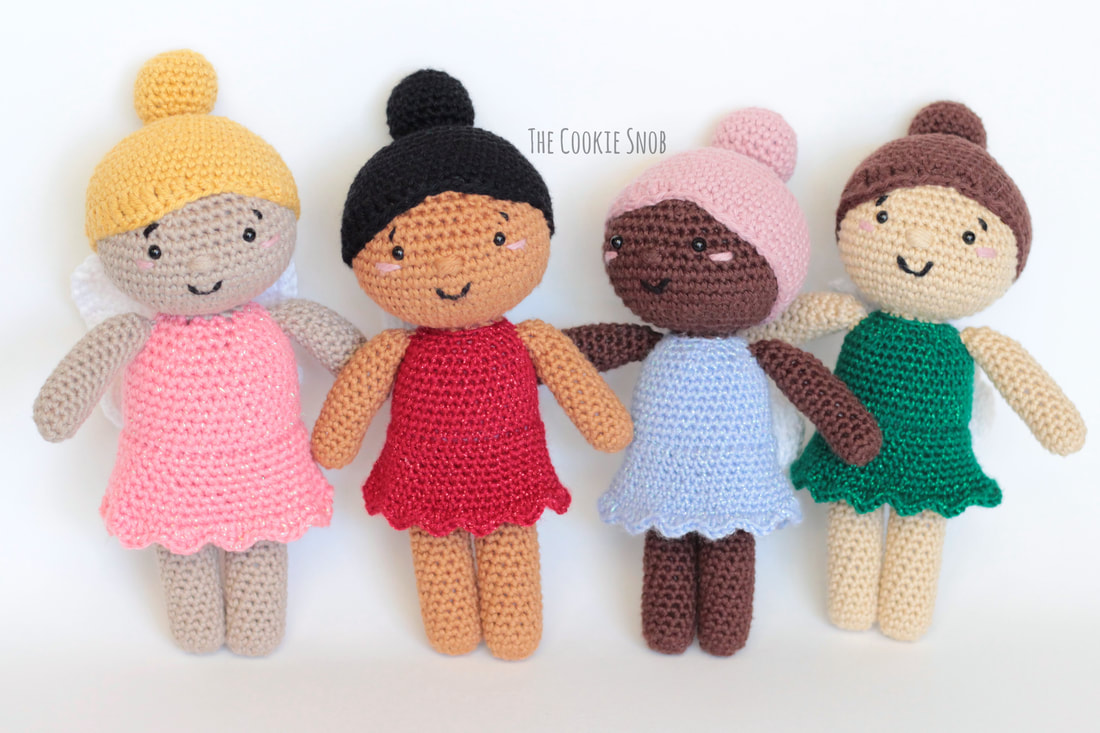 The summit class comes with the PDF for this pattern, but even if you don't want to participate in the summit or if you come across this after it's over, you can still make your own fairy with this pattern! The summit's the only spot to find the video tutorial, but you can find step-by-step photos here on my blog, as always. This pattern is made from the feet up, with the head, body, and dress all in one piece. The hair, arms, and wings are made separately, then sewed on at the end. You can use whatever yarn you'd like, but I'd recommend using yarn of the same weight for all the different colors so that things stay proportional. Now let's get started! 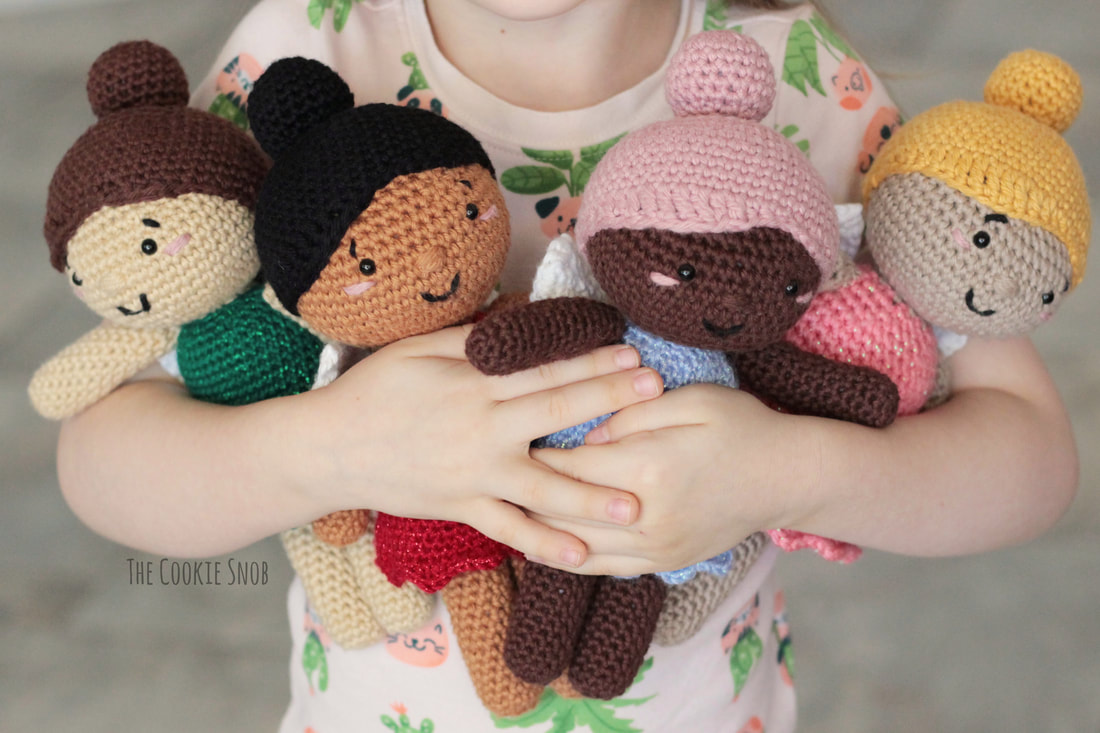 If you're interested in an ad-free printable PDF version of this pattern, you can find one on Ravelry. (And a special thank you to everyone who supports my blog and keeps it running!) Stitch Glossary: st(s) = stitch(es) ch = chain ss = slip stitch sc = single crochet inc = sc increase (work 2 sc into the same st) dec = sc decrease (I prefer to use an invisible decrease st, except for the wings) hdc = half double crochet dc = double crochet tr = treble (triple) crochet BLO = back loop only Materials:
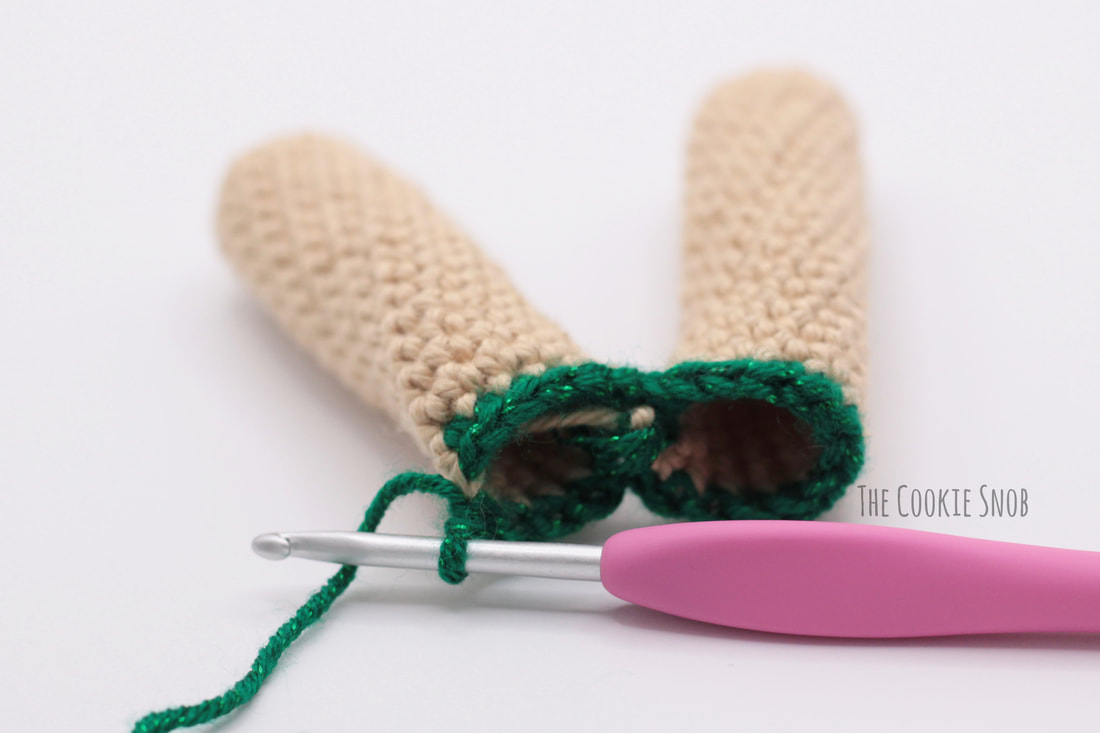
Gauge: 2” = 10 sc sts, 2” = 10 rows Finished fairy is about 10” tall Gauge isn't crucial for this project as long as your stitches are tight enough to keep in the stuffing. I tend to crochet tightly, so if you're a looser crocheter, I recommend sizing down a hook. Note: Unless otherwise specified, this pattern is worked in continuous rounds without joining. I recommend using a stitch marker and moving it after each round to help you keep your place. Body: Starting with color A: Round 1: make a magic circle and work 6 sc into the circle (6) Round 2: inc 6 times (12) Rounds 3-20: sc around (12) Fasten off first leg. Repeat Rounds 1-20, but this time don’t fasten off and continue to Round 21. Switch to color B. Fasten off color A. 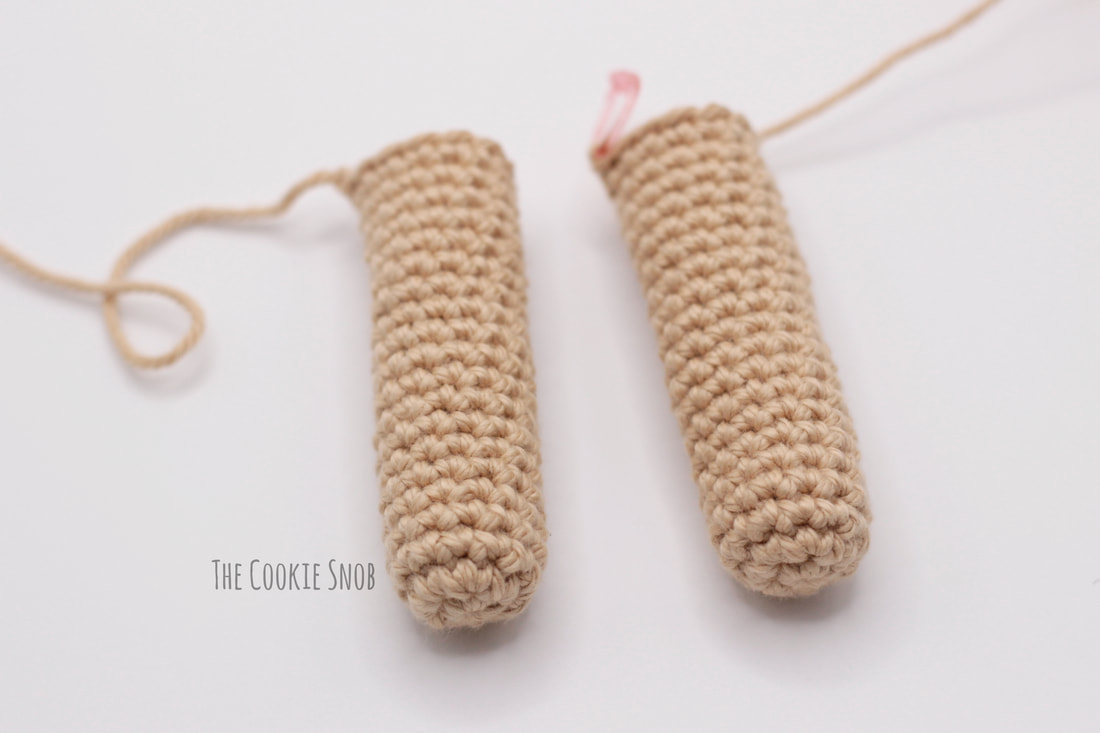 Round 21: sc in the next 6 sts, sc in the next 12 sts of the first leg, sc in the last 6 sts of the second leg (24)
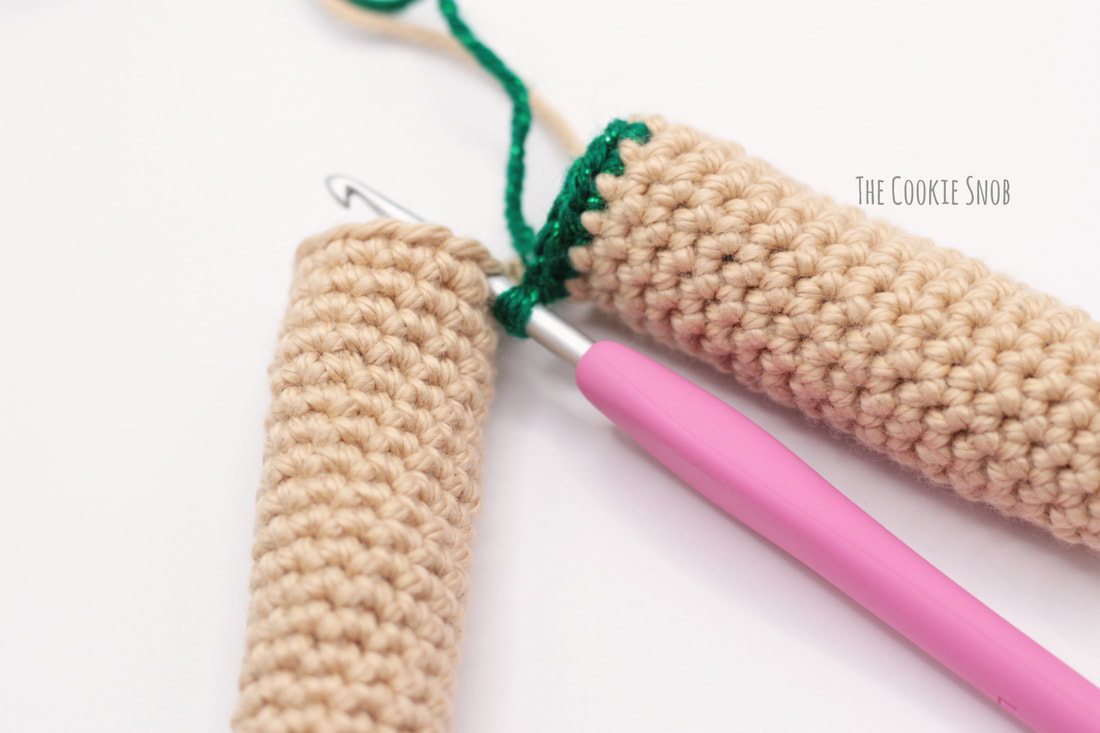
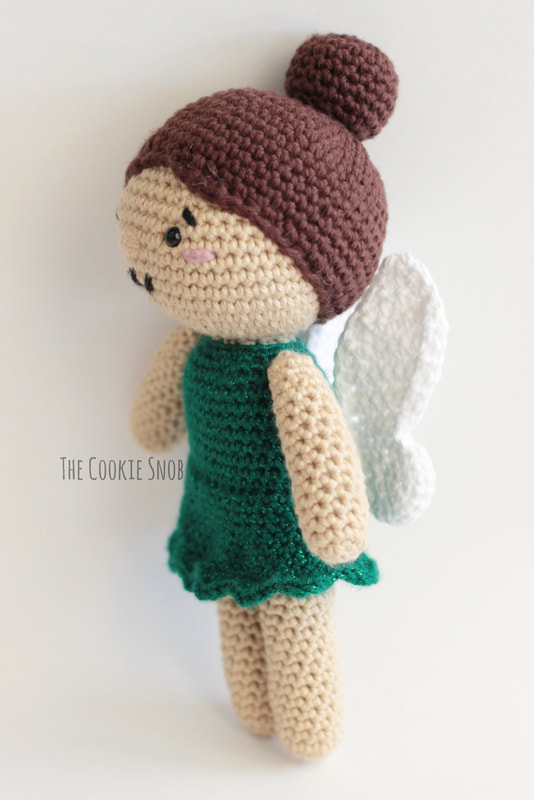
Round 22: [sc in the next 3 sts, inc] 6 times (30) Round 23: [sc in the next 2 sts, inc sc in the next 2 sts] 6 times (36) Rounds 24-26: sc around (36) Round 27: working in BLO, sc around (36) Begin to stuff legs. Continue to stuff as you go. Rounds 28-34: sc around (36) Round 35: [sc in the next 4 sts, dec] 6 times (30) Round 36: [sc in the next 3 sts, dec] 6 times (24) Stuff the body, if you haven’t already done so. Continue to stuff as you go. 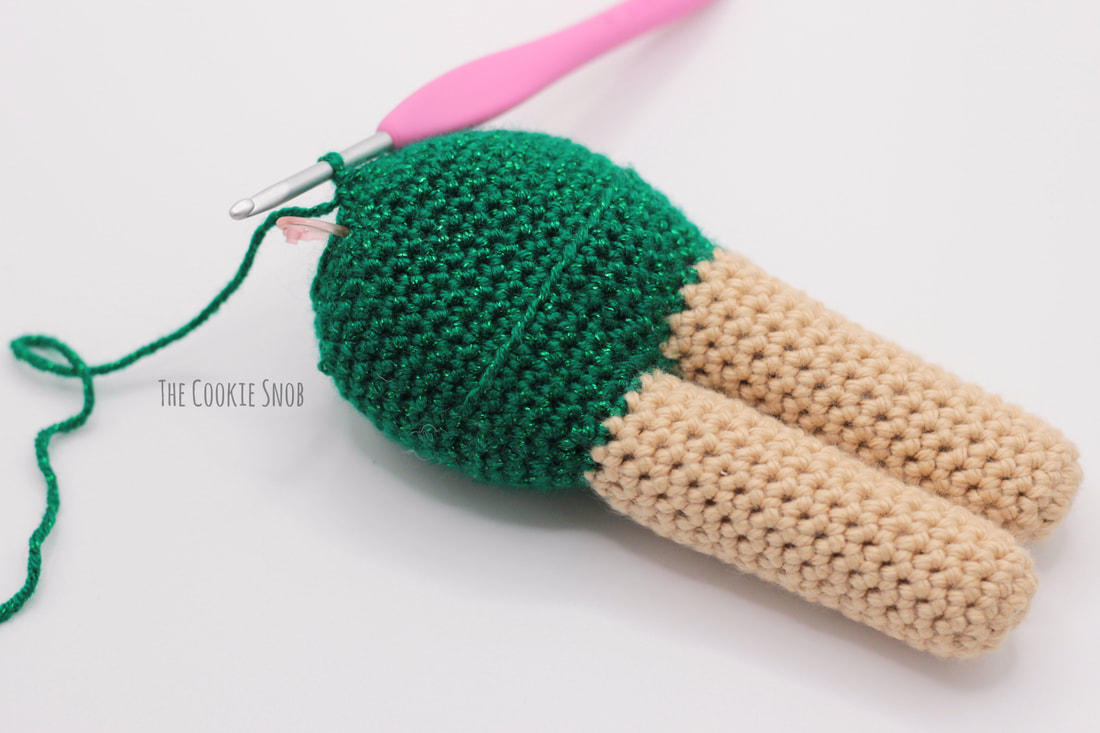 Round 37: [sc in the next 2 sts, dec] 6 times (18) Switch back to color A. Fasten off color B. Round 38: [sc, dec] 6 times (12) Round 39: sc around (12) Round 40: inc 12 times (24) Round 41: [sc, inc] 12 times (36) Rounds 42-43: sc around (36) Round 44: [sc, inc, sc] 12 times (48) Rounds 45-51: sc around (48) Pause crocheting and add the face. Place safety eyes between Rounds 49 and 50, about 8 sts apart. Stitch the nose using a bit of color A between Rounds 48 and 49, stitch back and forth about 7 times (or until you get the look you want). Using a bit of black yarn, stitch the smile across Round 46. If you’d like to add eyebrows, stitch them above the eyes, across Round 51. For the cheeks, use a little bit of pink yarn and stitch them below the eyes, between Rounds 48 and 49. 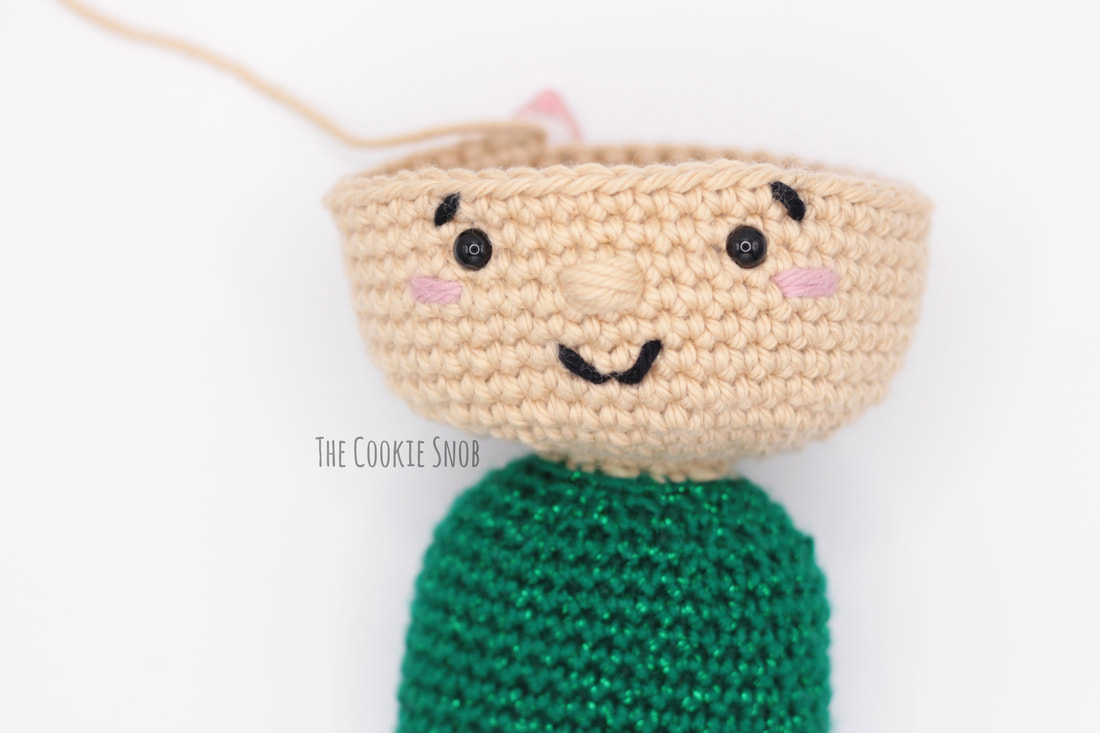 Round 52: [sc in the next 6 sts, dec] 6 times (42) Round 53: [sc in the next 5 sts, dec] 6 times (36) Round 54: [sc in the next 4 sts, dec] 6 times (30) Round 55: sc around (30) Round 56: [sc in the next 3 sts, dec] 6 times (24) Round 57: [sc in the next 2 sts, dec] 6 times (18) Round 58: [sc, dec] 6 times (12) Round 59: dec 6 times (6) Fasten off, leaving a yarn tail. Finish stuffing. Using the tapestry needle, pull the yarn tail through the front loops of the last round and pull taut to close the hole. 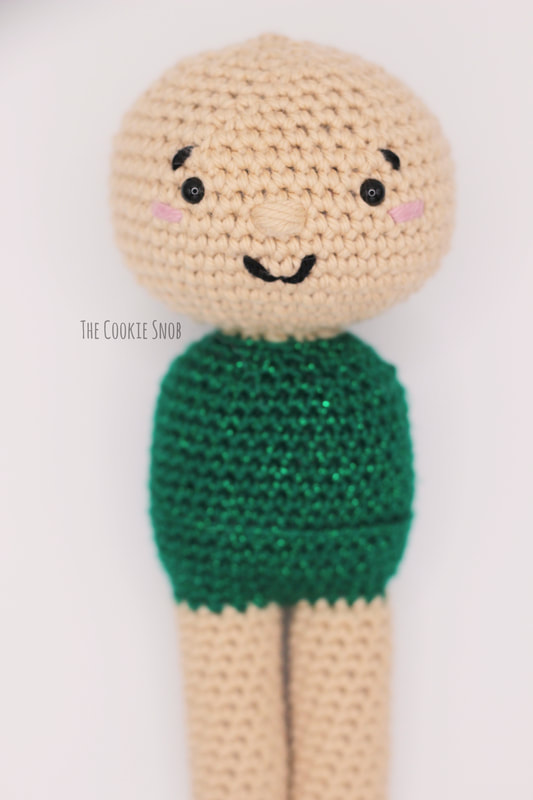 Dress: Using color B: Round 1: working into the unworked front loops from Round 26, sc around (36) 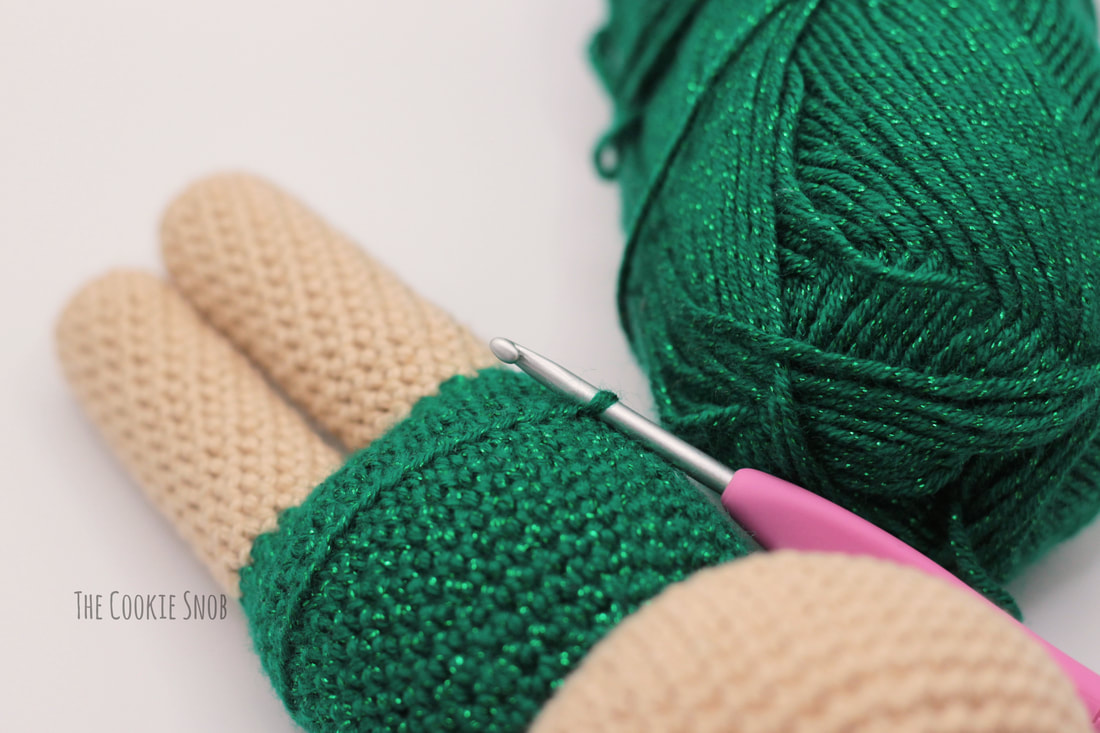 Rounds 2-3: sc around (36) Round 4: [sc in the next 5 sts, inc] 6 times (42) Round 5: sc around (42) Round 6: [sc in the next 3 sts, inc, sc in the next 3 sts] 6 times (48) Round 7: sc around (48) Round 8: *sc, [hdc, dc] in the next st, [dc, hdc] in the next st, sc*, repeat from * to * 10 more times, sc, [hdc, dc] in the next st, [dc, hdc] in the next st, ss (72) Fasten off. 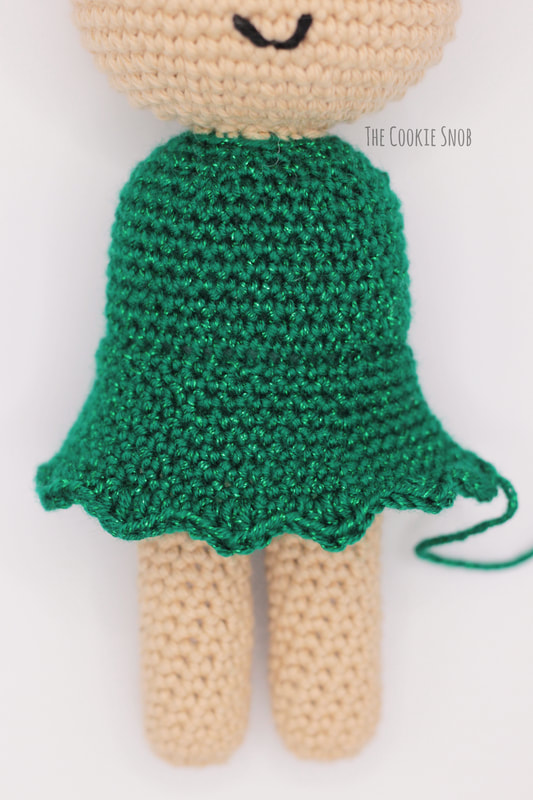 Arm (make 2): Using color A Round 1: make a magic circle and work 5 sc into the circle (5) Round 2: inc 5 times (10) Rounds 3-14: sc around (10) Begin stuffing. Continue to stuff as you go. Round 15: [sc in the next 3 sts, dec] 2 times (8) Rounds 16-17: sc around (8) Fasten off, leaving a long yarn tail. Finish stuffing. Using the tapestry needle, pull the yarn tail through the front loops of the last round and pull taut to close the hole. 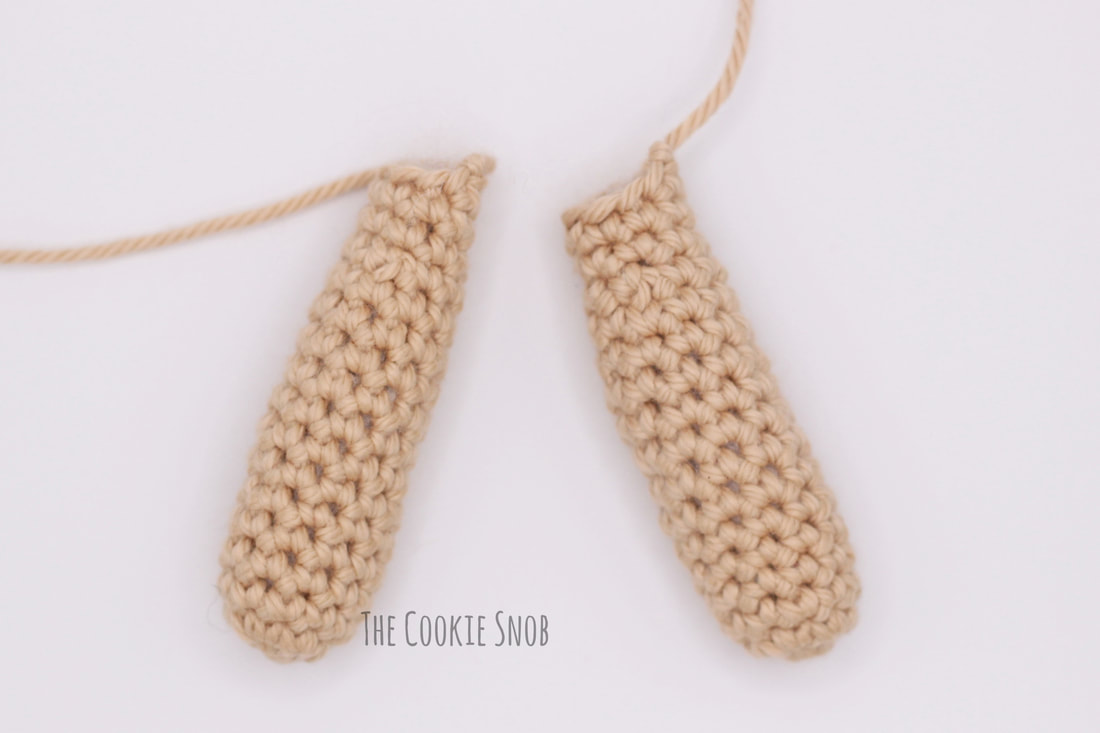 Hair: Using color C Round 1: make a magic circle and work 6 sc into the circle (6) Round 2: inc 6 times (12) Round 3: [sc, inc] 6 times (18) Rounds 4-8: sc around (18) Round 9: [sc, dec] 6 times (12) Round 10: [sc in the next 2 sts, dec] 3 times (9) Round 11: inc 9 times (18) Round 12: [sc, inc, sc] 6 times (24) Round 13: [sc in the next 3 sts, inc] 6 times (30) Round 14: [sc in the next 2 sts, inc, sc in the next 2 sts] 6 times (36) Round 15: [sc in the next 5 sts, inc] 6 times (42) Round 16: sc around (42) Round 17: [sc in the next 3 sts, inc, sc in the next 2 sts] 6 times (48) Rounds 18-22: sc around (48) Round 23: sc, hdc in the next 3 sts, dc in the next 3 sts, tr in the next 4 sts, dc in the next 2 sts, hdc in the next 2 sts, sc, ss, sc, hdc in the next 2 sts, dc, hdc in the next 2 sts, sc, ss, sc in the last 22 sts, ss Fasten off, leaving a long yarn tail. 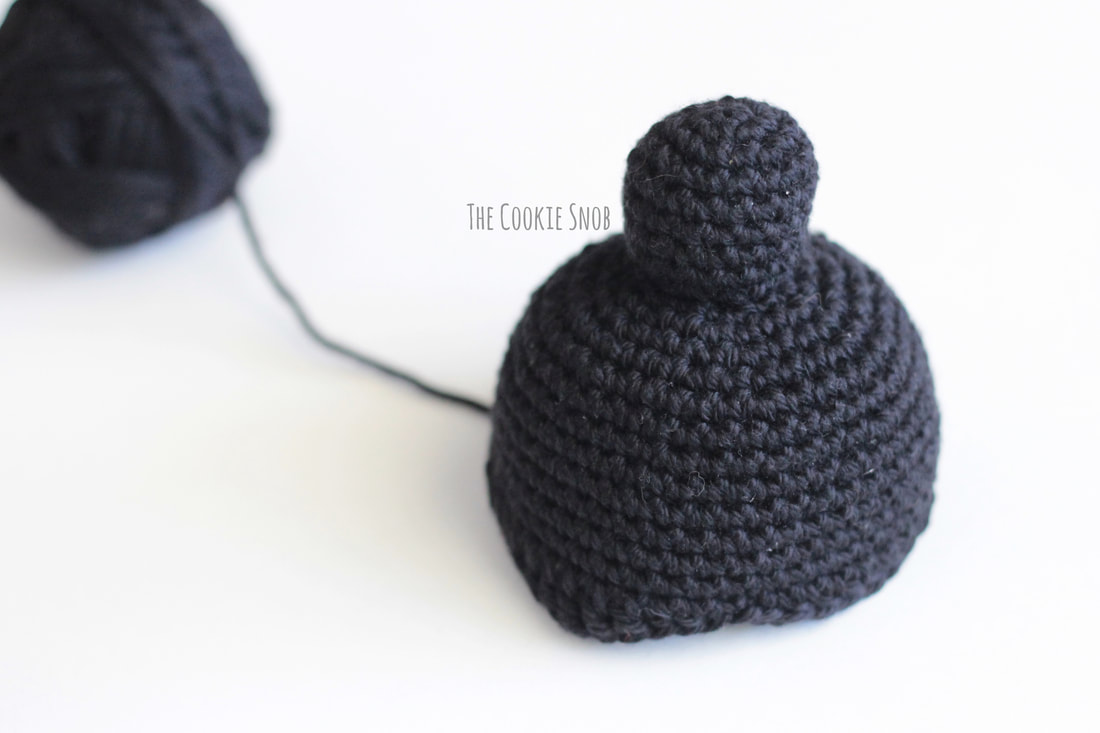 Wing 1: Using color D: Round 1: make a magic circle and work 6 sc into the circle (6) Round 2: inc 6 times (12) Round 3: [sc, inc] 6 times, turn (18) Row 4: ch 1, sc in the next 4 sts, turn (4) Row 5: ch 1, sc in the next 3 sts, inc, turn (5) Row 6: ch 1, sc in the next 5 sts, turn (5) Row 7: ch 1, sc in the next 4 sts, inc, turn (6) Row 8: ch 1, sc in the next 6 sts, turn (6) Row 9: ch 1, dec, sc in the next 3 sts, inc, turn (6) Row 10: ch 1, sc in the next 4 sts, dec, turn (5) Row 11: ch 1, dec, sc in the next 2 sts, inc, turn (5) Row 12: ch 1, dec, sc, dec, turn (3) Row 13: ch 1, dec, sc, turn (2) Row 14: ch 1, dec, turn (1) Edging: ch 1, sc 11 sts evenly down the side, ss 3 times, [sc in the next 2 sts, inc] 4 times, sc 12 sts evenly up the side, ss to join Fasten off, leaving a long yarn tail Wing 2: Using color D: Round 1: make a magic circle and work 6 sc into the circle (6) Round 2: inc 6 times (12) Round 3: [sc, inc] 6 times, turn (18) Row 4: sc in the next 4 sts, turn (4) Row 5: ch 1, inc, sc in the next 3 sts, turn (5) Row 6: ch 1, sc in the next 5 sts, turn (5) Row 7: ch 1, inc, sc in the next 4 sts, turn (6) Row 8: ch 1, sc in the next 6 sts, turn (6) Row 9: ch 1, inc, sc in the next 3 sts, dec, turn (6) Row 10: ch 1, dec, sc in the next 4 sts, turn (5) Row 11: ch 1, inc, sc in the next 2 sts, dec, turn (5) Row 12: ch 1, dec, sc, dec, turn (3) Row 13: ch 1, sc, dec, turn (2) Row 14: ch 1, dec, turn (1) Edging: ch 1, sc 12 sts evenly down the side, [sc in the next 2 sts, inc] 4 times, ss 3 times, sc 11 sts evenly up the side, ss to join Fasten off, leaving a long yarn tail 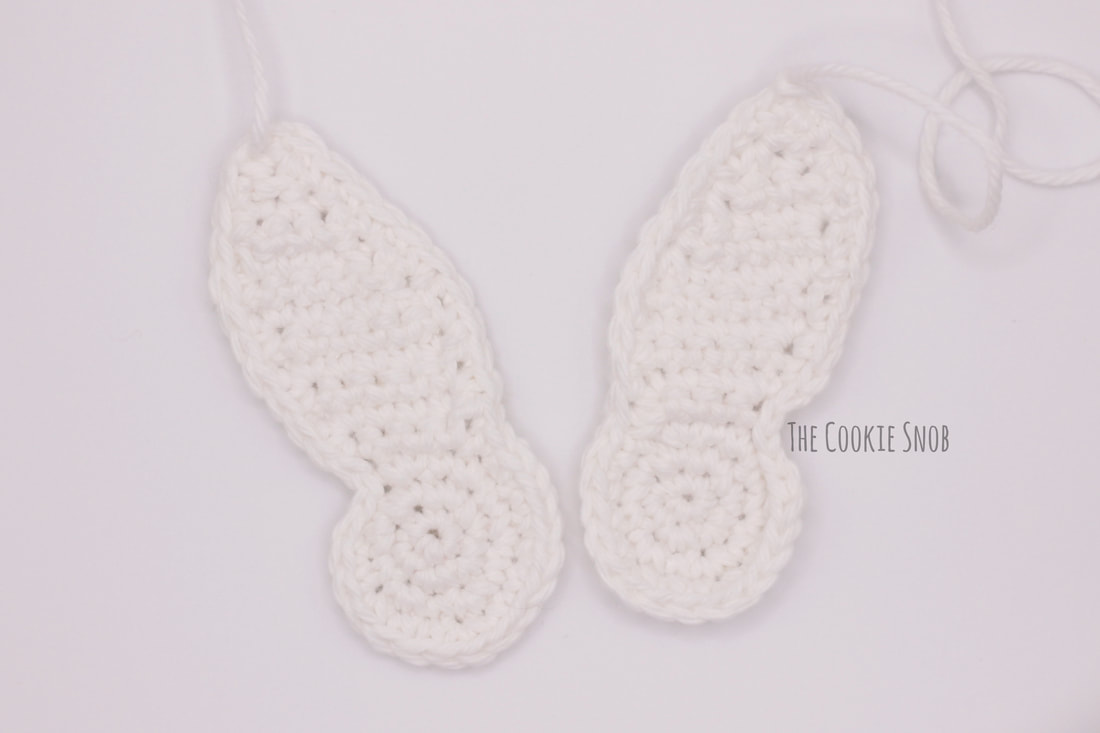 Assembly: Using the tapestry needles and the long yarn tails, sew the arms to the sides of the body. Place the hair onto the head. I recommend using a few stitch markers to hold the hair in place while you sew it to the head using the long yarn tail. Thread the long yarn tail from each wing through the edging sts until you get to the point where you want to connect the wing to the body (about 8 sts down). Sew in place on the back of the body using the yarn tails. Only sew several sts in the center of the wing to the body, leaving the top and bottom of the wing unattached. Weave in any remaining ends.
I hope that you had as much fun with this pattern as I did! And remember, you can find the video tutorial on the You.Make Crochet Summit, along with classes by a lot of other talented crocheters. If you have any comments or questions about this pattern, you can reach me in the comments section below, by email, or on social media and I'll get back to you as soon as I can. And, of course, I always love seeing what you make, so feel free to share a picture if you end up making one. Happy hooking! Want to make sure you don't miss any future blog posts? Join my mailing list! (Spam-free, I promise!) 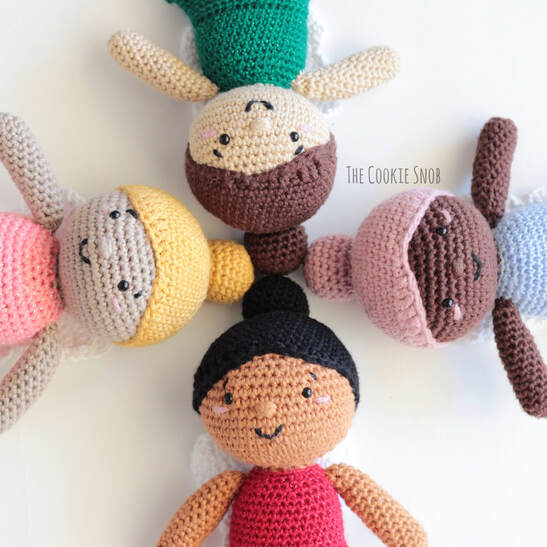 ***You're welcome to do whatever you'd like to with finished products made from this pattern but if you do sell them, I ask that you link back to my page. You may not copy this pattern, repost it anywhere (either altered or in its original form), or claim it as your own. You may not use any photos on this site for your own use. ***
0 Comments
Leave a Reply. |
Welcome!Thank you for stopping by to visit my own personal corner of the web! Feel free to take a look around and check out what I've been crafting, crocheting, or baking. Hopefully you'll find something to inspire your own creativity!   
Archives
March 2024
|
 RSS Feed