|
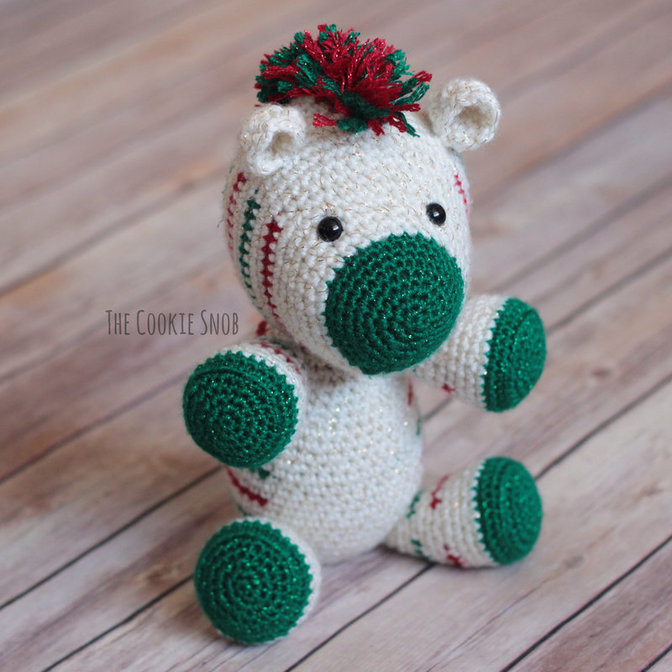
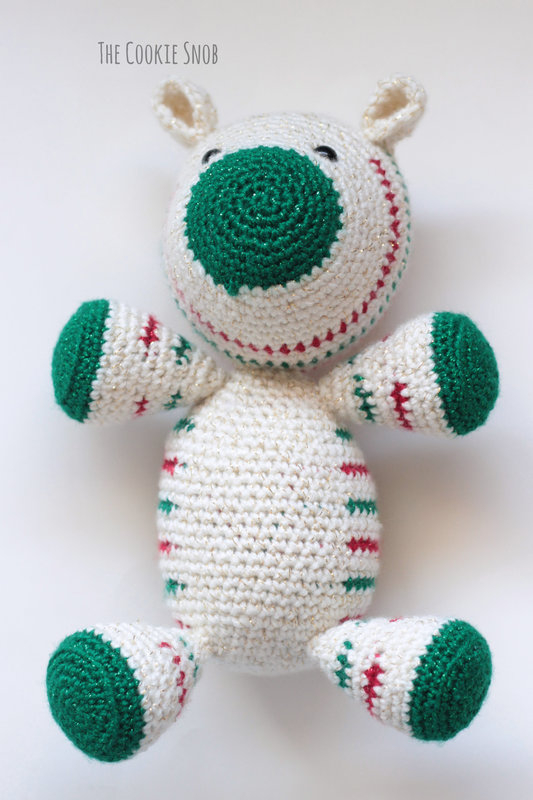
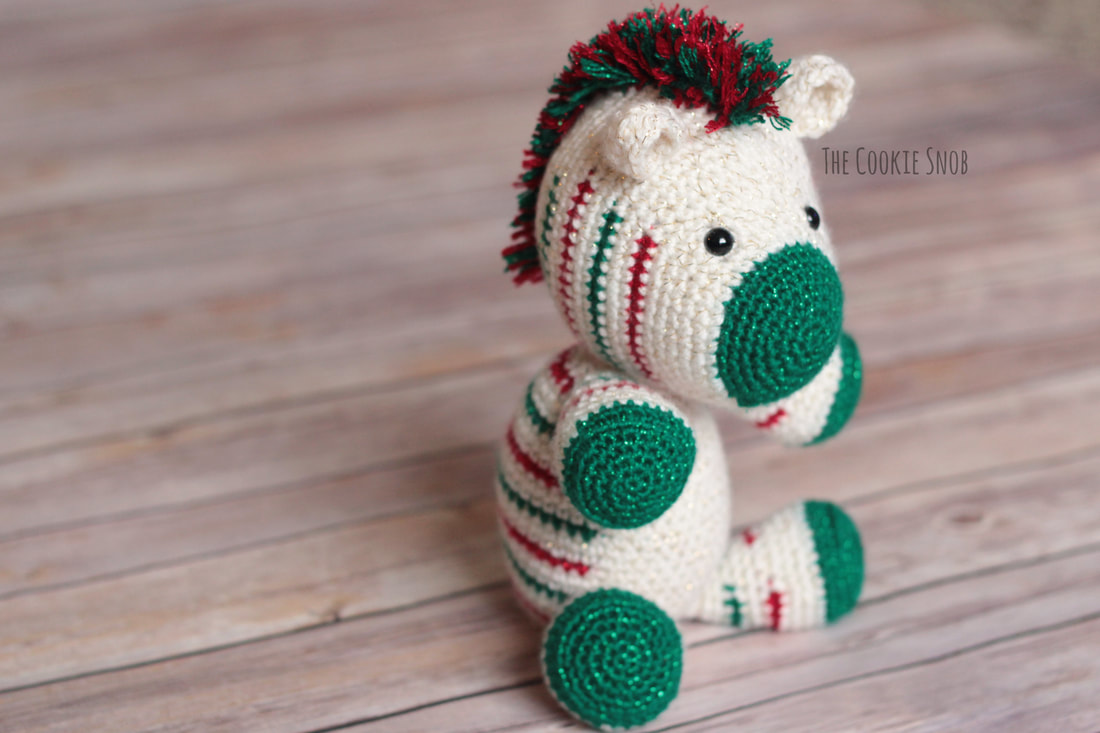
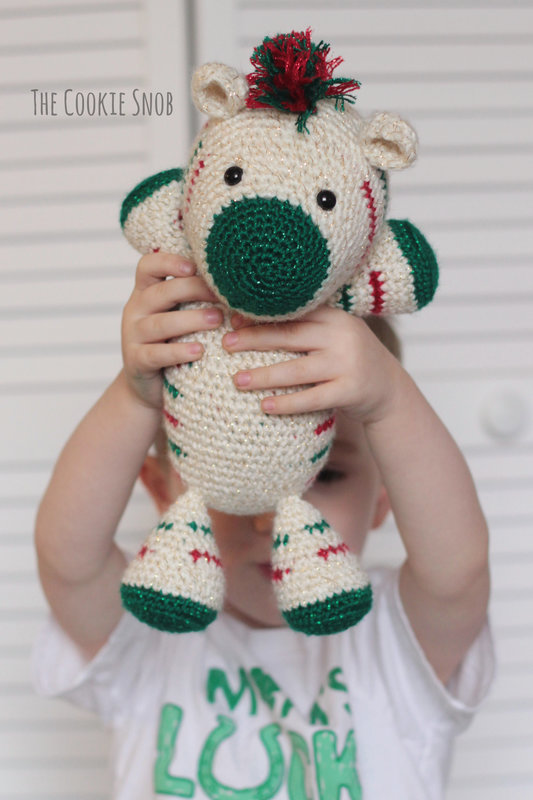
When I'm designing a new crochet pattern, my number one inspiration would have to be my kids. I love to make things for them, both practical (like a warm hat) and fun (like my Cuddly Camera toy. And now that my oldest is big enough to give me ideas, he can actually help design things, which is awesome. The other day we were playing an animal pretend game and he started describing a red and green zebra. Sounds like a Christmas zebra to me! Once the idea popped into my head, I knew it was too fun to ignore, and thus this little amigurumi came to be. A Christmas zebra certainly isn't the most conventional choice, but why not, right? 'Tis the season, after all. But if you're not feeling the Christmas-y vibes, you can make this little guy in a more traditional black and white (or any color combo you feel like); it's guaranteed to be adorable either way. Because of the color changes for the stripes, I probably wouldn't recommend this pattern for an absolute beginner. But if you've made an amigurumi before, there shouldn't be anything too surprising in this pattern. Other than the color changes, it's fairly basic. So to help you out with the color changes, here are a couple of quick tips:
A printer-friendly PDF version of this pattern is available on Ravelry. Materials:
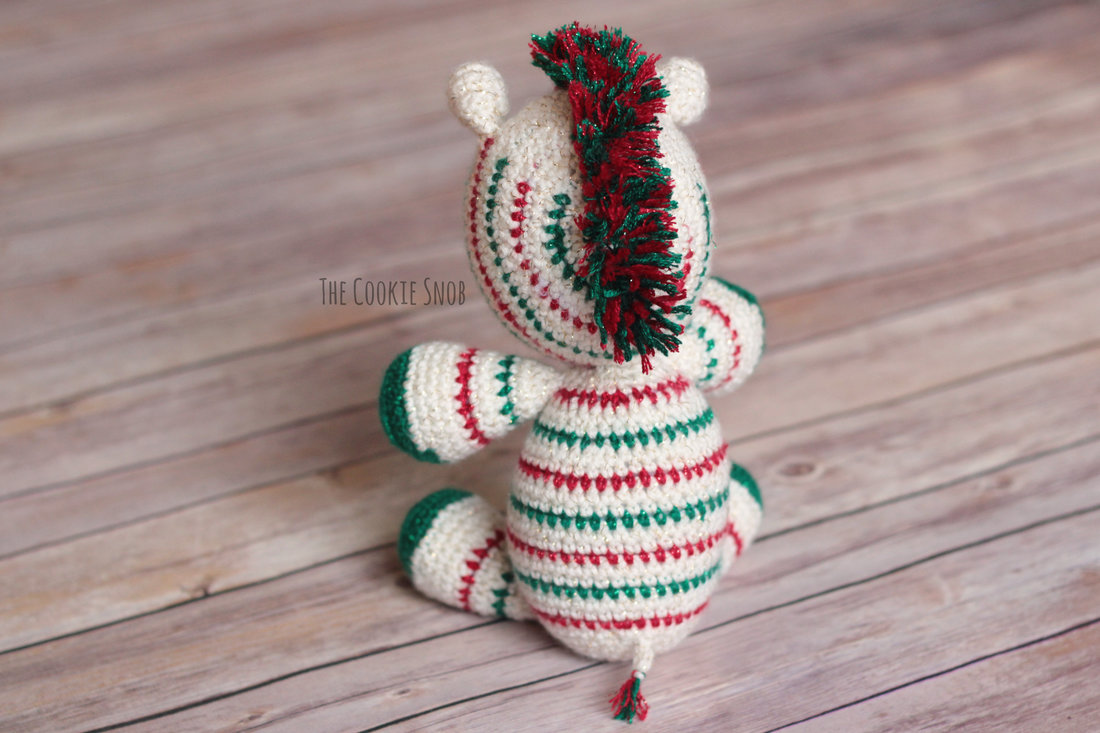
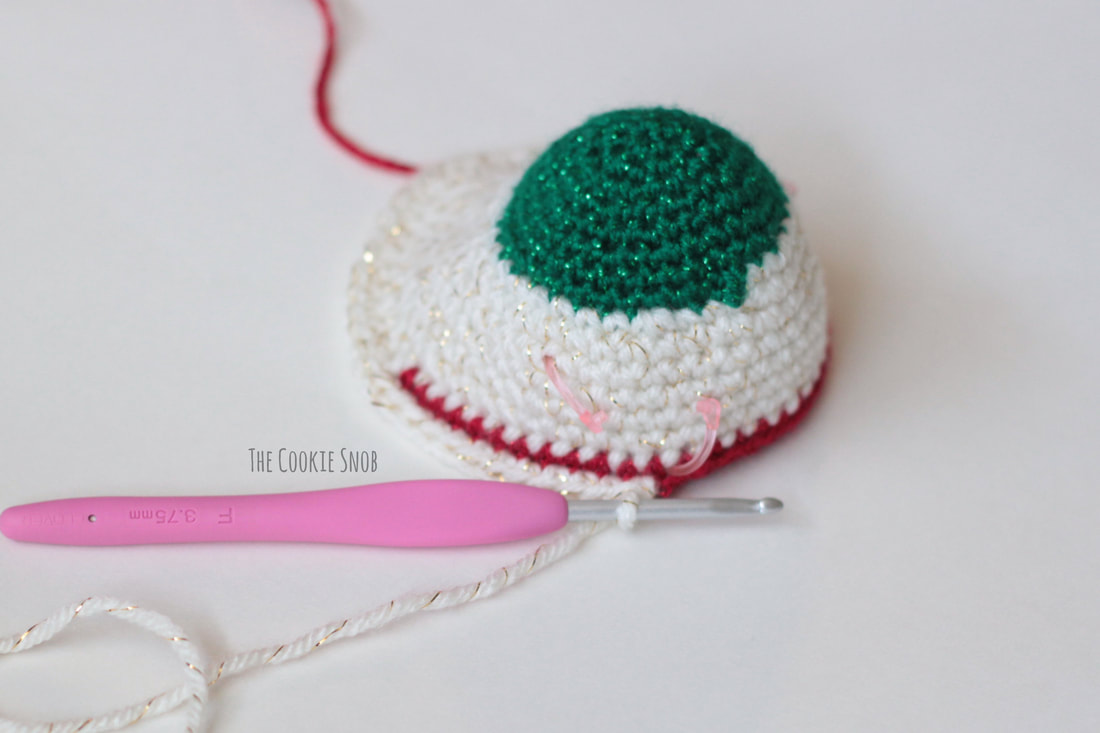
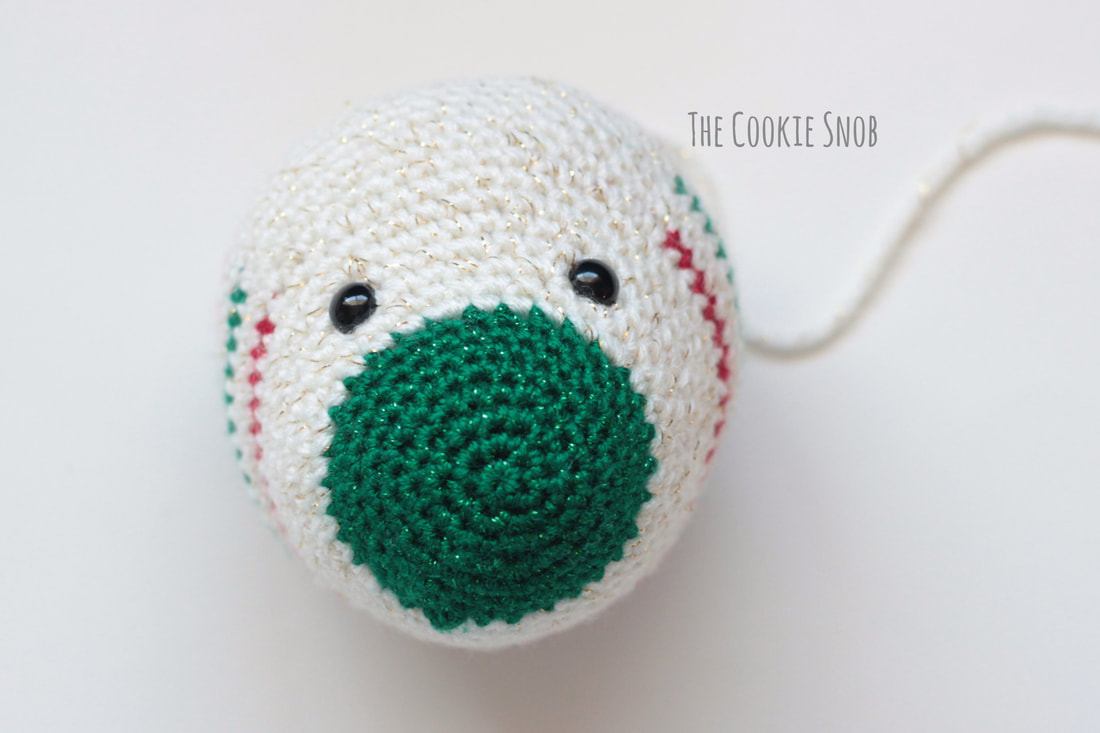
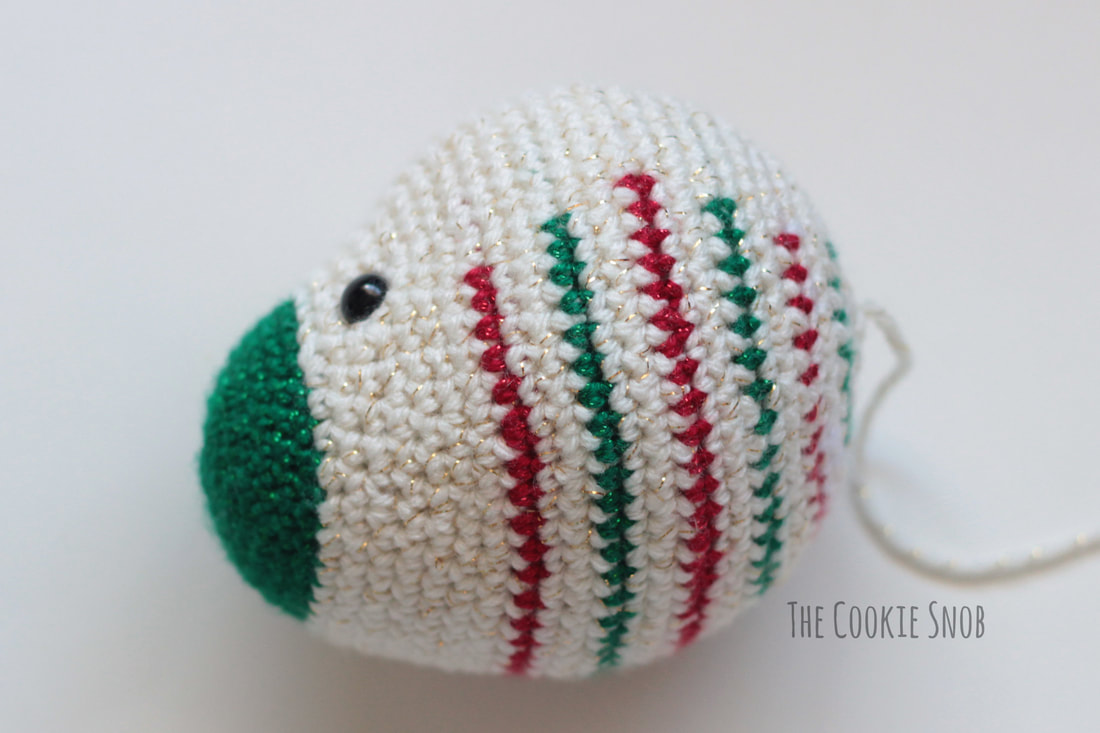
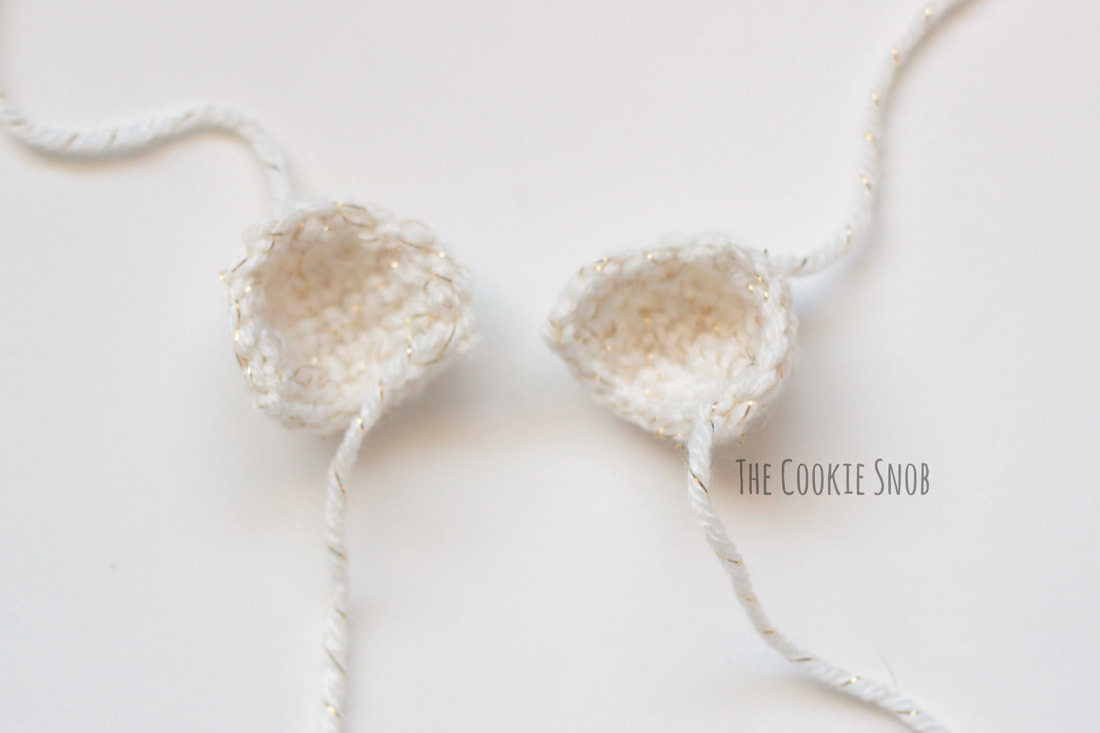
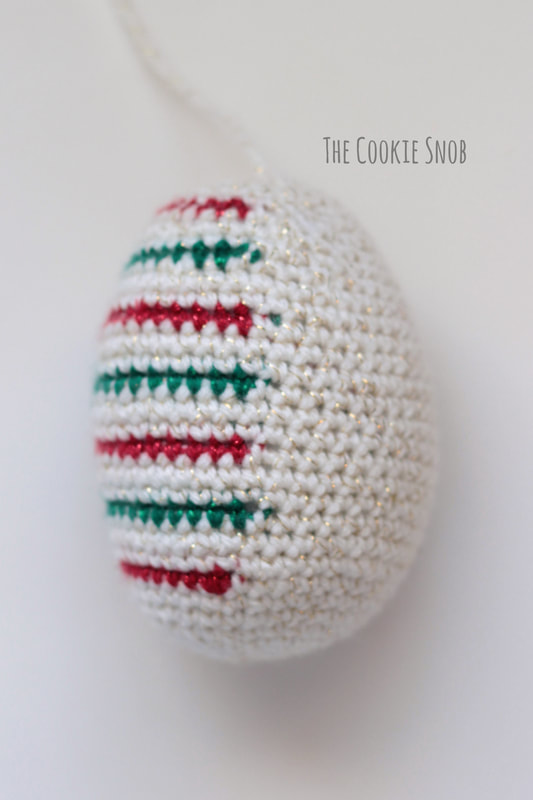
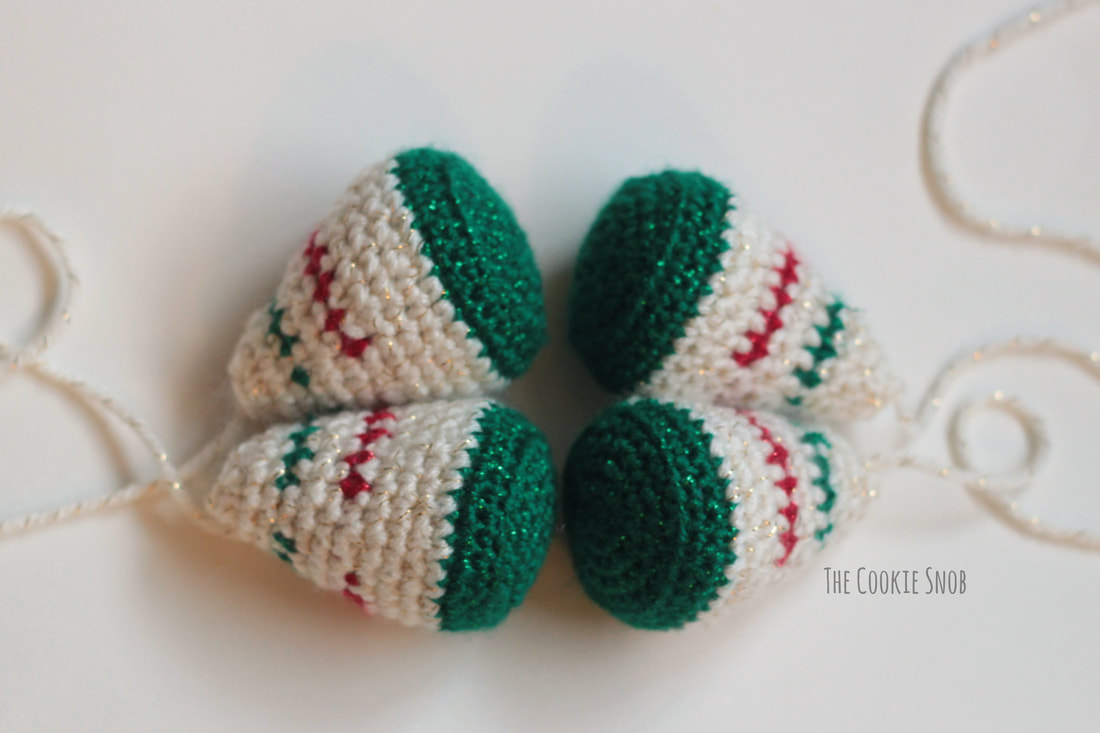
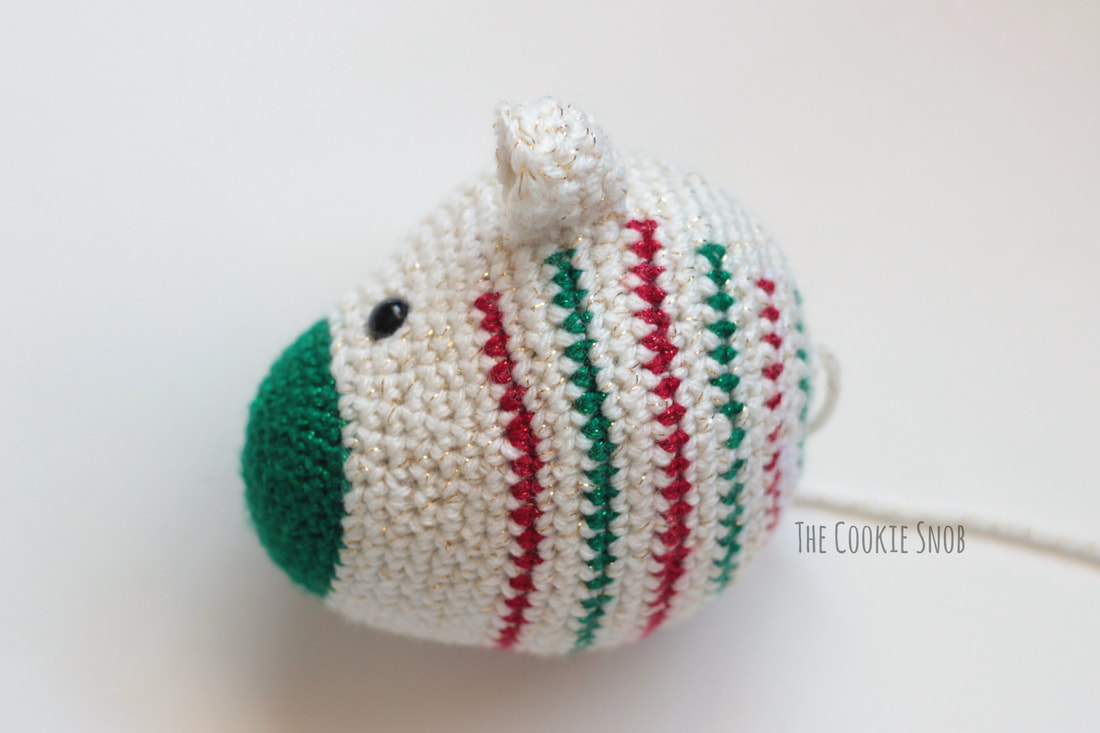
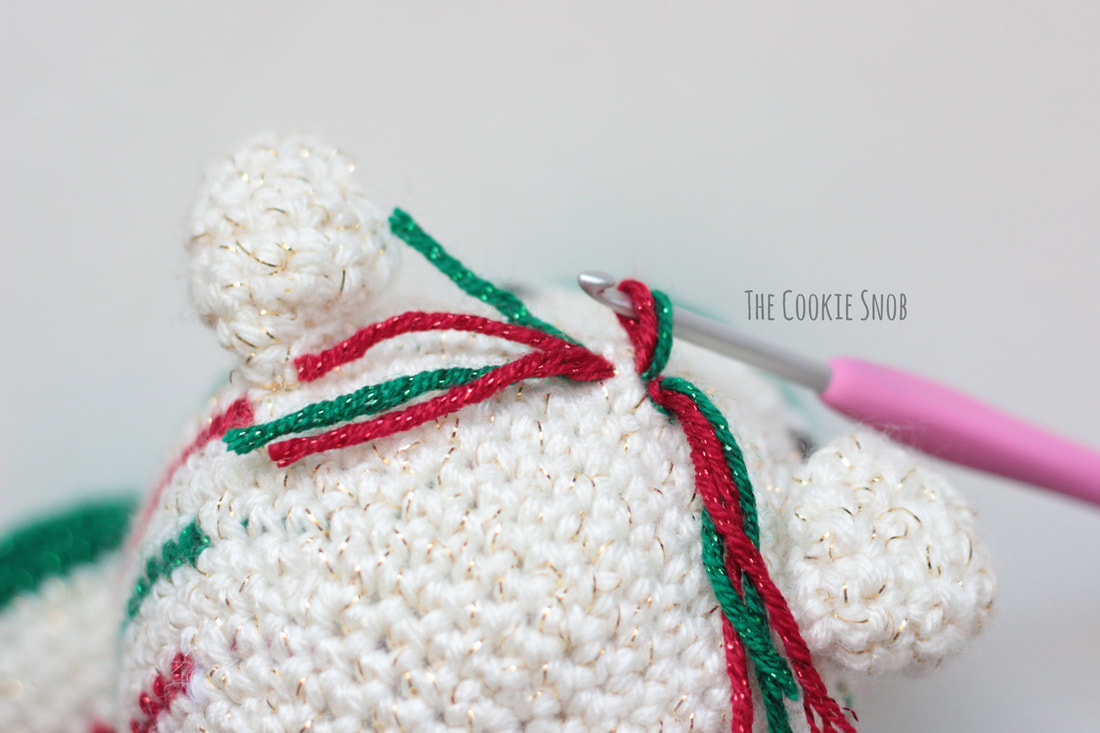
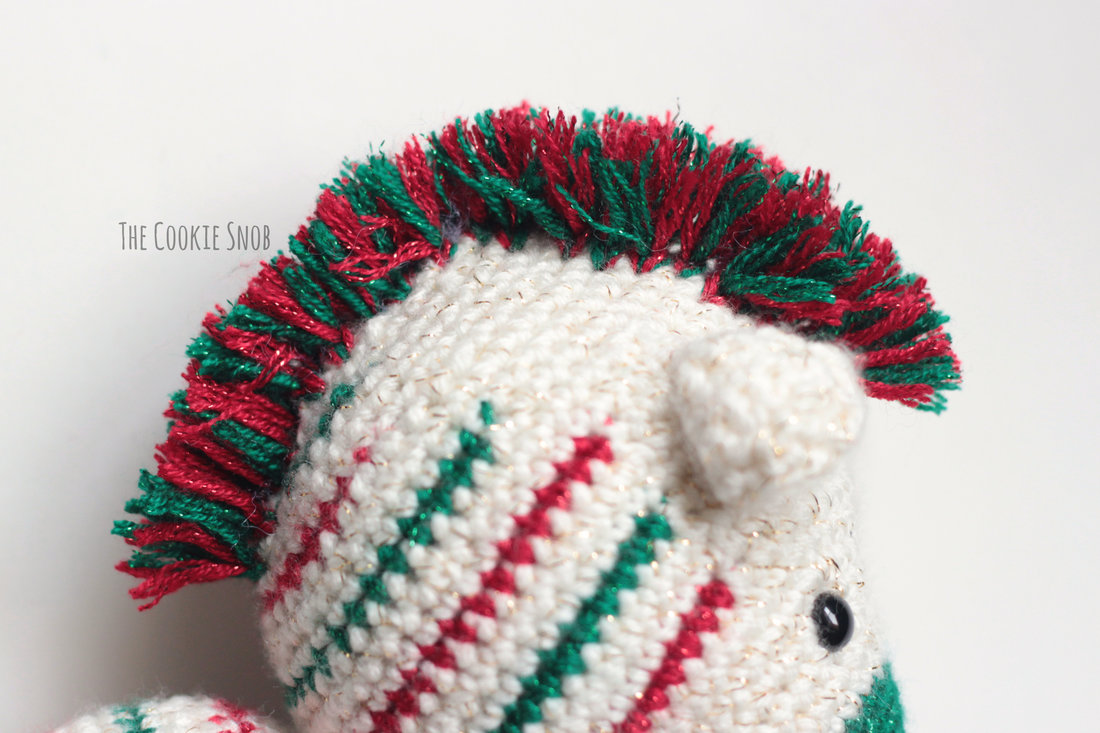
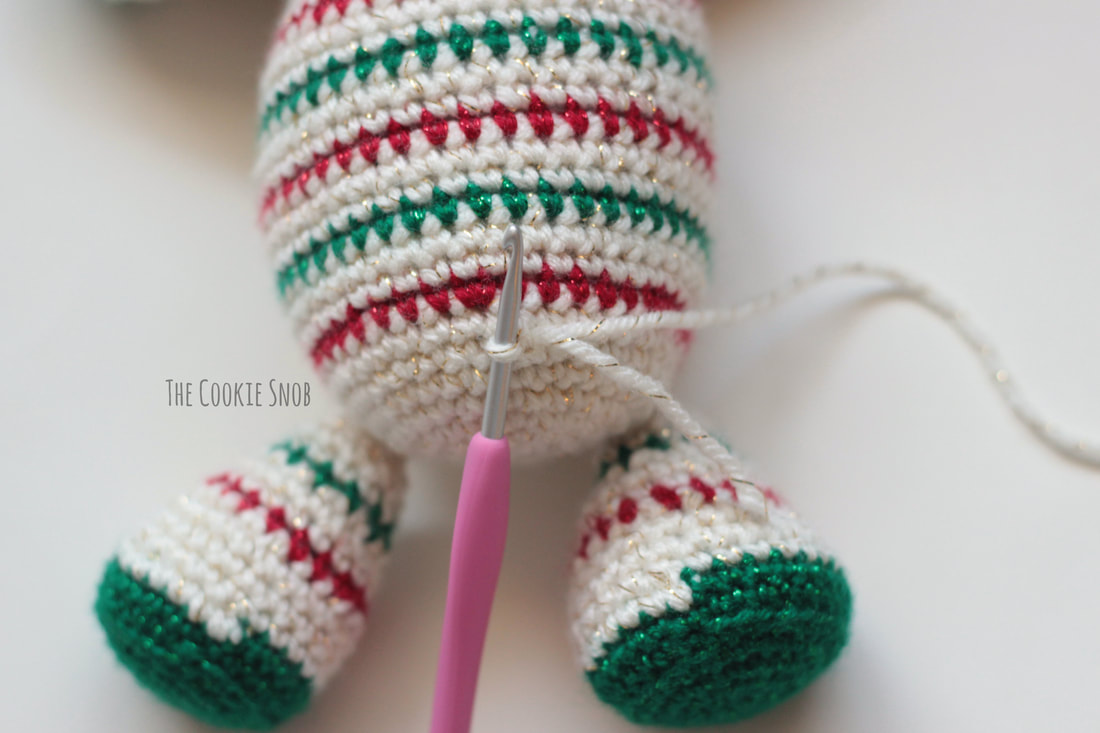
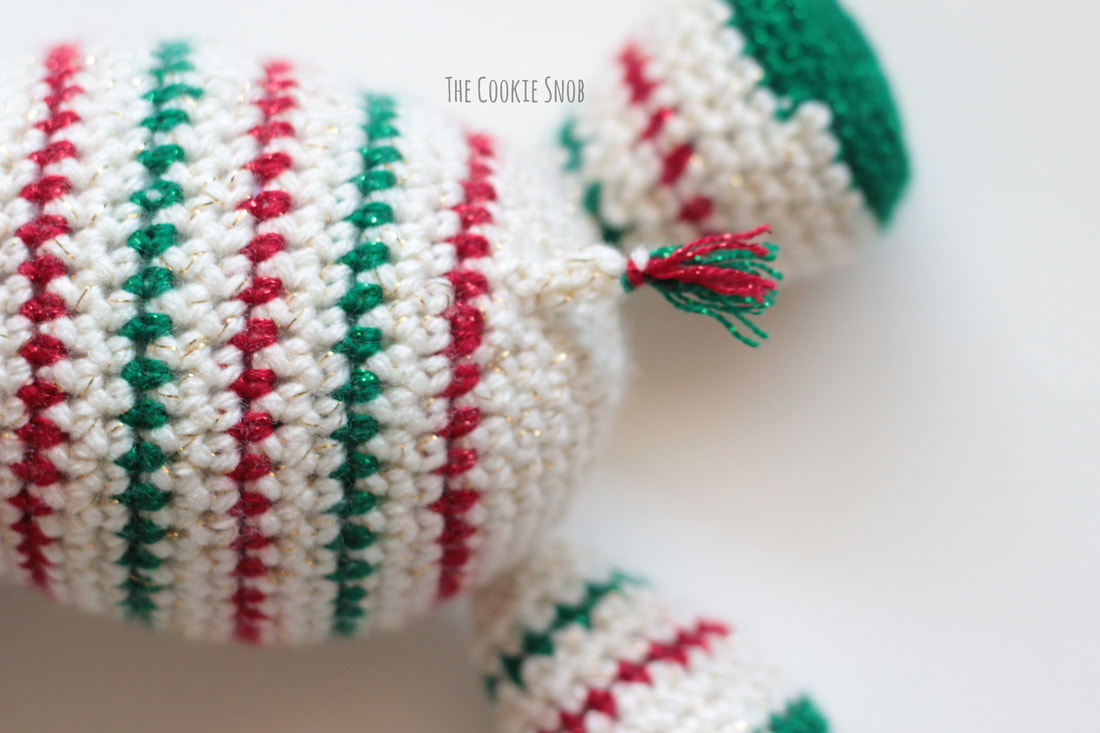
Stitch Glossary: st(s) = stitch(es) ch = chain ss = slip stitch sc = single crochet inc = sc increase (work 2 sc in the same st) dec = sc decrease (I prefer to use the invisible decrease stitch) sc3tog = decrease across 3 sc Head: Note: This pattern is worked in the round (meaning the stitches are worked in a continuous spiral). I recommend using a stitch marker and moving it after every round to help you keep track of which round you're working on. Start with green yarn Round 1: Make a magic circle and work 6 sc into the magic circle (6) Round 2: inc around (12) Round 3: [inc, sc] around (18) Round 4: [sc, inc, sc] around (24) Round 5: [inc, sc in the next 3 sts] around (30) Rounds 6-8: sc around (30) Switch to white yarn Round 9: [sc in the next 2 sts, inc, sc in the next 2 sts] around (36) Round 10: sc around (36) Round 11: sc in the next 12 sts, [inc, sc in the next 5 sts] 3 times, sc in the last 6 sts (39) Round 12: sc in the next 12 sts, [sc in the next 3 sts, inc, sc in the next 3 sts] 3 times, sc in the last 6 sts (42) Round 13: sc in the next 12 sts, [inc, sc in the next 7 sts] 3 times, sc in the last 6 sts (45) Round 14: sc in the next 12 sts, [sc in the next 4 sts, inc, sc in the next 4 sts] 3 times, sc in the last 6 sts (48) Round 15: sc in the next 12 sts, [inc, sc in the next 9 sts] 2 times, inc, sc in the next 3 sts, switch to red yarn, sc in the last 12 sts (51) Round 16: sc in the next 17 sts, inc, sc in the next 5 sts, switch to white, [sc in the next 5 sts, inc, sc in the next 5 sts] 2 times, sc in the last 6 sts (54) Round 17: sc in the next 12 sts, [inc, sc in the next 11 sts] 3 times, sc in the last 6 sts (57) Round 18: sc in the next 12 sts, [sc in the next 6 sts, inc, sc in the next 6 sts] 2 times, sc in the next 6 sts, inc, switch to green, sc in the last 12 sts (60) Round 19: sc in the next 28 sts, switch to white, sc in the last 32 sts (60) Round 20: sc around (60) Round 21: sc in the next 48 sts, switch to red, sc in the last 12 sts (60) Round 22: sc in the next 30 sts, switch to white, sc in the last 30 sts (60) Round 23: [sc in the next 4 sts, dec, sc in the next 4 sts] around (54) Round 24: sc in the next 46 sts, switch to green, sc in the last 8 sts (54) Round 25: [dec, sc in the next 7 sts] 3 times, switch to white, [dec, sc in the next 7 sts] 3 times (48) Round 26: sc around (48) Pause crocheting for a moment and add the safety eyes in the white section (without any colored stripes) between rounds 11 and 12, about 8 sts apart (or feel free to use your own placement or stitch on eyes, if you prefer.) If you'd like to stitch on a mouth or nostrils, now is a good time to do so. I didn't add any to mine, but feel free to personalize your zebra. Round 27: [sc in the next 3 sts, dec, sc in the next 3 sts] 5 times, sc in the next 3 sts, switch to red, dec, sc in the last 3 sts (42) Round 28: [dec, sc in the next 5 sts] 3 times, switch to white, [dec, sc in the next 5 sts] 3 times (36) Round 29: sc around (36) Round 30: [sc in the next 2 sts, dec, sc in the next 2 sts] 5 times, sc in the next 2 sts, switch to green, dec, sc in the last 2 sts (30) Round 31: [dec, sc in the next 3 sts] 3 times, dec, switch to white, sc in the next 3 sts, [dec, sc in the next 3 sts] 2 times (24) Begin stuffing the head. Continue to stuff as you go. Round 32: [sc, dec, sc] around (18) Round 33: [dec, sc] around (12) Round 34: dec around (6) Finish stuffing. Fasten off, leaving a yarn tail. Using a tapestry needle, weave the yarn tail through the front loop of the remaining sts and pull taut to close. Ear (Make 2): With white yarn, ch 10 Row 1: sc in the 2nd ch from the hook and in each remaining st across, turn (9) Rows 2-3: ch 1, sc across, turn (9) Row 4: ch 1, dec, sc in the next 5 sts, dec, turn (7) Row 5: ch 1, dec, sc in the next 3 sts, dec, turn (5) Row 6: ch 1, dec, sc, dec, turn (3) Row 7: ch 1, sc3tog (1) Optional: ss around the entire ear to create a clean edge Fasten off, leaving a long yarn tail for sewing To shape the ear, pinch the corners of the flat bottom edge of the ear (row 1) together and stitch shut using the tapestry needle and yarn tail. Body: Note: This pattern is worked in the round (meaning the stitches are worked in a continuous spiral). I recommend using a stitch marker and moving it after every round to help you keep track of which round you're working on. Start with white yarn Round 1: Make a magic circle and work 6 sc into the magic circle (6) Round 2: inc around (12) Round 3: [inc, sc] around (18) Round 4: [sc, inc, sc] around (24) Round 5: [inc, sc in the next 3 sts] around (30) Round 6: sc around (30) Round 7: [sc in the next 2 sts, inc, sc in the next 2 sts] around (36) Round 8: sc around (36) Round 9: switch to red, [inc, sc in the next 5 sts] 4 times, switch to white, [inc, sc in the next 5 sts] 2 times (42) Rounds 10-11: sc around (42) Round 12: switch to green, sc in the next 30 sts, switch to white, sc in the last 12 sts (42) Rounds 13-14: sc around (42) Round 15: sc, switch to red, sc in the next 30 sts, switch to white, sc in the last 11 sts (42) Rounds 16-17: sc around (42) Round 18: sc in the next 2 sts, switch to green, sc in the next 30 sts, switch to white, sc in the last 10 sts (42) Rounds 19-20: sc around (42) Round 21: sc in the next 3 sts, switch to red, sc in the next 30 sts, switch to white, sc in the last 9 sts (42) Rounds 22-23: sc around (42) Round 24: dec, sc in the next 3 sts, switch to green, sc in the next 2 sts, [dec, sc in the next 5 sts] 3 times, dec, sc in the next 3 sts, switch to white, sc in the next 2 sts, dec, sc in the next 5 sts (36) Round 25: sc around (36) Round 26: [sc in the next 2 sts, dec, sc in the next 2 sts] around (30) Begin stuffing the body. Continue to stuff as you go. Round 27: sc in the next 4 sts, switch to red, sc in the next 20 sts, switch to white, sc in the last 6 sts (30) Round 28: [dec, sc in the next 3 sts] around (24) Round 29: [sc, dec, sc] around (18) Round 30: [dec, sc] around (12) Round 31: dec around (6) Finish stuffing. Fasten off, leaving a long yarn tail for sewing. Using a tapestry needle, weave the yarn tail through the front loop of the remaining sts and pull taut to close. Leg (Make 4): Note: This pattern is worked in the round (meaning the stitches are worked in a continuous spiral). I recommend using a stitch marker and moving it after every round to help you keep track of which round you're working on. Start with green yarn Round 1: Make a magic circle and work 6 sc into the magic circle (6) Round 2: inc around (12) Round 3: [inc, sc] around (18) Round 4: [sc, inc, sc] around (24) Round 5: [inc, sc in the next 3 sts] around (30) Round 6: sc around in back loop only (30) Round 7: sc around (30) Round 8: switch to white, sc around (30) Round 9: [dec, sc in the next 3 sts] around (24) Round 10: sc around (24) Round 11: sc in the next 16 sts, switch to red, sc in the last 8 sts (24) Round 12: [sc, dec, sc] 3 times, switch to white, [sc, dec, sc] 3 times (18) Round 13: sc around (18) Round 14: sc in the next 13 sts, switch to green, sc in the next 5 sts (18) Round 15: [dec, sc] 3 times, dec, switch to white, sc [dec, sc] 2 times (12) Begin stuffing. Continue stuffing as you go. Rounds 16-17: sc around (12) Round 18: dec around (6) Finish stuffing. Fasten off, leaving a long yarn tail for sewing. Assembly: Using the long yarn tails and the tapestry needle, sew the first ear onto the head as shown, with the flat side attached to the head. Sew the second ear onto the opposite side of the head, keeping both ears symmetrical. Using the long yarn tails and the tapestry needles, sew the head onto the body. (Tip: If you find that the head is too wobbly, make sure that you're stitching the body and head together at multiple points all the way around the "neck" rather than just stitching in one place.) Then sew the legs onto the body as shown. To create the mane, cut pieces of red and green yarn into 5" lengths. Hold one red and one green strand together. Insert your hook through the stitch where you want to attach the hair and pull the yarn strands partway through the stitch from the center until a loop forms (as shown below). Pull the loose strands on the other end through the yarn loop you just made and pull taut to fasten in place. (I find that this last step is best done with your fingers rather than the hook). Repeat until the mane is as full/long as you'd like it to be. I began mine in between the ears (as shown above) and continued down to the last red stripe on the back of the head. I made my mane with alternating rows of 3 sts wide and 2 sts wide. Once the yarn is all attached, trim the mane to an even height. I trimmed mine until it was about 1" long. To create the tail, attach the white yarn as shown to the back of the zebra, centered beneath the last stripe. Ch 4. Then ss in the 2nd ch from the hook and in the remaining 2 sts. Ss to the body and fasten off. Weave in yarn ends. Attach at least one red and green yarn strand to the end of the tail (following the instructions for the mane above). Trim to desired length and pull apart yarn strands to give the look of individual hairs. Weave in any remaining ends. Congratulations! You've made your very own Christmas zebra! I hope that you've enjoyed this pattern! This is the sort of pattern that I would normal publish as a paid pattern, so if you like it, I hope you'll consider supporting my blog by purchasing your own printable, PDF version on Ravelry. Your support allows me to make more of my patterns available for free. If you make one, please share a picture! I'd love to see how it turns out. And if you have any questions or comments, you can reach me in the comments section below or on social media. Happy hooking! ***You're welcome to do whatever you'd like to with finished products made from this pattern but if you do sell them, I ask that you link back to my page. You may not copy this pattern, repost it anywhere (either altered or in its original form), or claim it as your own. You may not use any photos on this site for your own use. ***
1 Comment
Kaila
1/4/2018 06:30:43 pm
Sooo cute!
Reply
Leave a Reply. |
Welcome!Thank you for stopping by to visit my own personal corner of the web! Feel free to take a look around and check out what I've been crafting, crocheting, or baking. Hopefully you'll find something to inspire your own creativity! Archives
March 2024
|




 RSS Feed