|
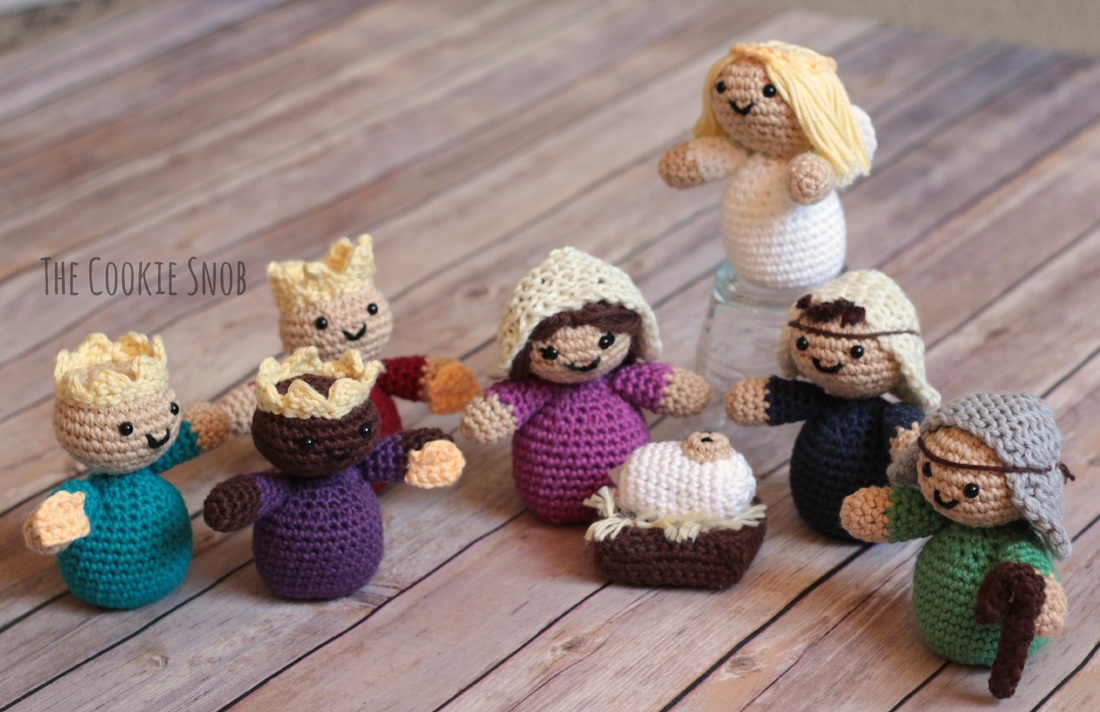
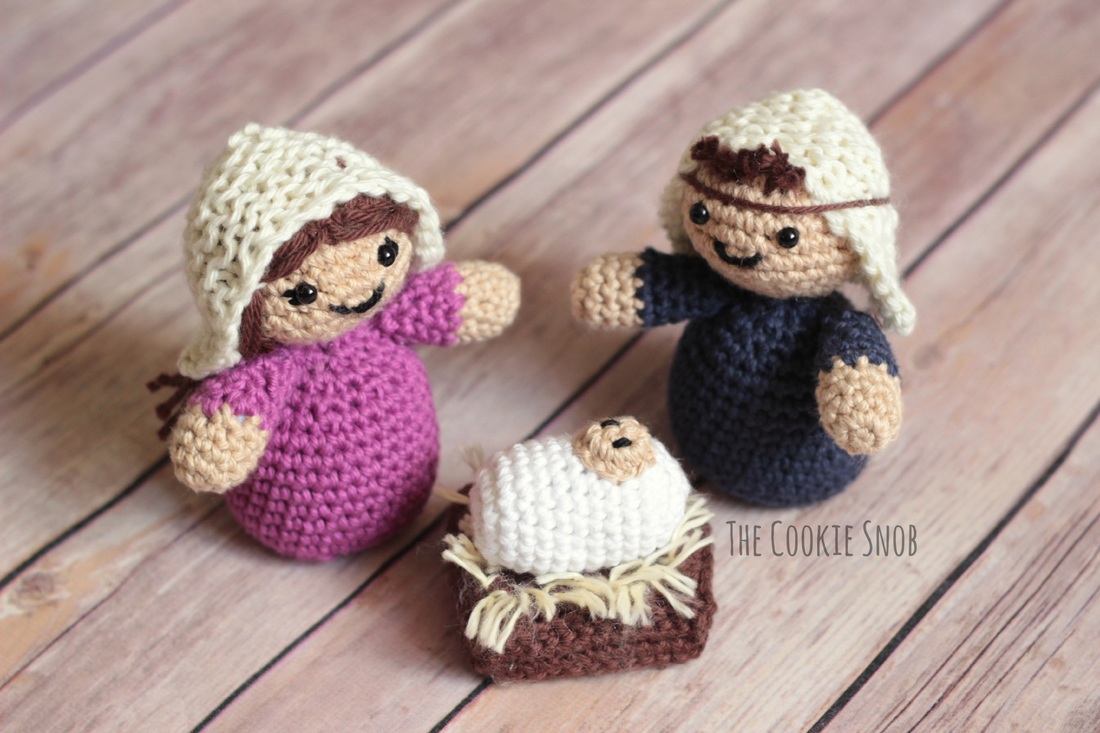
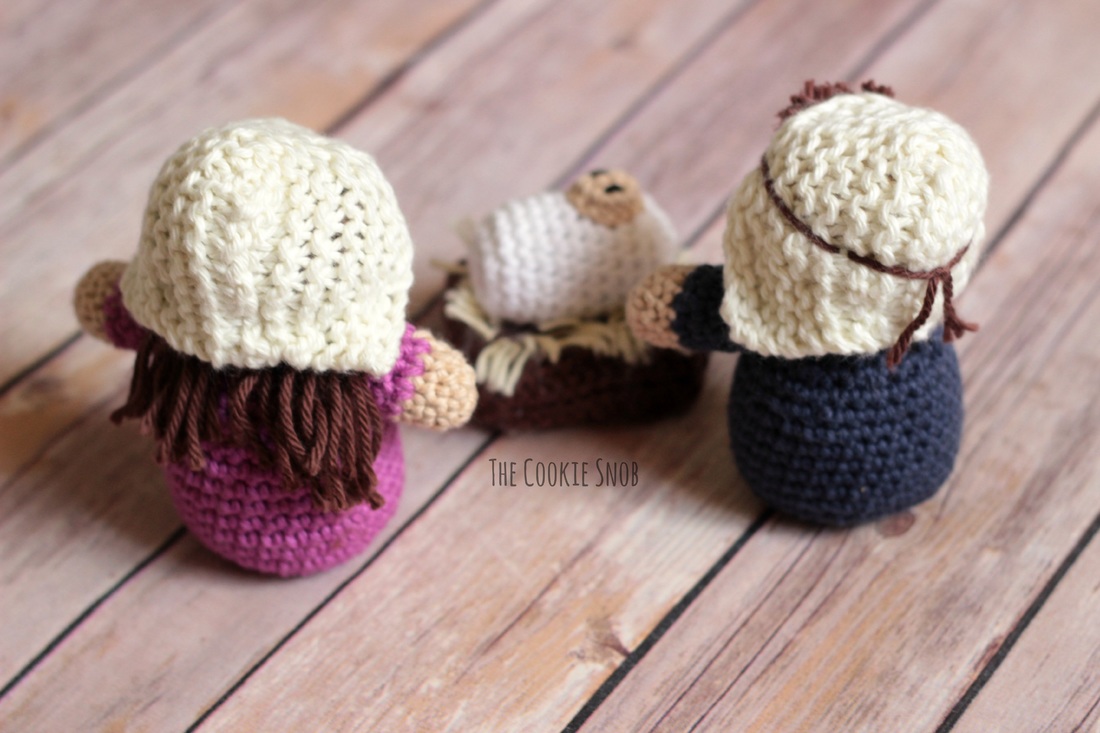
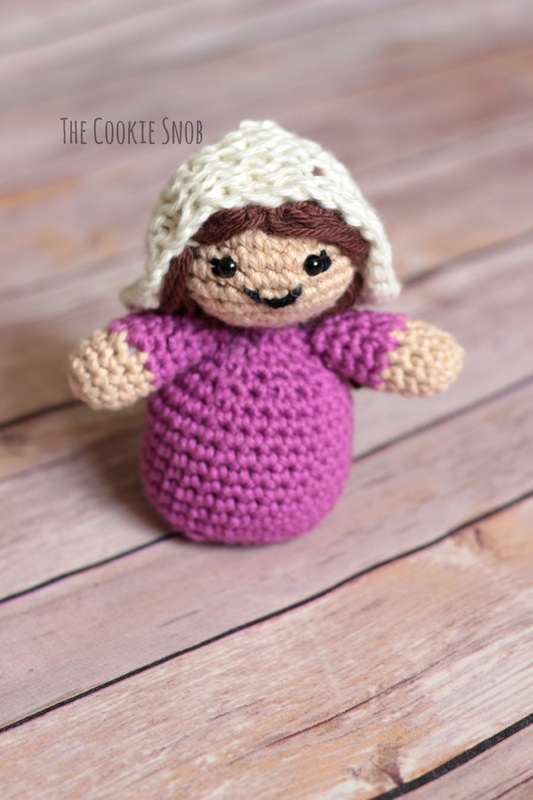
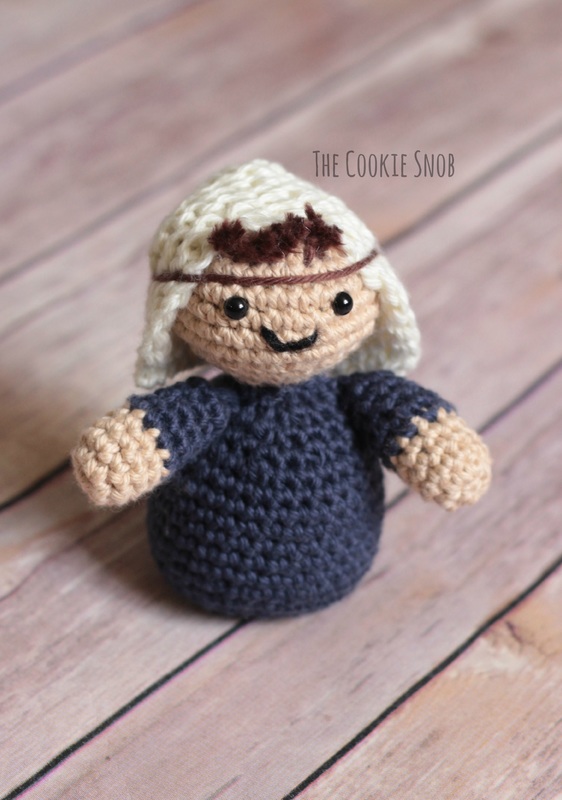
Now that Thanksgiving is over, it's officially time to pull out all of the Christmas decorations in our little apartment. So I thought I'd share some of the Christmas cheer on the blog by posting about this cute crocheted nativity I made. And, for those of you who don't celebrate Christmas, maybe this will give you some ideas for modifying the pattern to make your own cute dolls for some other occasion. Everybody needs cute crocheted things, right? I started brainstorming ideas for a crocheted nativity early on in the year, since I wanted to make one as a gift for someone who collects nativities. Right when I was about to get started on it, Repeat Crafter Me posted a tutorial for adorable amigurumi dolls. It was perfect for what I'd been thinking of, so I figured why reinvent the wheel? And I adapted her great pattern to make a cute little Mary and Joseph. Then I made up a quick pattern for the baby and the manger. And they were a hit. Fast forward to the present. My toddler is in a definite "must touch EVERYTHING" phase, so I've been trying to find a relatively indestructible nativity for him to play with at Christmastime since I probably won't be able to set out any of my lovely breakable ones this year. The cute plastic ones for kids are surprisingly expensive and Craigslist and eBay were failing me, so it was time come up with plan B. Then I was reminded of the crocheted nativity I'd made earlier and I decided to make another set for our family to keep. I made up another Mary, Joseph, and baby and decided to let my son play with it as sort of a durability test. He loved them. Okay, so he may have thrown baby Jesus across the room a few times....no lightening, please...but it's still really sweet to watch him play with them. And, in his defense, he's gotten better at gently placing the baby in the manger. Sometimes. So in a moment of insanity I decided to expand the set into a full nativity, complete with shepherd, wisemen, and an angel. I didn't make any animals yet, but the madness had to end somewhere, people! In case you'd like to join me in the Christmas Crazy, I decided to blog about how I modified the original pattern to make my nativity figures. All of the adult figures are derived from the Repeat Crafter Me pattern, with only a few minor modifications. I used worsted weight I Love This Cotton! Yarn for every piece of the nativity (if you're looking for the name of a specific color I used, just let me know and I'd be happy to share). I decided to make all of my figures using a size F (3.75 mm) crochet hook in order to make them a little smaller and to keep the stitches tighter. Instead of switching colors, I decided to make the body one uniform color to make their robes look longer. And I made a small change in the arm pattern by repeating round 9 twice before finishing off instead of following round 10 because I liked the look of it better that way. Instead of filling tights to weight the body, I used small drawstring favor bags that I got in a multipack at the dollar store. I filled mine about 2/3 full and then tied them off with a double knot before adding them to the body. Whatever you do, you should definitely put the plastic pellets inside of something before you add them to the body; I made the mistake of just pouring them straight into the body the first time I made this pattern and they started popping out of the stitches, but it was too late to fix it (sorry!). In order to give the figures that classic "nativity" look, I knew I had to add some sort of headpiece. You have a couple different options here. In my first version of the nativity, I just hot-glued felt to the head, which looked awesome and was super quick. But in order to make sure that our family set was washable (sticky little jam hands everywhere, I tell ya), I decided to knit mine this time. I knit a quick rectangle with a set of size 8 (5.0 mm) needles. I cast on 20 and then just did straight knit stitches until I had a piece about 2 1/2 to 3" long. Then I draped it over the figure's head and used the loose yarn ends to sew the edges together in the back before stitching it to the head. You could crochet the headpieces, but it will give you a heavier, chunkier fabric that won't flow as well and might make the figure top-heavy. So if you want a washable non-knit option, you may want to try sewing on a piece of fabric instead. On Joseph's headpiece, I decided to embellish a bit by adding a tie. I cut yarn long enough to wrap around his head and tie in the back. Then I used a little bit of coordinating yarn to make two small stitches on the sides of his headpiece to hold the tie in place. If your nativity will be for display only, you can skip this step, but it's already proved useful for keeping everything in place during playtime. Hopefully that's enough to get you started if you'd like to make a set of your own. To prevent this post from getting obnoxiously long and text-heavy, I'll be posting the patterns for the baby and manger and other embellishments I designed next. So be sure to check back! Don't worry, they'll be posted very soon. And, in the meantime, if you have comments or questions about the project so far I'd love to hear 'em! Find me on social media or in the comment section below. Happy hooking!
Edit: You can now find the free patterns for the baby and manger here and the free patterns for the other nativity accessories here.
4 Comments
Ashley R
12/30/2018 01:44:12 am
What color did you use for the skin?
Reply
Erin
12/30/2018 06:12:58 pm
Hi Ashley! I used I Love This Cotton in the colorway Taupe for most of the figures.
Reply
Erin
7/26/2021 04:03:34 pm
Hi Karen! The links are in the blog post. In case it helps, you can find the doll pattern I used here: https://www.repeatcrafterme.com/2015/04/girl-and-boy-amigurumi-dolls.html
Reply
Leave a Reply. |
Welcome!Thank you for stopping by to visit my own personal corner of the web! Feel free to take a look around and check out what I've been crafting, crocheting, or baking. Hopefully you'll find something to inspire your own creativity! Archives
March 2024
|



 RSS Feed