
 We've been lucky enough to get a visit from my husband's wonderful mother all the way from the UAE. She and I are both avid crocheters, so we like to bond over yarn. After seeing the Animal ABC Book I made, she decided to make some animal appliqués too. As a joke I mentioned that she should make a camel for the letter C and thus the idea for this little ungulate was was born! This tiny camel is a great addition to your appliqué collection and would also make a super cute Christmas ornament. My camel ended up being about 3 1/2 inches long and 2 1/2 inches tall, but you could easily adjust the size by using a different yarn or hook size. Materials:
Stitch Glossary: st(s) = stitch(es) ch = chain ss = slip stich sc = single crochet inc = 2 sc in the same st hdc = half double crochet hdc inc = 2 hdc in the same st dc = double crochet dc inc = 2 dc in the same st tr = treble (triple) crochet Note: This pattern is worked in the round, meaning that rounds are NOT joined together. Instead they are worked continually without turning. The entire camel is worked as one piece, so joining will not be necessary. Camel: Round 1: Make a magic circle and work 6 sc into the magic circle (6) Round 2: [inc, hdc inc, inc] twice (12) Round 3: [inc, hdc, dc inc, hdc, inc, sc] twice (18) 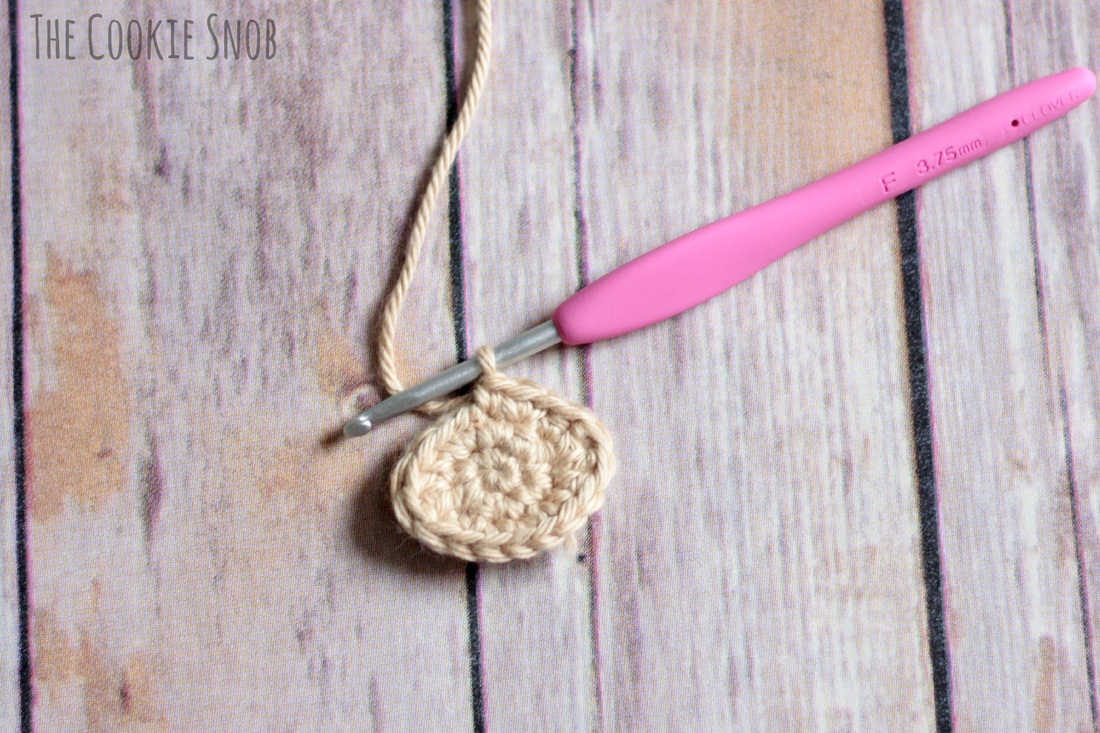 Now it's going to get a bit more complicated. Instead of continuing to divide the pattern up into rounds at this point, I'm going to divide it by body part so that it's (hopefully) a bit easier to follow. We'll just call this all the "Embellishment Round" (ER). ER: sc in next 3 sts, inc in next 2 sts, (begin hump) sc, hdc, dc inc, work 3 tr in next st, dc inc, hdc, sc (end hump) 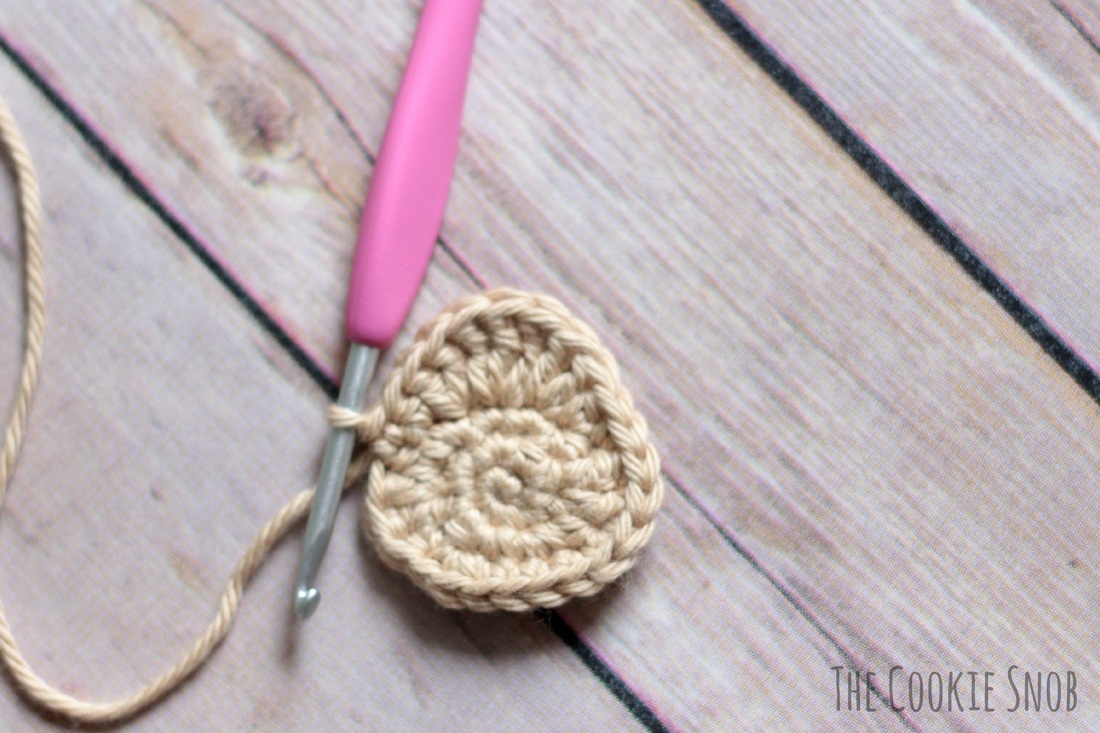 ER (continued): (begin tail) ss, ch 4, ss in second chain from the hook and in next 2 ch, join with ss back to the original st (end tail) 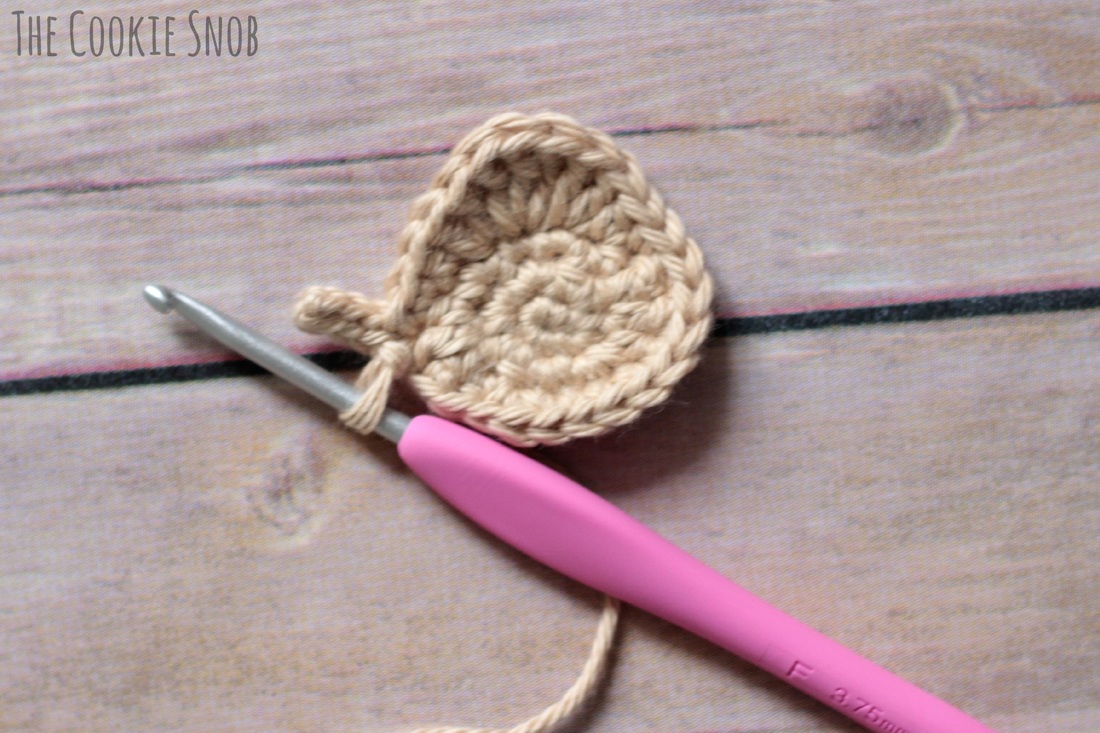 ER (continued): ss in next 3 sts, (begin first leg) ch 7, sc in second chain from the hook, sc in next ch, ss in remaining 4 ch, join with ss back to the original st (end first leg)  ER (continued): ss in next 5 sts, (begin second leg) ch 7, sc in second chain from the hook, sc in next ch, ss in remaining 4 ch, join with ss back to the original st (end second leg) 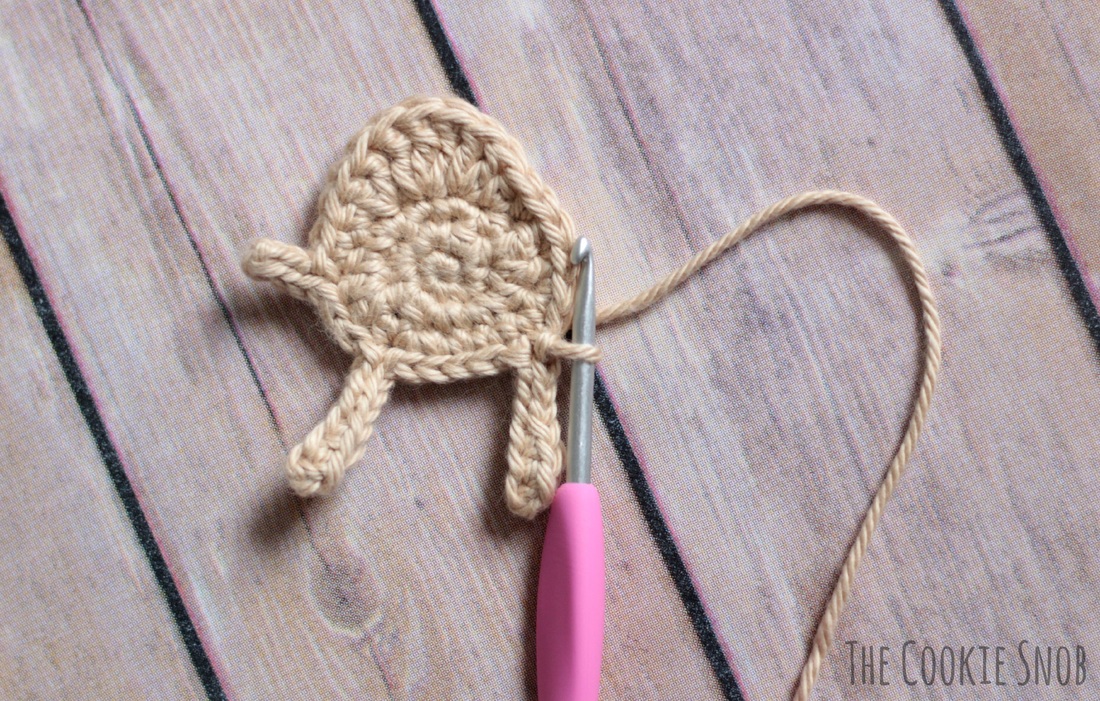 ER (continued): ss in next 2 sts, (begin neck) [ch 2, hdc in next 2 sts, turn] 4 times (end neck) 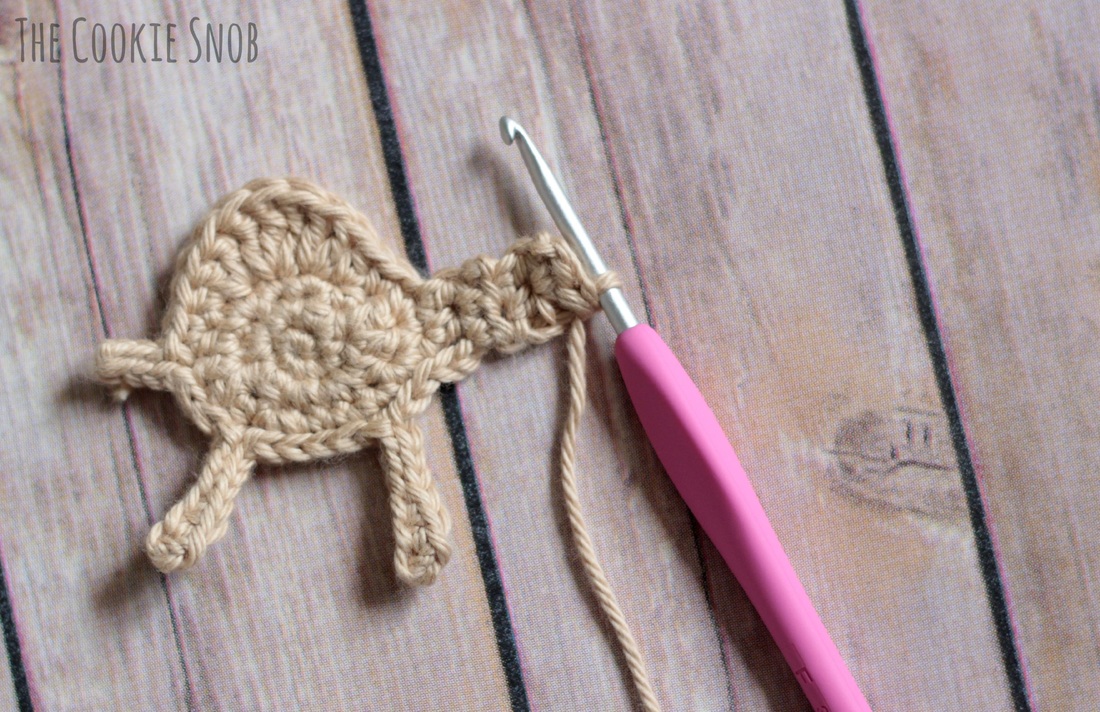 ER (continued): (begin head) ch 1, sc, dc in the same st, work 3 tr in the same st, ss in next st, ch 3, join with ss back to same st Fasten off and weave in ends. 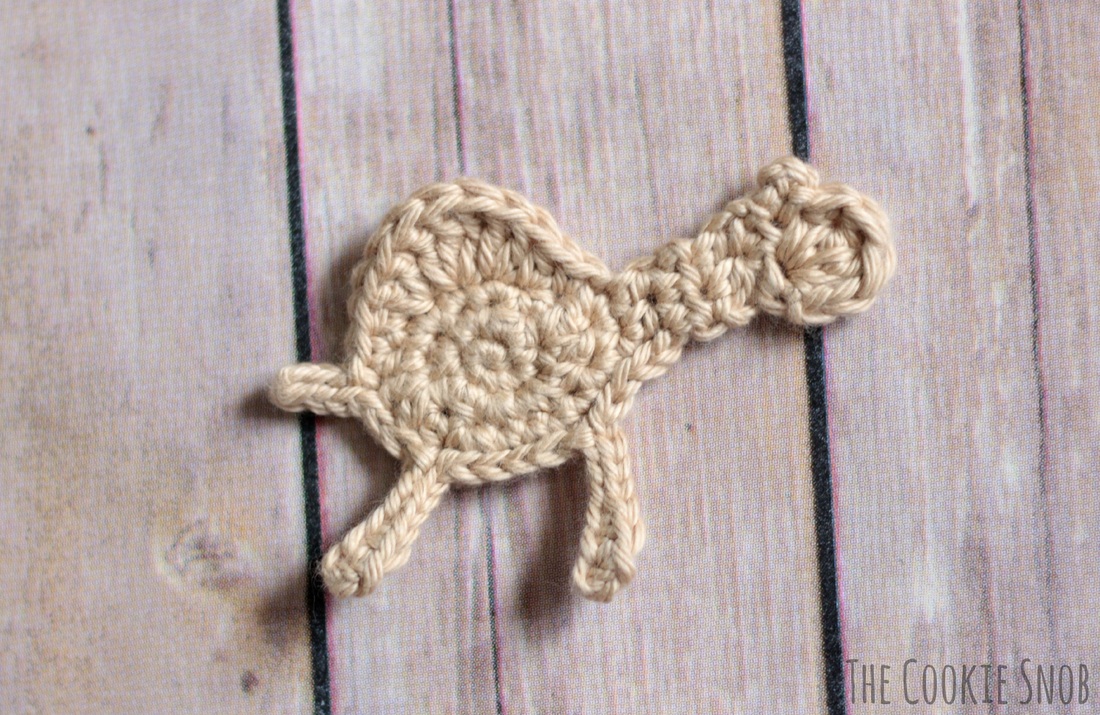 And you now have your very own little camel! If you want to, you can add a knot for the eye with a little bit of black yarn or stitch on a face to give it a bit more personality. 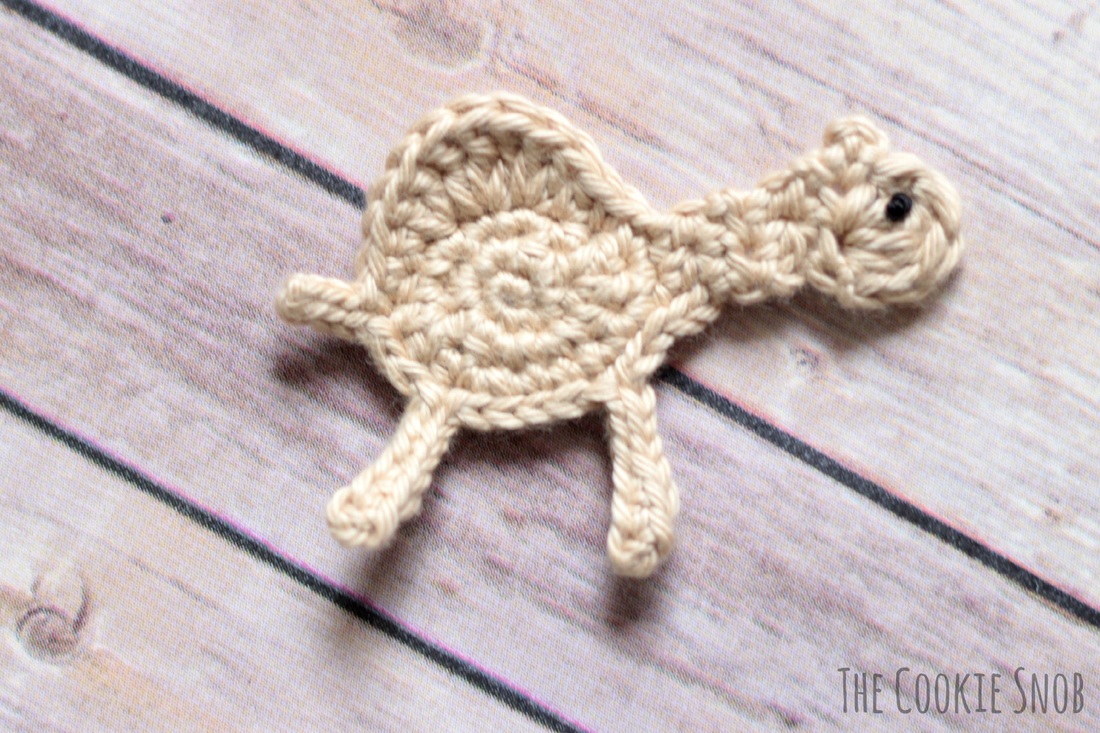 I hope that you enjoy this sweet camel! If you make one I'd love to see a picture of it or hear about how you plan to use it. And this pattern definitely has the potential to be confusing, so if you're having problems please drop me a line and I'll try my best to help! You can reach me on Twitter, Facebook, Ravelry, Pinterest or by email or in the comments section below. Happy hooking! Camel Appliqué ***You're welcome to do whatever you'd like to with finished products made from this pattern but if you do sell them, I ask that you link back to my page. You may not copy this pattern, repost it anywhere (either altered or in its original form), or claim it as your own. You may not use any photos on this site for your own use. ***
0 Comments
Leave a Reply. |
Welcome!Thank you for stopping by to visit my own personal corner of the web! Feel free to take a look around and check out what I've been crafting, crocheting, or baking. Hopefully you'll find something to inspire your own creativity!   
Archives
March 2024
|
 RSS Feed