
|
I was cleaning out my closet the other day and came across the prototype for the Bobble-Wobble Blanket. The final version is worked in stripes of one color at a time, but the original version used color changes to make each bobble a different color. I ended up scrapping that concept because I didn't want to have to choose between carrying yarn (which looked a bit sloppy) and weaving a ton of ends (which makes my soul die a little). But when I found the beginnings of the color change version, I couldn't help but admire how nice it looked with the pops of color. So I did the next best thing and turned it into a new pattern. Behold: the Bobble-Wobble Pillow! 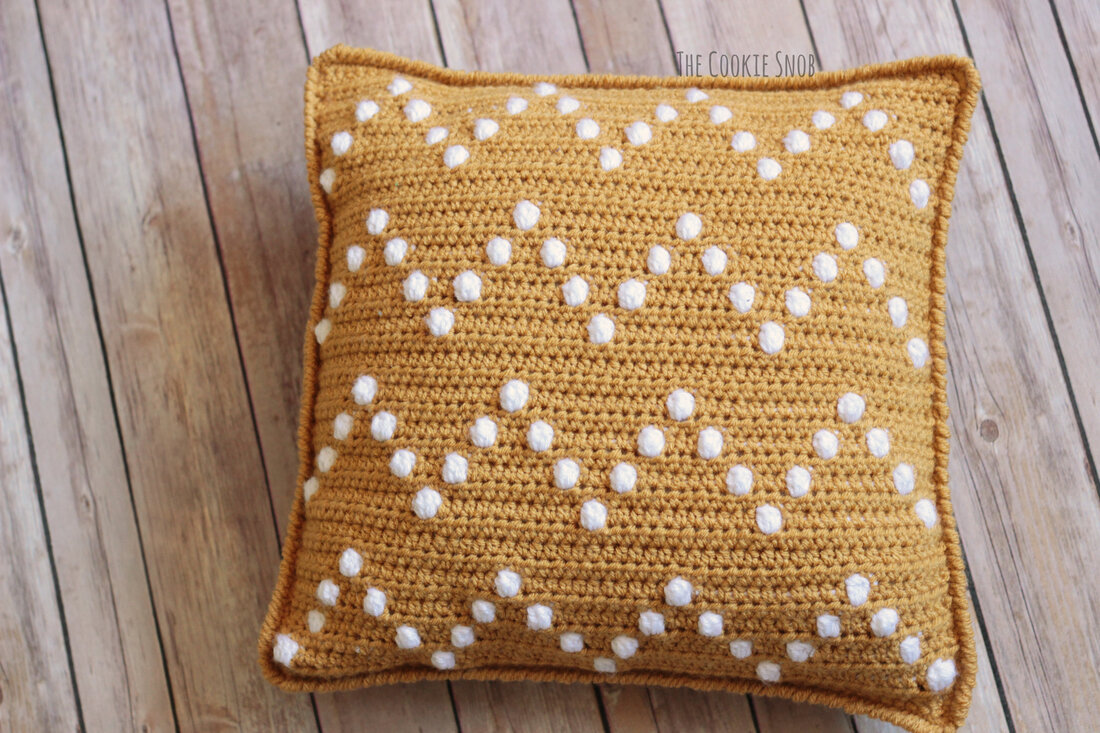 This pillow is much smaller than an entire blanket, so the constant color changes are much more feasible. And, since it's 3D, you can just hide all the ends on the inside and you don't have to worry about weaving them in or carrying the yarn! Win-win! I made mine in yellow and white, but this pillow would look awesome in just about any color scheme. You could even make it in all one color like the Bobble-Wobble blanket; you'll just need more yarn of that color than the pattern calls for. 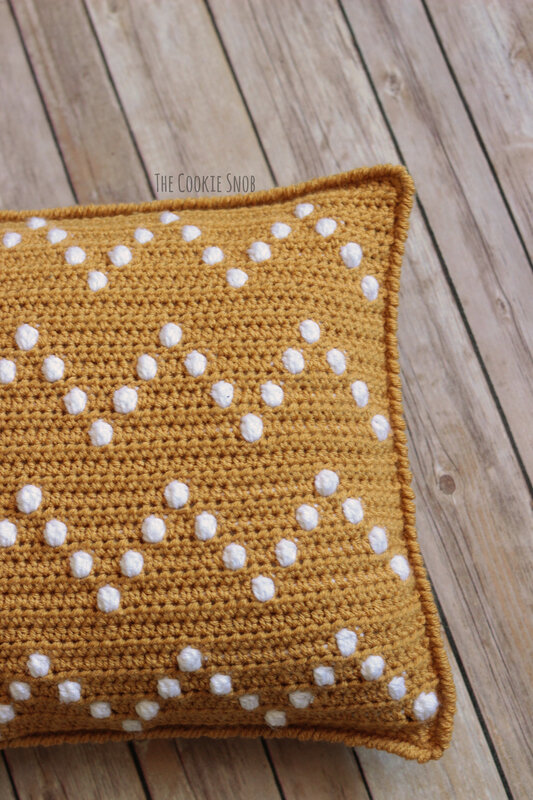 I did cheat just the tiniest bit with this pattern. My goal was to make the pattern using only one skein of the main color. And I totally did! It was perfect! Until I decided that I reaaaaaally wanted to finish it off with crab stitch border and I pulled out some scrap yarn in the same color to finish mine. So you can definitely make this pillow with just one skein of the main yarn and it'll look great! But if you want the extra row of crab stitch edging, you'll probably need just a bit more (or you can switch colors and make the border in white, since you'll have a lot of the white leftover). 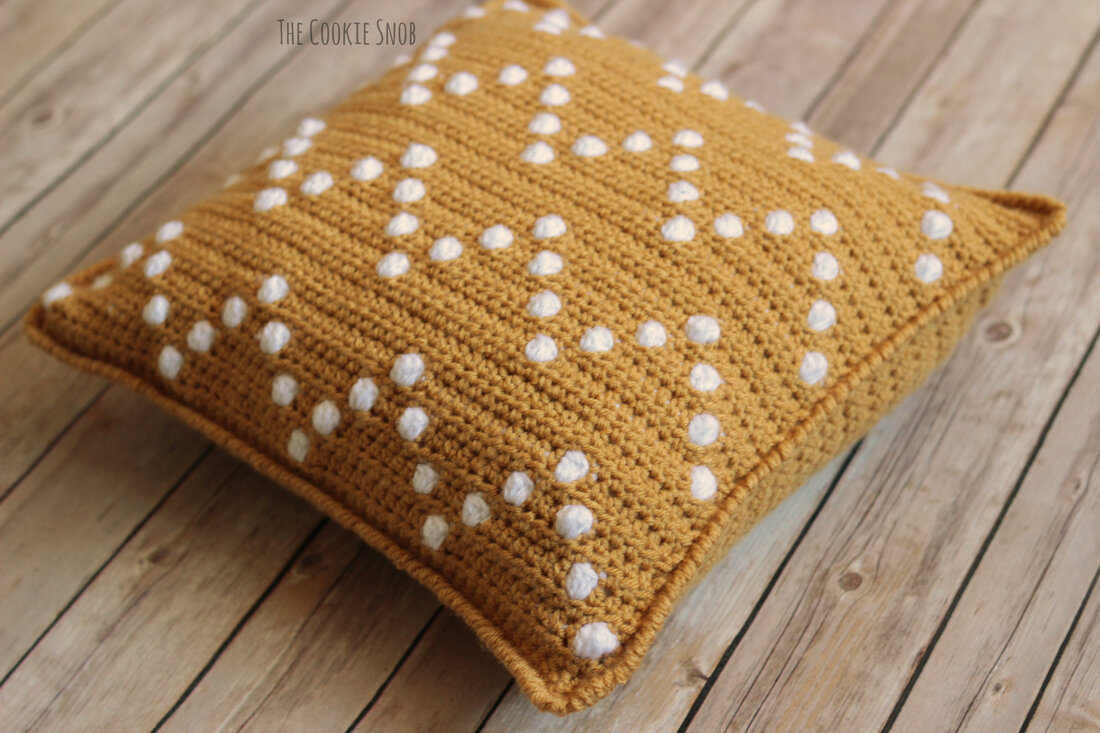 Now let's get started on the pattern. Make sure to check your gauge if you're using a pillow form so that it all fits correctly. As written, the pattern should cover a 14" square pillow form. If you'd like an ad-free printable PDF version of the pattern, you can find one on Ravelry. Stitch Glossary: st(s) = stitch(es) ch = chain sc = single crochet hdc = half double crochet fhdc = foundation hdc bo = bobble stitch (4 dc together in the same st) RS = right side WS = wrong side Materials:
Gauge: 4" = 15 hdc sts 4" = 11 rows Tip: When changing colors before each bobble stitch, make the hdc as you normally would up until the final step, then use the new color to yarn over and pull through all 3 loops on your hook to finish off the stitch. And when changing colors after the end of each bobble stitch, complete the bobble as you normally would up until the final step, then use the other color to yarn over and pull through all 5 loops on your hook to finish off the stitch. This will keep your color changes neat. Front Panel: Starting with the sungold yarn: Row 1: (RS) fhdc 51, turn (51) Row 2: (WS) ch 2, hdc across, turn (51) Row 3: (RS) ch 2, hdc, [switch to white yarn, bo, switch to sungold yarn, hdc in the next 11 sts] 4 times, switch to white yarn, bo, switch to sungold yarn, hdc, turn, cut white yarn (51) Row 4: (WS) ch 2, hdc across, turn (51) Row 5: (RS) ch 2, hdc in the first 3 sts, [switch to white yarn, bo, switch to sungold yarn, hdc in the next 7 sts, switch to white yarn, bo, switch to sungold yarn, hdc in the next 3 sts] 4 times, turn, cut white yarn (51) Row 6: (WS) ch 2, hdc across, turn (51) Row 7: (RS) ch 2, hdc in the first 5 sts, [switch to white yarn, bo, switch to sungold yarn, hdc in the next 3 sts, switch to white yarn, bo, switch to sungold yarn, hdc in the next 7 sts] 3 times, switch to white yarn, bo, switch to sungold yarn, hdc in the next 3 sts, switch to white yarn, bo, switch to sungold yarn, hdc in the next 5 sts, turn, cut white yarn (51) Row 8: (WS) ch 2, hdc across, turn (51) Row 9: (RS) ch 2, hdc in the next 7 sts, [switch to white yarn, bo, switch to sungold yarn, hdc in the next 11 sts] 3 times, switch to white yarn, bo, switch to sungold yarn, hdc in the next 7 sts, turn, cut white yarn (51) Rows 10-11: ch 2, hdc across, turn (51) Rows 12-21: Repeat Rows 2-11 Rows 22-31: Repeat Rows 2-11 Rows 32-41: Repeat Rows 2-11 Fasten off 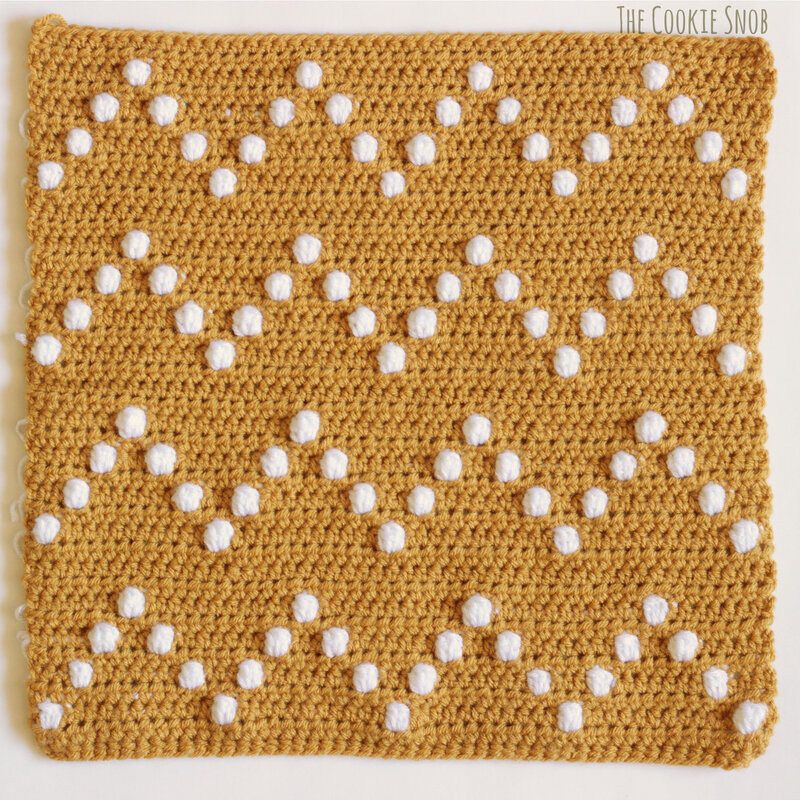 Back Panel: Using the sungold yarn: Row 1: fhdc 51, turn (51) Row 2: ch 2, hdc across, turn (51) Repeat Row 2 until your back panel is the same length as the front panel Fasten off. Assembly: Hold the front panel and the back panel together, with the right side of the front panel facing out. Using the sungold yarn (or you can switch to white if you want to use a contrasting color for the edging), sc around the square, being sure to work through the edges of both the front and back panel simultaneously. When you get to a corner, work 3 sc into the corner to keep the square shape. Once you've finished two of the sides, insert the pillow form between the panels and then continue to sc around the remaining two sides, enclosing the pillow form. 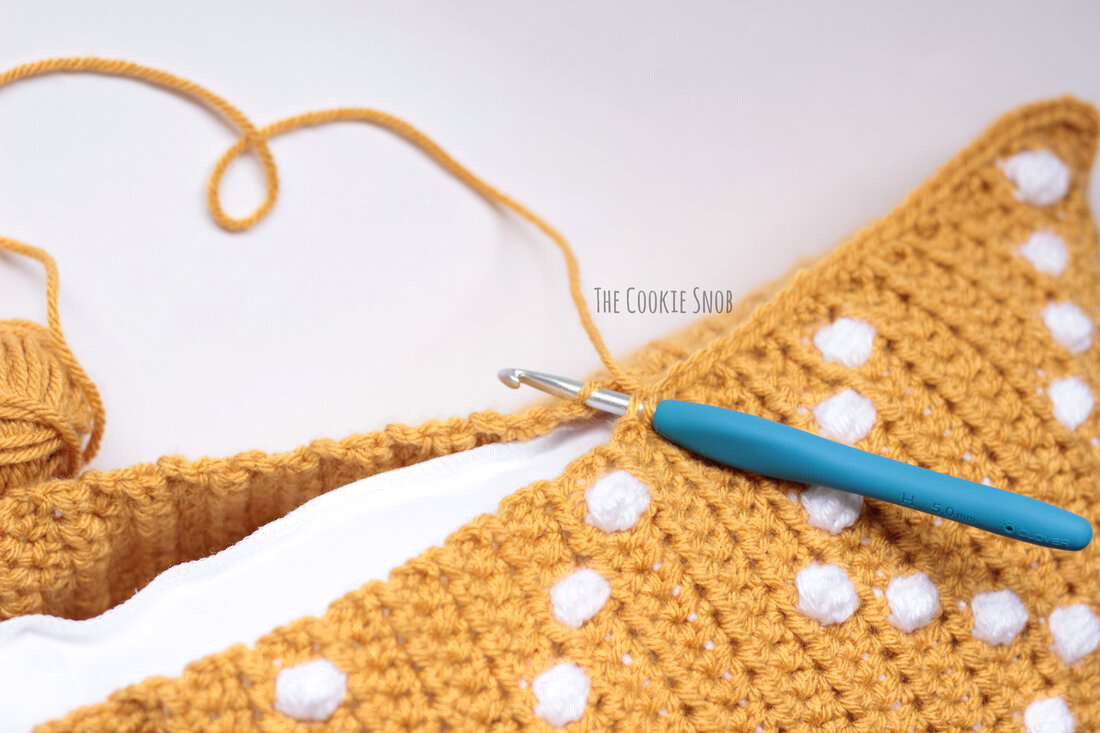 Fasten off. OR, you can add the additional finishing row by working reverse sc (aka "crab stitch") in each sc st of the edging you just made. Fasten off. 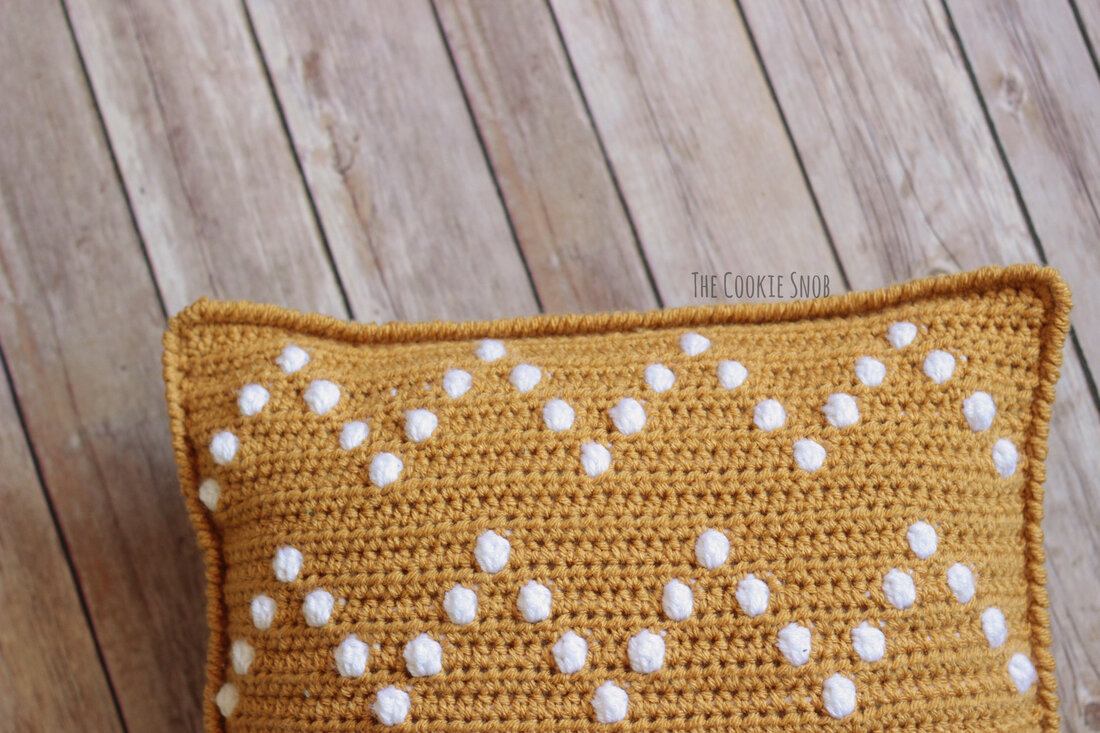 You now have a finished Bobble-Wobble Pillow! Way to go! 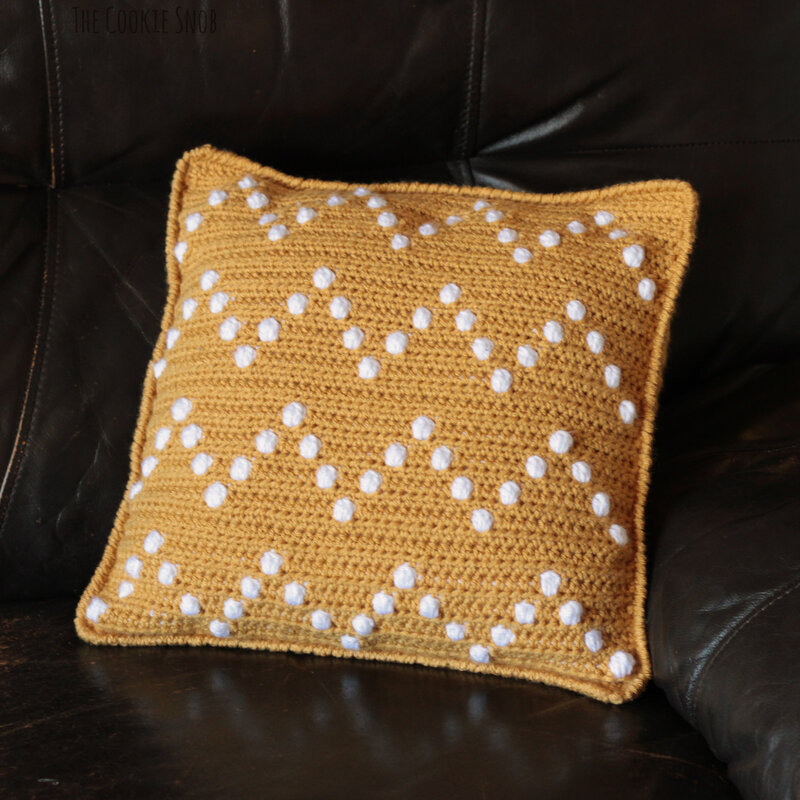 I hope that you enjoyed this fun pillow pattern! Customize the colors to match your space and it'll be the perfect accent piece for your home. If you have any comments or questions about this pattern, you can reach me in the comments section below, by email, or on social media. And be sure to let me know if you end up making one! I'd love to see how it turns out. You guys always make such beautiful projects. Happy hooking! Want to make sure you don't miss out on any future blog posts? Join my mailing list! (Spam free, I promise!) ***You're welcome to do whatever you'd like to with finished products made from this pattern but if you do sell them, I ask that you link back to my page. You may not copy this pattern, repost it anywhere (either altered or in its original form), or claim it as your own. You may not use any photos on this site for your own use. ***
3 Comments
Abigail
9/4/2020 04:00:22 pm
I LOVE this pattern. I want to make it to fit a 20x20 ikea pillow form. Would you recommend increasing the width and height of the pillow by 4" to be the size of the form, or should I only do it by 2" so the pillow is full & fluffy? 4/19/2024 08:42:09 am
Your blog posts have been a source of great enjoyment for me. Thank you for your wonderful content! Leave a Reply. |
Welcome!Thank you for stopping by to visit my own personal corner of the web! Feel free to take a look around and check out what I've been crafting, crocheting, or baking. Hopefully you'll find something to inspire your own creativity!   
Archives
March 2024
|
 RSS Feed