
|
Right after Thanksgiving I posted about the toddler-friendly crocheted nativity set I made, just in time for the holidays. (If you haven't already seen it you can check it out here). The last post explained how to make the adult figures, but didn't have any details about the elements that I designed myself. So today's blog post will walk you through making the baby and manger for your nativity. 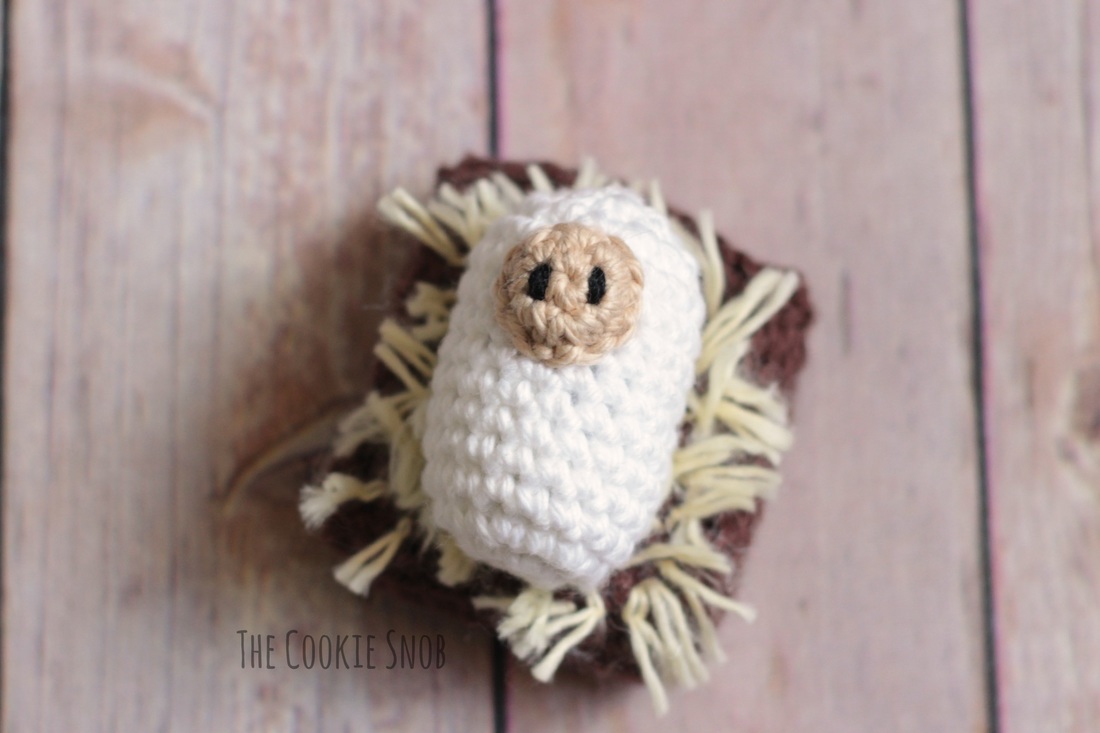 As with the other pieces in the nativity, I made everything with a size F (3.75 mm) crochet hook and worsted weight I Love This Cotton! Yarn. You will also need fiberfill stuffing and a tapestry needle. I recommend using a stitch marker as well. Stitch glossary: st(s) = stitch(es) ch = chain ss = slip stitch sc = single crochet inc = work 2 sc in the same st dec = sc decrease (I prefer to use the invisible decrease stitch) Baby body: Note: This pattern is worked in the round (meaning the stitches are worked in a continuous spiral). I recommend using a stitch marker and moving it after every round to help you keep track of which round you're working on. Round 1: Make a magic circle and work 6 sc into the magic circle (6) Round 2: inc around (12) Round 3: [inc, sc] around (18) Rounds 4-12: sc around (18) Round 13: [dec, sc] around (12) Begin stuffing lightly with fiberfill Round 14: dec around (6) Fasten off, leaving a tail of yarn. Finish stuffing the body. Using a tapestry needle, thread the yarn tail through the front loops of remaining stitches and pull taut to close. Weave in ends. Baby Face: Note: I prefer to join each round of this pattern instead of working in a continuous spiral so that the head is an even circle. Round 1: Make a magic circle and work 6 sc into the magic circle. Ss to first st to join (6) Round 2: Ch 1, inc around. Ss to first st to join (12) Fasten off, leaving long tail of yarn for sewing. Stitch any desired facial features (eyes or a mouth) onto the head before sewing it onto the top half of the body. Weave in ends.  Manger base: Note: Rows 6-15 are important for shaping the manger so that there's an indentation for the baby to lay in Ch 11 Row 1: sc in the second ch from the hook and in every other ch across, turn (10) Rows 2-3: ch 1, sc across, turn (10) Row 4: ch 1, sc across in back loops only, turn (10) Row 5: ch 1, sc across, turn (10) Rows 6-14: ch 1, sc, inc, dec, sc in next 2 sts, dec, inc, sc, turn (10) Row 15: ch 1, sc, dec, inc, sc in next 2 sts, inc, dec, turn (10) Row 16: ch 1, sc across, turn (10) Row 17: ch 1, sc in front loops only, turn (10) Rows 18-19: ch 1, sc across, turn (10) Row 20: ch 1, sc in back loops only, turn (10) Rows 21-31: ch 1, sc across, turn (10) Fasten off, leaving long tail for sewing Manger Sides: (make 2) Ch 12 Row 1: sc in the second ch from the hook and in every other ch across, turn (11) Rows 2-3: ch 1, sc across, turn (11) Fasten off, leaving long tail for sewing. You should now have pieces that look something like this: 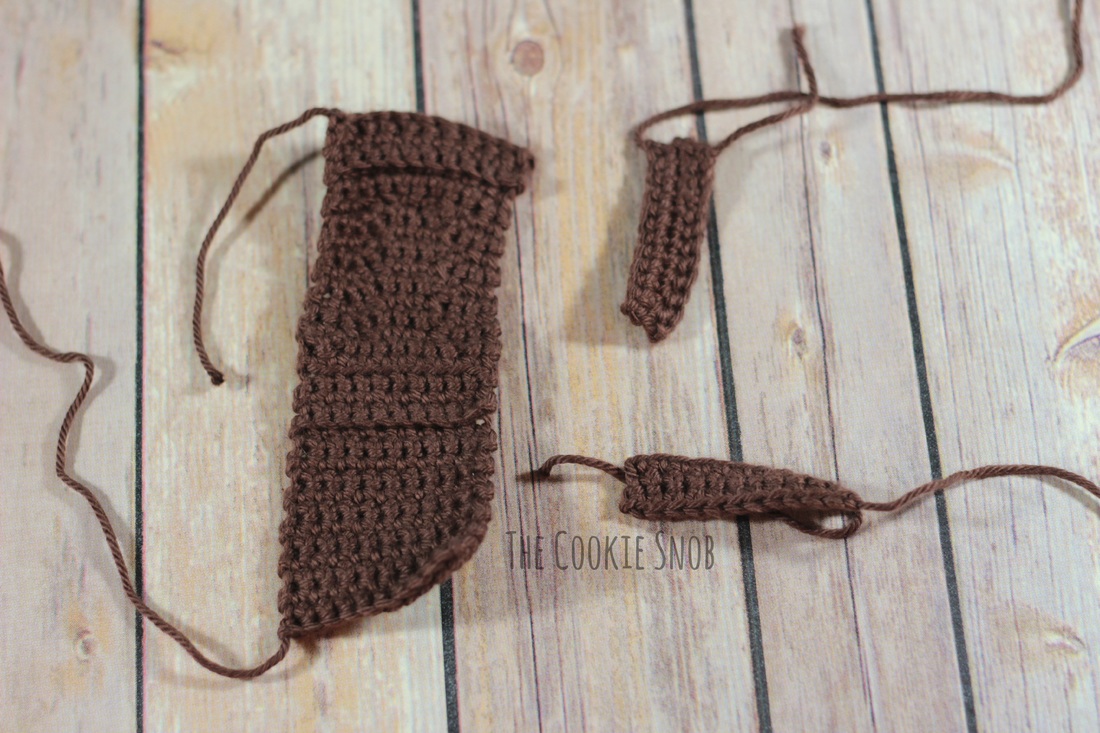 Manger Assembly: First we'll sew the base of the manger together. fold the manger in half so that two short ends (first and last row you crocheted) are touching. The rows worked in one loop only should form nice corners; if they don't, try flipping the piece the other way. Using a tapestry needle and your long tail of yarn, sew the short ends together, creating a quasi-tube shape. 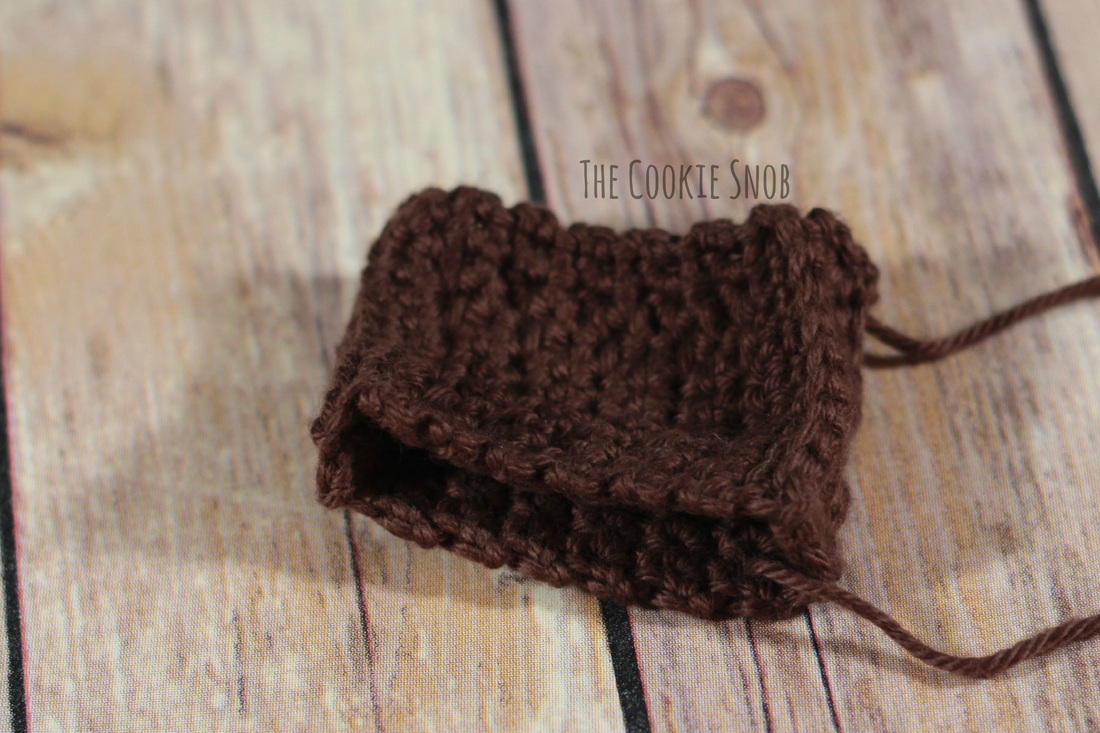 Now it's time to add the sides. Match up one side to the first hole on the side of the manger base and use your tapestry needle and yarn tails to sew it in place. Then begin lightly stuffing the manger. Be sure to concentrate most of the stuffing in the sides of the manger rather than in the middle so that you help maintain the indentation. If you want to, you can also use yarn to sew a small, tight stitch straight through the center of the manger to help it keep its shape. Then sew the second side into place and weave in ends. 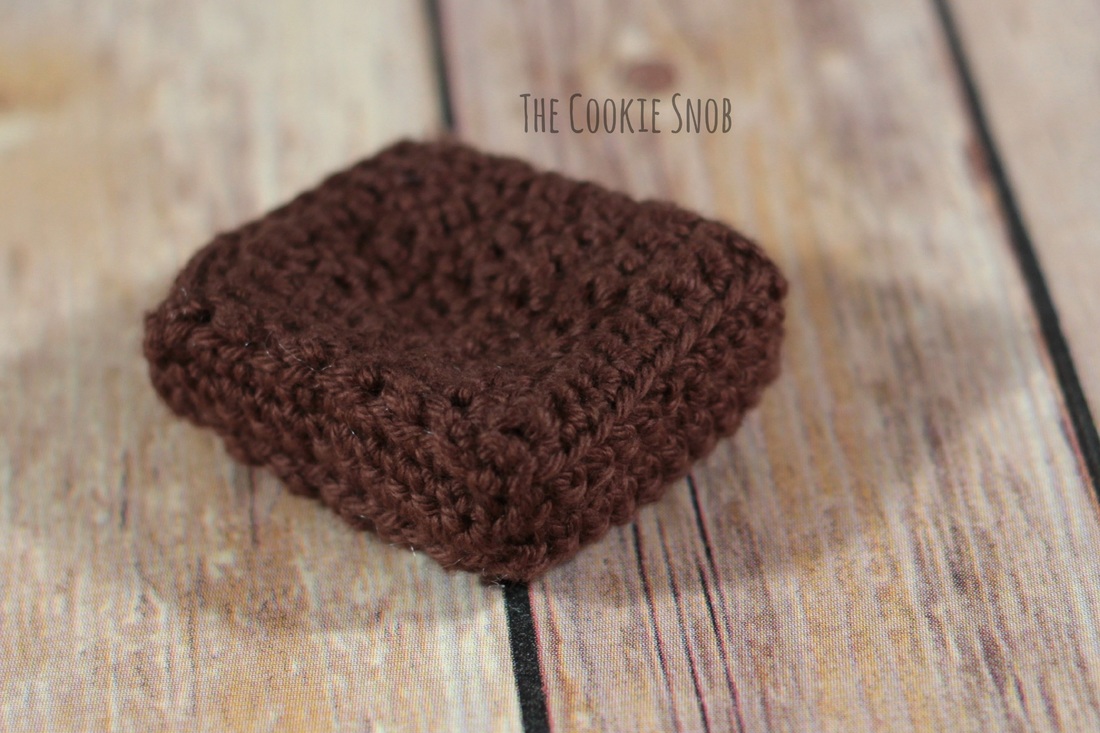 Ta-dah! A manger, perfect for the baby. You can either leave it as it is, or decorate it with some yarn that looks like hay. If you want to add "hay," just attach small pieces of yarn the same way you'd attach hair to the adult nativity figures. To make it look more like hay, I actually picked apart my pieces of yarn into their separate stands before attaching them, but this definitely an optional step. 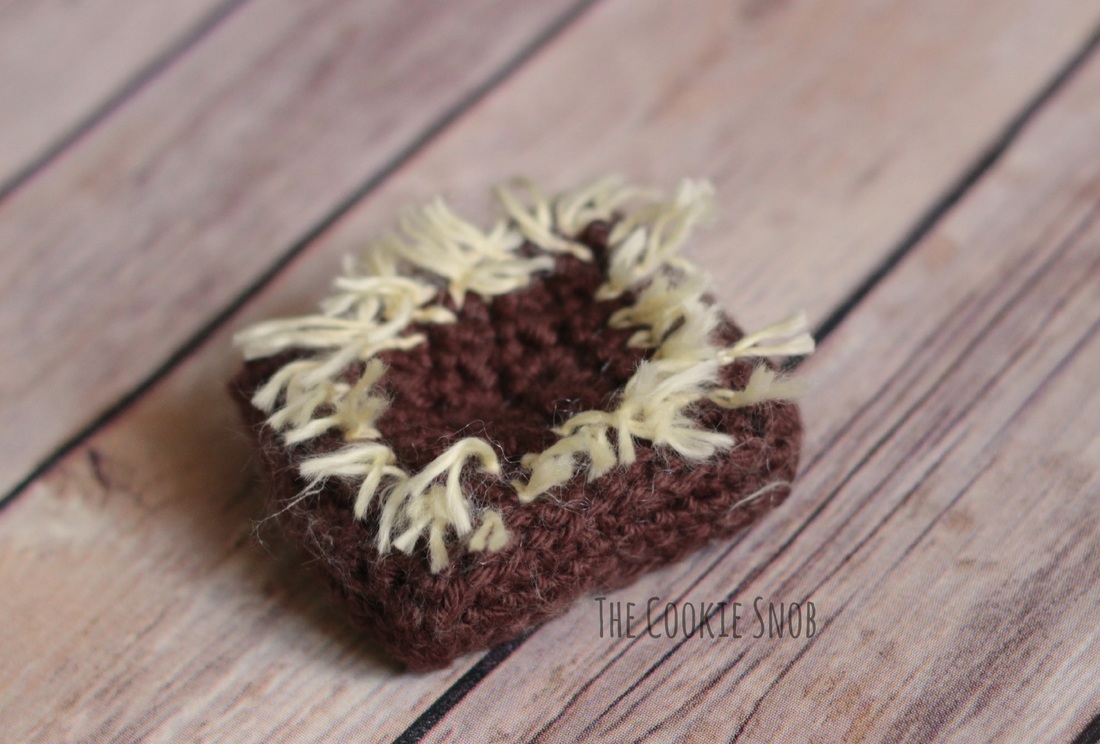 The manger is now complete! If you have any questions or comments about making the manger or the baby, please contact me in the comment section below or on social media. And be sure to check back, because next I'll be posting the patterns for nativity accessories like crowns and angel wings. Happy hooking! 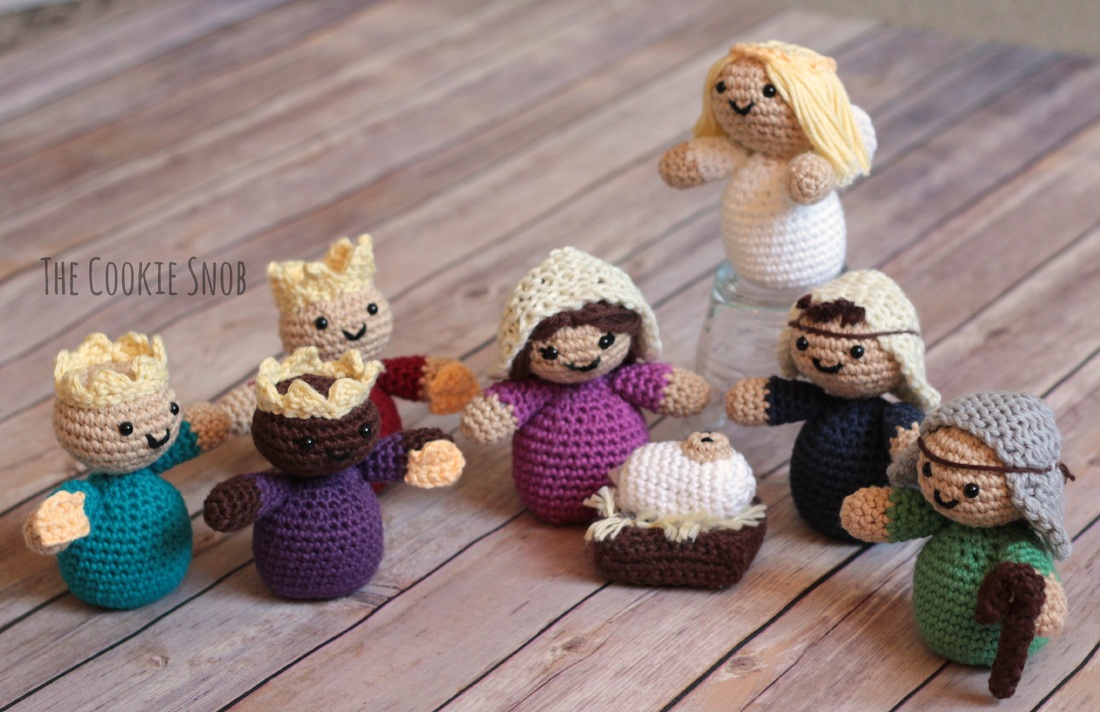 ***You're welcome to do whatever you'd like to with finished products made from these patterns but if you do sell them, I ask that you link back to my page. You may not copy these patterns, repost them anywhere (either altered or in their original form), or claim them as your own. You may not use any photos on this site for your own use. ***
4 Comments
Deborah
11/30/2015 09:37:50 pm
Thank-you so very much. I want to make the set for next year as my grand children are 1 and 2 so they will be able to play with them. Plus I'll make a set for them to take home.
Erin
12/1/2015 07:21:19 pm
What a great idea! You have very lucky grandchildren :) My 1 year old loves to play with this set, so I'm sure they'll enjoy it too. 3/2/2016 05:20:38 am
Awesome article, I am regular visitor of this website, keep up the excellent work, and I will be a regular visitor for a very long time.. 5/22/2016 10:24:53 pm
nice product, you'r so clever, i will try this at home tonight :) many thanks ... Leave a Reply. |
Welcome!Thank you for stopping by to visit my own personal corner of the web! Feel free to take a look around and check out what I've been crafting, crocheting, or baking. Hopefully you'll find something to inspire your own creativity!   
Archives
March 2024
|
 RSS Feed