
|
For those of you working on my 3.2 mL beanie or 3 mL slouchy beanie pattern, crocheting in the 3rd loop is key to getting the right look. Working in the 3rd loop is fairly simple, but can take a bit of getting used to if you haven't done it before. So, for anyone who is using the 3rd loop for the first time, I put together this short tutorial to help you out. And, to make it a little more fun, I also designed this cute snail coaster pattern to help you practice. Now grab your hooks and let's get hookin'!  The hardest part of crocheting in the 3rd loop is just seeing where the 3rd loop is. Normally when you crochet, you insert the hook into the 1st and 2nd loop (or front and back loop) that make up the characteristic "v" at the top of a crocheted row. 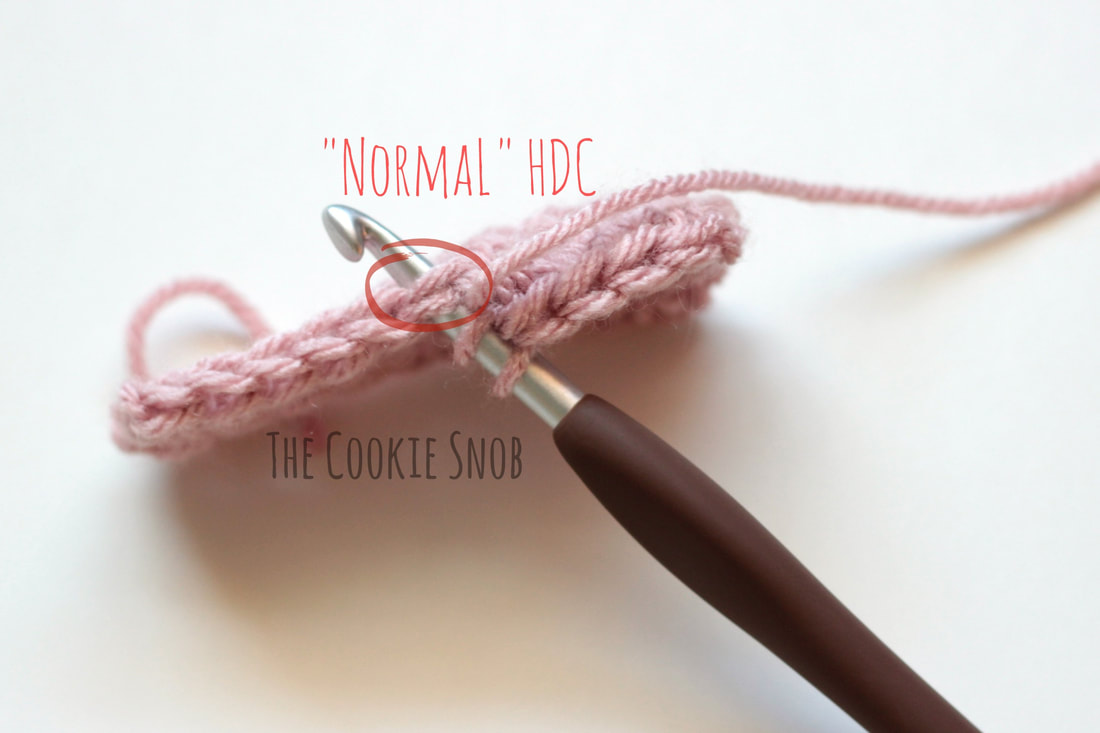 Working hdcs into the 1st and 2nd loops (a "normal" hdc) produces the typical hdc stitch pattern. 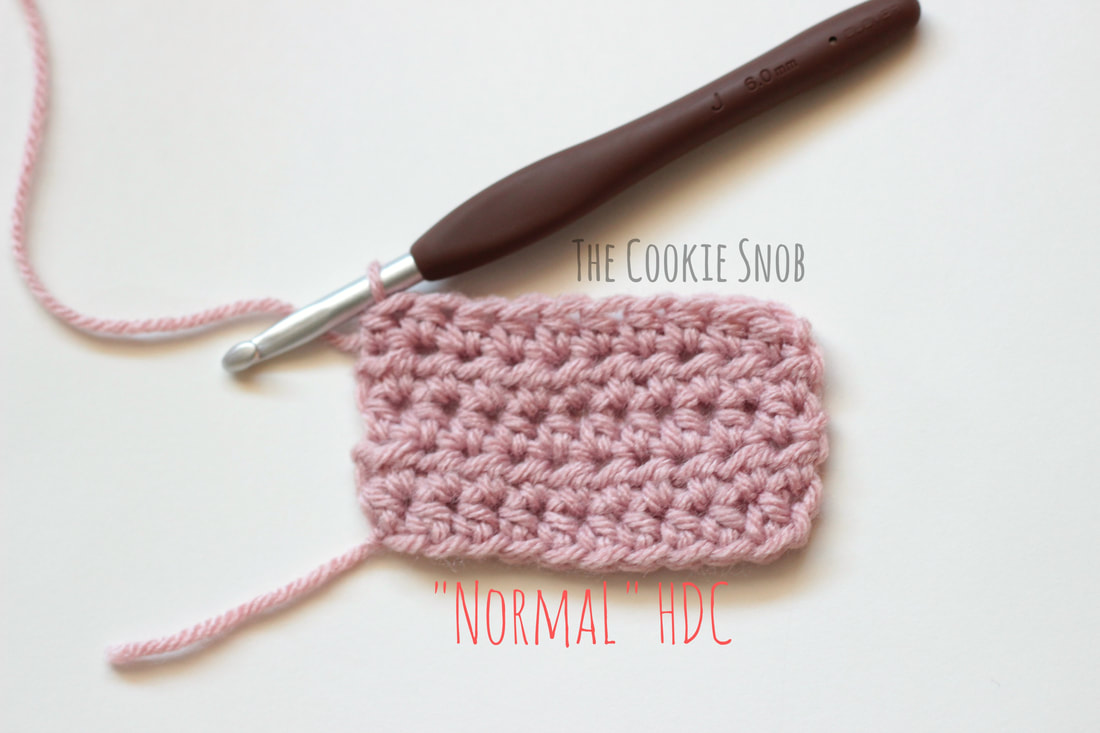 But if we insert the hook somewhere else, we can get a different look. This picture shows hook being inserted into the 3rd loop (the loop directly below the front loop). Doing so effectively pushes the 1st and 2nd loops off to the side, creating a neat knit-like appearance. 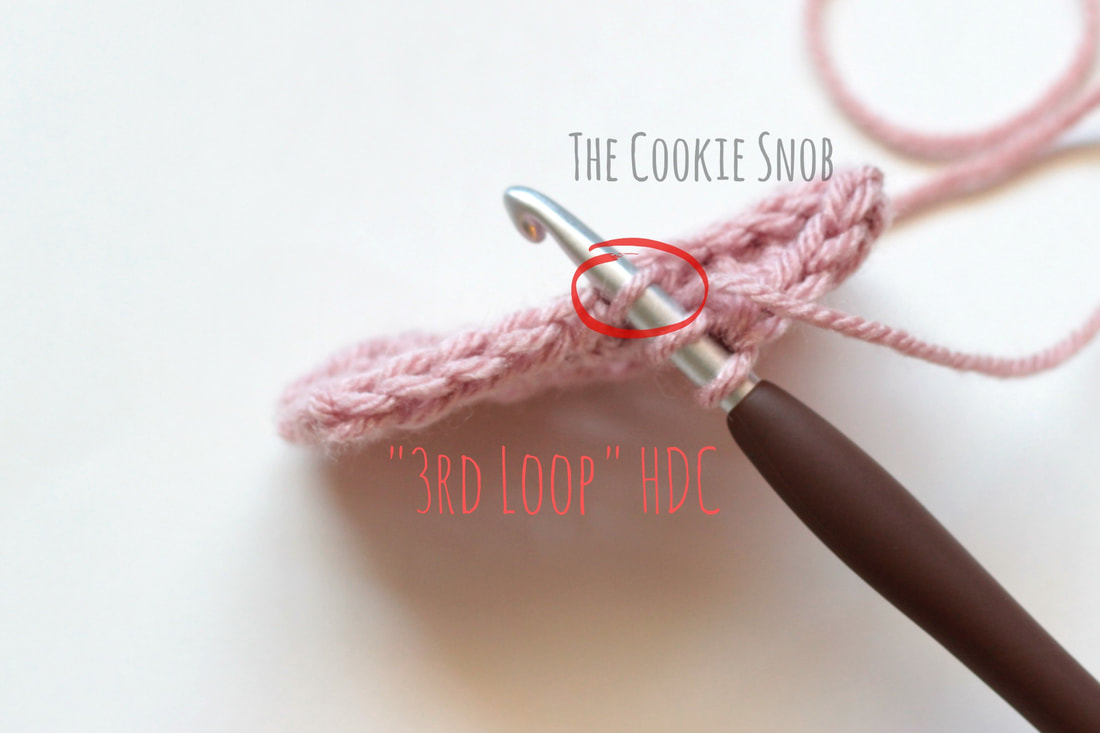 Here's another view of the 3rd loop that may make it easier to see. I've highlighted the 3rd loops for the rest of the row in purple (you'll note that the front loop is visible directly above and is not highlighted because it's not where you want to insert the hook). Other than changing where you'll insert the crochet hook, working in the 3rd loop is exactly the same as a normal crochet stitch. So as soon as you see where to place the hook, you'll be a pro. 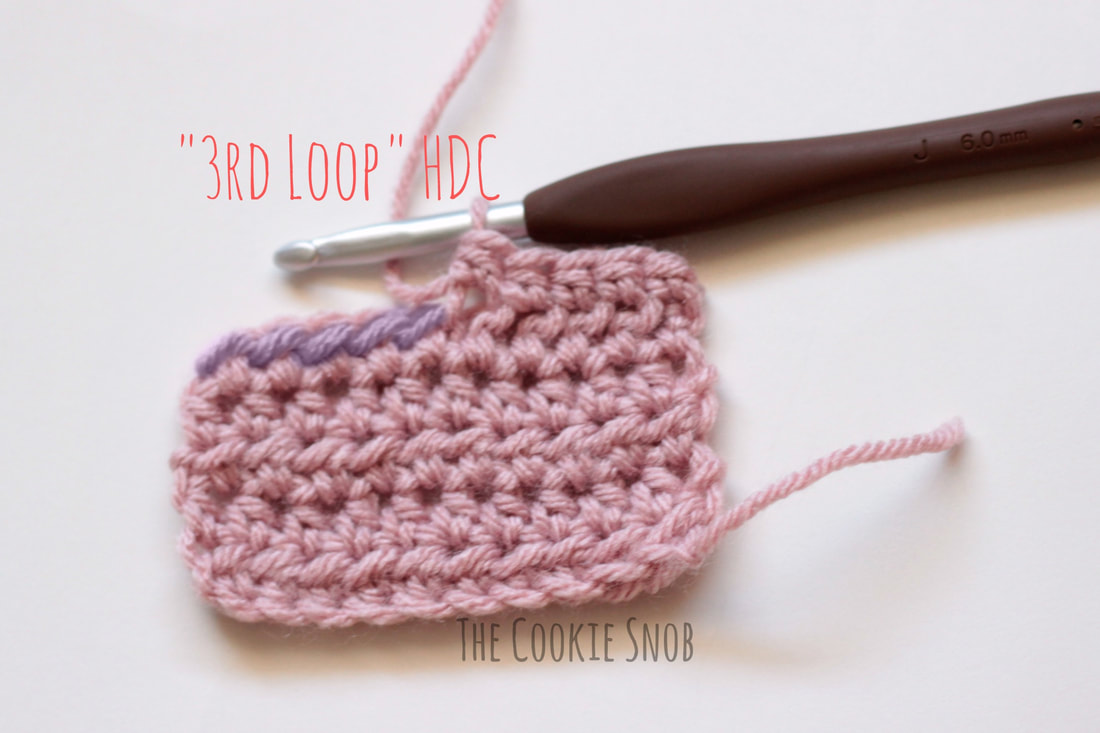 Crocheting in the 3rd loop gives an entirely new look to a piece. Here's a side-by-side comparison of working in the 3rd loop and doing a normal hdc in the 1st and 2nd loops. The 3rd loop creates a very interesting looking ridge, almost like knit ribbing, whereas the normal approach creates a flatter appearance. Give it a try by making yourself a small swatch. Ch 10 (or however many you want) and then hdc across in the 3rd loop only, turning after each row. 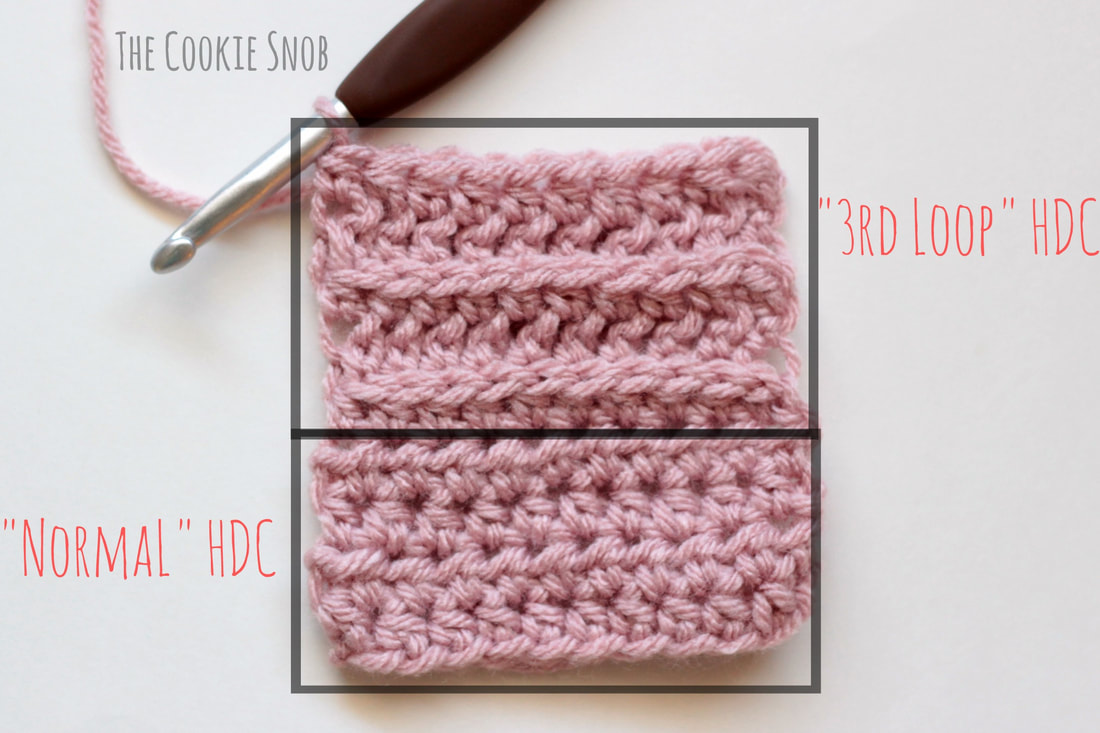 Working in the 3rd loop doesn't always create a ribbed look, however. When you're working in the round without turning (as with the body of the 3 mL hats), all of the "v"s end up on the same side. To practice this use of the 3rd loop, give this snail coaster a try. Its shell is made up of hdcs in the round worked in the 3rd loop. Once you've finished with this quick pattern, not only will you be a pro, but you'll also have an adorable coaster. Win-win! Materials:
Stitch Glossary: st(s) = stitch(es) ch = chain ss = slip stitch sc = single crochet hdc = half double crochet hdc inc = work 2 hdc in the same st Note: The shell is worked in a continuous round without joining or turning. I recommend moving your stitch marker at the end of each round to help you keep your place. The shell is all worked in the 3rd loop. Begin with the shell colored yarn Round 1: Make a magic circle, ch 2, work 8 hdc into the circle and pull taut to close (8) Round 2: hdc inc around (16) 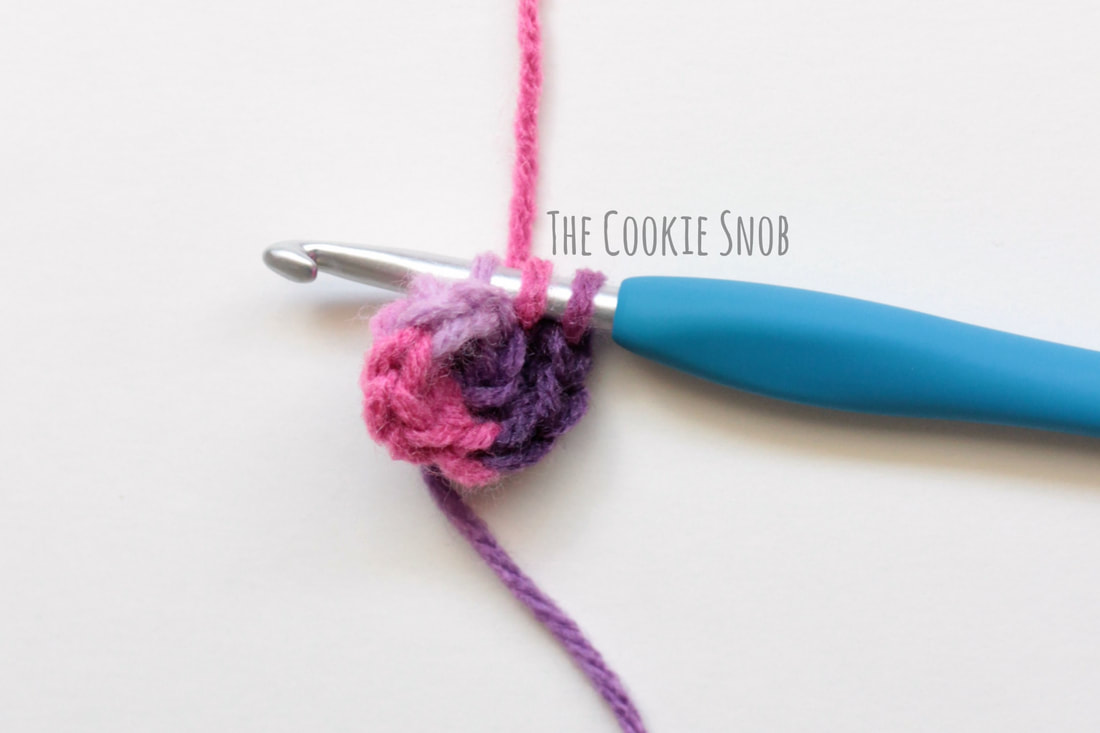 Round 3: [hdc inc, hdc] around (24) Round 4: [hdc inc, hdc in the next 2 sts] around (32) Round 5: [hdc inc, hdc in the next 3 sts] around (40) Round 6: [hdc inc, hdc in the next 4 sts] around (48) 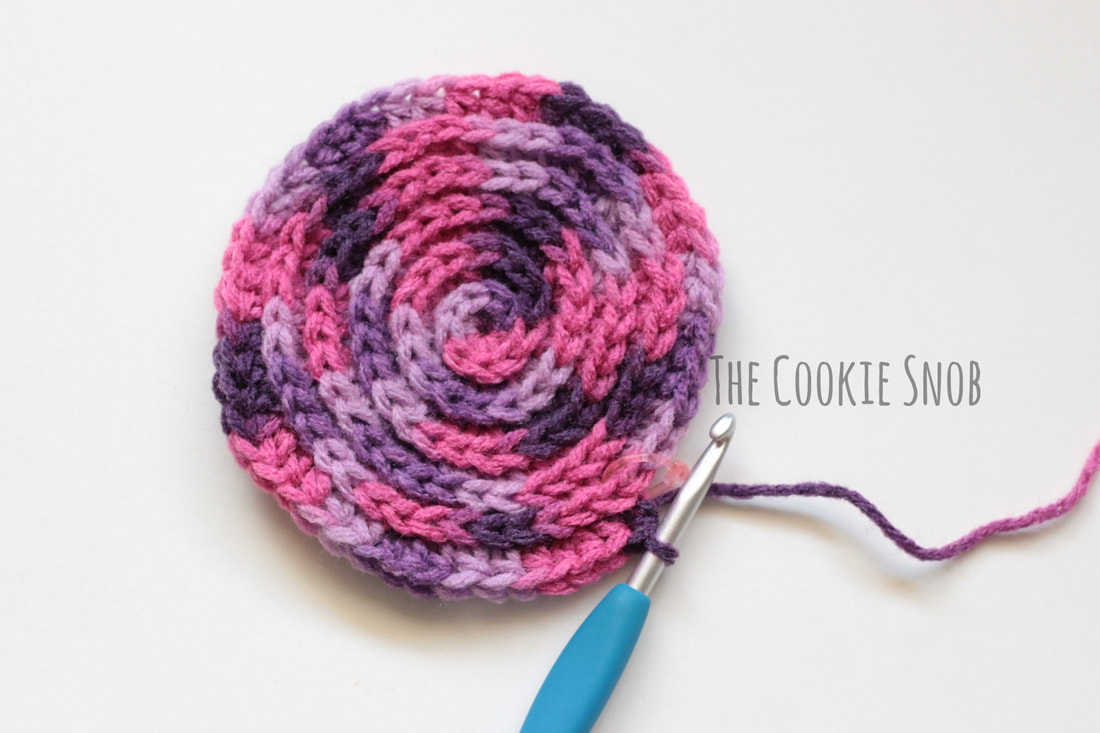 Switch to the body colored yarn Ch 7 Ss in the 2nd ch from the hook and in the next 3 sts, ch 5, ss in the 2nd ch from the hook and in the next 3 sts, sc in the next 3 sts 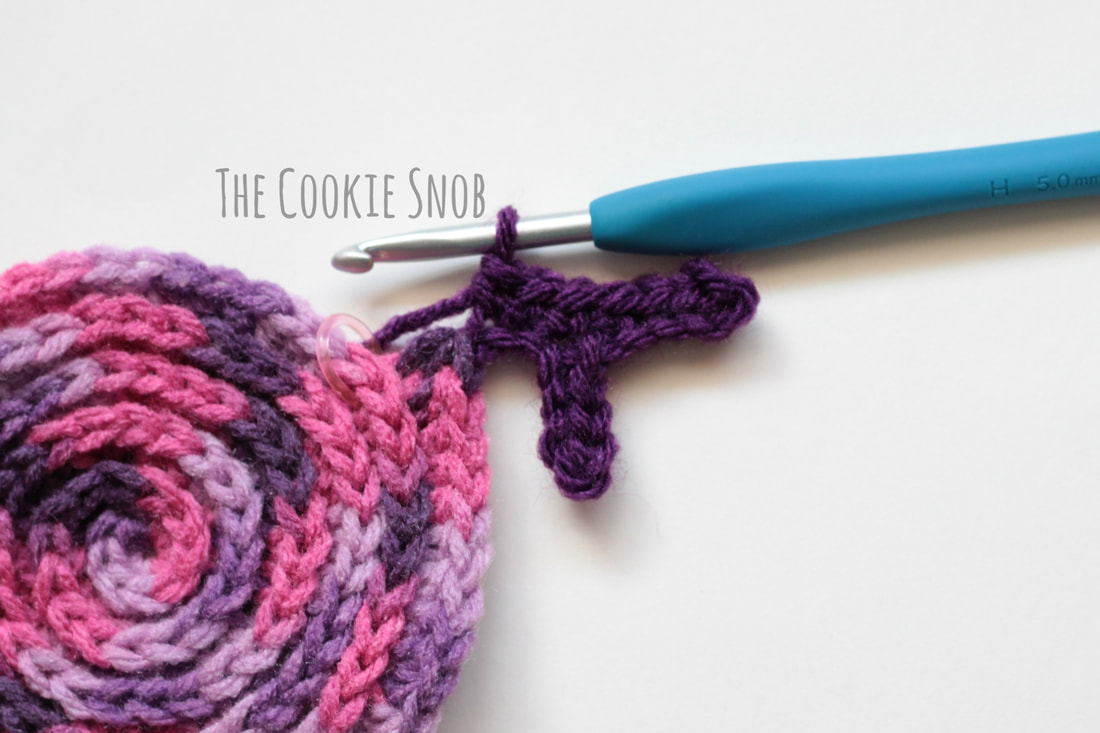 Flip the shell over so that the wrong side is facing you. Working in the 3rd loop, sc in the next 17 sts (along the shell). 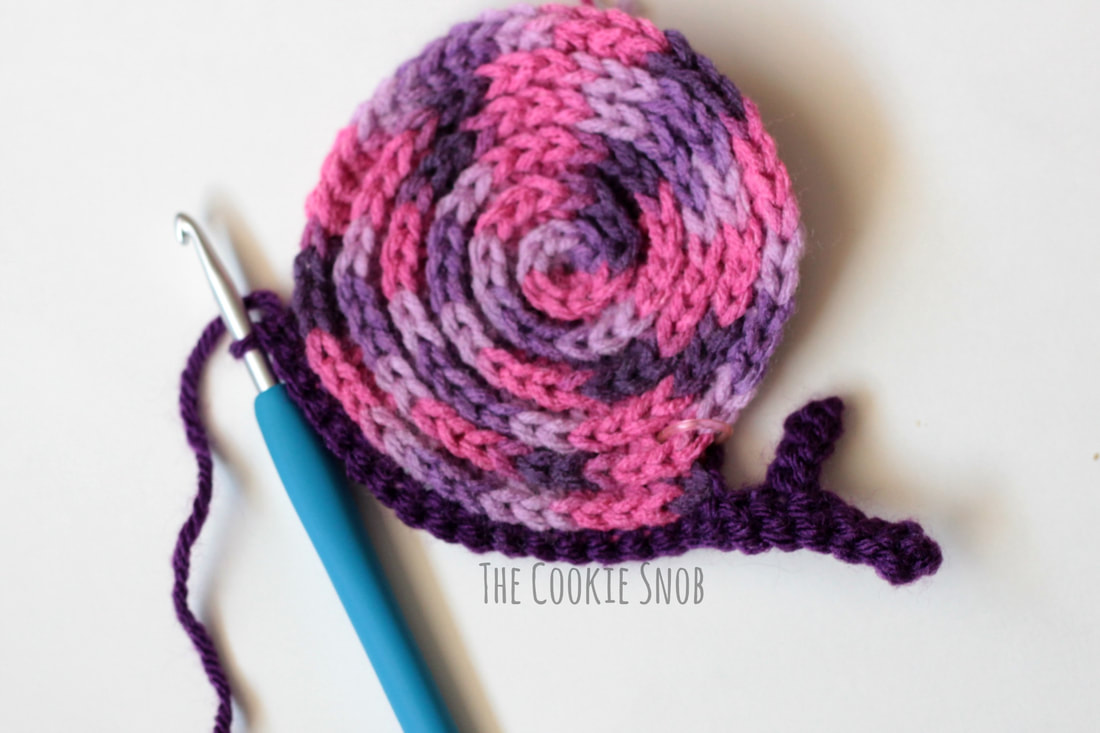 Ch 3, turn, sc in the 2nd ch from the hook and in the next 20 sts. Ss in the last st and fasten off. Weave in ends. 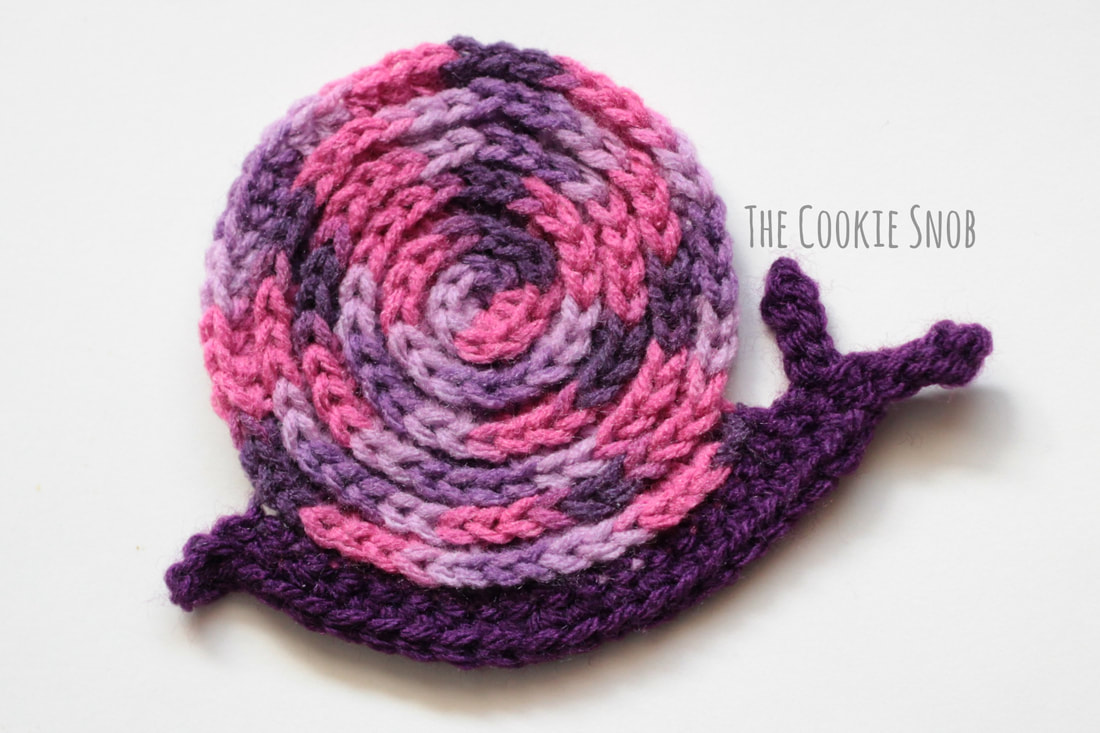 And there you have a neat snail coaster! The body of the snail can seem a bit confusing, but will hopefully make sense when you actually start doing it. If you do have questions though, feel free to contact me in the comments section below or on social media. I hope you all enjoy this tutorial and this pattern. I'm sure you're now 3rd loop masters! Happy hooking!
***You may not copy this pattern, repost it anywhere (either altered or in its original form), or claim it as your own. You may not use any photos on this site for your own use. ***
4 Comments
Daphne
8/11/2018 11:04:48 pm
Hello :) i chanced upon your website while googling for 3rd loop stitches.
Erin
8/16/2018 02:09:07 pm
Hi Daphne!
Nicola
12/13/2018 05:33:51 pm
Hi I love your patterns are they uk or USA terms?
Erin
12/13/2018 05:42:15 pm
Thanks! All of my patterns use US terminology. Leave a Reply. |
Welcome!Thank you for stopping by to visit my own personal corner of the web! Feel free to take a look around and check out what I've been crafting, crocheting, or baking. Hopefully you'll find something to inspire your own creativity!   
Archives
March 2024
|
 RSS Feed